
1. Introduction
The WOPET Automatic Cat Feeder FT30 is designed to provide scheduled and portion-controlled meals for your pets, ensuring they are well-fed whether you are home or away. It features programmable meal times, voice recording, and dual power supply for reliability. This manual provides detailed instructions for setup, operation, maintenance, and troubleshooting.
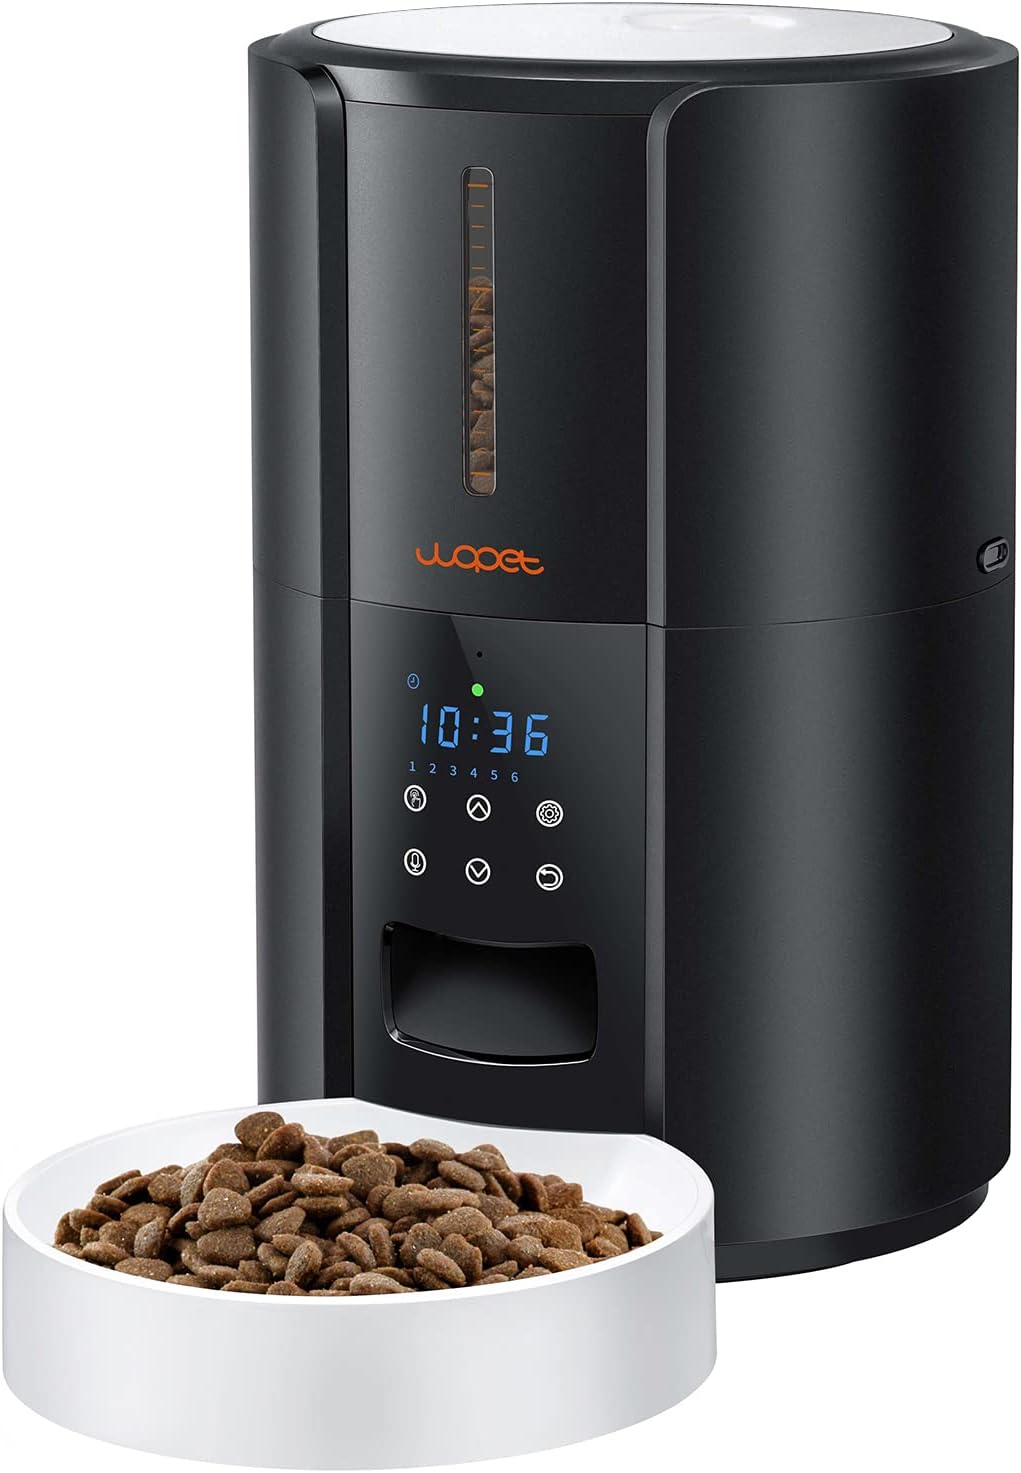
Figure 1: WOPET Automatic Cat Feeder FT30
2. Setup
2.1 Unboxing and Assembly
- Carefully remove all components from the packaging: the main feeder unit, food tray, power adapter, USB cable, desiccant bag, and user manual.
- Remove the food bucket from the main unit by pressing the two buttons located on both sides of the pet feeder and pulling upwards.
- Take out the food tray and any other accessories from inside the food bucket.
- Locate the desiccant compartment on the underside of the food bucket lid. Open it and insert the provided desiccant bag. Close the compartment securely.
- Install the food tray by sliding it into the designated slot at the base of the feeder unit.

Figure 2: Inserting Desiccant Bag
2.2 Power Supply
The WOPET FT30 supports dual power mode for continuous operation.
- Battery Power: Open the battery cover at the base of the feeder and insert three D-type batteries (not included).
- Adapter Power: Connect the USB cable to the power adapter and then plug the USB-C end into the port located at the base of the pet feeder.

Figure 3: Dual Power Supply Connection
It is highly recommended to use both power modes simultaneously to prevent disruption of feeding during a power outage.
2.3 Initial Power-On
Plug the pet feeder into a power outlet. The screen will light up, and the clock icon will flash. Ensure the pet feeder is in an unlocked state. If the lock icon is displayed, long-press the setting button (gear icon) for 3 seconds to unlock.
2.4 Setup Video Guide
Video 1: Product Assembly and Program Setting Introduction-FT30. This video provides a visual guide for assembling and initially setting up your WOPET Automatic Pet Feeder.
3. Operating Instructions
The control panel features an LED screen and several buttons for easy programming:
- Indicator: Shows current status.
- Clock Indicator: Displays current time.
- Meals Indicator: Shows programmed meals (1-6).
- Manual: Button for manual feeding.
- Recording: Button for voice recording.
- Up/Down Arrows: Adjust values.
- Setting/Confirm (Gear Icon): Enter settings mode and confirm selections.
- Return/Cancel: Go back or cancel current operation.
- Child Lock: Indicates if the panel is locked/unlocked.
- Timing/Portions: Used for setting meal times and portion sizes.
- Battery Indicator: Shows battery level.
3.1 Setting Current Time
- Press the Setting button (gear icon). The hour display will flash.
- Use the Up and Down arrow buttons to adjust the clock hour (24-hour format).
- Press the Setting button again to confirm the hour. The minute display will flash.
- Use the Up and Down arrow buttons to adjust the clock minute.
- Press the Setting button again to confirm and save the current time.
3.2 Programming Meals (1-6 Meals)
The feeder supports up to 6 meals per day, with up to 8 portions per meal (15g each portion).
- After setting the current time, the first meal icon (1) will flash. Press the Setting button.
- The portion size (P-00) will flash. Use the Up and Down arrow buttons to adjust the portion size (P-01 to P-08).
- Press the Setting button to save and confirm the portion size.
- The meal time hour will flash. Use the Up and Down arrow buttons to adjust the meal time hour.
- Press the Setting button to confirm the hour. The meal time minute will flash.
- Use the Up and Down arrow buttons to adjust the meal time minute.
- Press the Setting button to confirm and save the meal time.
- Repeat steps for subsequent meals (2nd to 6th). If a meal is not desired, set its portion size to P-00.
- When all desired meals are set, press the Return button to exit to the main menu.

Figure 4: Automatic Feeding in Action
3.3 Voice Recording (10 seconds)
You can record a 10-second voice message that will play during each food dispense.
- Long-press the Recording button (microphone icon) for 3 seconds.
- After hearing a "beep" sound, start recording your message.
- Release the button when finished. Two "beeps" will confirm the recording is complete.

Figure 5: Voice Recording Feature
3.4 Manual Feeding
To manually dispense food:
- Ensure the feeder is unlocked (long-press Setting button for 3 seconds if locked).
- Press the Manual feeding button (hand icon).
- The portion size will flash. Use the Up and Down arrow buttons to select the desired portion size.
- Press the Setting button to dispense the selected portion.
3.5 Operation Video Guide
Video 2: WOPET automatic pet feeder FT30 setting. This video demonstrates the detailed steps for programming meal times, portions, and other settings.
4. Maintenance
4.1 Cleaning the Feeder
Regular cleaning ensures optimal performance and hygiene for your pet.
- Unplug the feeder and remove any remaining food.
- Remove the food bucket and food tray. The food tray is dishwasher safe for easy cleaning.
- To clean the rotator: Pull out the cover lid. Turn the rotator counter-clockwise to the open position and remove it. Clean the rotator and the internal food dispensing area.
- After cleaning, match the rotator to the indicator and press down. Turn the rotator clockwise to the install position and insert the cover lid.
- Wipe the main unit with a damp cloth. Do not submerge the main unit in water.

Figure 6: Internal Components and Desiccant Box
4.2 Desiccant Bag Replacement
The built-in replaceable desiccant bag helps keep food fresh. Replace it periodically (e.g., every 1-2 months) for best results.
5. Troubleshooting
- Feeder is not dispensing food:
- Check if the feeder is powered on and unlocked.
- Ensure there is enough food in the food bucket.
- Verify that meal times and portion sizes are correctly programmed.
- Check for any food jams in the dispensing mechanism. A solid red light may indicate a jam. Clean the rotator area as described in Maintenance.
- Feeder dispenses food multiple times or at incorrect times:
- Carefully review your programmed meal times and portion settings. Ensure no overlapping times or unintended multiple portions are set.
- If the unit resets or behaves erratically, ensure both battery and adapter power are stable.
- Display panel is unresponsive or locked:
- Long-press the Setting button (gear icon) for 3 seconds to unlock the panel.
- If the issue persists, try unplugging the feeder and removing batteries for a few minutes, then reconnecting.
- Voice recording is not playing:
- Ensure the recording process was completed successfully (two "beeps" after releasing the button).
- Re-record your message if necessary.
6. Specifications
| Feature | Detail |
|---|---|
| Brand | WOPET |
| Model | FT30 |
| Item Weight | 3.41 pounds |
| Item Package Dimensions L x W x H | 12.52 x 8.23 x 7.83 inches |
| Material | Plastic |
| Color | Black/white |
| Power Supply | Wall powered and/or 3 D-size batteries (not included) |
| Meals Per Day | 1-6 meals |
| Portions Per Meal | Up to 8 portions (15g each) |
| Voice Recorder | 10 seconds |
| Target Species | Cat, Dog (Small Breeds) |
| Care Instructions | Hand Wash Only (for removable tray) |
7. Warranty & Support
WOPET offers a 12-month warranty for Amazon purchases of the FT30 Automatic Pet Feeder. For product support, troubleshooting assistance, or warranty claims, please visit the official WOPET Store on Amazon or contact their customer service directly.
WOPET Store: https://www.amazon.com/stores/WOPET/page/F64A4A8F-9EA0-4B7A-8D18-CEDDE02619EB