
Introduction
This user manual provides comprehensive instructions for the installation and operation of the REDTIGER F7N Dash Cam Hardwire Kit. This kit is designed to provide a continuous power supply to your dash cam, enabling features like 24-hour parking monitoring and low voltage protection. Please read this manual carefully before installation to ensure proper functionality and safety.
Safety Information
Always prioritize safety during installation. Disconnect the vehicle's battery before working with electrical components. If you are unsure about any step, it is recommended to seek professional assistance. Ensure all connections are secure to prevent short circuits or damage to your vehicle's electrical system.
Product Overview
The REDTIGER F7N Hardwire Kit is a Type-C USB power solution for compatible dash cameras. It converts 12V-24V vehicle power to a stable 5V/2.5A output. The kit includes three essential wires for connection to your vehicle's fuse box.

Image: Overview of the REDTIGER F7N Dash Cam Hardwire Kit, showing the main cable with the power converter box and the three connection wires (red, yellow, black) at one end, and the USB-C connector at the other.
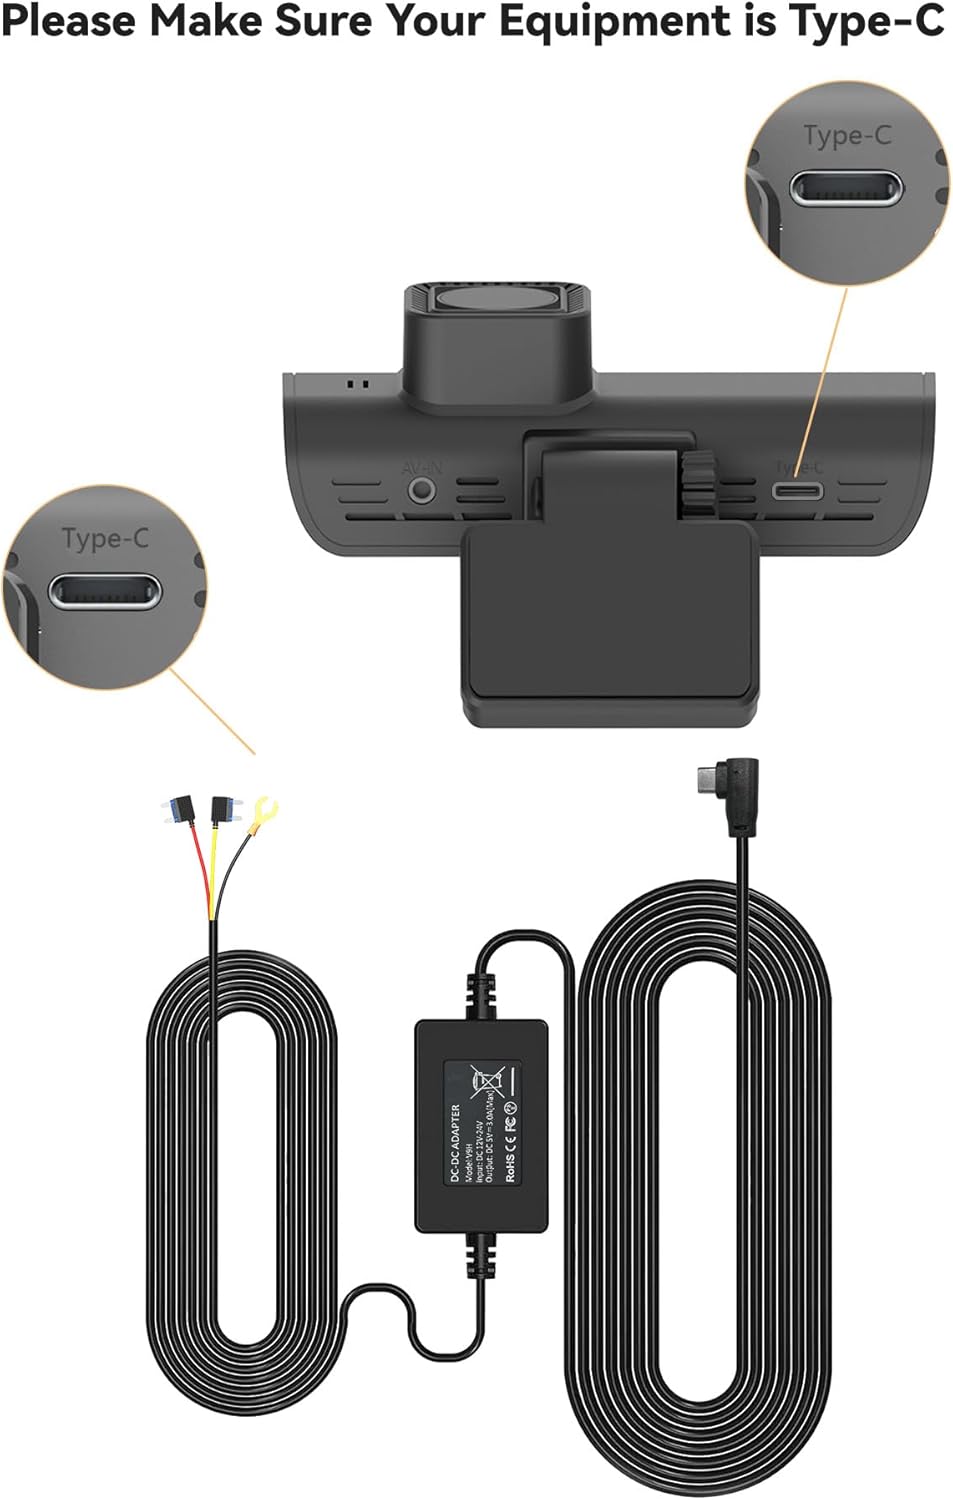
Image: Close-up of the REDTIGER F7N Hardwire Kit, emphasizing the Type-C USB connector, which is crucial for compatibility with the F7N series dash cams.
Key Features:
- Type-C Compatibility: Designed specifically for USB-C powered dash cams, providing a stable 5V/2A output from 12V-24V input.
- Easy Installation: Eliminates the need for a car cigarette lighter socket, offering a permanent and hidden cable solution.
- 24-Hour Monitoring: Connects directly to the car battery or fuse box for continuous power, even when the vehicle is off, enabling parking surveillance.
- Low Voltage Protection: Automatically cuts off power when the vehicle's voltage drops below 11.8V (±0.2V) to prevent battery drain. Not suitable for trucks with voltage above 24V.
- Enhanced Security: Includes protection against over-current, short-circuit, reverse connection, and overheating.
Installation Guide
Follow these steps carefully to install your REDTIGER Hardwire Kit. It is strongly recommended to refer to your vehicle's manual or seek professional help if needed, as installation steps may vary by vehicle model.
Pre-Installation Checklist:
- Ensure the vehicle's engine is off.
- Disconnect the negative terminal of your car battery to prevent short circuits.
- Gather necessary tools: crowbar/trim removal tool, wire strippers/crimpers (if needed for fuse taps), multimeter (optional, for testing fuse slots).
Step-by-Step Installation:
- Route the Dash Cam Cable:
Reserve a section of the dash cam's power cable for the hardwire kit connection. Use a trim removal tool (crowbar) to hide the remaining wire along the gap of the front windshield. Continue routing the cable along the A-pillar, then along the gap between the car body and the ceiling on the passenger side, and finally between the rear seat and the ceiling towards the trunk.

Image: Diagram illustrating the wire connection points for the hardwire kit, showing the dash cam connected to the power cord, which then leads to the ACC, BATT, and Ground connections in the fuse box.
- Locate the Fuse Box:
The fuse box is typically located under the dashboard on the driver's side or in the engine compartment. For some vehicles, like certain BMW models, it might be in the trunk. Consult your vehicle's manual for the exact location.

Image: A view of a vehicle's fuse box, showing various colored fuses and wiring. This is where the hardwire kit will connect to the vehicle's power supply.
- Identify Fuse Slots:
The hardwire kit has three wires: red, yellow, and black. You need to identify two specific fuse slots in your vehicle's fuse box:
- ACC (Accessory) Fuse Slot: This slot provides power only when the ignition is on.
- Constant Power (B+) Fuse Slot: This slot provides power even when the ignition is off.
You can determine the specific current for each terminal by referring to the fuse box instructions or by checking the markings on the fuse box cover. A multimeter can also be used to test for power presence.
Note: Some car models have a delayed power-off feature for the ACC terminal. It is necessary to wait until the power is completely cut off before conducting the test to accurately identify the ACC terminal.

Image: A detailed view of a fuse box, highlighting various fuse types and their positions. This image helps in understanding the layout for connecting the hardwire kit.
- Connect the Wires:
- Connect the red wire from the hardwire kit to the identified ACC fuse slot.
- Connect the yellow wire from the hardwire kit to the identified constant power (B+) fuse slot.
- Find a suitable grounding point near the fuse box (a metal surface securely connected to the vehicle's chassis). Connect the black wire from the hardwire kit to this grounding point using a ring terminal or suitable connector.

Image: A close-up of a grounding point in a vehicle, showing a black wire with a ring terminal securely fastened to a metal chassis component. This demonstrates the proper connection for the ground wire of the hardwire kit.
- Secure Wiring and Test:
Once all connections are secure, tuck away any excess wires and ensure they are safely routed to avoid interference with the vehicle's controls. Reconnect the negative terminal of your car battery. Test the hardwire kit by turning on the ignition. The dash cam should receive power and begin functioning.
Installation Video:
Video: Official installation guide for the REDTIGER Hardwire Kit, demonstrating the process of routing cables and connecting to the vehicle's fuse box. This video provides a visual aid for the installation steps.
Operating Instructions
Once installed, the REDTIGER Hardwire Kit enables continuous power to your dash cam, primarily for parking monitoring features.
24-Hour Parking Monitor:
The kit allows your dash cam to remain powered and record even when your vehicle is parked and the ignition is off. This feature is crucial for surveillance against incidents like hit-and-runs or vandalism while your car is unattended.

Image: A dash cam mounted in a vehicle, with text indicating "24H Parking Monitor," illustrating the continuous surveillance capability provided by the hardwire kit.
Low Voltage Protection:
To protect your vehicle's battery from excessive discharge, the hardwire kit is equipped with a low voltage cut-off function. If the vehicle's battery voltage drops below 11.8V (±0.2V), the kit will automatically cut off power to the dash cam after 60 seconds. This ensures that there is sufficient power remaining to start your vehicle.

Image: Vehicle interior with a dash cam visible, overlaid with text "Low-Voltage Battery Drain Protection," highlighting the kit's ability to prevent the car battery from draining completely.
Troubleshooting
If you encounter issues with your REDTIGER Hardwire Kit, please refer to the following common problems and solutions:
| Problem | Possible Cause | Solution |
|---|---|---|
| Dash cam does not power on after installation. |
|
|
| Dash cam turns off immediately after vehicle ignition is off. |
|
|
| Dash cam drains car battery. |
|
|
Specifications
| Attribute | Detail |
|---|---|
| Product Dimensions | 5.11 x 2.91 x 1.81 inches |
| Item Weight | 8.1 ounces |
| Model Number | HW01-DT |
| Connectivity Technologies | USB (Type-C) |
| Special Features | Parking monitor, Low Voltage Protection |
| Input Voltage | 12V-24V |
| Output Voltage/Current | 5V/2.5A |
| Cable Length | 21.3ft |
| Color | Black |
| Manufacturer | REDTIGER |
Warranty and Support
REDTIGER is committed to providing high-quality products and excellent customer service.
- Warranty: This product comes with an 18-month replacement assurance for quality problems.
- Customer Support: For any professional help or inquiries, please feel free to reach us.
You can contact REDTIGER customer support via:
- 24-hour support
- Email support
- Phone support
Please visit the official REDTIGER website or your purchase platform for specific contact details.