
Haier JW-U55HK
Haier JW-U55HK 5.5kg Top-Loading Washing Machine
Instruction Manual
1. Important Safety Information
Please read this instruction manual carefully before using your Haier washing machine. Keep this manual for future reference. Failure to follow these instructions may result in property damage, personal injury, or death.
- Electrical Safety: Ensure the washing machine is connected to a properly grounded 100V power outlet. Do not use extension cords or adapters. Disconnect power before cleaning or servicing.
- Water Safety: Ensure water inlet and drain hoses are securely connected to prevent leaks. Do not operate the machine if water is leaking.
- Child Safety: Keep children away from the washing machine during operation. Do not allow children to play with the appliance.
- Flammable Materials: Do not wash items that have been soiled with flammable substances (e.g., gasoline, solvents).
- Installation: Install the machine on a firm, level surface to prevent excessive vibration and noise.
2. Product Overview
Familiarize yourself with the main components of your Haier JW-U55HK washing machine.
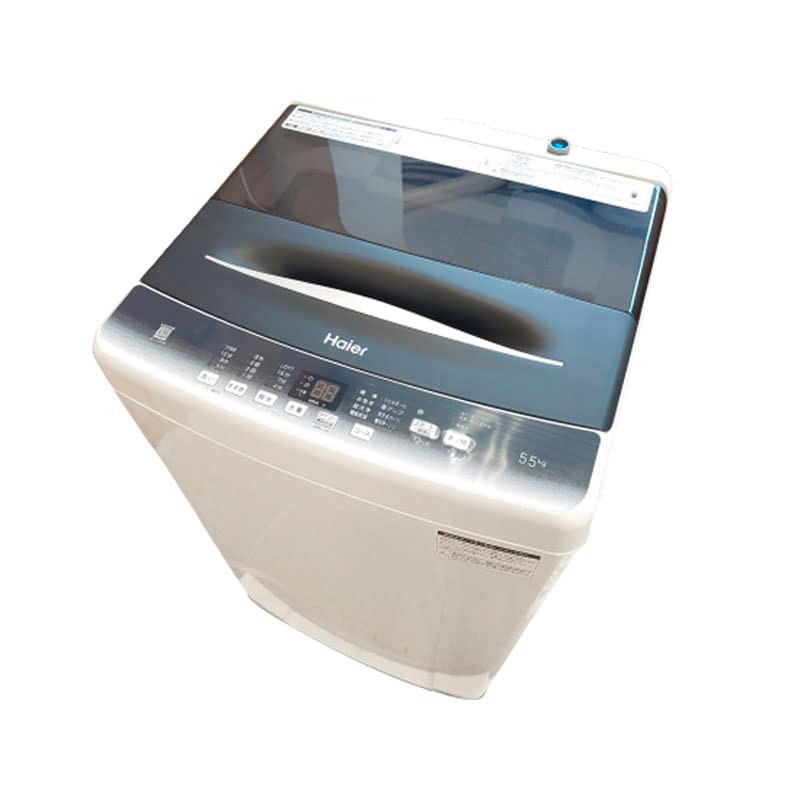
Figure 2.1: Front view of the Haier JW-U55HK washing machine. This image shows the top-loading design, the control panel at the front, and the overall black and white metallic finish of the appliance.

Figure 2.2: Close-up of the control panel. This image highlights the push-buttons for various functions such as Wash, Rinse, Spin, Water Level, Timer, and Course selection, along with the digital display.

Figure 2.3: Side view of the Haier JW-U55HK washing machine. This perspective shows the compact, upright design suitable for various laundry spaces.
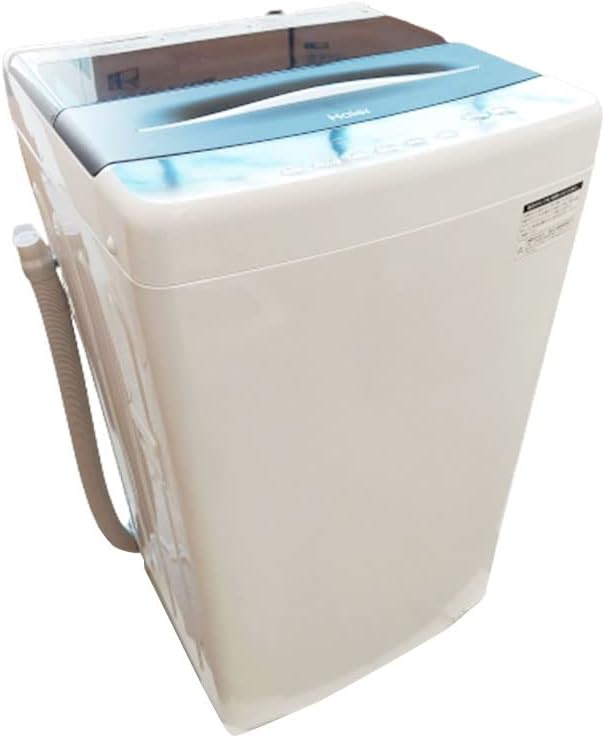
Figure 2.4: Rear-side view of the Haier JW-U55HK washing machine. This image illustrates the placement of the drain hose, which is essential for water discharge.
3. Setup and Installation
Proper installation is crucial for the safe and efficient operation of your washing machine.
- Unpacking: Carefully remove all packaging materials. Check for any damage during transit.
- Location: Place the washing machine on a flat, stable, and level surface. Ensure there is adequate space around the machine for ventilation and access. Avoid direct sunlight or areas with extreme temperatures.
- Water Supply Connection: Connect the water inlet hose to a cold water tap. Ensure the connection is tight to prevent leaks.
- Drain Hose Installation: Position the drain hose into a suitable drain pipe or sink. Ensure the hose is securely fixed and not kinked, allowing for proper water drainage.
- Power Connection: Plug the power cord into a grounded 100V electrical outlet.
- Leveling: Adjust the leveling feet at the bottom of the machine to ensure it is perfectly level. This minimizes vibration and noise during operation.
4. Operating Instructions
Follow these steps for effective use of your washing machine.
4.1 Control Panel Functions
The control panel features push-buttons for easy operation:
- Power (入/切): Turns the machine on or off.
- Start/Pause (スタート/一時停止): Starts or pauses the selected wash cycle.
- Wash (洗い): Selects the wash duration.
- Rinse (すすぎ): Selects the number of rinse cycles.
- Spin (脱水): Selects the spin duration.
- Water Level (水量): Adjusts the water level according to the load size.
- Timer (タイマー): Sets a delayed start time for the wash cycle.
- Course (コース): Selects the desired wash program.
4.2 Basic Washing Steps
- Load Laundry: Open the top lid and place laundry loosely into the stainless steel drum. Do not overload.
- Add Detergent: Add the appropriate amount of detergent to the dispenser.
- Power On: Press the Power button.
- Select Course: Press the Course button to choose a wash program. Available courses include Normal and Tub Wash.
- Adjust Settings (Optional): Use the Wash, Rinse, Spin, and Water Level buttons to customize settings if needed.
- Start Cycle: Press the Start/Pause button to begin the wash cycle.
4.3 Special Features
- Heater Function: This washing machine is equipped with a heater for enhanced washing performance. The heater function is integrated into certain wash cycles.
- Semi-Automatic Operation: The machine offers semi-automatic control, allowing for manual adjustment of wash, rinse, and spin cycles.
5. Maintenance and Care
Regular maintenance ensures optimal performance and extends the lifespan of your washing machine.
- Cleaning the Exterior: Wipe the exterior surfaces with a soft, damp cloth. Do not use abrasive cleaners or solvents.
- Cleaning the Drum: Use the Tub Wash cycle regularly to clean the stainless steel drum and prevent mold and odor buildup.
- Lint Filter Cleaning: Locate and clean the lint filter after every few washes. Remove accumulated lint to maintain efficient drainage and washing performance.
- Detergent Dispenser: Clean the detergent dispenser periodically to remove any residue buildup.
- Winterization (if applicable): If the machine is in an unheated area during winter, drain all water from the hoses and pump to prevent freezing and damage.
6. Troubleshooting
Refer to this section for common issues and their solutions before contacting service.
| Problem | Possible Cause | Solution |
|---|---|---|
| Machine does not start | Power cord unplugged; Lid not closed properly; Power outage. | Check power connection; Ensure lid is fully closed; Check household power supply. |
| Water does not fill | Water tap closed; Water inlet hose kinked or blocked. | Open water tap; Straighten hose; Clean inlet filter if blocked. |
| Water does not drain | Drain hose kinked or blocked; Drain pump filter clogged. | Straighten hose; Clean drain pump filter. |
| Excessive vibration/noise | Machine not level; Laundry unevenly distributed; Shipping bolts not removed (if applicable). | Adjust leveling feet; Redistribute laundry; Ensure all shipping bolts are removed. |
| Poor washing results | Too much or too little detergent; Overloading; Incorrect wash cycle. | Use correct detergent amount; Reduce load size; Select appropriate wash cycle. |
7. Specifications
Key technical specifications for the Haier JW-U55HK washing machine.
- Model: JW-U55HK
- Type: Top-Loading Washing Machine
- Washing Capacity: 5.5 kg
- Color: Black (Metallic Finish)
- Drum Material: Stainless Steel
- Voltage: 100 V
- Noise Level: 55 dB
- Control Type: Push-Button
- Operation Mode: Semi-Automatic
- Special Features: Heater Function, Normal Cycle, Tub Wash Cycle
8. Warranty and Support
For warranty information, please refer to the warranty card included with your product. For technical support or service inquiries, please contact Haier customer service through their official website or the contact details provided in your purchase documentation.
Related documentsJW-U55HK


Ask a question about this manual
Ask about setup, troubleshooting, compatibility, parts, safety, or missing instructions. Manuals+ will review the question and use this page’s manual context to help answer it.