
1. Introduction
This manual provides detailed instructions for the Tonnlog 64GB Voice Activated Digital Audio Recorder, Model TN6. Please read this manual thoroughly before use to ensure proper operation and to maximize the device's capabilities. This compact and portable recorder is designed for various applications, including meetings, lectures, classes, and interviews.

Image 1.1: The Tonnlog 64GB Voice Activated Digital Audio Recorder.
Video 1.1: An introductory overview of the Tonnlog 64GB Voice Recorder, demonstrating its components and basic features.
2. Package Contents
Verify that all items are present in the package:
- 1 x Tonnlog 64GB Voice Activated Digital Audio Recorder (Model TN6)
- 1 x USB Data Cable
- 1 x Earphone
- 1 x Instruction Manual
- 1 x USB-A to Micro USB Adapter
- 1 x USB-C to Micro USB Adapter
3. Device Overview
The Tonnlog TN6 recorder features a minimalist design with essential controls for ease of use.

Image 3.1: Side view of the recorder, highlighting the ON/OFF switch and connection ports.
- ON/OFF Switch: Used to start and stop recording, and to power the device.
- Micro USB Port: For charging, data transfer, and connecting the earphone adapter.
- Indicator Light: Provides status feedback (e.g., charging, power on).
4. Setup
4.1 Setting Time and Date
To ensure recorded files are named with the correct date and time, synchronize the recorder's internal clock with your local time. This is done by modifying the RECSET.txt file on the device when connected to a computer.
- Turn off the recorder before connecting it to your computer.
- Connect the recorder to your computer using the provided USB data cable.
- Locate the
RECSET.txtfile on the recorder's USB disk. - Open
RECSET.txtwith a text editor. - Find the line starting with
Time:. The number followingTime:represents the year, month, day, hour, minute, and second. Modify this number to reflect your current local time (e.g.,20221124152435for November 24, 2022, 15:24:35). - Save the
RECSET.txtfile. - For Windows users, it is recommended to use the
SetDigitRecorderTm.exetool found in the 'Settime' folder on the USB disk to synchronize the time after modifyingRECSET.txt. - Safely eject the recorder from your computer and restart it.
Video 4.1: Instructions for setting up the time and date on a Mac computer.
Video 4.2: Instructions for setting up the time and date on a Windows PC.
4.2 Initial Charge
Before first use, fully charge the recorder. Connect the device to a USB power source (computer or USB wall charger) using the provided USB data cable. The red indicator light will flash during charging and turn blue when fully charged. A full charge takes approximately 2 hours and provides up to 37 hours of continuous recording.

Image 4.1: The Tonnlog 64GB Digital Recorder offers over 37 hours of continuous recording on a full charge.
5. Operating Instructions
5.1 Basic Recording
The recorder features a simple one-touch operation for recording.
- To start recording, slide the ON/OFF switch to the ON position. The indicator light will flash briefly and then turn off, indicating that recording has begun. There will be no light flashing during recording.
- To save the recording, slide the ON/OFF switch to the OFF position. The device will automatically save the current recording file.

Image 5.1: Sliding the switch to 'ON' initiates recording, and sliding to 'OFF' saves the file.
5.2 Voice Activated Recording (VOR)
The Voice Activated Recording (VOR) function allows the recorder to capture audio only when sound above a certain level is detected, conserving memory and listening time. This feature is off by default.
- Connect the recorder to your computer and open the
RECSET.txtfile. - Locate the line starting with
Vor:. The default value is0(off). - Change the value to
1or2to enable VOR. A higher number indicates higher sensitivity. - Save the
RECSET.txtfile, safely eject the recorder, and restart it. - When VOR is enabled, the recorder will only record when sound is detected.

Image 5.2: The Voice Activation Function captures sound above a set threshold, saving space and time.
5.3 Playback
You can listen to your recordings directly from the device or by connecting it to a computer or smartphone.
- Using Earphones: Connect the provided earphone adapter to the recorder's Micro USB port, then plug in the earphones. Power on the recorder. Use the controls on the earphone adapter to play, pause, skip tracks, adjust volume, fast forward, and rewind.
- Using a Computer/Smartphone: Connect the recorder to your computer (Windows/Mac) or Android smartphone using the appropriate USB adapter. The device will appear as a removable disk. Navigate to the 'RECORD' folder to access and play your WAV audio files.
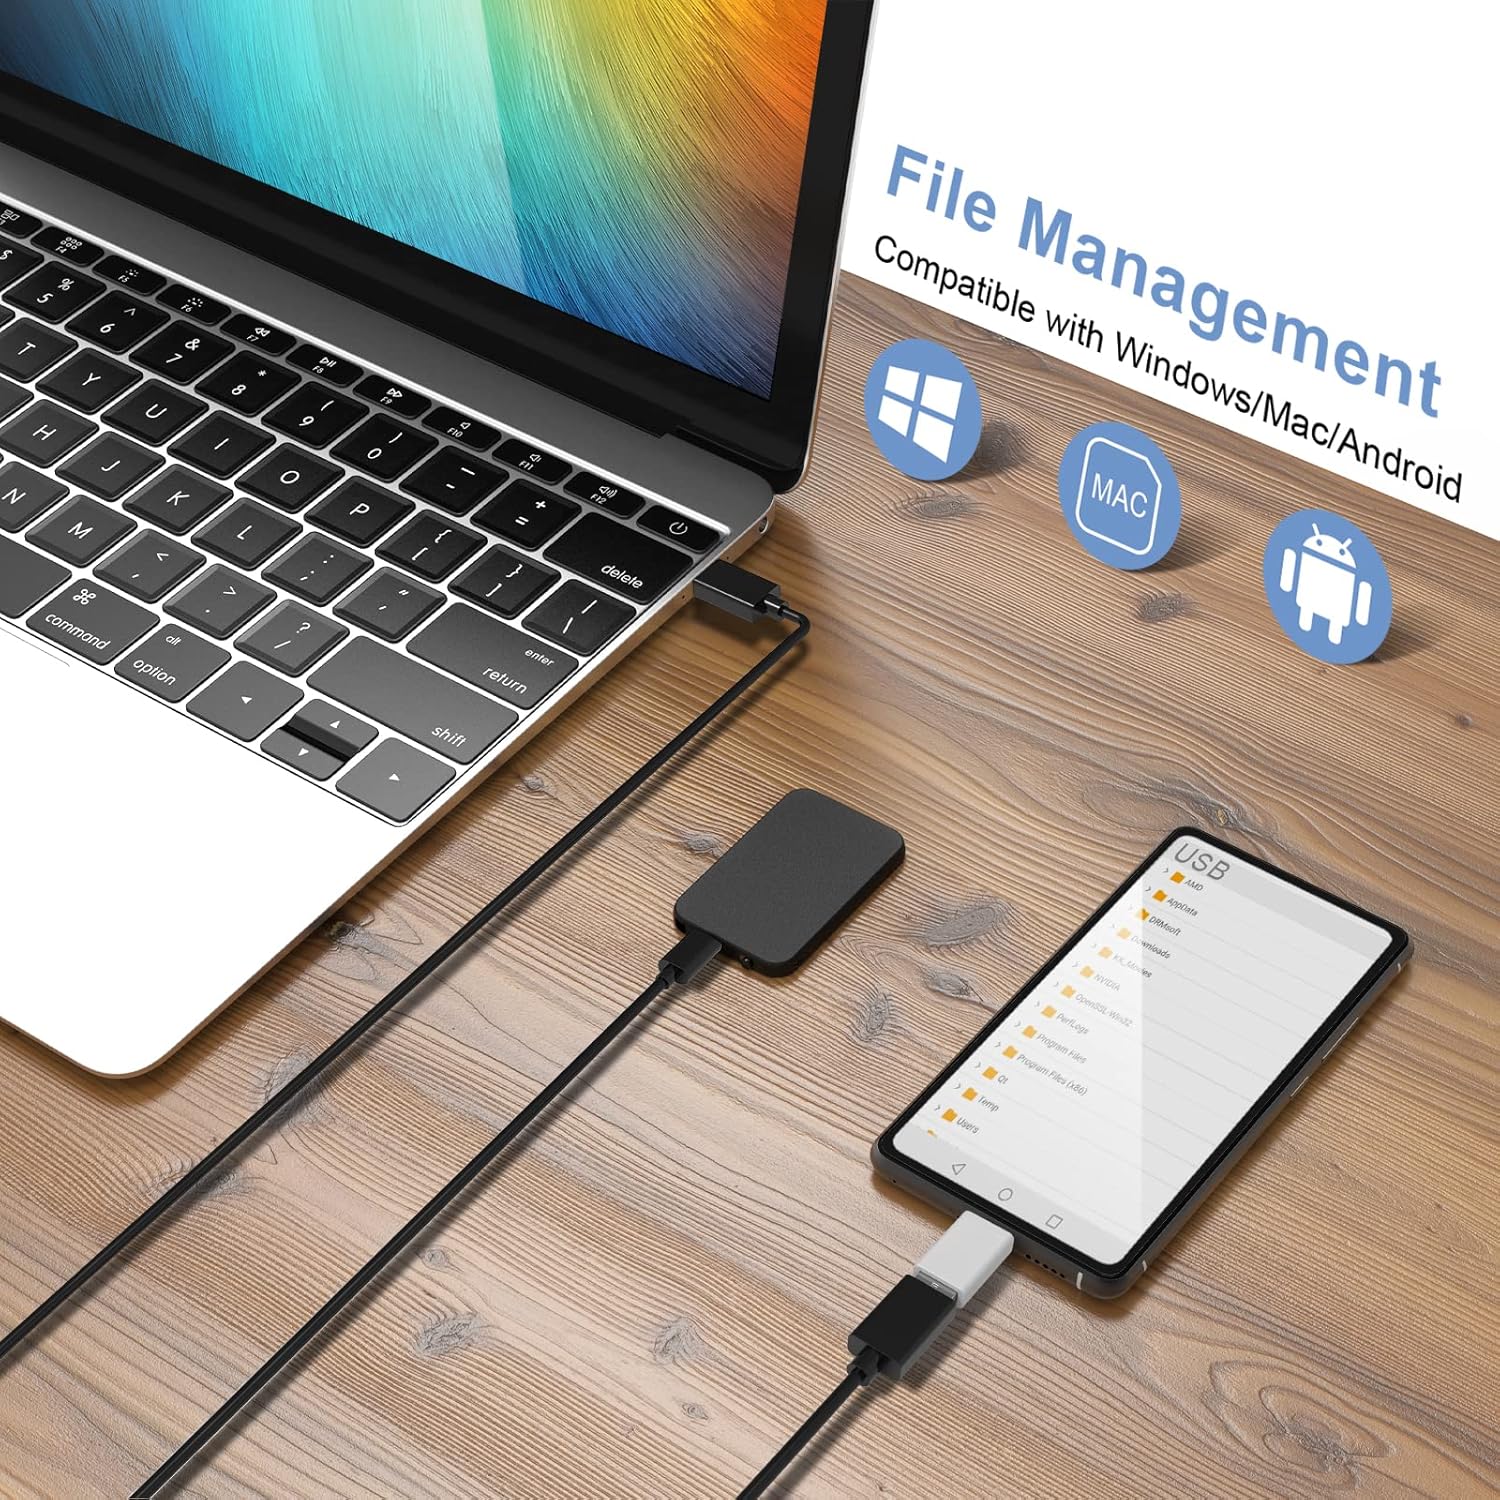
Image 5.3: The recorder connected to earphones for direct playback.
5.4 File Management
Manage your recorded files by connecting the device to a computer or Android phone.
- Connect the recorder to your computer (Windows/Mac) or Android smartphone.
- Access the 'USB DISK' drive. Recorded files are stored in the 'RECORD' folder.
- Files are named according to the date and time of recording (e.g.,
R20220625093005.WAV). 'R' indicates VOR is off, 'V' indicates VOR is on. - You can copy, move, or delete files as needed.

Image 5.4: Connecting the recorder to a computer or Android phone for file transfer and management.

Image 5.5: Recorded files are automatically named with a timestamp for easy organization.
6. Maintenance
6.1 Achieving Clear Recordings
- Place the recorder on a stable surface to avoid vibrations or rubbing noises.
- Keep the device away from sources of noise such as air conditioning units, typing sounds, or running computers.
- For optimal clarity, record in a quiet environment.

Image 6.1: The recorder is suitable for various scenarios, including meetings and lectures, with beamforming microphones designed to capture clear audio.
6.2 Battery Care
- The recorder can record while charging.
- If the battery runs low during recording, the device will automatically save the current audio file before powering off.

Image 6.2: The Smart Battery Detection feature automatically saves recordings when the battery is low.
7. Troubleshooting
- Computer Connection Failure:
1. Ensure the audio recorder is turned off before connecting to the computer and placed flat.
2. Try changing the USB port on your computer.
3. Check if a 'USB DISK' identifier appears. If issues persist on Windows, click 'USB Disk Identifier' in the lower right corner of the desktop, then 'Open Devices and Printers', right-click 'HS USB FlashDisk', and select 'Remove Device' before reconnecting. - Failed to Play on Headphones:
1. Ensure a recording file is available.
2. Increase the volume using the earphone adapter controls.
3. Press Previous/Next buttons to locate the correct recording file. Ensure you are playing a recorded file and not a silent file or an MP3 file (short press 'M' to toggle modes if applicable). - Indicator Light Behavior:
- Power on: Purple light flashes once, then red light flashes 3 times.
- Switching off: Purple light flashes once.
- Recording: No indicator light flashes.
- Charging: Red light flashes when charging; blue light is solid when charging is complete (turn off recorder before charging with a USB wall charger).
- Recording while charging: No indicator light flashes.
- Actual Memory vs. Advertised:
The actual usable memory may appear slightly less than advertised (e.g., ~28GB for a 32GB recorder) due to differences in how computer systems (1GB = 1024MB) and memory manufacturers (1GB = 1000MB) calculate storage capacity. - Unclear Recordings:
Refer to Section 6.1 for tips on achieving clear recordings, including stable placement and avoiding noise sources.
8. Specifications
| Feature | Specification |
|---|---|
| Model Number | TN6 |
| Memory Storage Capacity | 64 GB |
| Battery Life (Continuous Recording) | Up to 37 hours |
| Charging Time | Approximately 2 hours |
| Recording Format | WAV |
| Bit Rate | Up to 384kbps |
| Microphone Form Factor | Built-In |
| Hardware Interface | Micro USB 2.0 Type B |
| Headphones Jack | 3.5 millimeters |
| Compatible Devices | MAC computer, Windows computer, Android smartphone (Not compatible with iPhone) |
| Product Dimensions | 0.24 x 1.22 x 2.09 inches |
| Item Weight | 0.741 ounces (21 Grams) |
9. Warranty and Support
Tonnlog provides a 12-month free warranty and lifetime customer support for this product. If you have any questions, require assistance, or encounter any issues, please contact Tonnlog customer service. We aim to respond within 24 hours.

Image 9.1: Tonnlog offers 24-hour online customer service for support.