1. Introduction
Thank you for choosing the VGR V909 Hair Trimmer. This manual provides essential information for the safe and effective use, maintenance, and troubleshooting of your device. Please read it thoroughly before first use and keep it for future reference.
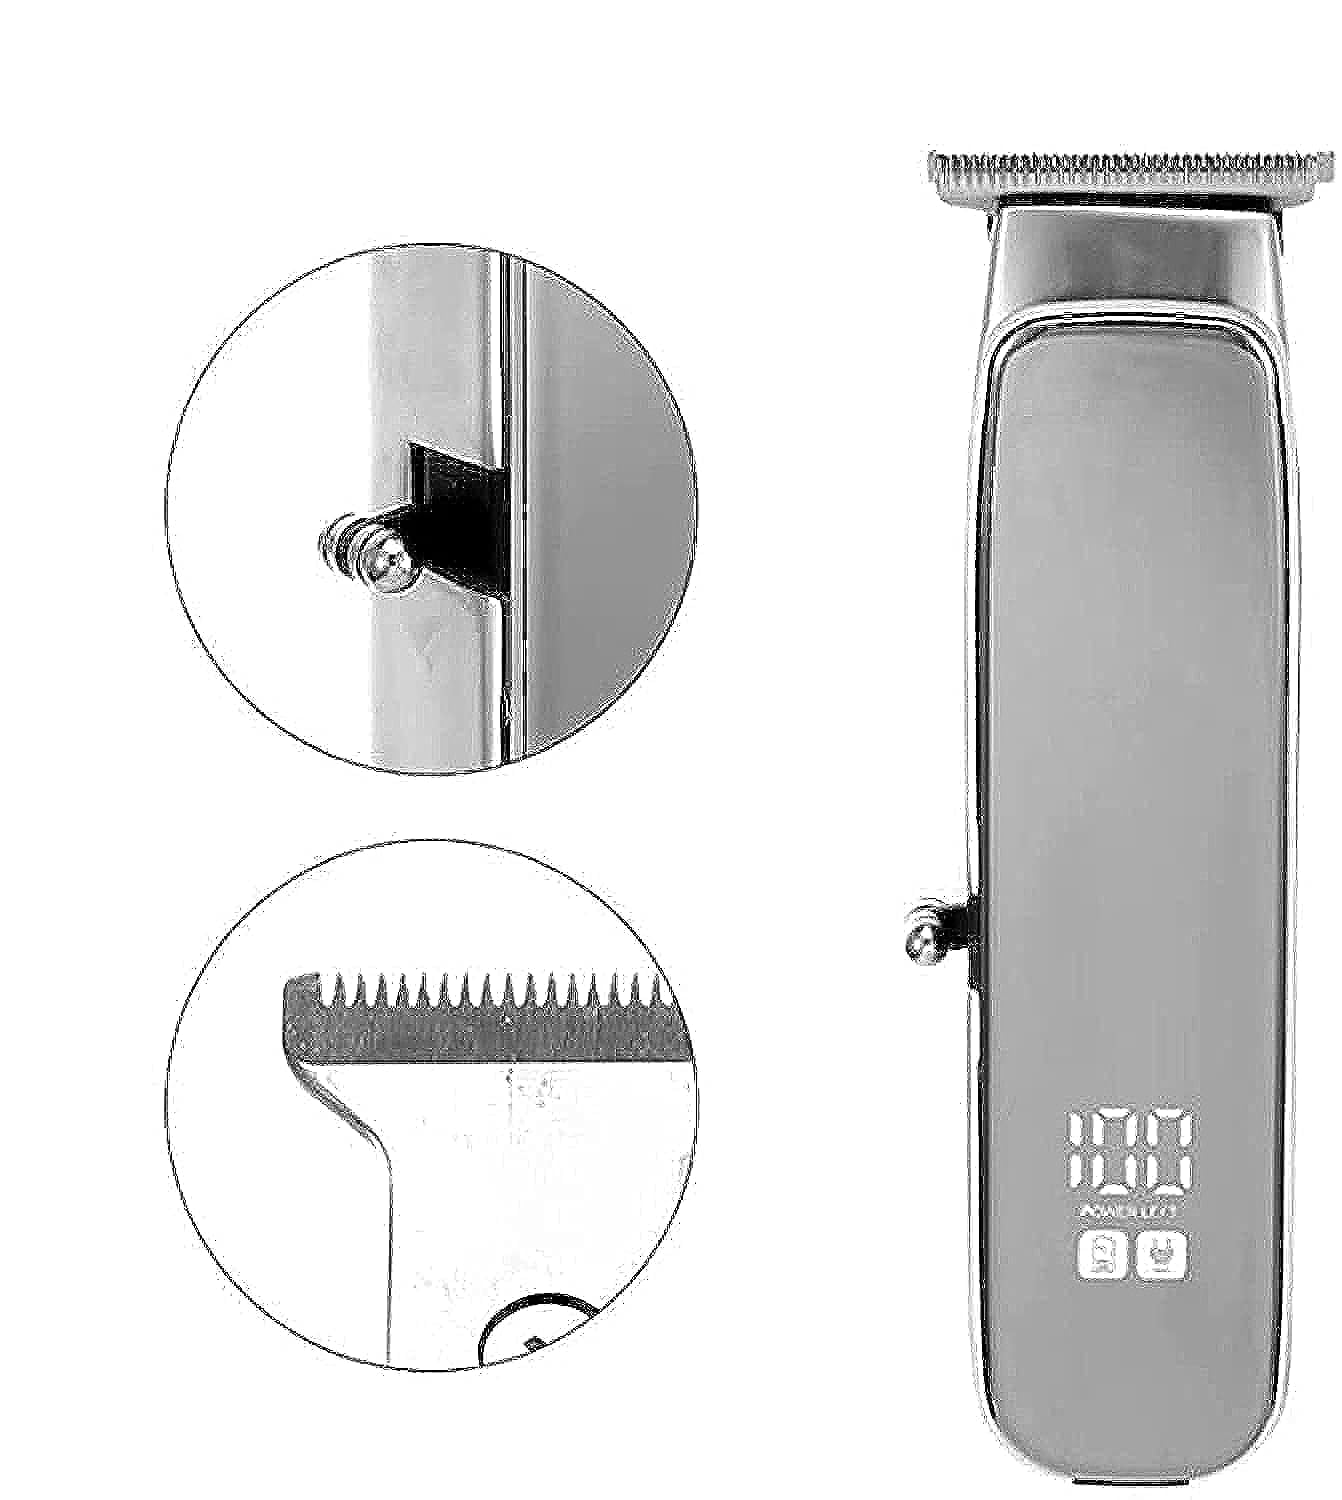
Image 1.1: The VGR V909 Hair Trimmer and its included accessories, showcasing the main unit, guide combs, and charging cable.
2. Safety Instructions
To reduce the risk of electric shock, injury, or fire, always follow these basic safety precautions:
- Keep blades away from eyes and skin during operation.
- Do not use this appliance on infants.
- Keep the trimmer away from water sources. Do not use it near bathtubs, showers, basins, or other vessels containing water.
- Always unplug the trimmer before cleaning or performing any maintenance.
- Use the trimmer with the cord only in a dry environment.
- This appliance is intended for household use only.
- Do not attempt to repair or disassemble the trimmer yourself. Contact qualified service personnel.
- Ensure the charging voltage matches the specifications of your power outlet.
3. Package Contents
Verify that all items are present in the package:
- VGR V909 Hair Trimmer Unit
- Guide Combs (2 pieces)
- Cleaning Brush
- Blade Oil Bottle
- USB Charging Cable
- Instruction Manual
4. Product Overview
Familiarize yourself with the main components of your VGR V909 Hair Trimmer:
- Blade Head: Precision stainless steel blade with a titanium fixed blade for sharp and durable cutting.
- Power Button: Used to turn the trimmer ON/OFF.
- Charging Indicator: Light that indicates charging status.
- Charging Port: For connecting the USB charging cable.
- Guide Combs: Attachments for adjusting trimming length.
5. Setup and Charging
5.1 Initial Charge
Before using your trimmer for the first time, ensure it is fully charged.
- Connect the USB charging cable to the trimmer's charging port.
- Plug the other end of the USB cable into a compatible USB power adapter (not included) or a USB port on a computer.
- The charging indicator light will illuminate, indicating that the trimmer is charging.
- Allow approximately 8 hours for a full charge. The indicator light may change or turn off once fully charged (refer to specific product behavior if different).
- A full charge provides up to 90 minutes of cordless operation.
5.2 Attaching Guide Combs
To achieve desired hair lengths, attach one of the provided guide combs:
- Ensure the trimmer is turned OFF.
- Align the guide comb with the trimmer blade head.
- Gently push the comb onto the blade head until it clicks securely into place.
- To remove, gently pull the comb away from the blade head.
6. Operating Instructions
6.1 Turning On/Off
- To turn ON the trimmer, press the Power Button.
- To turn OFF the trimmer, press the Power Button again.
6.2 Trimming Hair
For best results, ensure hair is clean and dry before trimming.
- Attach the desired guide comb for your preferred hair length.
- Turn on the trimmer.
- Hold the trimmer with the blades pointing upwards and flat against the skin.
- Move the trimmer slowly against the direction of hair growth.
- For detailing or precise lines, remove the guide comb and use the bare blade carefully.
- After use, turn off the trimmer.
7. Maintenance
Regular cleaning and oiling will ensure optimal performance and extend the life of your trimmer.
7.1 Cleaning the Blades
- Ensure the trimmer is turned OFF and unplugged from any power source.
- Remove the guide comb.
- Use the provided cleaning brush to brush away any loose hairs from the blades and the trimmer body.
- For a more thorough clean, the blade head can often be detached (refer to specific product design for removal instructions if applicable).
- Do not rinse the entire trimmer under water unless explicitly stated as waterproof. Clean blades with a damp cloth if necessary, then dry thoroughly.
7.2 Oiling the Blades
After every few uses, or if the trimmer feels sluggish, oil the blades:
- Ensure the trimmer is clean and dry.
- Apply 1-2 drops of the provided blade oil evenly across the top of the blades.
- Turn the trimmer ON for a few seconds to allow the oil to distribute.
- Wipe off any excess oil with a soft cloth.
7.3 Storage
Store the trimmer in a cool, dry place, away from direct sunlight and moisture. Keep it out of reach of children.
8. Troubleshooting
If you encounter issues with your VGR V909 Trimmer, refer to the following common problems and solutions:
| Problem | Possible Cause | Solution |
|---|---|---|
| Trimmer does not turn on. | Battery is depleted. | Charge the trimmer for 8 hours. |
| Poor cutting performance or pulling hair. | Blades are dirty or not oiled. | Clean and oil the blades as per maintenance instructions. |
| Trimmer stops during use. | Battery is low. | Recharge the trimmer. |
| Trimmer makes unusual noise. | Blades may be misaligned or require oiling. | Check blade alignment and apply oil. If problem persists, contact support. |
9. Specifications
| Model | V-909 |
| Rated Voltage | AC 220-240V 50-60Hz or AC 100-110V 60Hz (Optional) |
| Power | 3 Watts |
| Blade Material | Stainless Steel with Titanium Fixed Blade |
| Body Material | Acrylonitrile Butadiene Styrene (ABS) |
| Power Source | USB, Battery, Corded Electric |
| Charging Time | 8 hours for full charge |
| Max Operating Time | 90 minutes (cordless) |
| Special Features | Rechargeable, Portable |
| Target Audience | Men |
| Item Weight | 500 grams |
| Package Dimensions | 20.3 x 9.8 x 6.9 cm |
10. Warranty and Support
For warranty information and customer support, please refer to the warranty card included with your product or visit the official VGR website. Keep your purchase receipt as proof of purchase.
If you have any questions or require assistance, please contact VGR customer service through the channels provided on their official website or product packaging.