1. Introduction
This manual provides essential information for the safe and efficient operation, assembly, and maintenance of your Trailmaster Blazer 200R Youth Go Kart. Please read this manual thoroughly before operating the vehicle to ensure proper usage and longevity.

Figure 1: Trailmaster Blazer 200R Go Kart, front three-quarter view.
2. Safety Information
Operating a go-kart requires caution and adherence to safety guidelines. Always wear appropriate safety gear, including a helmet, eye protection, and protective clothing. Ensure all passengers are properly secured with seatbelts.
- Age Recommendation: Suitable for ages 10 and up.
- Passenger Safety: Do not shift into reverse unless the vehicle is stopped and all passengers are seated with their feet and arms inside.
- Off-Road Use Only: This vehicle is for off-road use only. Do not operate on public streets or highways.
- Hot Surfaces: Allow hot surfaces to cool before refueling.
- CARB Compliance: This product is NOT CA CARB-compliant.
3. Setup and Assembly
Your Trailmaster Blazer 200R Go Kart arrives almost fully assembled in its crate, with tires, shocks, and fenders already in place. The following video provides a visual guide for the final assembly steps.
Video 1: Assembly guide for the Trailmaster Blazer 200R Go Kart. This video demonstrates unpacking, attaching seats, connecting suspension components, installing wheels, mounting the fuel tank, connecting fuel lines, attaching the steering wheel, installing mirrors, and securing protective padding.
3.1 Unpacking and Initial Inspection
Carefully remove the outer packaging and metal frame. Inspect all components for any signs of damage during transit. Ensure all parts listed in the packing list are present.
3.2 Seat Installation
Place the seats into the go-kart frame. Secure them using the provided bolts and nuts. Ensure seatbelts are properly routed and secured.

Figure 2: Go-kart seats with integrated seatbelts.
3.3 Wheel and Tire Attachment
Attach the wheels to the axles. Ensure all washers, nuts, and cotter pins are correctly installed and tightened to prevent wheels from detaching during operation. Inflate tires to the recommended pressure (refer to tire sidewall for details).

Figure 3: Side view of the go-kart, highlighting the wheels and suspension.
3.4 Fuel Tank and Line Connection
Mount the fuel tank securely. Connect the fuel line from the tank to the carburetor, ensuring all clamps are tight to prevent leaks. Verify the fuel valve operates correctly.

Figure 4: Engine and fuel tank assembly.
3.5 Steering Wheel and Accessories
Attach the steering wheel to the steering column. Install any additional accessories such as mirrors and protective padding as per the instructions.
4. Operating Instructions
4.1 Pre-Operation Checklist
- Check fuel level (Fuel Capacity: 1 Gallon).
- Verify engine oil level.
- Inspect tire pressure (recommended PSI is typically on the tire sidewall).
- Ensure brakes are functioning correctly.
- Confirm all nuts and bolts are tight.
4.2 Starting the Go Kart
- Turn the ignition key to the 'ON' position.
- If equipped, engage the choke for cold starts.
- Press the electric start button.
- Once the engine starts, disengage the choke.
4.3 Driving and Controls
The Blazer 200R features a 4-stroke, single-cylinder, air-cooled 212cc engine with 7hp. It includes an electric start and a throttle limiter for speed control.
- Throttle: Located on the right foot pedal. Press to accelerate.
- Brake: Located on the left foot pedal. Press to slow down or stop.
- Gear Selector: Use the gear lever to select Forward, Neutral, or Reverse. Ensure the vehicle is completely stopped before shifting gears.
- Throttle Limiter: Adjust the throttle limiter to control the maximum speed, especially for younger or inexperienced riders.
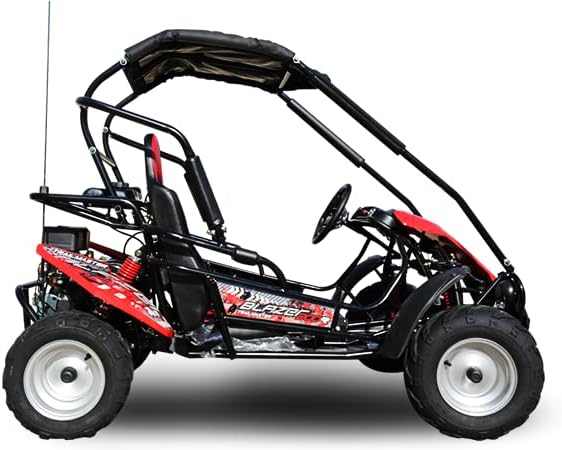
Figure 5: Front view of the go-kart, showing headlights and front suspension.
5. Maintenance
Regular maintenance is crucial for the performance and safety of your go-kart.
- Engine Oil: Check and change engine oil regularly as specified in the engine manual.
- Air Filter: Clean or replace the air filter periodically.
- Spark Plug: Inspect and replace the spark plug as needed.
- Chain: Keep the drive chain clean, lubricated, and properly tensioned.
- Brakes: Regularly inspect brake pads and fluid levels. Adjust or replace as necessary.
- Tires: Maintain correct tire pressure. Inspect for wear and damage.
- Fasteners: Periodically check all nuts, bolts, and fasteners for tightness.
6. Troubleshooting
This section addresses common issues you might encounter with your go-kart.
- Engine Fails to Start: Check fuel level, ignition key position, battery charge, and spark plug condition.
- Loss of Power: Inspect air filter, fuel filter, and carburetor for blockages.
- Brakes Not Effective: Check brake fluid, brake pads, and cable adjustments.
- Unusual Noises: Investigate loose components, worn bearings, or chain issues.
For complex issues, consult a qualified technician or contact Trailmaster customer support.
7. Specifications
| Feature | Specification |
|---|---|
| Engine Type | 4-Stroke, Single Cylinder, Air Cooled |
| Displacement | 212cc |
| Horsepower | 7hp |
| Starting System | Electric Start |
| Max Speed | 31 mph |
| Max Load | 400 pounds |
| Product Dimensions | 67 x 43.3 x 51.2 inches |
| Item Weight | 408 pounds |
| Batteries | 1 12V battery required |
| Tire Size (Front) | 16x6-8 |
| Tire Size (Rear) | 16x7-8 |
Figure 6: Trailmaster Blazer 200R specifications overview.

Figure 7: Dimensional drawing of the Trailmaster Blazer 200R Go Kart.
8. Warranty and Support
For warranty information, please refer to the documentation included with your purchase. For customer support, contact Trailmaster Powersports directly or visit their official website.
- Returns: Returnable until Jan 31, 2026 (as per product listing at time of manual generation).
- Protection Plans: Optional 2-Year Protection Plan and Complete Protect plans may be available for purchase.


