
K&F CONCEPT B234A1+BH-28L
Contents
K&F CONCEPT B234A1+BH-28L Camera Tripod Instruction Manual
Model: B234A1+BH-28L
Introduction
This manual provides detailed instructions for the K&F CONCEPT B234A1+BH-28L Camera Tripod. Please read this manual carefully before using the product to ensure proper operation and longevity. This tripod is designed for use with SLR, DSLR, and digital cameras, offering versatility for various photographic needs.

Image: The K&F CONCEPT B234A1+BH-28L Camera Tripod in its assembled form, showcasing its compact design and ball head.
1. Setup and Assembly
Follow these steps to set up your K&F CONCEPT B234A1+BH-28L Camera Tripod.
1.1 Unfolding the Tripod
- Grasp the tripod legs and gently pull them outwards until they lock into position. The legs can be adjusted to three different angles using the button-type clips at the top of each leg.
- Extend the tripod legs by opening the quick flip leg locks on each section. Extend to the desired height and then securely close the locks.
- To achieve maximum height, extend the center column by loosening the center column lock knob and pulling the column upwards. Securely tighten the knob once the desired height is reached.

Image: Various height configurations of the tripod, demonstrating its adjustable range from folded to maximum extension, including monopod mode.
1.2 Attaching the Ball Head
The BH-28L ball head comes pre-attached to the tripod. Ensure it is securely fastened before use.
1.3 Attaching Your Camera
- Locate the quick release plate on top of the ball head.
- Unscrew the quick release plate from the ball head by turning the locking knob.
- Attach the quick release plate to the bottom of your camera using the 1/4" screw. Ensure it is tightened securely.
- Slide the camera with the attached quick release plate back into the ball head's clamp and tighten the locking knob until the camera is firmly secured.

Image: Close-up view of the BH-28L ball head, highlighting its 360-degree rotation capability and quick release plate mechanism.
2. Operating Instructions
2.1 Adjusting Tripod Height and Leg Angles
- Leg Locks: Each leg features quick flip locks. Open them to extend or retract leg sections, then close them firmly to secure the desired length.
- Leg Angles: Press the angle adjustment buttons at the top of each leg to select one of three available leg angles, allowing for stable positioning on uneven terrain.
- Center Column: Loosen the center column lock knob to raise or lower the center column for fine height adjustments. Tighten the knob to secure.

Image: A hand demonstrating the quick lock-unlock mechanism on a tripod leg, illustrating ease of height adjustment.
2.2 Using the Ball Head (BH-28L)
- Ball Lock Knob: Loosen the main ball lock knob to adjust the camera's angle freely. Tighten it to secure the camera in position.
- Panning Lock Knob: The ball head features a separate knob for horizontal panning. Loosen this knob to rotate the camera 360 degrees horizontally without affecting the tilt angle. Tighten to lock.
- Quick Release Plate: The Arca-Swiss compatible quick release plate allows for rapid attachment and detachment of your camera.
2.3 Detachable Monopod Function
One of the tripod legs can be detached and converted into a monopod for increased mobility.
- Identify the leg with the foam grip. This is the detachable monopod leg.
- Unscrew this leg from the tripod chassis.
- Unscrew the center column from the tripod.
- Attach the ball head (or the provided screw adapter if necessary, found in the accessory bag) to the top of the detached leg.
- You can also attach the center column to the monopod leg for additional height.

Image: A visual guide demonstrating how to detach one of the tripod legs and convert it into a monopod, with a person using it for photography.
2.4 Low-Angle Shooting
For macro photography or low-angle shots, the center column can be inverted.
- Fully extend the center column and loosen its lock knob.
- Remove the center column from the tripod chassis.
- Invert the center column and reinsert it into the tripod chassis from below.
- Secure the center column with the lock knob. Your camera can now be mounted upside down for extremely low perspectives.

Image: The tripod configured for low-angle shooting with the center column inverted, showing a camera positioned close to the ground.
3. Maintenance
Proper maintenance ensures the longevity and optimal performance of your tripod.
- Cleaning: After use, especially in dusty, sandy, or wet environments, wipe down the tripod with a clean, damp cloth. Avoid using harsh chemicals.
- Lubrication: Periodically check leg locks and moving parts for smooth operation. If necessary, apply a small amount of silicone-based lubricant to the leg mechanisms. Do not over-lubricate.
- Storage: Store the tripod in its carrying bag in a dry, cool place away from direct sunlight and extreme temperatures.
- Inspection: Regularly inspect all screws, knobs, and leg locks for tightness. Tighten any loose components to prevent accidental collapse or damage.
4. Troubleshooting
This section addresses common issues you might encounter with your tripod.
- Tripod Instability:
- Ensure all leg sections are fully extended and their flip locks are securely closed.
- Verify that the leg angle adjustment buttons are fully engaged for all three legs.
- Check that the center column lock knob is tightened.
- For maximum stability, especially with heavier cameras or in windy conditions, avoid extending the center column fully. Consider hanging a weight from the hook at the bottom of the center column.
- Ball Head Not Holding Position:
- Ensure the main ball lock knob is tightened sufficiently.
- Verify that the quick release plate is securely attached to both the camera and the ball head.
- The ball head has a maximum load capacity of 10kg (22lbs). Exceeding this limit may cause slippage.
- Monopod Conversion Difficulty:
- Ensure you are unscrewing the correct leg (the one with the foam grip).
- If the ball head does not attach directly, locate the small screw adapter in the accessory bag. This adapter is sometimes needed to connect the ball head to the monopod leg.
- Panoramic Panning Unscrews Ball Head:
- Ensure the ball head is very tightly secured to the tripod's center column. If the ball head is not sufficiently tightened, rotating the panning base counter-clockwise can loosen the entire head from the tripod. Always ensure the main ball head attachment is firm.
5. Specifications
Key specifications for the K&F CONCEPT B234A1+BH-28L Camera Tripod:
| Feature | Detail |
|---|---|
| Model Name | B234A1+BH-28L |
| Material | Magnesium-Aluminum Alloy |
| Maximum Height | 162 cm (63.8 inches) |
| Folded Length | 47 cm (18.5 inches) |
| Load Capacity | 10 kg (22 lbs) |
| Item Weight | 1.3 kg (2.92 lbs) |
| Leg Sections | 4 |
| Tripod Head Type | Ball Head (BH-28L) |
| Ball Head Diameter | 28mm (1.1 inches) |
| Compatible Devices | Camera (SLR, DSLR, Digital) |
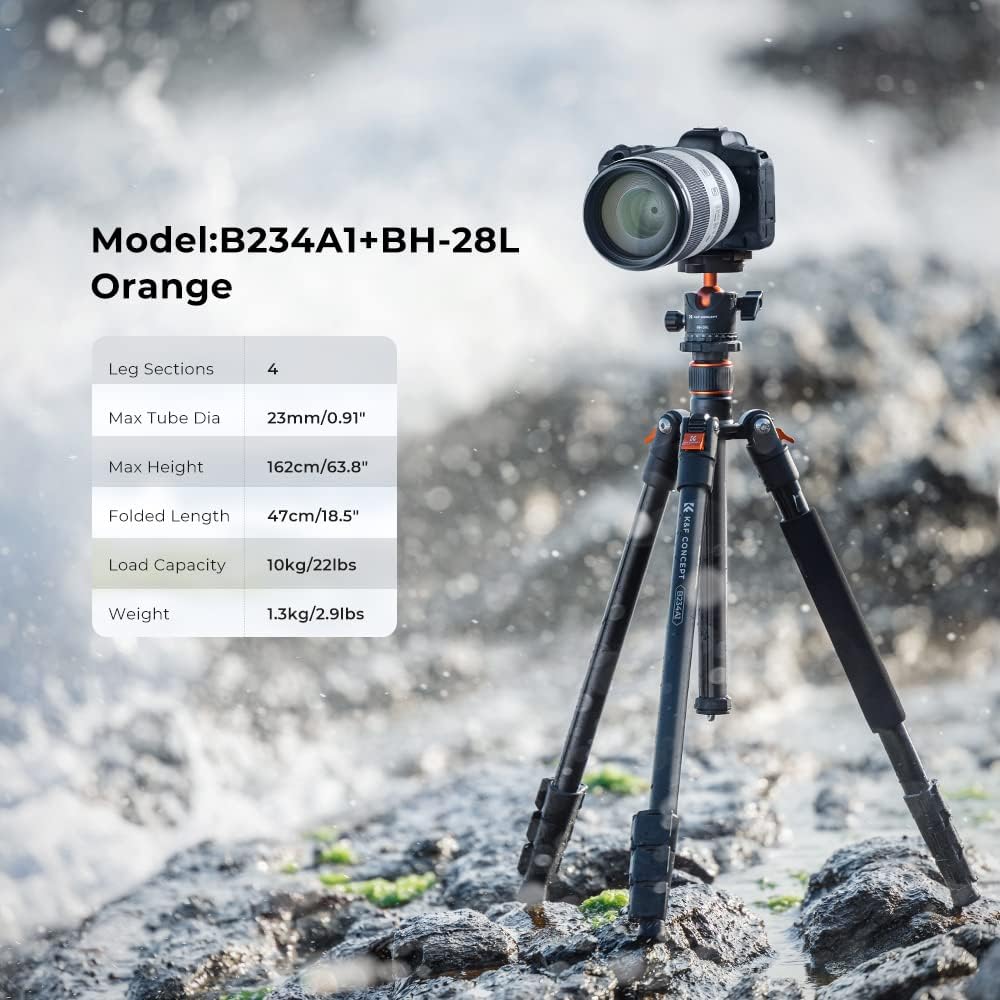
Image: Infographic detailing the key specifications of the K&F CONCEPT B234A1+BH-28L tripod, including max height, folded length, and load capacity.
6. Warranty and Support
K&F CONCEPT products are designed for reliability and performance. For warranty information and customer support, please refer to the official K&F CONCEPT website or contact their customer service directly.
You can visit the official K&F CONCEPT store for more information: K&F CONCEPT Store
Ask a question about this manual
Ask about setup, troubleshooting, compatibility, parts, safety, or missing instructions. Manuals+ will review the question and use this page’s manual context to help answer it.