1. Introduction
This manual provides detailed instructions for the installation, operation, and maintenance of your Ideal Standard Free-Flow Waste for Washbasin, Model J3291XG. Please read these instructions carefully before beginning installation to ensure proper function and longevity of the product.
2. Product Overview
The Ideal Standard J3291XG is a high-quality free-flow waste designed for washbasins. It features a modern silk black finish and is constructed from durable brass. This waste mechanism allows water to drain freely without retaining water in the basin, making it suitable for basins without an overflow or where a non-closing waste is preferred.
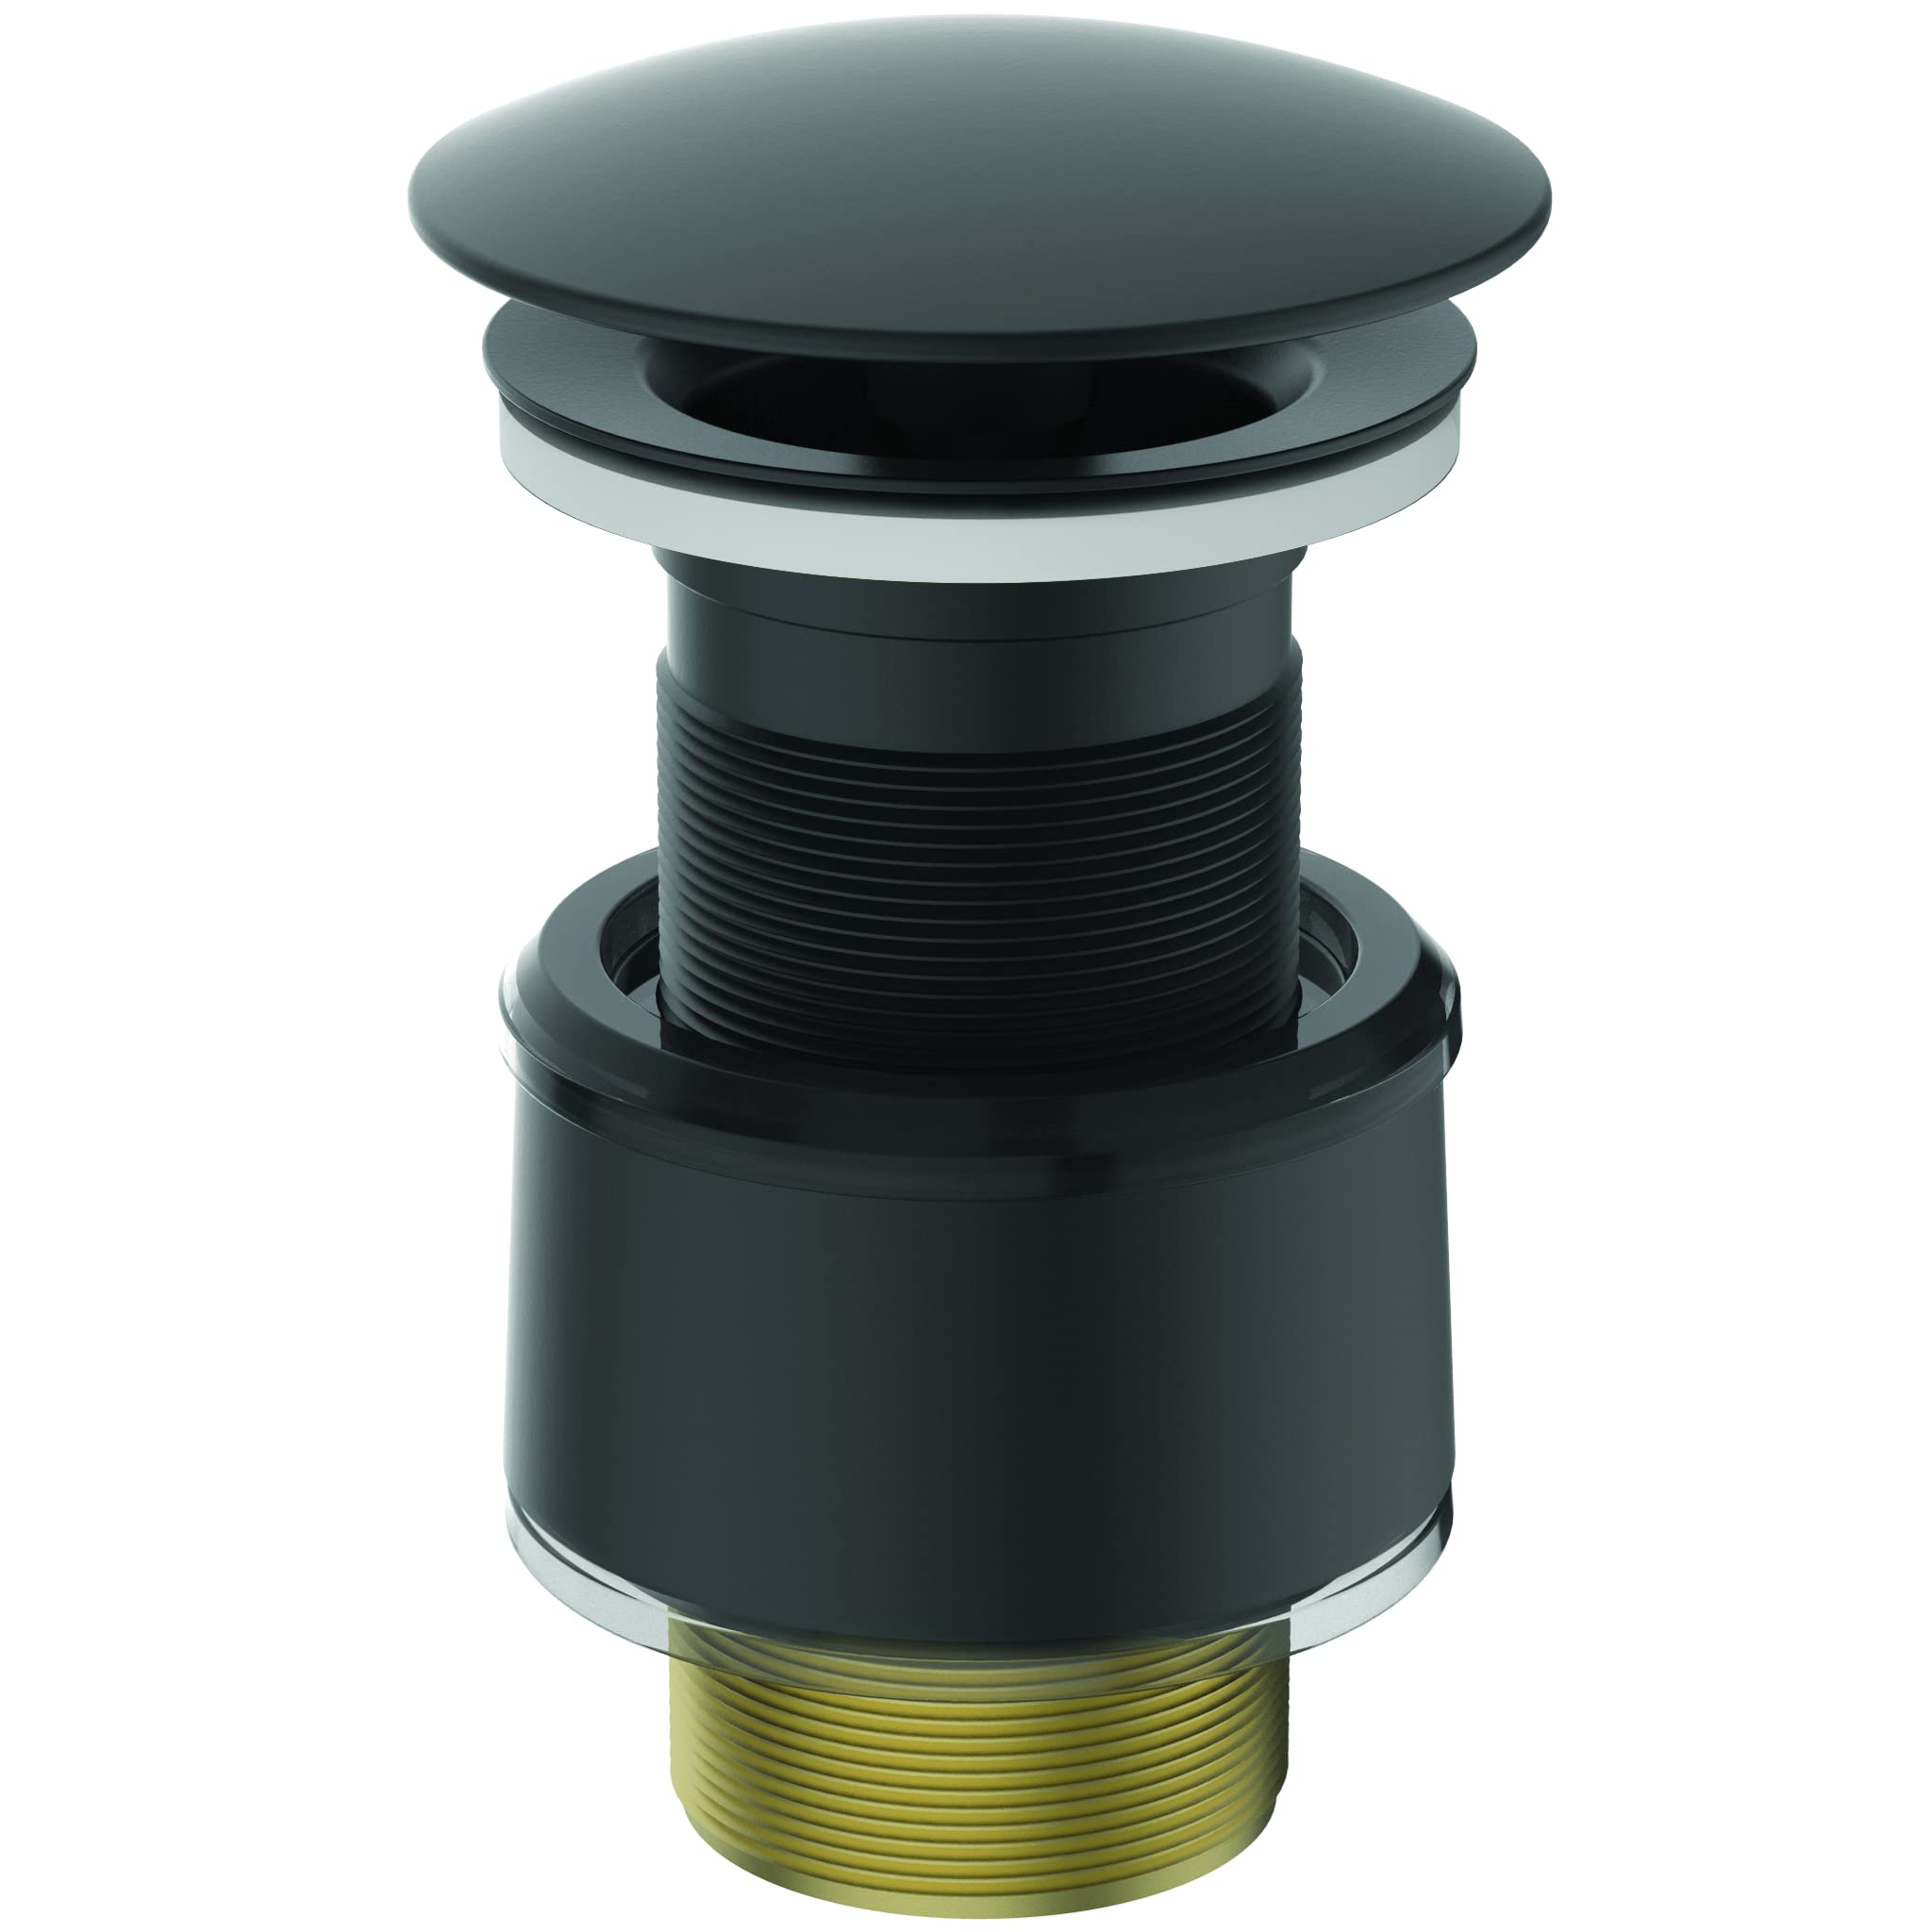
Image 1: Ideal Standard Free-Flow Waste (Model J3291XG) in Silk Black finish. This image shows the complete waste assembly, highlighting its sleek design and dark color.
3. Specifications
| Model Number | J3291XG |
| Brand | Ideal Standard |
| Type | Free-Flow Waste |
| Color | Silk Black |
| Material | Brass |
| Product Dimensions (LxWxH) | 7.2 x 7.2 x 7.5 cm |
| Item Weight | 357 grams |
| Inlet Connection Type | Compression |
| Outlet Connection Type | FIP |
| Number of Ports | 2 |
| Certifications | CE, ISO |
| Included Components | 1 Waste Assembly |
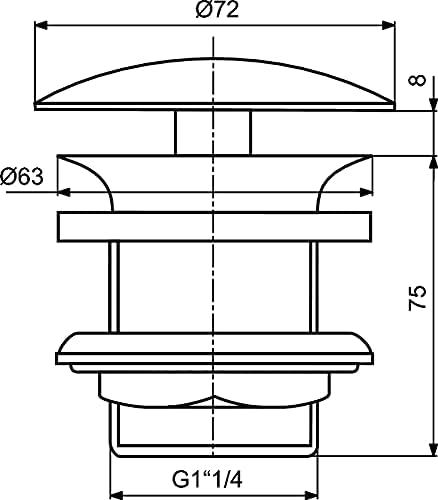
Image 2: Technical drawing showing the dimensions of the Ideal Standard Free-Flow Waste. Key dimensions include a top diameter of 72mm, a body diameter of 63mm, an overall height of 75mm, and a G1"1/4 connection thread.
4. Installation Instructions
Before starting, ensure you have the necessary tools (e.g., adjustable wrench, plumber's putty or silicone sealant) and that the water supply to the basin is turned off. This free-flow waste is designed for basins without an overflow.
- Prepare the Basin: Clean the drain opening of the washbasin thoroughly, removing any old sealant or debris.
- Assemble the Upper Part: Apply a thin bead of plumber's putty or silicone sealant around the underside of the waste flange (the top part that sits inside the basin). Insert the waste flange into the basin's drain opening from above.
- Install the Gasket and Nut: From underneath the basin, slide the rubber gasket (if provided) and then the plastic washer onto the threaded tailpiece of the waste. Ensure the gasket is properly seated against the basin.
- Tighten the Locking Nut: Thread the locking nut onto the tailpiece and hand-tighten it. Use an adjustable wrench to gently tighten the nut further, ensuring a watertight seal. Do not overtighten, as this can damage the basin or the waste.
- Connect to Trap: Connect the waste tailpiece to your existing P-trap or S-trap assembly. Ensure all connections are secure and watertight.
- Test for Leaks: Turn on the water supply and fill the basin. Observe the waste connections for any leaks. If leaks are present, gently tighten the connections until they stop.
Note: Professional installation is recommended if you are unsure about any steps.
5. Maintenance
To maintain the appearance and functionality of your Ideal Standard free-flow waste, follow these simple guidelines:
- Regular Cleaning: Clean the waste regularly with a soft cloth and mild, non-abrasive soap and water.
- Avoid Harsh Chemicals: Do not use abrasive cleaners, scouring pads, or chemical-based drain cleaners, as these can damage the silk black finish and the brass material.
- Remove Debris: Periodically remove any hair or debris that may accumulate in the waste opening to ensure proper drainage.
6. Troubleshooting
- Slow Drainage: If water drains slowly, check for blockages in the waste opening or the connected trap. Remove any visible debris.
- Leaks: If leaks occur after installation, ensure all connections are properly tightened. Check the gaskets and washers for correct placement and condition. If necessary, disassemble, re-apply sealant, and re-tighten.
- Damaged Finish: Avoid using harsh chemicals or abrasive materials that can scratch or dull the silk black finish. For persistent issues, contact customer support.
7. Warranty and Support
This Ideal Standard product comes with a 2-year warranty from the date of purchase, covering manufacturing defects. Please retain your proof of purchase for warranty claims.
For technical support, spare parts, or warranty inquiries, please contact Ideal Standard customer service. You can find contact information on the official Ideal Standard website or through your retailer.
Genuine Ideal Standard spare parts are recommended for all replacements to ensure compatibility and maintain product performance.


