
1. Introduction
This manual provides comprehensive instructions for the setup, operation, and maintenance of your Amazon Fire 7 Tablet (12th Generation). This bundle includes the Fire 7 Tablet, an Amazon Standing Case, and a Screen Protector (2-Pack). Please read this manual thoroughly to ensure proper use and to maximize your device's performance and longevity.
2. What's in the Box
Verify that all items are present in your package:
- Amazon Fire 7 Tablet (12th Generation)
- USB-C Cable
- Power Adapter
- Amazon Standing Case for Fire 7 Tablet
- Screen Protector (2-Pack)
- Quick Start Guide
3. Setup
3.1. Initial Fire 7 Tablet Setup
- Charge the Tablet: Connect the USB-C cable to the tablet's charging port and the power adapter. Plug the adapter into a wall outlet. Allow the tablet to charge fully before first use. The power indicator light will show charging status.
- Power On: Press and hold the power button located on the side of the tablet until the Amazon logo appears.
- Language and Region: Follow the on-screen prompts to select your preferred language and region.
- Connect to Wi-Fi: Select your Wi-Fi network from the list and enter the password. A stable internet connection is required for initial setup and software updates.
- Register Your Device: Sign in with your existing Amazon account or create a new one. This links the tablet to your Amazon content and services.
- Restore from Backup (Optional): If you have a previous Fire tablet, you may have the option to restore settings and content from a backup.
- Complete Setup: Follow any remaining prompts to finalize the setup process, including setting up parental controls if desired.
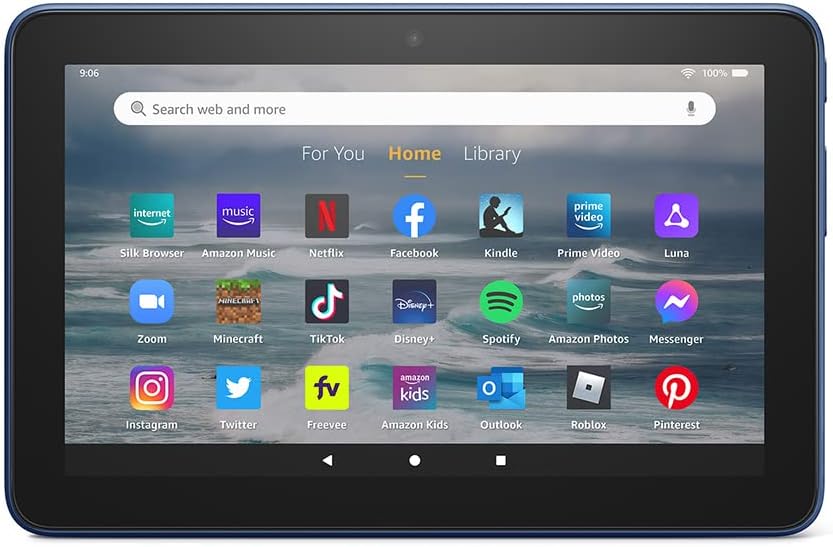
Image: The Fire 7 Tablet displaying its home screen with various applications. This shows the user interface after initial setup.
3.2. Installing the Screen Protector
The screen protector provides an additional layer of defense against scratches and smudges. For best results, install in a dust-free environment.
- Clean the Screen: Use the provided cleaning cloth to thoroughly clean the tablet screen, removing all dust, fingerprints, and smudges. Ensure the screen is completely dry.
- Peel Back Layer 1: Carefully peel off the protective film labeled "Layer 1" or "Back" from the screen protector, exposing the adhesive side. Avoid touching the adhesive.
- Align and Apply: Align the screen protector with the tablet's screen, paying attention to the camera and speaker cutouts. Once aligned, gently lay the protector onto the screen, starting from one edge and slowly lowering it.
- Remove Bubbles: Use a squeegee tool (if provided) or a soft cloth to gently push out any air bubbles towards the edges of the screen.
- Peel Back Layer 2: Once the protector is smoothly applied and free of bubbles, carefully peel off the top protective film labeled "Layer 2" or "Front".

Image: Features of the screen protector, highlighting its ultra-clear view, easy alignment, residue-free adhesive, and bubble-resistant installation.
3.3. Attaching the Amazon Standing Case
The Amazon Standing Case protects your tablet and provides a convenient stand function.
- Open the Case: Open the standing case fully.
- Insert Tablet: Carefully insert your Fire 7 Tablet into the case, ensuring all edges are securely seated within the case's frame. The case is designed for a snug fit, providing access to all ports, buttons, and cameras.
- Secure the Cover: Close the front cover. The magnetic connection will keep it securely closed.
- Using the Stand: To use the stand function, fold the front cover back and position it to support the tablet in a viewing or typing angle.
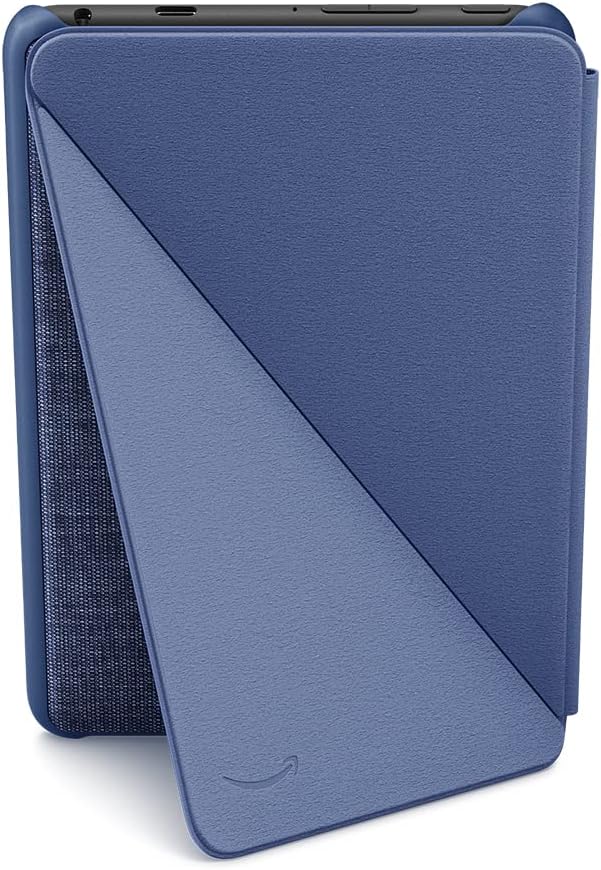
Image: The Amazon Standing Case for the Fire 7 Tablet, demonstrating its design and how it can be opened.
4. Operating the Fire 7 Tablet
4.1. Basic Navigation
- Touch Gestures: Tap to select, swipe to scroll, pinch to zoom.
- Home Screen: Tap the home icon at the bottom of the screen to return to the main home screen.
- Back Button: Tap the back icon to go to the previous screen.
- Recent Apps: Tap the square icon to view and switch between recently used applications.
- Quick Settings: Swipe down from the top of the screen to access quick settings like Wi-Fi, Bluetooth, brightness, and notifications.
4.2. Connecting to Wi-Fi
- Swipe down from the top of the screen to open Quick Settings.
- Tap the Wi-Fi icon.
- Select your desired network from the list.
- Enter the password if prompted and tap Connect.
4.3. Downloading Apps
Apps can be downloaded from the Amazon Appstore.
- Tap the Appstore icon on your home screen.
- Browse or search for the app you wish to install.
- Tap the app, then tap Get or the price to download and install.
4.4. Using the Camera
The Fire 7 Tablet features front and rear cameras.
- Tap the Camera app icon.
- Tap the shutter button to take a photo or switch to video mode to record.
- Tap the camera switch icon to toggle between the front and rear cameras.
4.5. Managing Storage
Your Fire 7 Tablet comes with 16 GB of internal storage, expandable up to 1 TB with a microSD card.
- Insert microSD Card: Locate the microSD card slot on the side of the tablet. Gently insert the card until it clicks into place.
- Check Storage: Go to Settings > Storage to view storage usage and manage files.
- Move Content: You can move compatible apps and media files to the microSD card to free up internal storage.
4.6. Parental Controls
Amazon FreeTime (now Amazon Kids) allows you to create profiles for children and manage their content, screen time, and access to features.
- Access parental controls via Settings > Parental Controls or through the Amazon Kids app.
- Set daily time limits, age filters for content, and control web browser access.
5. Maintenance
5.1. Cleaning the Tablet and Screen Protector
- Use a soft, lint-free cloth (microfiber is ideal) to gently wipe the screen and tablet body.
- For stubborn smudges, slightly dampen the cloth with water or a screen-cleaning solution specifically designed for electronics. Avoid harsh chemicals, abrasive materials, or excessive moisture.
- Ensure the tablet is powered off and unplugged before cleaning.
5.2. Battery Care
- To prolong battery life, avoid extreme temperatures.
- Charge the tablet using the provided Amazon power adapter and USB-C cable.
- While it's not necessary to fully discharge the battery before recharging, occasional full charge cycles can help calibrate the battery meter.
5.3. Software Updates
Amazon regularly releases software updates to improve performance, add features, and enhance security.
- Ensure your tablet is connected to Wi-Fi.
- Go to Settings > Device Options > System Updates to check for and install available updates.
- It is recommended to keep your tablet updated to the latest software version.
6. Troubleshooting
6.1. Common Issues and Solutions
- Tablet Not Powering On:
- Ensure the tablet is charged. Connect it to the power adapter and wait a few minutes before attempting to power on.
- Perform a hard reset: Press and hold the power button for 40 seconds, then release and press it again to power on.
- Wi-Fi Connection Issues:
- Verify your Wi-Fi password is correct.
- Restart your Wi-Fi router and modem.
- Go to Settings > Wi-Fi, forget the network, and then reconnect.
- Apps Crashing or Freezing:
- Close and reopen the app.
- Clear the app's cache: Go to Settings > Apps & Games > Manage All Applications, select the app, then Clear Cache.
- Uninstall and reinstall the app.
- Ensure your tablet's software is up to date.
- Slow Performance:
- Close unused apps running in the background.
- Clear cache for frequently used apps.
- Check available storage and free up space if necessary.
- Restart the tablet.
6.2. Factory Reset
A factory reset will erase all data from your tablet and restore it to its original factory settings. This can resolve persistent software issues but should be used as a last resort.
- Backup Data: If possible, back up any important data to the cloud or a computer.
- Go to Settings > Device Options > Reset to Factory Defaults.
- Confirm your decision when prompted. The tablet will restart and begin the reset process.
7. Specifications
| Feature | Specification |
|---|---|
| Model Name | Fire 7 Tablet (12th Generation) |
| Display | 7-inch touchscreen |
| Storage | 16 GB (expandable up to 1 TB via microSD) |
| RAM | 2 GB |
| Processor | Quad-core (up to 30% faster than 9th Gen) |
| Battery Life | Up to 10 hours (reading, browsing, video, music) |
| Cameras | Front and Rear cameras |
| Ports | USB-C, 3.5mm stereo jack, microSD slot |
| Connectivity | Wi-Fi, Bluetooth |
8. Warranty and Support
Your Amazon Fire 7 Tablet is covered by a limited warranty. For detailed warranty information, please refer to the documentation included with your device or visit the official Amazon support website. For technical assistance, troubleshooting, or to contact customer service, please visit amazon.com/devicesupport.


