
1. Introduction
The HFCCYBGS TA8131 is a hand-held, high-accuracy digital light meter designed for measuring illuminance in various environments. It provides precise readings in Lux and Foot-Candles (Fc), making it suitable for professional and personal use in photography, stage lighting, agriculture, and environmental monitoring. This manual provides essential information for the safe and effective operation, maintenance, and troubleshooting of your device.
2. Safety Information
- Read this instruction manual thoroughly before operating the device.
- Do not attempt to repair or modify the meter. Refer all servicing to qualified personnel.
- Keep the device away from water, high humidity, and extreme temperatures.
- Avoid exposing the sensor to direct sunlight or strong artificial light for prolonged periods, as this may affect accuracy.
- Remove batteries if the device will not be used for an extended period to prevent leakage.
- Dispose of batteries and the device according to local regulations.
3. Product Overview
The TA8131 Digital Light Meter consists of a main display unit and a separate light sensor connected by a coiled cable. The display unit features an LCD screen, control buttons, and a battery compartment. The sensor is designed to accurately capture light intensity.

Figure 3.1: Front view of the TA8131 Digital Light Meter with key dimensions. The main unit measures approximately 13cm (5.12") in length, 5.5cm (2.17") in width, and 3cm (1.18") in thickness. The sensor unit measures approximately 9cm (3.54") in length, 4cm (1.57") in width, and 1.5cm (0.59") in thickness.

Figure 3.2: Front view of the TA8131 Digital Light Meter, showing the LCD display and control buttons.

Figure 3.3: Back view of the TA8131 Digital Light Meter, illustrating the battery compartment and CE certification mark.

Figure 3.4: The complete TA8131 Digital Light Meter kit, including the meter, sensor, protective bag, and instruction manual.

Figure 3.5: The TA8131 Digital Light Meter shown with its integrated kickstand extended for convenient tabletop use.
4. Specifications
| Feature | Specification |
|---|---|
| Measuring Range | 200 Lux, 2000 Lux, 20000 Lux, 100000 Lux (20/200/2000/10000 Fc) |
| Resolution | 0.1 Lux (for 200 Lux range); 1 Lux (for other ranges) |
| Accuracy | ±3% rdg ± 10 dgts (<10,000 Lux); ±4% rdg ± 10 dgts (>10,000 Lux) |
| Total Accuracy | For C.I.E standard illuminate A (2856K) |
| Sample Rate | 2 times/second |
| Repeatability | ±2% |
| Range Selection | Automatic measurement / Manual measurement |
| Data Record | Can hold 50 measuring data (Time-delay record function) |
| Spectral Response | Meets CIE Photopic |
| Photoreceptor | Photodiode with attached filter |
| Unit Selection | Lux / Fc |
| Data Hold Function | Yes |
| Max/MIN Record | Yes |
| LCD Display | Max Display 1999 (3-1/2 digit LCD display), LCD size: 35*32MM |
| Power Supply | 2 * AAA batteries (Not included) |
| Product Dimensions | Machine size: 125*55*30MM; Sensor size: 87*55*20MM |
| Item Weight | 1.1 pounds |
| Certifications | CE certified |
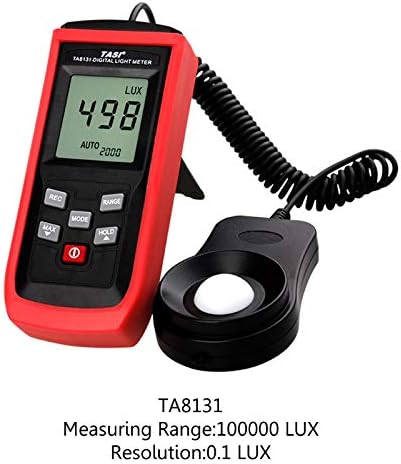
Figure 4.1: The TA8131 Digital Light Meter displaying a reading, with an overlay highlighting its measuring range of up to 100,000 LUX and a resolution of 0.1 LUX.
5. Setup
5.1 Battery Installation
- Ensure the device is powered off.
- Locate the battery compartment cover on the back of the main unit.
- Slide or unscrew the cover to open it.
- Insert two (2) AAA batteries, observing the correct polarity (+/-) as indicated inside the compartment.
- Replace the battery compartment cover securely.
5.2 Powering On/Off
- To power on the device, press the POWER button (red button with a circle and line symbol).
- The LCD display will illuminate, and the device will perform a self-test before entering measurement mode.
- To power off the device, press and hold the POWER button until the display turns off.
6. Operating Instructions
6.1 Basic Measurement
- Power on the device.
- Place the light sensor in the area where you wish to measure illuminance. Ensure the white dome of the sensor is facing the light source and is unobstructed.
- The current light intensity will be displayed on the LCD screen.
6.2 Unit Selection (Lux/Fc)
- Press the MODE button to toggle between Lux and Foot-Candle (Fc) measurement units. The selected unit will be indicated on the LCD.
6.3 Range Selection (Auto/Manual)
- The meter typically operates in automatic ranging mode, indicated by "AUTO" on the display.
- To manually select a range, press the RANGE button. Each press will cycle through the available ranges (200, 2000, 20000, 100000 Lux/Fc).
- To return to auto-ranging, press and hold the RANGE button.
6.4 Data Hold Function
- To freeze the current reading on the display, press the HOLD button. "HOLD" will appear on the screen.
- Press the HOLD button again to release the reading and return to live measurement.
6.5 Max/Min Record
- Press the MAX/MIN button once to display the maximum recorded value since the function was activated. "MAX" will appear.
- Press the MAX/MIN button again to display the minimum recorded value. "MIN" will appear.
- Press the MAX/MIN button a third time to exit Max/Min mode and return to live measurement.
6.6 Data Storage and Delay Logging
- The device can store up to 50 measurement data points.
- To record data, press the REC button. The current reading will be stored.
- The delay logging function allows for automatic recording at set intervals (1 to 60 seconds). Refer to the detailed manual for specific steps on setting up delay logging.
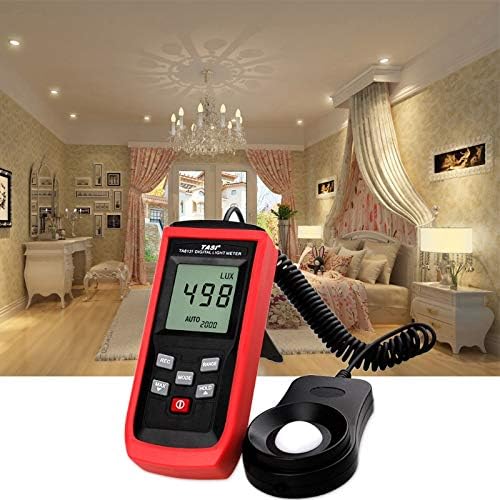
Figure 6.1: The TA8131 Digital Light Meter being used to measure ambient light in a room, demonstrating a typical application.

Figure 6.2: The TA8131 Digital Light Meter in action, showing its use for measuring light from a window, a candle, and general indoor lighting conditions.
7. Maintenance
7.1 Cleaning
- Wipe the meter and sensor with a soft, dry cloth.
- Do not use abrasive cleaners or solvents, as these can damage the plastic casing or the sensor.
- Keep the sensor's white dome clean and free from dust or smudges to ensure accurate readings.
7.2 Storage
- Store the device in a cool, dry place, away from direct sunlight and extreme temperatures.
- If storing for an extended period, remove the batteries to prevent leakage and potential damage to the device.
- Use the provided protective bag for storage to prevent scratches and dust accumulation.
7.3 Battery Replacement
- When the low battery indicator appears on the LCD, replace the batteries as described in Section 5.1.
- Always replace both AAA batteries at the same time with new ones.
8. Troubleshooting
| Problem | Possible Cause | Solution |
|---|---|---|
| Device does not power on | Dead or incorrectly installed batteries | Check battery polarity; replace with fresh AAA batteries. |
| Inaccurate or fluctuating readings | Dirty sensor; sensor not properly positioned; strong electromagnetic interference | Clean the sensor dome; ensure sensor faces the light source directly; move away from strong electrical fields. |
| "OL" or "OVER" displayed | Measurement exceeds current range | Switch to a higher measurement range using the RANGE button or enable auto-ranging. |
| Display is dim or blank | Low battery power | Replace batteries immediately. |
9. Warranty and Support
9.1 Warranty Information
This product is covered by a standard manufacturer's warranty against defects in materials and workmanship. Please refer to the warranty card included with your purchase or contact the retailer for specific warranty terms and conditions. The warranty typically does not cover damage caused by misuse, accidents, unauthorized repairs, or normal wear and tear.
9.2 Customer Support
For technical assistance, troubleshooting not covered in this manual, or warranty claims, please contact your point of purchase or the manufacturer directly. Keep your purchase receipt and product model number (TA8131) handy when contacting support.