
Introduction
Thank you for purchasing the Bella Depot 36" Retractable Ceiling Fan with Lights and Remote. This manual provides essential information for the safe installation, operation, and maintenance of your new ceiling fan. Please read these instructions thoroughly before installation and retain them for future reference.
Important Safety Information
- WARNING: To reduce the risk of fire, electric shock, or personal injury, always turn off the main power supply at the circuit breaker before installation or maintenance.
- All wiring must be in accordance with national and local electrical codes. Consult a qualified electrician if you are unsure about wiring.
- Ensure the installation site can support the weight of the fan (approximately 5.84 kg).
- Do not operate the fan with damaged blades.
- Keep hands, clothing, and other objects away from the fan blades when the fan is in operation.
- This appliance is not intended for use by persons (including children) with reduced physical, sensory or mental capabilities, or lack of experience and knowledge, unless they have been given supervision or instruction concerning use of the appliance by a person responsible for their safety.
Package Contents
Verify that all components are present before beginning installation:
- Ceiling Fan Motor Housing
- Retractable Fan Blades (4)
- LED Light Kit
- Remote Control
- Downrods (5" and 10" included)
- Mounting Bracket
- Hardware Pack (screws, wire nuts, etc.)
- Instruction Manual
Setup and Installation
Professional installation is recommended. Ensure power is disconnected at the circuit breaker before proceeding.
- Mounting Bracket Installation: Secure the mounting bracket to the ceiling junction box. Ensure the junction box is securely fastened to the building structure and can support the fan's weight.
- Downrod Assembly: Choose the appropriate downrod (5" or 10") for your ceiling height. Feed the electrical wires from the fan motor through the downrod.
- Hanging the Fan: Carefully lift the fan assembly and place the downrod ball into the mounting bracket.
- Wiring Connections: Connect the fan's electrical wires to the household wiring according to the wiring diagram provided in the separate wiring guide (if applicable) or standard electrical practices (Live to Live, Neutral to Neutral, Ground to Ground). Use the provided wire nuts.
- Canopy Installation: Slide the canopy up to the ceiling and secure it to the mounting bracket with the provided screws.
- Blade Attachment: The retractable blades are pre-installed and will deploy when the fan is turned on.
- Light Kit Installation: Connect the light kit wires to the fan motor housing wires. Secure the light kit to the fan housing.
Operating Instructions
Your Bella Depot ceiling fan is operated via the included remote control.

Remote Control Functions:
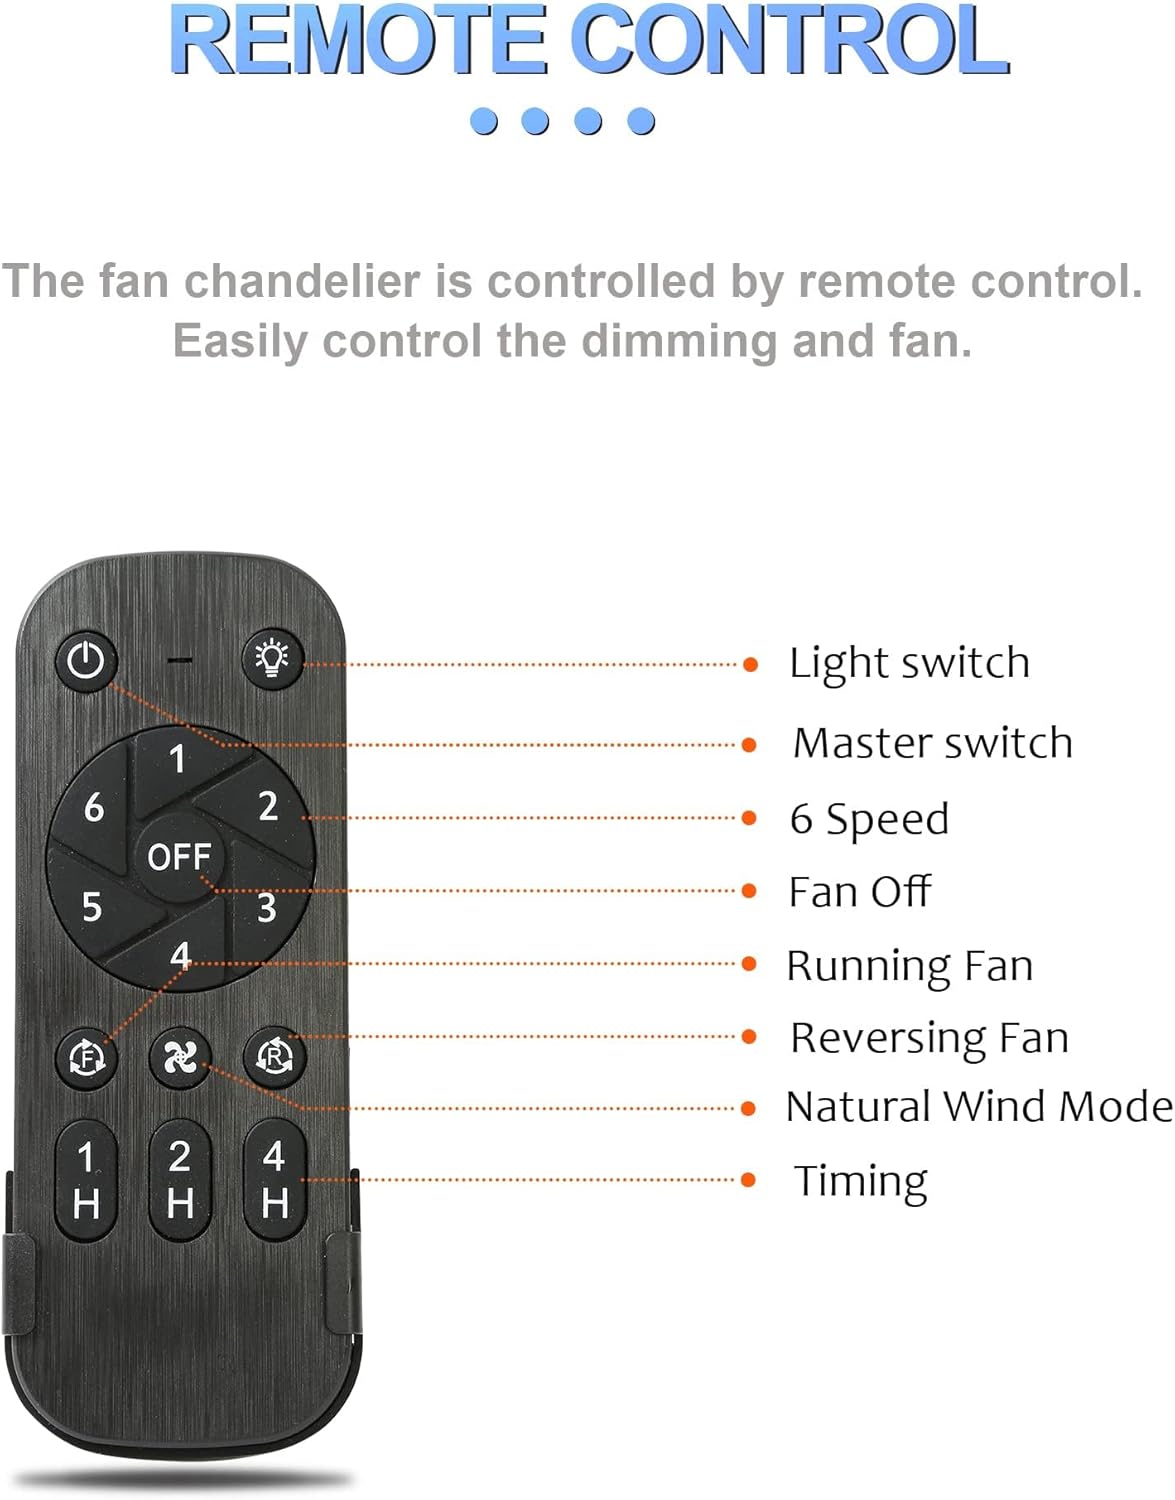
- Power Button (On/Off): Turns the fan and light on or off.
- Light Switch: Toggles the light on/off.
- Master Switch: Controls overall power to the fan and light.
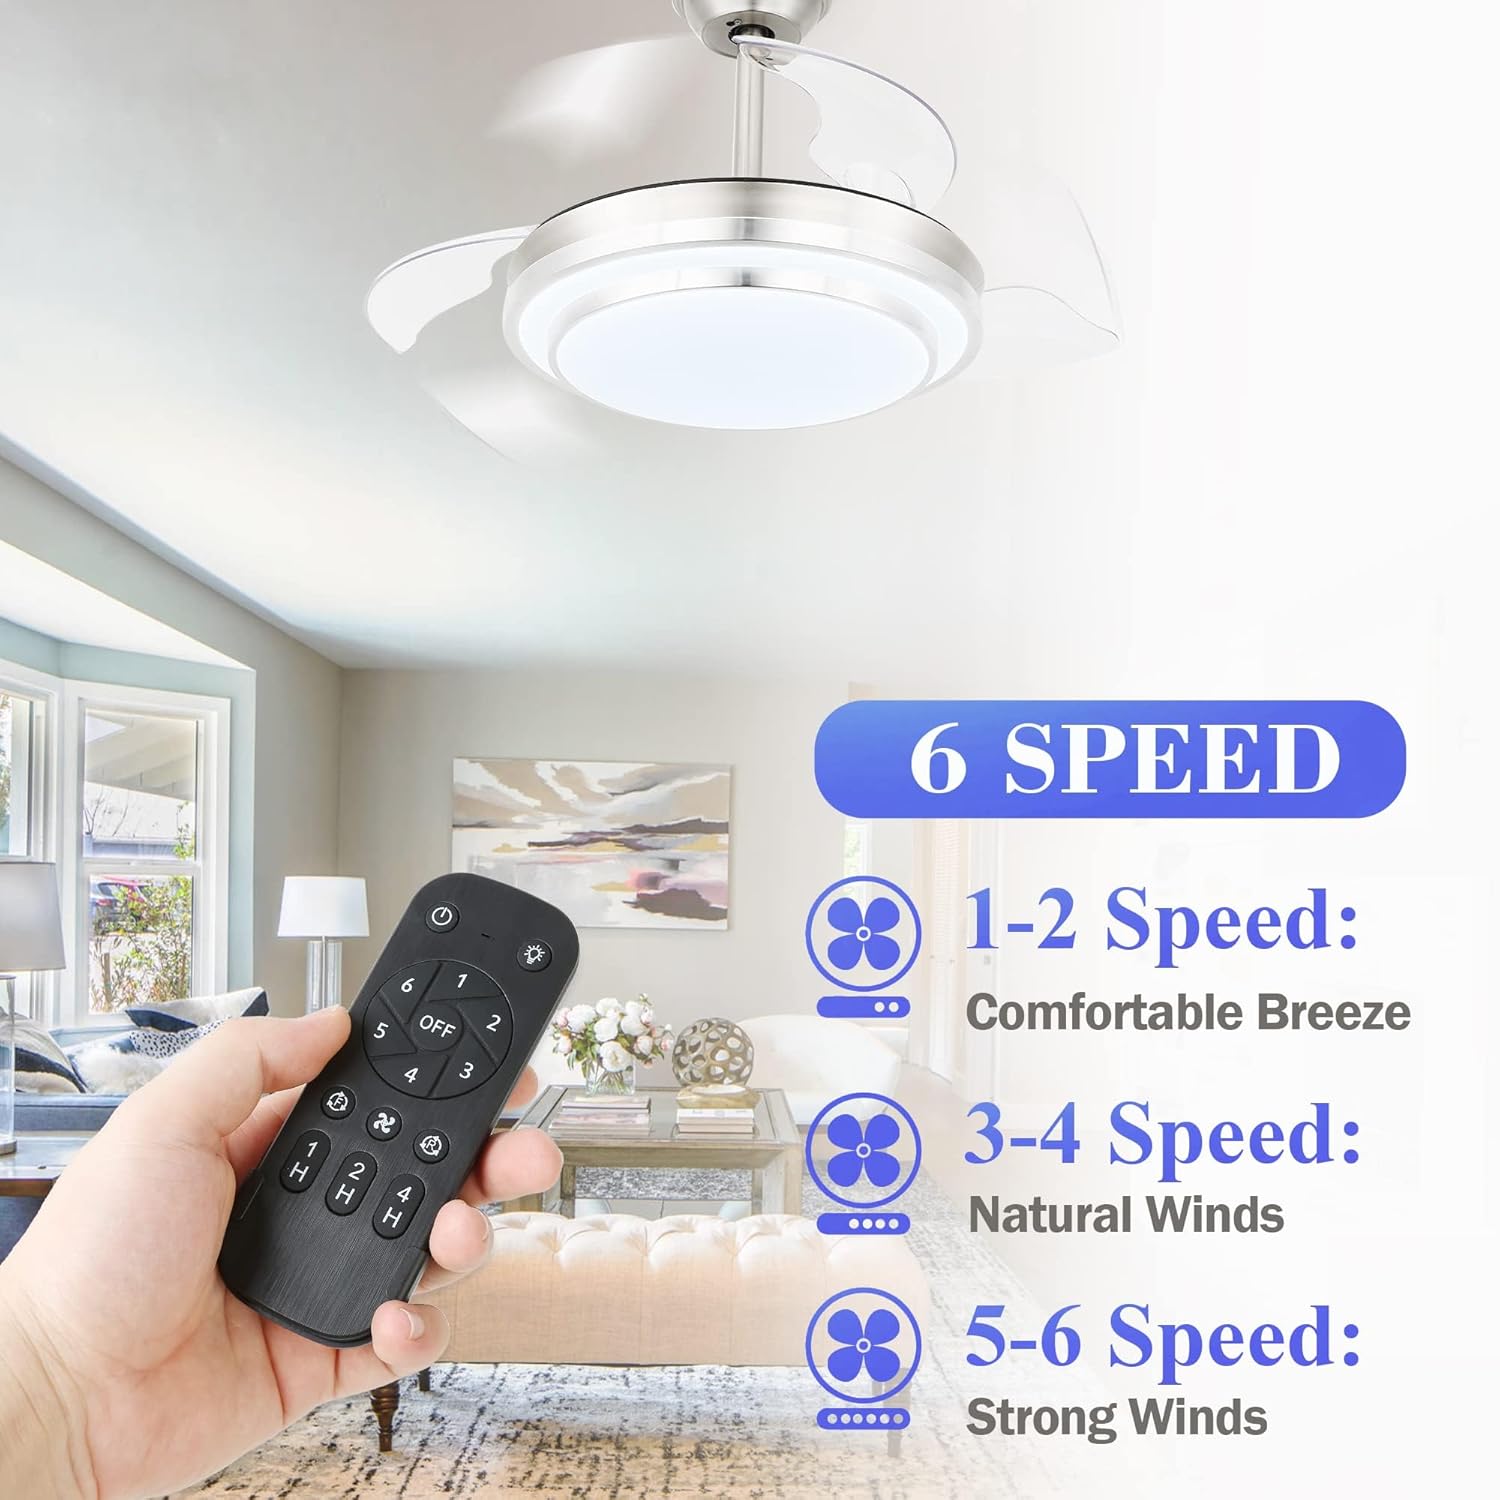
- Fan Speed (1-6): Adjusts the fan speed.
- 1-2 Speed: Comfortable Breeze
- 3-4 Speed: Natural Winds
- 5-6 Speed: Strong Winds
- Fan Off: Stops the fan.
- Running Fan: Activates the fan.
- Reversing Fan: Changes the direction of the fan blades for summer (downward airflow) or winter (upward airflow).
- Natural Wind Mode: Simulates natural breeze by varying fan speed.
- Timing Options (1H, 2H, 4H): Sets the fan to turn off automatically after 1, 2, or 4 hours.

Light Color Temperature Adjustment:
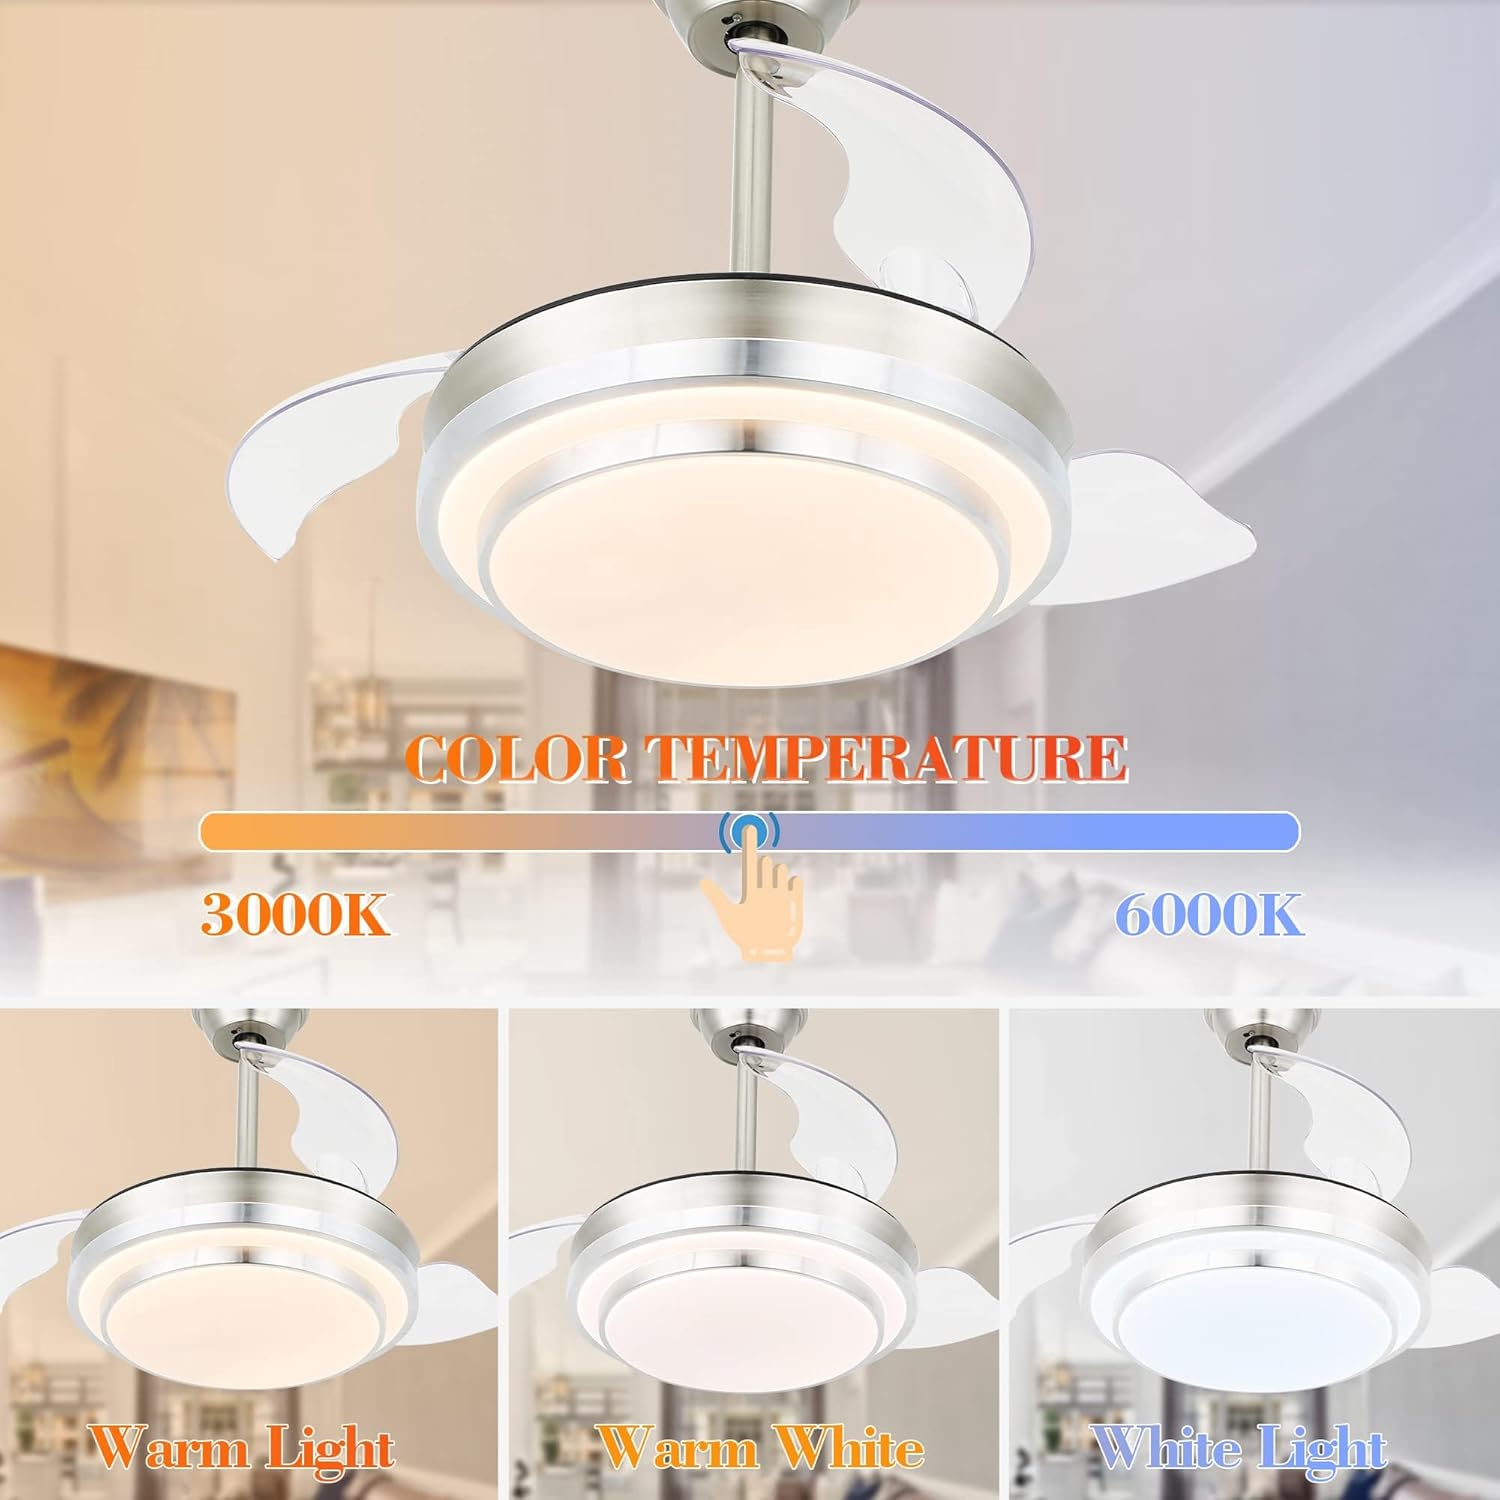
The light color temperature can be adjusted from 3000K (Warm Light) to 6000K (White Light) using the remote control. Press the light button repeatedly to cycle through the color temperatures.
Reversible Blades Function:
The fan features reversible blades to optimize airflow for different seasons. Use the "Reversing Fan" button on the remote control to switch direction.
- Summer Mode (Forward): Blades rotate counter-clockwise, pushing air downwards to create a cooling effect.
- Winter Mode (Reverse): Blades rotate clockwise, pulling air upwards to circulate warm air near the ceiling.
Silent Operation:
The fan is designed with a DC motor for quiet operation, minimizing noise disturbance.

Maintenance
- Cleaning: Periodically clean the fan blades and light kit with a soft, damp cloth. Do not use abrasive cleaners or solvents. Ensure power is off before cleaning.
- Tightening Screws: Check all screws and connections annually to ensure they are secure.
- Light Bulb Replacement: The LED light kit is integrated. If replacement is needed, contact customer support.
Troubleshooting
| Problem | Possible Cause | Solution |
|---|---|---|
| Fan does not start | No power to the fan; Loose wire connections; Remote control battery low. | Check circuit breaker; Verify all wire connections are secure; Replace remote control batteries. |
| Light does not work | Loose wire connection; LED light kit malfunction. | Check light kit wiring; Contact customer support for replacement. |
| Fan wobbles | Loose mounting screws; Unbalanced blades; Downrod not seated correctly. | Tighten all mounting screws; Ensure blades are securely attached; Re-seat downrod in mounting bracket. |
| Remote control not working | Low battery; Remote not paired with fan. | Replace batteries; Refer to remote pairing instructions (if applicable, usually in a separate guide). |
Specifications
- Brand: Bella Depot
- Model Number: DC3604
- Product Dimensions: 91.44 x 8.51 x 30.48 cm (36" x 3.35" x 12")
- Item Weight: 5.84 kg (12.87 lbs)
- Material: Metal, Plastic
- Style: Modern
- Room Type: Bedroom (suitable for various indoor spaces)
- Installation Type: Flush Mount
- Power Source: Corded Electric
- Fan Speeds: 6-Speed DC Motor
- Blade Type: Retractable, Reversible
- Light Type: LED, Dimmable, Color Temperature Adjustable (3000K-6000K)
- Control: Remote Control
Warranty and Support
For warranty information or technical support, please refer to the warranty card included with your product or contact Bella Depot customer service directly. Keep your purchase receipt as proof of purchase.
For further assistance, please visit our website or contact our support team:
- Website: www.belladepot.com
- Email: support@belladepot.com