
1. Introduction
This manual provides essential information for the safe and effective installation, operation, and maintenance of your X-PRO ZongShen 125cc 4-stroke pit dirt bike engine. Please read this manual thoroughly before attempting any procedures to ensure proper handling and to prevent damage or injury.
2. Safety Information
Always prioritize safety when working with engines. Failure to follow safety instructions can result in serious injury or property damage.
- Read the Manual: Understand all instructions before operating or servicing the engine.
- Protective Gear: Wear appropriate personal protective equipment, including gloves and eye protection.
- Ventilation: Operate the engine in a well-ventilated area to avoid carbon monoxide poisoning.
- Fuel Handling: Handle fuel with extreme care. It is highly flammable. Store in approved containers away from ignition sources.
- Hot Surfaces: The engine and exhaust system become very hot during operation and remain hot for some time afterward. Avoid contact to prevent burns.
- Moving Parts: Keep hands, feet, and clothing away from moving parts to prevent entanglement.
- Professional Installation: If you are not experienced with engine installation, seek assistance from a qualified mechanic.
3. Product Overview
The X-PRO ZongShen 125cc engine is a single-cylinder, 4-stroke, air-cooled unit designed for pit dirt bikes. It features a manual wet multi-plate clutch and a 4-speed constant mesh transmission with kick start functionality.

Figure 3.1: Overall view of the X-PRO ZongShen 125cc 4-stroke pit dirt bike engine. This image shows the complete engine assembly, highlighting its compact design and key components such as the cylinder head, crankcase, and transmission housing.

Figure 3.2: Gear position identification sticker located on the engine casing. This sticker illustrates the gear shift pattern (0-1-2-3-4) and includes a warning that gear shifting is prohibited unless the accelerator is loosened.
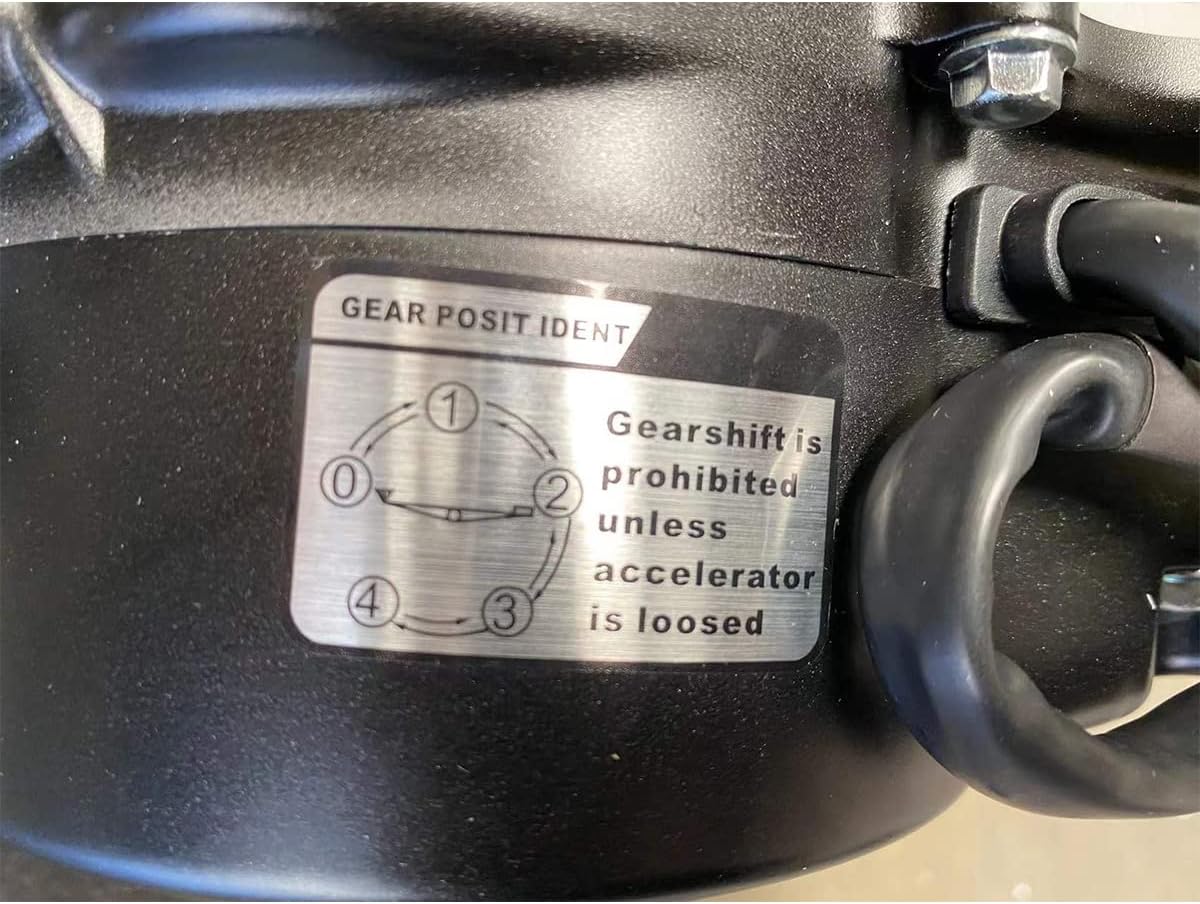
Figure 3.3: Close-up view of the engine oil drain plug. This component is used for draining old engine oil during maintenance procedures.
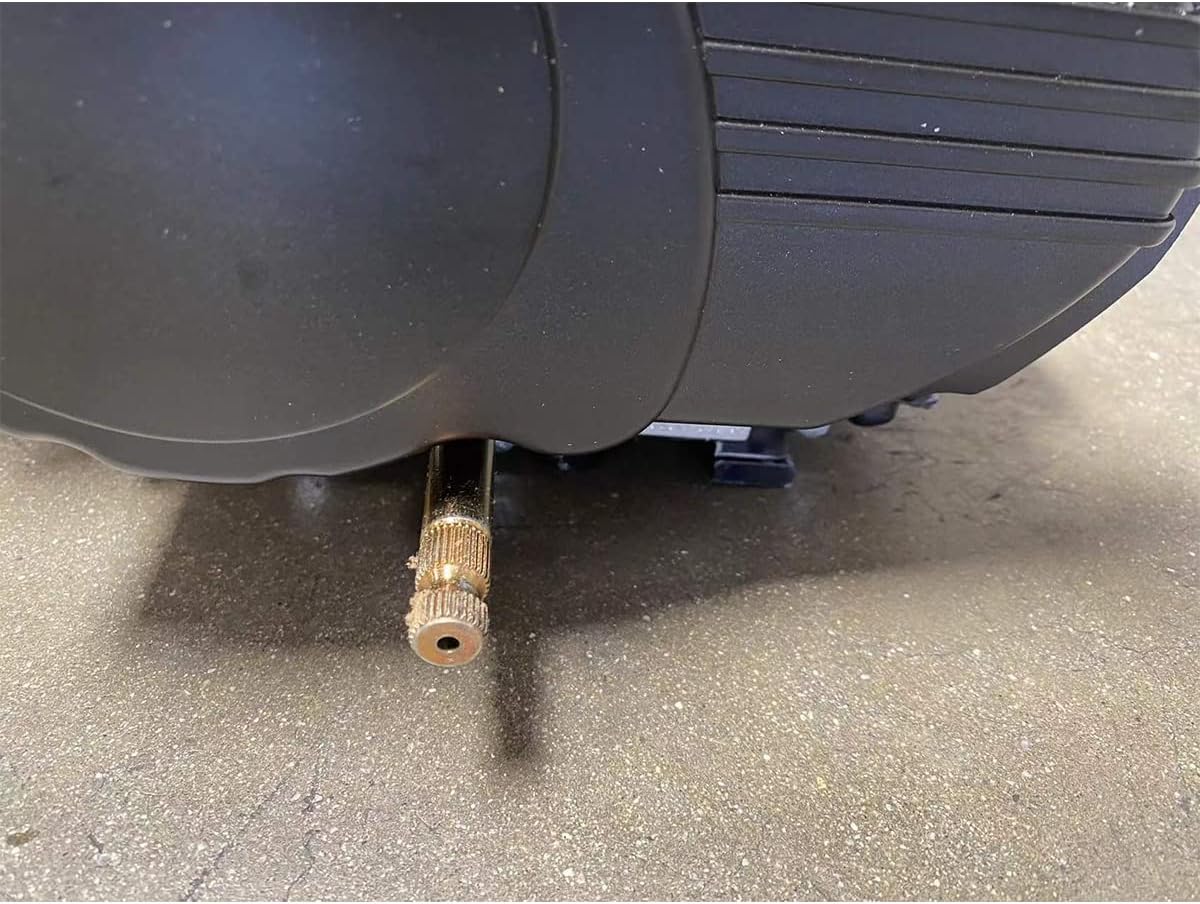
Figure 3.4: View of the spark plug and surrounding cylinder head area. The spark plug is a critical component for ignition and requires periodic inspection and replacement.

Figure 3.5: Example of an engine wiring connector. These connectors are used to link the engine's electrical components to the bike's wiring harness.
4. Setup and Installation
Proper installation is crucial for engine performance and longevity. It is recommended that installation be performed by individuals with mechanical experience or a qualified technician.
4.1 Pre-Installation Checks
- Inspect the engine for any shipping damage.
- Ensure all necessary mounting hardware and accessories are available.
- Verify compatibility with your pit bike frame and existing components (e.g., exhaust, carburetor, electrical system).
4.2 Mounting the Engine
- Securely mount the engine to the frame using appropriate engine mounts and bolts. Ensure all bolts are torqued to the manufacturer's specifications for your specific frame.
- Check for proper alignment and clearance with other bike components.
4.3 Connecting Components
- Fuel System: Connect the carburetor to the fuel tank and ensure all fuel lines are secure and free of leaks.
- Exhaust System: Install the exhaust header and muffler, ensuring a tight seal to prevent leaks.
- Electrical System: Connect the engine's wiring harness to the bike's electrical system (CDI, ignition coil, kill switch, etc.). Refer to your bike's wiring diagram.
- Clutch Cable: Install and adjust the clutch cable for proper engagement and disengagement.
- Throttle Cable: Install and adjust the throttle cable for smooth operation and full throttle response.
- Chain: Install the drive chain and adjust its tension according to your bike's specifications.
4.4 Initial Fluid Fill
- Engine Oil: Fill the engine with the recommended type and quantity of engine oil. Refer to the 'Specifications' section for details. Do not overfill.
- Fuel: Fill the fuel tank with fresh, appropriate gasoline.
5. Operating Instructions
Familiarize yourself with the controls and operating procedures before riding.
5.1 Starting the Engine (Kick Start)
- Ensure the fuel petcock is in the 'ON' position.
- If the engine is cold, engage the choke.
- Place the transmission in neutral (0).
- Firmly and smoothly push down the kick start lever through its full stroke. Repeat if necessary.
- Once the engine starts, gradually disengage the choke as the engine warms up.
5.2 Gear Shifting
The engine features a 4-speed manual transmission. Refer to the gear position sticker (Figure 3.2) for the shift pattern.
- To shift gears, release the accelerator (throttle) and simultaneously pull in the clutch lever.
- Shift the gear lever to the desired gear.
- Smoothly release the clutch lever while gradually applying the accelerator.
- The gear shift pattern is typically 0 (Neutral) - 1 - 2 - 3 - 4.
5.3 Engine Break-in Period
A proper break-in period is essential for the longevity and performance of your new engine. For the first 5-10 hours of operation:
- Avoid sustained high RPMs or full throttle operation.
- Vary engine speed and load.
- Avoid lugging the engine (operating at low RPMs under heavy load).
- Perform the first oil change after the initial break-in period.
6. Maintenance
Regular maintenance ensures optimal performance, reliability, and extends the life of your engine.
6.1 Engine Oil
- Check Oil Level: Regularly check the engine oil level using the dipstick. Maintain the level between the upper and lower marks.
- Oil Change: Change the engine oil after the break-in period and then every 10-20 hours of operation or as recommended by your bike's manual. Use the specified oil type (refer to 'Specifications').
- Oil Filter: If applicable, clean or replace the oil filter screen during oil changes.
6.2 Spark Plug
- Inspection: Inspect the spark plug every 20-30 hours of operation. Check for wear, carbon buildup, and proper gap.
- Replacement: Replace the spark plug if it is fouled, worn, or damaged. Use the recommended spark plug type.
6.3 Air Filter
- Cleaning: Clean the air filter element regularly, especially when riding in dusty conditions. Use appropriate cleaning solutions and re-oil foam filters if applicable.
- Replacement: Replace the air filter if it is damaged or cannot be cleaned effectively.
6.4 Valve Clearance
Periodically check and adjust valve clearances according to your bike's service manual. Incorrect valve clearance can affect engine performance and cause damage.
6.5 Chain Maintenance
- Lubrication: Keep the drive chain clean and properly lubricated.
- Tension: Maintain correct chain tension to prevent excessive wear and potential derailment.
7. Troubleshooting
This section outlines common issues and basic troubleshooting steps. For complex problems, consult a qualified mechanic.
7.1 Engine Will Not Start
- No Fuel: Check if the fuel tank has sufficient fuel and the petcock is open.
- No Spark: Remove the spark plug, reconnect it to the spark plug cap, and ground the plug against the engine block. Kick start the engine and check for a visible spark. If no spark, inspect the spark plug, CDI, ignition coil, and wiring.
- Flooded Engine: If the engine smells of fuel, it might be flooded. Close the fuel petcock, hold the throttle wide open, and kick start several times to clear excess fuel.
- Compression: Check for adequate compression. A lack of compression could indicate valve issues or piston ring wear.
7.2 Loss of Power
- Fuel Supply: Check for clogged fuel lines or a dirty carburetor.
- Air Filter: A dirty air filter can restrict airflow and reduce power. Clean or replace it.
- Spark Plug: A worn or fouled spark plug can lead to misfires and power loss.
- Valve Clearance: Incorrect valve clearance can significantly impact engine performance.
8. Specifications
| Feature | Specification |
|---|---|
| Engine Model | 308-999036 |
| Engine Type | Single cylinder, 4-stroke, Air-cooled, Horizontal |
| Displacement | 123.7 ml |
| Dimensions (L x W x H) | 457 x 313 x 352 mm |
| Net Weight | 23.5 kg |
| Max Power | 6.2 kW at 8500 rpm (±5%) |
| Max Torque | 8.5 N.m at 7500 rpm (±5%) |
| Compression Ratio | 9.3:1 |
| Bore x Stroke | 54 x 54 mm |
| Ignition Method | CDI |
| Lubrication Method | Pressure/Splash |
| Min Fuel Consumption | ≤ 367 g/kW.h |
| Starting Method | Kick Start |
| Clutch Method | Manual Wet Multi-plate |
| Transmission Method | Constant Mesh, 2-stage transmission, 4-speed gear shift |
9. Warranty and Support
For specific warranty information and technical support regarding your X-PRO ZongShen 125cc engine, please contact the original seller or the X-PRO manufacturer directly. Keep your purchase receipt and engine model number (308-999036) readily available when seeking support.


