1. Important Safety Information
Read all instructions carefully before using the appliance. Keep this manual for future reference. Improper use can cause damage to the appliance and injury to the user.
1.1 General Safety
- Electrical Safety: Ensure the oven is correctly installed and earthed by a qualified electrician. Do not use adapters or extension cords.
- Hot Surfaces: The oven and its accessible parts become very hot during use. Always use oven mitts when handling hot items or surfaces. Keep children away.
- Children and Vulnerable Persons: This appliance can be used by children aged 8 years and above and persons with reduced physical, sensory or mental capabilities or lack of experience and knowledge if they have been given supervision or instruction concerning use of the appliance in a safe way and understand the hazards involved. Children shall not play with the appliance. Cleaning and user maintenance shall not be made by children without supervision.
- Flammable Materials: Do not store flammable materials in or near the oven.
- Cleaning: Always disconnect the appliance from the power supply before cleaning.
1.2 Pyrolytic Cleaning Safety
- Remove all accessories, food residues, and large spills from the oven cavity before starting a pyrolytic cycle.
- Ensure adequate ventilation during and after the pyrolytic cycle.
- The oven door will lock during the pyrolytic cycle and remain locked until the temperature has cooled sufficiently. Do not attempt to force it open.
2. Product Overview
The Candy FCTS896XWIFI is a built-in pyrolytic electric oven designed for modern kitchens. It features multiple cooking functions, including convection, and a self-cleaning pyrolytic function for easy maintenance. Its sleek design integrates seamlessly into your cabinetry.

Image 2.1: The Candy FCTS896XWIFI built-in electric oven, shown installed in a kitchen cabinet, featuring a black glass door and a stainless steel control panel.
3. Setup and Installation
This appliance must be installed by a qualified technician in accordance with local regulations and safety standards. Incorrect installation can lead to injury or damage.
3.1 Unpacking
Carefully remove the oven from its packaging. Inspect for any damage during transit. Report any damage to your retailer immediately. Keep packaging materials away from children.
3.2 Electrical Connection
Ensure the electrical supply matches the voltage and frequency specified on the rating plate of the oven. The oven must be connected to a properly earthed electrical outlet.
3.3 Initial Cleaning
Before first use, clean the oven interior and all accessories with warm soapy water. Then, run the oven empty at maximum temperature for approximately 30 minutes to burn off any manufacturing residues. Ensure good ventilation during this process.
4. Operating Instructions
Familiarize yourself with the control panel and various functions before cooking.
4.1 Control Panel Overview

Image 4.1: The oven's control panel, featuring three rotary knobs for temperature, timer, and cooking function selection, alongside a digital display.
- Left Knob: Temperature selection (e.g., 50°C to 250°C).
- Middle Knob: Timer and clock settings.
- Right Knob: Cooking function selection (e.g., Convection, Grill, Bottom Heat, Pyrolytic).
4.2 Setting the Time
Upon first connection or after a power outage, the display will flash. Use the middle knob to set the current time. Press the knob to confirm.
4.3 Selecting a Cooking Function and Temperature
- Turn the right knob to select the desired cooking function (e.g., Convection for even cooking, Grill for browning).
- Turn the left knob to set the desired temperature.
- The oven will begin to preheat. The indicator light will turn off when the set temperature is reached.
4.4 Using the Timer
The middle knob allows you to set a cooking duration or a delayed start. Refer to the full manual for detailed timer programming instructions.
5. Pyrolytic Cleaning Function
The pyrolytic cleaning function uses high temperatures to burn off food residues, turning them into ash that can be easily wiped away.
5.1 Preparing for Pyrolytic Cleaning
- Remove all oven accessories (racks, trays, side supports) from the oven cavity.
- Wipe away any large food spills or loose debris.
- Ensure the oven door is securely closed.
5.2 Starting a Pyrolytic Cycle
- Turn the right knob to the pyrolytic cleaning symbol.
- The oven will automatically select a cleaning duration. You may be able to adjust the duration depending on the level of soiling.
- Press the middle knob to start the cycle. The oven door will lock.
5.3 After the Cycle
Once the cycle is complete and the oven has cooled down, the door will unlock. Wipe away the fine ash residue with a damp cloth. Do not use abrasive cleaners.
6. Maintenance and Cleaning (Non-Pyrolytic)
Regular cleaning helps maintain the oven's performance and appearance.
6.1 Exterior Cleaning
Clean the exterior surfaces with a soft cloth and mild detergent. Avoid abrasive cleaners or solvents that could damage the finish.
6.2 Interior Cleaning (Light Soiling)
For light soiling, clean the oven interior with warm soapy water and a soft sponge. For stubborn stains, use a specialized oven cleaner, following the product's instructions carefully. Always ensure the oven is cool before cleaning.
6.3 Cleaning Accessories
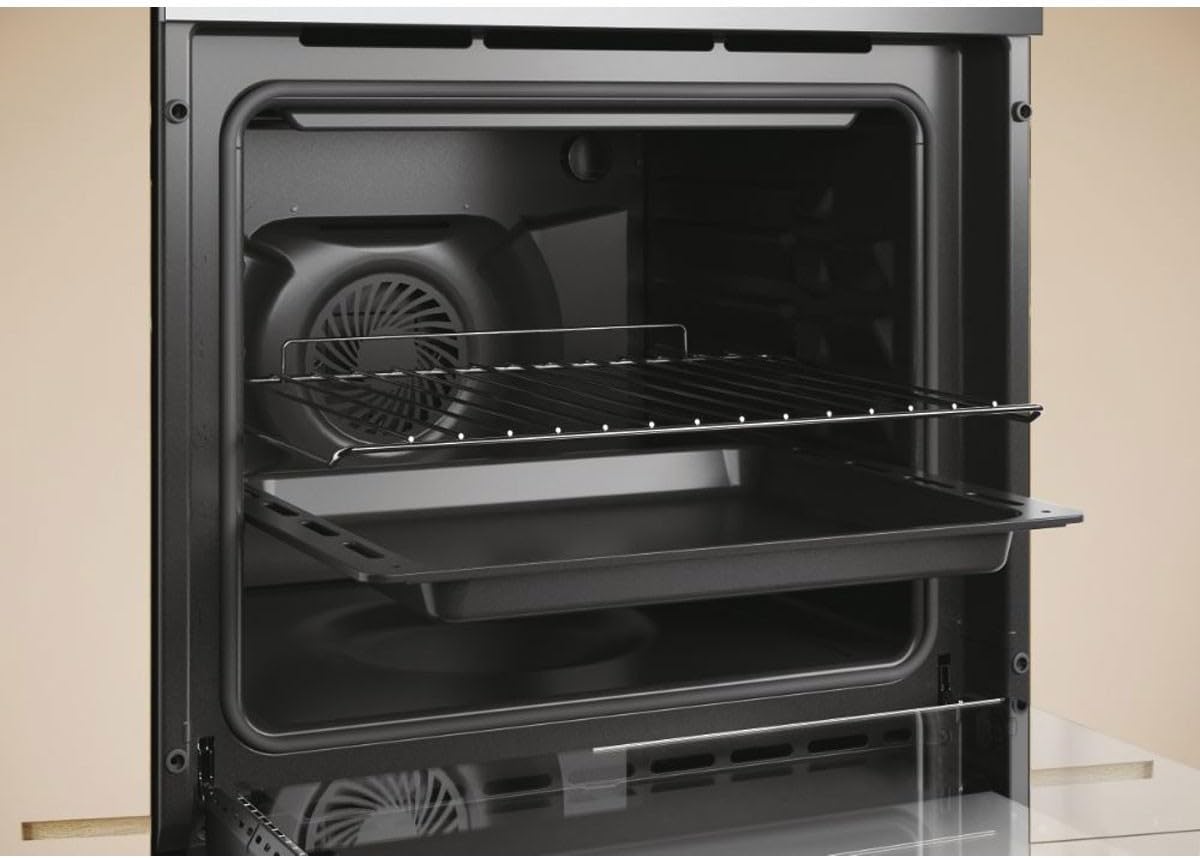
Image 6.1: The oven interior with two wire racks and a baking tray, illustrating the removable accessories.
Oven racks and trays can be removed and washed by hand in warm soapy water or in a dishwasher. Ensure they are completely dry before placing them back into the oven.

Image 6.2: A standard black enamel baking tray, designed to fit the oven racks.
7. Troubleshooting
Before contacting customer service, check the following common issues:
| Problem | Possible Cause | Solution |
|---|---|---|
| Oven does not heat up. | No power supply; incorrect settings. | Check circuit breaker/fuse; ensure oven is plugged in; verify function and temperature settings. |
| Oven light not working. | Bulb is faulty. | Replace the oven bulb (ensure oven is cool and disconnected from power). |
| Pyrolytic cycle does not start. | Oven door not closed properly; accessories still inside. | Ensure door is fully closed; remove all accessories. |
| Uneven cooking. | Incorrect rack position; overloaded oven. | Use recommended rack positions; avoid overcrowding the oven. |
If the problem persists after checking these points, please contact a qualified service technician.
8. Specifications
| Feature | Specification |
|---|---|
| Brand | Candy |
| Model Number | FCT896X |
| Cooking Mode | Convection, Electric |
| Energy Type Used | Electric |
| Heating Method | Convection, Electric |
| Fuel Type | Electric |
| ASIN | B0B129TH77 |
9. Warranty and Customer Support
This appliance comes with a manufacturer's warranty. Please refer to the warranty card included with your purchase for specific terms and conditions. For technical assistance, spare parts, or to schedule a service appointment, please contact Candy customer support or your authorized retailer. Have your model number (FCT896X) and serial number ready when contacting support.


