
Introduction
This manual provides detailed instructions for the setup, operation, maintenance, and troubleshooting of your Xtrfy MZ1 Wireless Gaming Mouse. Please read this manual thoroughly before using the product to ensure optimal performance and longevity.
Package Contents
Verify that all items are present in the package:
- Xtrfy MZ1 Wireless Gaming Mouse
- 1.8 m Xtrfy EZcord Pro cable
- USB-A to USB-C cable
- USB Adapter
- USB Dongle
- 500 mA battery (pre-installed or included separately)
- Second back shell (for adjustable shape)
Product Overview
The Xtrfy MZ1 Wireless Gaming Mouse is designed for high-performance gaming, featuring a lightweight design, adjustable shape, and customizable settings without the need for software.
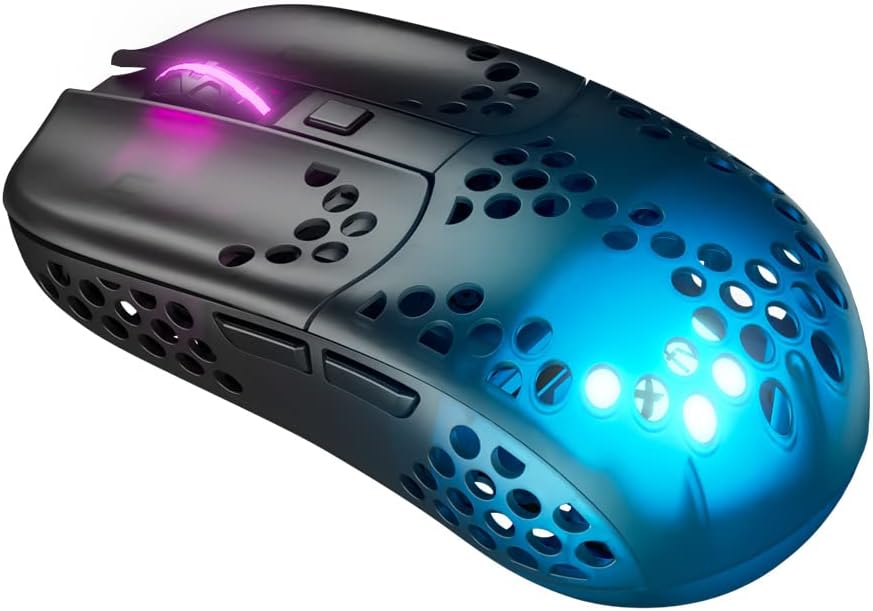
Figure 1: Xtrfy MZ1 Wireless Gaming Mouse, angled view with RGB lighting.
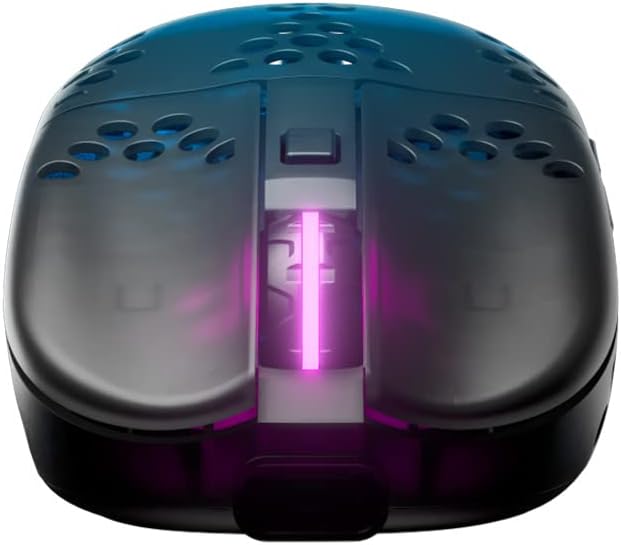
Figure 2: Top view of the Xtrfy MZ1 Wireless Gaming Mouse, highlighting the scroll wheel and main buttons.

Figure 3: The Xtrfy MZ1 Wireless Gaming Mouse shown with its two interchangeable back shells, allowing for shape adjustment.
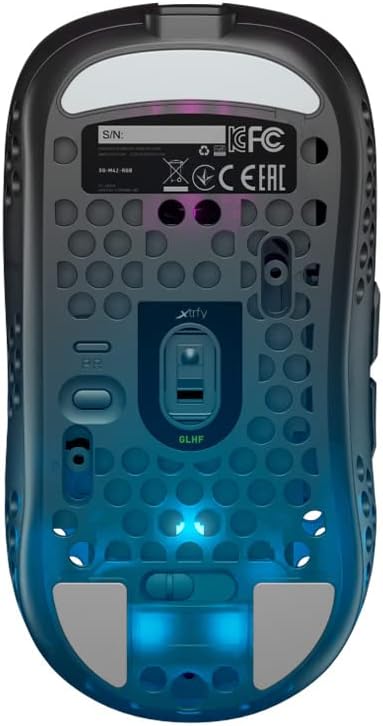
Figure 4: Bottom view of the Xtrfy MZ1 Wireless Gaming Mouse, displaying the sensor, power switch, and configuration buttons.
Setup
1. Connecting the Mouse
- Connect the USB dongle to your computer using the provided USB-A to USB-C cable and adapter.
- Turn on the mouse using the power switch located on the bottom of the mouse.
- The mouse should automatically connect to the dongle. If not, ensure the dongle is properly connected and the mouse is powered on.
2. Initial Charging
For first use, it is recommended to fully charge the mouse. Connect the Xtrfy EZcord Pro cable to the front of the mouse and to a USB power source. The mouse can be used while charging.
3. Adjusting the Back Shell
The MZ1 Wireless comes with two interchangeable back shells to customize the mouse shape to your preference. To change the back shell:
- Gently remove the currently installed back shell by lifting it from the rear.
- Align the desired back shell with the mouse body and press down until it clicks into place.
4. Adjusting Weight Balance
The battery position can be adjusted to fine-tune the mouse's weight balance. To do this:
- Remove the back shell.
- Carefully slide the battery forward or backward within its compartment to achieve your preferred balance.
- Replace the back shell.
Operating Instructions
The Xtrfy MZ1 Wireless Mouse allows for on-the-fly adjustments without software.
1. CPI (Counts Per Inch) Adjustment
The CPI setting controls the mouse sensitivity. Use the dedicated CPI button on the bottom of the mouse to cycle through preset CPI levels. The LED indicator will change color to show the current CPI setting.
2. Polling Rate Adjustment
The polling rate determines how often the mouse reports its position to the computer. A higher polling rate results in smoother tracking. Adjust the polling rate using the switch on the bottom of the mouse, typically labeled 'PR' or similar.
3. Lift-Off Distance (LOD) Adjustment
LOD is the height at which the mouse sensor stops tracking when lifted from the surface. Adjust this setting using the switch on the bottom of the mouse, typically labeled 'LOD'.
4. Debounce Time Adjustment
Debounce time is the delay before a second click can be registered after the first, preventing accidental double-clicks. Adjust this setting using the switch on the bottom of the mouse, typically labeled 'DT'.
5. Battery Life and Charging
The mouse provides up to 75 hours of playtime on a single charge. When the battery is low, connect the EZcord Pro cable to the mouse and a USB power source to charge. The mouse can be used normally during charging.
6. Programmable Button ('PGDN')
The top button, after adjusting other settings, can be set to 'PGDN'. This allows you to bind it to any desired function within your games or applications.
Maintenance
- Cleaning: Use a soft, dry cloth to clean the mouse. Avoid using harsh chemicals or abrasive materials.
- Sensor Care: Keep the optical sensor on the bottom of the mouse clean and free from dust or debris to ensure accurate tracking.
- Storage: When not in use for extended periods, store the mouse in a dry, cool place.
Troubleshooting
| Problem | Possible Solution |
|---|---|
| Mouse not responding |
|
| Intermittent connection |
|
| Tracking issues |
|
| Buttons not responding correctly |
|
Specifications
| Feature | Detail |
|---|---|
| Model Number | MZ1W |
| Product Dimensions | 4.37 x 2.3 x 1.33 inches |
| Item Weight | 2.15 ounces (approx. 61 grams) |
| Connectivity Technology | Wireless (2.4 GHz) |
| Movement Detection | Optical (Pixart 3370 sensor) |
| Switches | Kailh GM 8.0 (80 million clicks) |
| Microcontroller | ARM 32-bit |
| Battery | 1 Lithium Ion battery (500 mA, up to 75 hours playtime) |
| Special Features | Lightweight, Rechargeable, Adjustable Shape (interchangeable back shells), Adjustable Weight Balance, No Software Needed |
| Color | Black |
Warranty and Support
For warranty information, technical support, or further assistance, please visit the official Xtrfy website or contact their customer support directly. Keep your proof of purchase for warranty claims.


