
1. Setup
This section guides you through the initial setup of your Phrozen Sonic Mini 8K 3D printer.
1.1 Unboxing and Component Overview
Carefully remove all components from the packaging. Ensure all items listed in the 'What's in the Box' section are present.
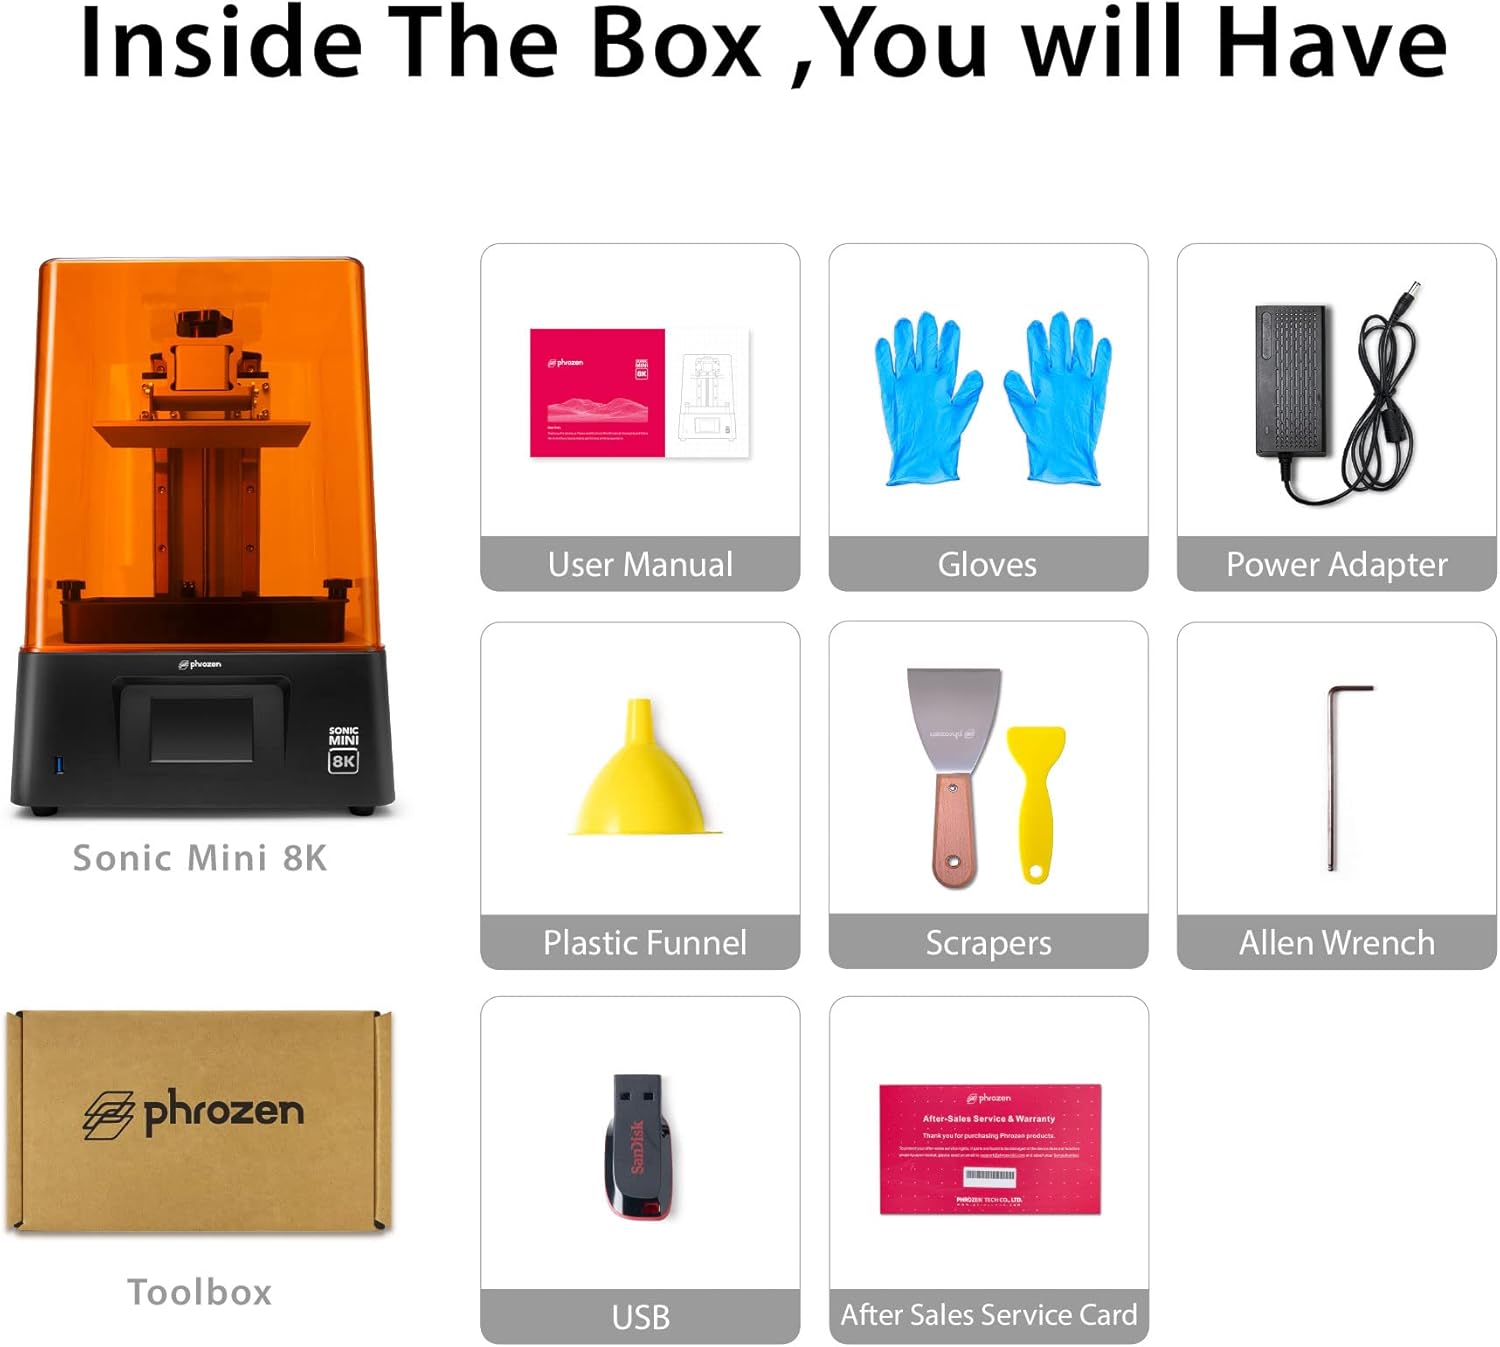
Included items: Sonic Mini 8K 3D Printer, User Manual, Gloves, Power Adapter, Plastic Funnel, Scrapers, Allen Wrench, Toolbox, and USB drive.
1.2 Removing Protective Films
Remove all protective films from the printer, including the film on the UV cover and the LCD screen. The resin tank also has a protective film that needs to be removed before use.
1.3 Build Plate Leveling (Z-Axis Calibration)
Accurate build plate leveling is crucial for successful prints. Follow these steps:
- Loosen the four screws on the build plate using the largest Allen wrench provided. The build plate should be able to move freely.
- Place four pieces of paper (or a single sheet) on the LCD screen.
- Power on the printer. Navigate to 'Tools' on the touchscreen.
- Select 'Z-axis Calibration' and then 'Next'. The build plate will slowly lower until it presses against the paper on the LCD screen.
- Once the plate stops and the printer beeps twice, gently apply downward pressure to the build plate with one hand while tightening the four screws with the Allen wrench. Ensure the paper can be pulled out with slight resistance.
- Hit 'Done' on the touchscreen. The build plate will raise to its home position.
1.4 Installing the Resin Vat
Place the resin vat onto the LCD screen, aligning the four feet of the vat with the depressions on the printer's base. Secure it in place by tightening the two screws on the sides of the vat. Ensure it is firmly seated to prevent resin leaks during printing.
1.5 Filling the Resin Tank
Before filling, ensure your resin bottle is thoroughly shaken for at least one minute to ensure proper mixing of components. Carefully pour the resin into the vat, making sure not to exceed the 'MAX' fill line indicated on the vat. Overfilling can lead to spills during printing.

The Phrozen Sonic Mini 8K printer with various resin bottles, highlighting the resin filling process.
2. Operating Your 3D Printer
2.1 Loading Print Files
Prepare your 3D model using a compatible slicing software (e.g., Lychee Slicer) and save it as a .ctb file. Transfer the .ctb file to the provided USB drive. Insert the USB drive into the printer's front USB port.
2.2 Starting a Print
On the printer's touchscreen, navigate to the '3D Print' menu. Select your desired .ctb file from the USB drive. Press 'Go' to start the printing process. The screen will display the print progress, including the percentage complete and estimated time remaining.
2.3 Monitoring the Print
The orange UV cover protects the resin from ambient UV light. Keep the cover on during printing. You can monitor the print progress via the touchscreen display.
2.4 Removing a Finished Print
Once the print is complete, the build plate will raise. Carefully loosen the screws on the build plate and remove it from the printer. Use the provided metal scraper to gently detach the printed model from the build plate. For any remaining resin on the build plate, use the plastic scraper.
3. Maintenance
Regular maintenance ensures optimal performance and longevity of your 3D printer.
3.1 Cleaning the Resin Vat
After each print, or if you plan to change resin colors, clean the resin vat. Carefully pour any unused resin back into its original bottle through a filter funnel to remove cured particles. Clean the vat with isopropyl alcohol (IPA) and a soft cloth. Avoid using abrasive materials that could scratch the FEP film.
3.2 Cleaning the Build Plate
Clean the build plate with IPA after each print to remove any residual resin. For stubborn cured resin, you may use the provided sanding pad (80-grit) to lightly rough up the surface, which can also improve adhesion for future prints.
3.3 Z-Axis Maintenance
Periodically inspect the Z-axis lead screw and linear rails for any dust or debris. Clean them with a lint-free cloth and apply a small amount of lithium grease if necessary to ensure smooth movement.
4. Troubleshooting
Common issues and their solutions.
4.1 Print Adhesion Issues
- Problem: Prints are not sticking to the build plate.
- Solution: Re-level the build plate carefully. Ensure the build plate surface is clean and free of any resin residue. Increase the bottom exposure time in your slicing software to improve initial layer adhesion. Lightly sand the build plate surface with the provided 80-grit sanding pad to create a better grip.
4.2 Failed Prints / Partial Prints
- Problem: Prints fail midway or only partially print.
- Solution: Check the resin for cured bits or debris; filter it if necessary. Ensure the FEP film in the resin vat is not damaged or cloudy. Verify that the exposure settings (normal exposure time, lift distance, lift speed) are appropriate for your resin type and model. Ensure the room temperature is within the recommended range for resin printing.
4.3 Z-Axis Wobbling or Layer Shifts
- Problem: Visible lines or shifts in the print along the Z-axis.
- Solution: Check the Z-axis lead screw and linear rails for any obstructions or loose components. Ensure the build plate is securely tightened. Lubricate the Z-axis components if they appear dry.
5. Specifications
| Feature | Detail |
|---|---|
| Product Dimensions | 11.4 x 11.4 x 16.9 inches (28.96 x 28.96 x 42.93 cm) |
| Item Weight | 26.9 pounds (12.2 kg) |
| Printing Volume | 6.5 x 2.8 x 7.1 inches (16.5 x 7.2 x 18 cm) |
| XY Resolution | 22 µm (7500 x 3240 pixels, 1152 PPI) |
| LCD Type | 7.1" Monochrome LCD |
| Z-axis Guide | Dual Linear Rails |
| Build Plate | Frosted Laser Cut |
| Material | Acrylic, Metal |
| Color | Black, Orange |
| Power Consumption | 50 watts (On-mode) |
5.1 Key Features Visualized

Overview of the Sonic Mini 8K's key features including 8K resolution and linear projection LED module.

Diagram illustrating the larger print volume of 16.5x7.2x18cm.

Example of the highest resolution achievable with 22µm XY resolution.
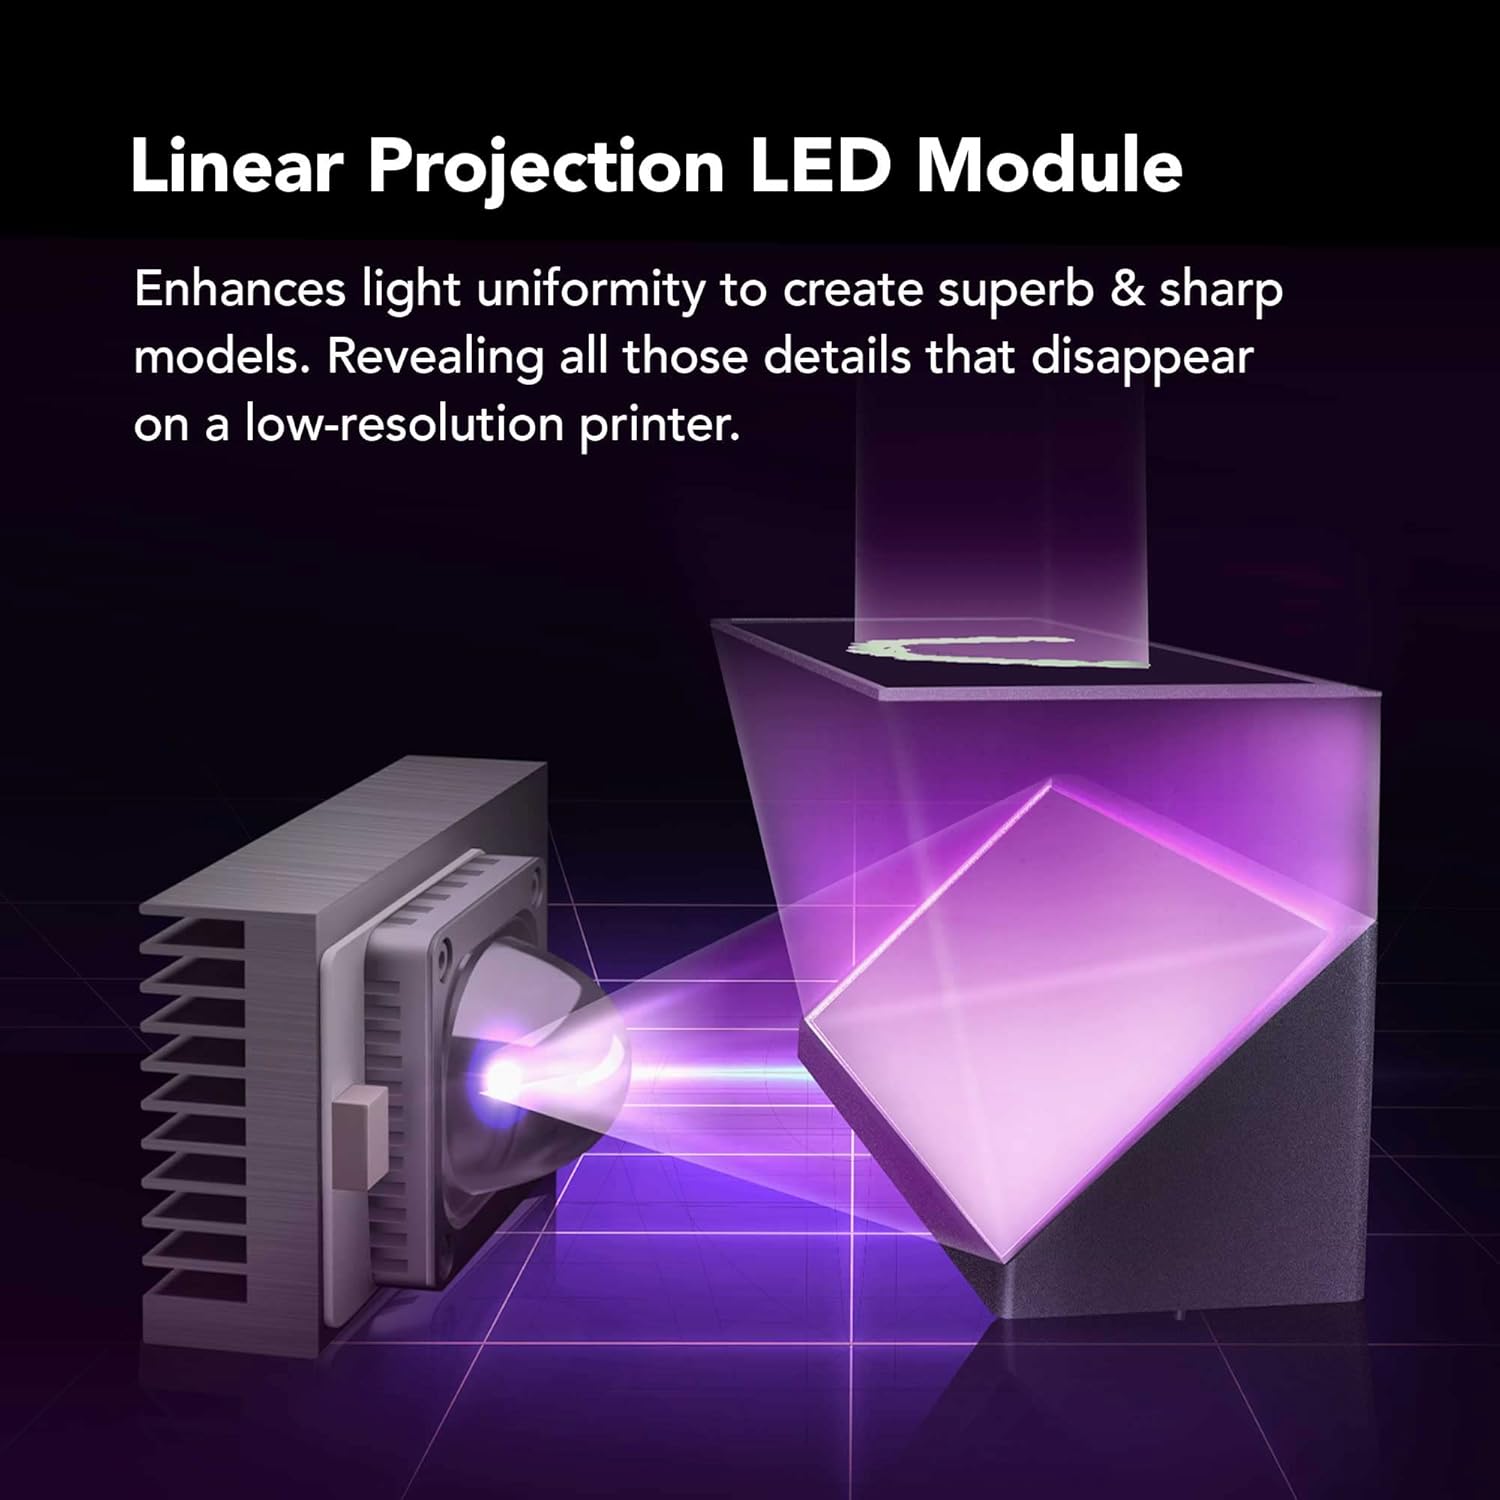
Illustration of the Linear Projection LED Module for enhanced light uniformity.

Visual representation of the Dual-Linear Rails designed to prevent wobbling during printing.

Close-up of the Frosted Laser Cut Building Plate, ensuring secure model adhesion.
6. What's in the Box
- Mini 8K 3D Printer
- Tool Box (containing various accessories like Allen wrenches, scrapers, funnel, USB drive)
7. Warranty and Support
For detailed warranty information and technical support, please refer to the official Phrozen website or the user manual PDF provided with your product.
A user manual in PDF format is available for download: User Manual (PDF)
Protection plans are also available for extended coverage:
- 3-Year Protection Plan: $36.99
- 4-Year Protection Plan: $47.99


