
Glorious GLO-GMMK2-96-RGB-W
Glorious GMMK 2 Full Size (96%) Barebones Mechanical Gaming Keyboard Manual
Brand: Glorious | Model: GLO-GMMK2-96-RGB-W
Product Overview
The Glorious GMMK 2 Full Size (96%) Barebones Mechanical Gaming Keyboard is designed for enthusiasts seeking a customizable and durable typing experience. This frame-only kit allows users to select their preferred mechanical switches and keycaps, offering unparalleled personalization. Its robust aluminum construction ensures longevity and a premium feel, while per-key RGB lighting provides extensive aesthetic customization.
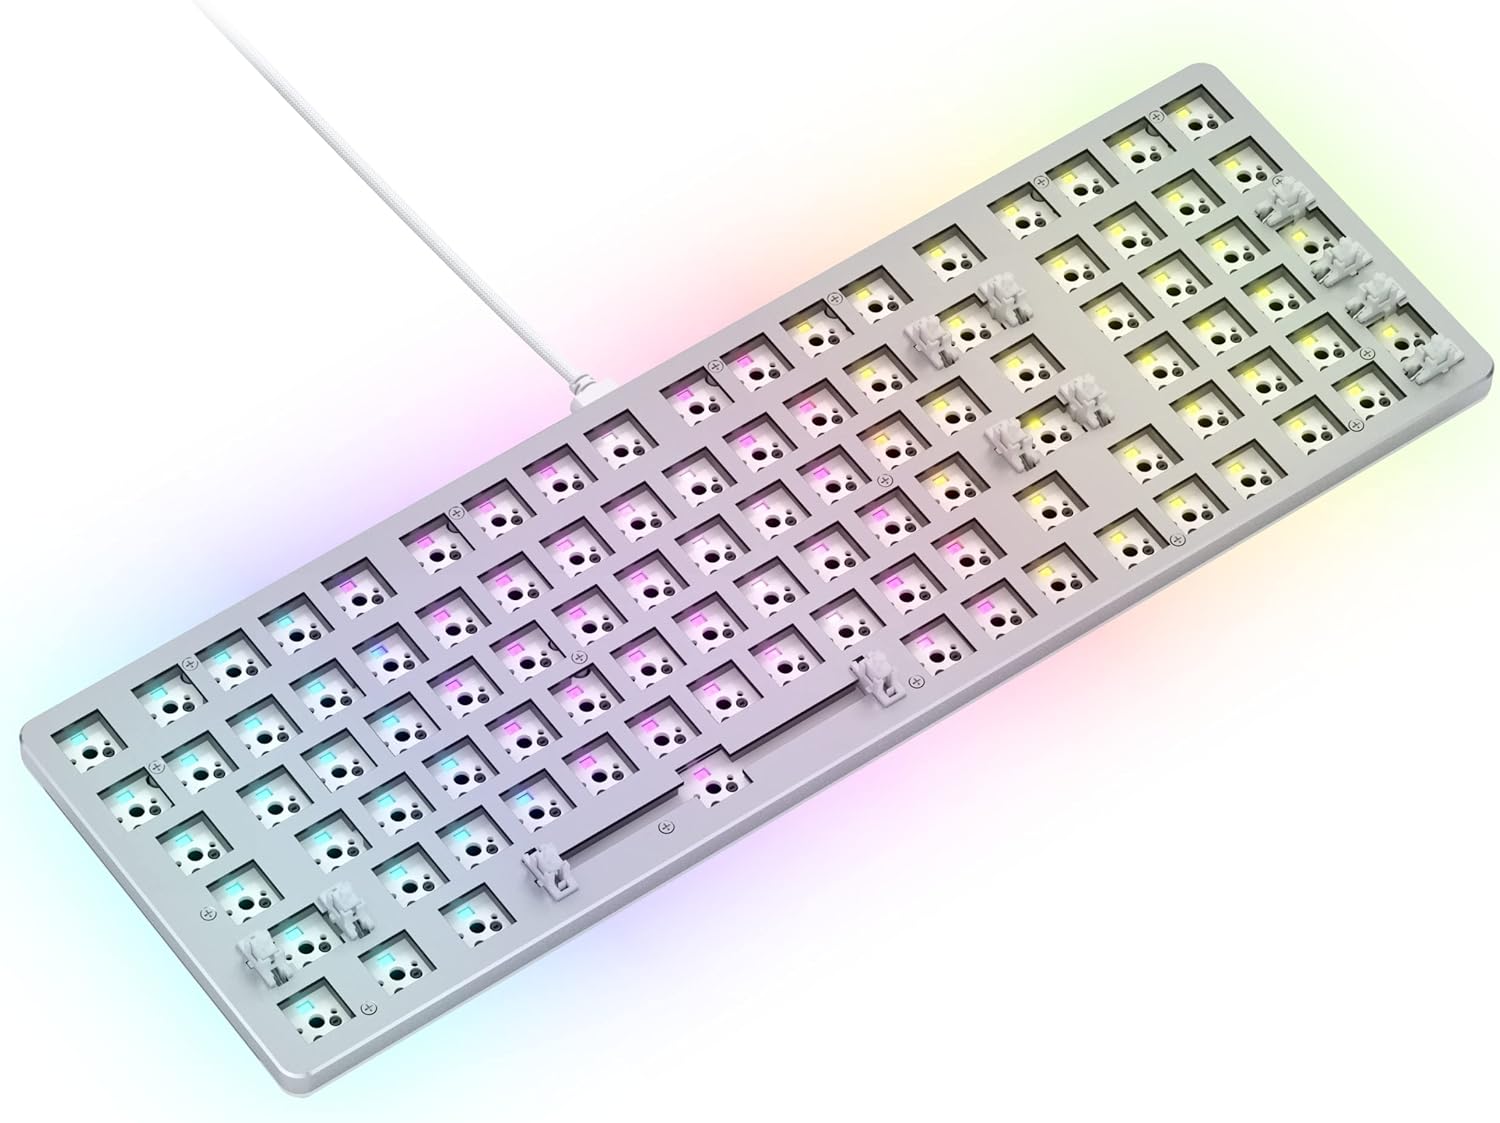
Image: The GMMK 2 Full Size (96%) barebones keyboard, showcasing its layout and per-key RGB lighting.
What's Included
Your Glorious GMMK 2 Full Size (96%) Barebones kit includes the following components:
- GMMK 2 Full Size (96%) Barebone Frame
- 2M Black Braided USB Cable
- Switch Puller
- Keycap Puller
- 1 x Novelty ESC Key

Image: All components included with the GMMK 2 Barebones Keyboard: the frame, cable, switch puller, keycap puller, and novelty ESC key.
Setup Guide
The GMMK 2 is a barebones keyboard, meaning you will need to install your own mechanical switches and keycaps to complete the assembly. Follow these steps for a quick and easy setup:
1. Installing Mechanical Switches
- Ensure the keyboard frame is on a stable, flat surface.
- Take your desired 5-pin mechanical switch. Carefully align the pins of the switch with the hot-swap sockets on the PCB (Printed Circuit Board) within the keyboard frame.
- Gently press the switch down until it clicks firmly into place. Do not force the switch if it doesn't align easily; bent pins can occur. Repeat for all desired switch locations.

Image: Visual representation of the three-step assembly process: choosing the base, installing switches, and adding keycaps.

Image: A detailed view of the GMMK 2's hotswap sockets, aluminum top frame, and USB-C connection point.
2. Installing Keycaps
- Once all switches are installed, place your chosen keycaps onto the stems of the switches.
- Press down firmly but gently until each keycap is securely seated. Ensure proper orientation for each keycap.
3. Connecting the Keyboard
Connect the provided 2M Black Braided USB Cable to the USB-C port on the keyboard and the other end to an available USB port on your computer or device. The keyboard is plug-and-play and should be recognized automatically by most operating systems.
Setup Video Guide
For a visual guide on customizing and setting up your Glorious GMMK 2 keyboard, please watch the official video below:
Video: "Customize the Glorious GMMK 2 Keyboard In Different Styles!" - An official guide from Glorious PC Gaming on personalizing your GMMK 2.
Operating Your Keyboard
The GMMK 2 is designed for seamless operation with various devices and operating systems. Its 96% full-size layout provides comprehensive functionality without occupying excessive desk space.
Customization and RGB Lighting
The GMMK 2 features per-key RGB lighting, allowing for extensive visual customization. Lighting effects and colors can be adjusted through the Glorious CORE software (available for download from the official Glorious website) or via keyboard shortcuts using the Fn key. This software also enables macro programming and key remapping.

Image: The GMMK 2 keyboard showcasing its vibrant, customizable RGB lighting effects.
Acoustics and Typing Experience
The keyboard is engineered for a superior sound profile. It includes pre-installed, lubricated stabilizers for smooth and consistent key presses, minimizing rattle. Thick interior keyboard foam acts as a dampener, eliminating case ping and contributing to a pleasant acoustic experience.

Image: An exploded view illustrating the internal structure of the GMMK 2, highlighting the premium aluminum frame, 5-Pin PCB, and dual-layer sound dampening foam.
Maintenance
Proper maintenance ensures the longevity and optimal performance of your Glorious GMMK 2 keyboard.
Cleaning
- General Cleaning: Use a soft, lint-free cloth to wipe down the keyboard surface. For dust and debris between keycaps, use compressed air.
- Deep Cleaning (Keycaps): Use the provided keycap puller to carefully remove keycaps. Clean the keycaps with mild soap and water, then dry thoroughly before reattaching.
- Switch Cleaning: With keycaps removed, use compressed air to clear any debris from around the switches. Avoid spraying liquids directly into the switches.
Switch and Keycap Management
The hot-swappable design allows for easy replacement of switches and keycaps. Use the included switch puller and keycap puller for safe removal and installation. This prevents damage to the switches or the PCB.
Troubleshooting
If you encounter issues with your Glorious GMMK 2 keyboard, consider the following common solutions:
- Keyboard Not Responding:
- Ensure the USB cable is securely connected to both the keyboard and the computer.
- Try connecting the keyboard to a different USB port on your computer.
- Test the keyboard on another computer to rule out system-specific issues.
- RGB Lighting Issues:
- Verify that the Glorious CORE software is installed and up to date.
- Check the keyboard's internal settings via the software or Fn key shortcuts to ensure RGB is enabled and configured correctly.
- A common fix for RGB issues is to perform a factory reset via the Glorious CORE software or a specific key combination (refer to the software's help section or Glorious support for exact steps).
- Keys Not Registering:
- Carefully remove the keycap and switch from the affected key.
- Inspect the switch pins for any bends or damage. Straighten bent pins gently with tweezers if possible, or replace the switch if damaged.
- Reinsert the switch firmly into the hot-swap socket, ensuring it is fully seated.
For more detailed troubleshooting steps and solutions, please refer to the official Glorious Troubleshooting Guide (PDF): Glorious Troubleshooting Guide
Specifications
| Feature | Detail |
|---|---|
| Brand | Glorious |
| Model Name | Glorious GMMK 2 Full Size Barebones ANSI - White |
| Item Model Number | GLO-GMMK2-96-RGB-W |
| Hardware Platform | Laptop, Linux, PC |
| Operating System Compatibility | Linux, Mac OS 9, Supported Gaming Console, Windows 10, Windows 11 |
| Item Weight | 2.76 pounds |
| Product Dimensions (LxWxH) | 14.8 x 4.9 x 1.5 inches |
| Color | White |
| Power Source | USB |
| Connectivity Technology | USB-C |
| Keyboard Description | Gaming |
| Recommended Uses | Gaming |
| Special Feature | 5-Pin Hot Swap Support |
| Number of Keys | 99 |
| Backlighting Color Support | RGB |
| Style | Modern Minimalist |

Image: Diagram illustrating the dimensions of the GMMK 2 keyboard: 12.3" x 4.1" x 1.5" (313 x 105 x 37.5 mm).
Warranty and Support
Warranty Information
Glorious provides a 2-Year Warranty on the GMMK 2 Barebones Mechanical Gaming Keyboard. This warranty covers manufacturing defects and ensures a hassle-free return and replacement process for all Glorious electronic devices.
For detailed terms and conditions regarding the warranty, please visit the official Glorious website or contact their support team.
Customer Support
For any questions, concerns, or technical assistance, Glorious's support team is available to help. You can find more information and contact options on their official brand store:
Visit the Glorious Store on Amazon
Additionally, the product is eligible for a 30-day refund/replacement return policy through Amazon.
Related documentsGLO-GMMK2-96-RGB-W

Ask a question about this manual
Ask about setup, troubleshooting, compatibility, parts, safety, or missing instructions. Manuals+ will review the question and use this page’s manual context to help answer it.