
AMZCNC YQK-70
AMZCNC 8-Ton Hydraulic Crimping Tool User Manual
Model: YQK-70
Brand: AMZCNC
1. Introduction
This manual provides essential information for the safe and effective operation, maintenance, and troubleshooting of your AMZCNC 8-Ton Hydraulic Crimping Tool (Model YQK-70) and accompanying cable cutter. Please read this manual thoroughly before use to ensure proper handling and to prevent injury or damage to the tool.
2. Product Overview and Components
The AMZCNC hydraulic crimping tool is designed for crimping copper and aluminum terminals with a force of up to 8 tons. It comes with a set of dies for various cable sizes and a dedicated cable cutter.

Figure 2.1: Complete AMZCNC Hydraulic Crimping Tool Kit, including the crimper, cable cutter, and a durable carrying case.

Figure 2.2: The crimping tool, cable cutter, and various crimping dies neatly organized within the robust carrying case.
2.1 Package Contents:
- AMZCNC YQK-70 Hydraulic Crimping Tool (Standard Crimping Force: 80 kN, Max Crimping Force: 100 kN, Stroke: 11 mm)
- 9 Sets of Crimping Dies (4/6/8/10/16/25/35/50/70 mm²)
- Copper and Aluminum Cable Cutter
- 2 Pairs of Replacement Seals
- Insulated and Shock-Resistant Carrying Case
- Customer Service Contact Card
2.2 Key Features:
- Improved C-Type Clamp Head: High-density formed head, resistant to breakage. Suitable for various work environments. Innovative guide groove design eliminates difficult rotation positioning.
- Anti-slip Insulated Handle with Innovative Return Spring: Allows for one-handed operation, making crimping easier and more efficient. Ergonomic grooved handle for reduced effort.
- Sealed Design: Equipped with a double seal to prevent oil leakage. Includes two replacement seal kits.
- Thickened Dies: 9 sets of steel crimping dies (4-70 mm²). Enlarged internal piston surface ensures more uniform force and prevents deformation.
3. Specifications
| Parameter | Value |
|---|---|
| Model Number | YQK-70 |
| Crimping Range (Copper) | 4-70 mm² |
| Crimping Range (Aluminum) | 4-50 mm² |
| Standard Crimping Force | 80 kN |
| Maximum Crimping Force | 100 kN |
| Stroke | 11 mm |
| Tool Length (Approx.) | 310 mm |
| Tool Weight (Approx.) | 1.8 kg |
| Handle Material | Plastic, Rubber |
| Die Material Hardness | HRC38 |

Figure 3.1: Detailed parameters and key features of the hydraulic crimping tool, including crimping range, force, and stroke.

Figure 3.2: Reference chart for the 9 included crimping die sizes (4-70 mm²) and their approximate AWG equivalents.

Figure 3.3: Specifications for the included cable cutter, noting its suitability for copper and aluminum wires, but not steel wire ropes.
4. Setup
- Unpack the Tool: Carefully remove all components from the carrying case. Inspect the tool and accessories for any signs of damage during transit.
- Familiarize with Components: Identify the hydraulic crimping tool, the various crimping dies, and the cable cutter.
- Select the Correct Die: Based on the cross-sectional area of the cable terminal you intend to crimp, select the appropriate die set (e.g., 4mm², 6mm², etc.). Refer to Figure 3.2 for guidance.
- Install the Die:
- Open the crimping head by rotating the movable jaw.
- Insert the selected die halves into their respective slots in the crimping head. Ensure they are seated correctly and securely.
- Close the crimping head.
- Check Oil Level (Initial Check): While the tool is new and sealed, it is pre-filled. For future reference, ensure the hydraulic oil level is adequate. If low, refer to the Maintenance section for refilling instructions.
5. Operating Instructions
5.1 Using the Hydraulic Crimping Tool:
- Prepare the Cable: Strip the insulation from the cable end to the appropriate length for the terminal.
- Insert Terminal: Place the cable terminal onto the stripped cable end.
- Position for Crimping: Open the crimping head by rotating the movable jaw. Insert the cable terminal with the cable into the selected die. Ensure the terminal is centered within the die for an even crimp.
- Close the Head: Close the crimping head, ensuring the dies fully enclose the terminal.
- Initiate Crimping: Pump the movable handle repeatedly. The hydraulic pressure will build, and the dies will close, crimping the terminal onto the cable. Continue pumping until the dies meet and the crimp is complete. The tool is designed to stop when maximum pressure is reached.
- Release Pressure: To release the crimped terminal, rotate the pressure release knob (usually marked "OPEN" or with an arrow) counter-clockwise. The dies will retract, and the crimped terminal can be removed.
- Inspect Crimp: Visually inspect the crimped connection to ensure it is secure and properly formed.
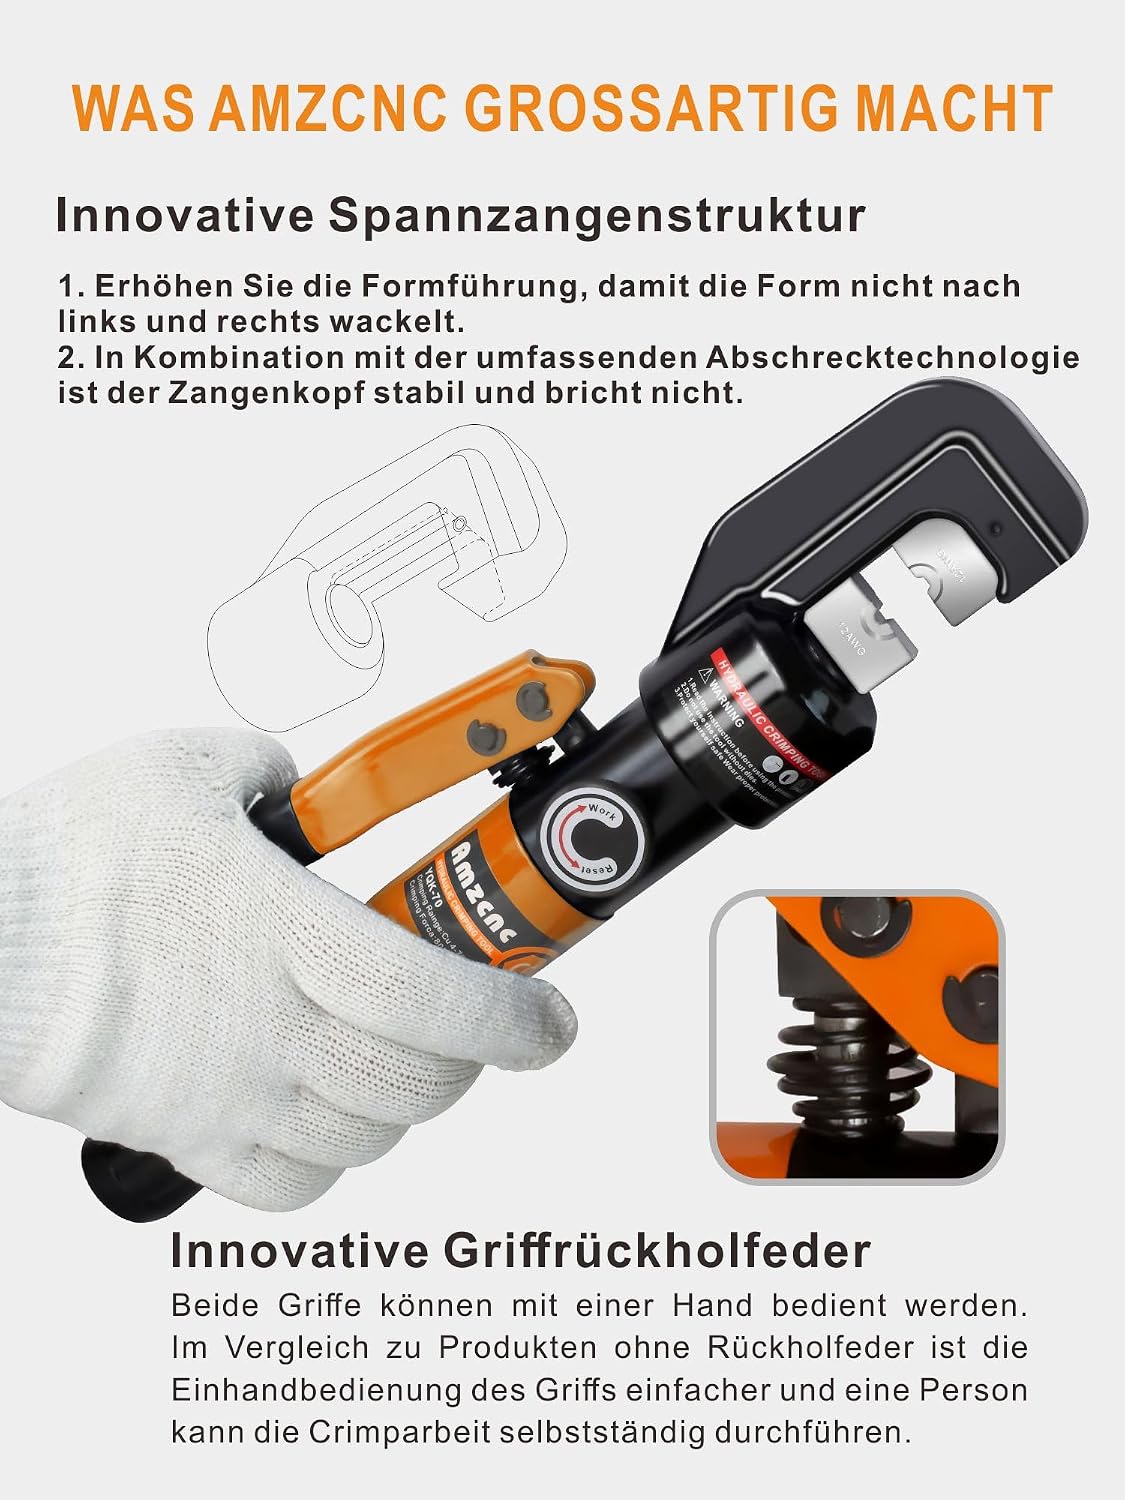
Figure 5.1: Illustration of the innovative C-type clamp head structure and the ergonomic handle with return spring, facilitating single-handed operation.

Figure 5.2: Key operational aspects: (1) Enhanced form guidance for stable crimping, (2) Easy one-handed operation due to return spring, (3) Effective anti-slip and ergonomic handle design.
5.2 Using the Cable Cutter:
The included cable cutter is designed for cutting copper and aluminum cables. It is not suitable for cutting steel wire ropes or hardened wires.
- Position Cable: Place the cable to be cut between the jaws of the cable cutter.
- Cut: Squeeze the handles firmly to cut the cable.
6. Maintenance
Regular maintenance ensures the longevity and optimal performance of your hydraulic crimping tool.
- Cleaning: After each use, wipe down the tool and dies with a clean, dry cloth to remove any dirt, debris, or oil residue.
- Lubrication: Periodically apply a light coat of machine oil to the moving parts and the crimping dies to prevent rust and ensure smooth operation.
- Oil Level Check and Refill: If the tool's performance degrades (e.g., incomplete crimps, spongy feel), the hydraulic oil level may be low.
- Locate the oil filler screw (typically on the main cylinder).
- Unscrew the filler screw.
- Add high-quality hydraulic oil (e.g., ISO VG 32 or equivalent) until the level is visible at the filler hole.
- Replace the filler screw securely.
- Seal Replacement: The tool is equipped with a double seal to prevent oil leakage, and two replacement seal kits are included. If oil leakage occurs, replace the seals following the instructions provided with the seal kit or consult a qualified technician.
- Storage: Store the tool and all accessories in the provided carrying case in a clean, dry environment, away from direct sunlight and extreme temperatures.
7. Troubleshooting
| Problem | Possible Cause | Solution |
|---|---|---|
| Tool does not crimp fully or pressure is weak. | Low hydraulic oil level. Air in the hydraulic system. Worn seals. | Check and refill hydraulic oil (see Maintenance). Bleed air from the system (consult a technician if unsure). Replace seals using the included kits. |
| Oil leakage. | Damaged or worn seals. Loose oil filler screw. | Replace seals (two kits included). Tighten the oil filler screw. |
| Dies do not retract after crimping. | Pressure release valve not fully opened. Obstruction in the mechanism. | Ensure the pressure release knob is fully rotated to the "OPEN" position. Check for any debris obstructing the dies. |
| Crimping results are uneven or poor quality. | Incorrect die size selected. Improper cable preparation. Worn dies. | Ensure the correct die size is used for the terminal and cable. Verify cable insulation is stripped to the correct length. Inspect dies for wear; replace if necessary. |
8. Warranty and Support
All AMZCNC products undergo double testing to ensure quality. If you encounter any issues or have questions regarding your hydraulic crimping tool, please do not hesitate to contact AMZCNC customer service. We are committed to providing perfect after-sales service, including replacement or refund for quality-related problems.
Please refer to the customer service contact card included in your product packaging for specific contact details.
9. Applications
The AMZCNC hydraulic crimping tool is versatile and suitable for various applications requiring secure electrical connections.

Figure 9.1: Common applications include (1) Circuit Repair, (2) Battery Cable Crimping, and (3) Wire Rope Compression for wooden railings.
Related documentsYQK-70


Ask a question about this manual
Ask about setup, troubleshooting, compatibility, parts, safety, or missing instructions. Manuals+ will review the question and use this page’s manual context to help answer it.