Introduction
This manual provides instructions for the installation, operation, and maintenance of your TOLEBLID 144 Position Wall Mount Key Lock Box. Please read these instructions thoroughly before use to ensure proper functionality and security.
Package Contents
Verify that all items are present in the package:
- TOLEBLID 144 Position Key Lock Box
- Mounting Hardware (screws, anchors)
- Override Keys (2)
- External Battery Box
- Key Tags (144, assorted colors)
This image displays the key lock box along with its included accessories: override keys, an external battery box, and mounting hardware for installation.
Setup
Wall Mounting
The key box is designed for secure wall mounting. Follow these steps for installation:
- Select Location: Choose a sturdy wall location that can support the weight of the key box and its contents.
- Mark Holes: Use the pre-drilled holes on the back of the key box as a template to mark the drilling points on the wall.
- Drill Pilot Holes: Drill pilot holes at the marked locations using an appropriate drill bit for your wall type.
- Insert Anchors: If necessary, insert wall anchors into the pilot holes.
- Secure Box: Align the key box with the holes and secure it to the wall using the provided screws. Ensure it is firmly attached.
Battery Installation (for Digital Lock)
The digital combination lock requires power. Batteries are typically installed internally, but an external battery box is provided for emergency power or initial setup if internal batteries are depleted.
- Internal Batteries: Locate the internal battery compartment (usually behind the door or keypad) and insert the required batteries (type not specified, typically AA or AAA).
- External Battery Box: If internal batteries are low or for initial access, connect the external battery box to the designated port on the keypad. This will temporarily power the lock.
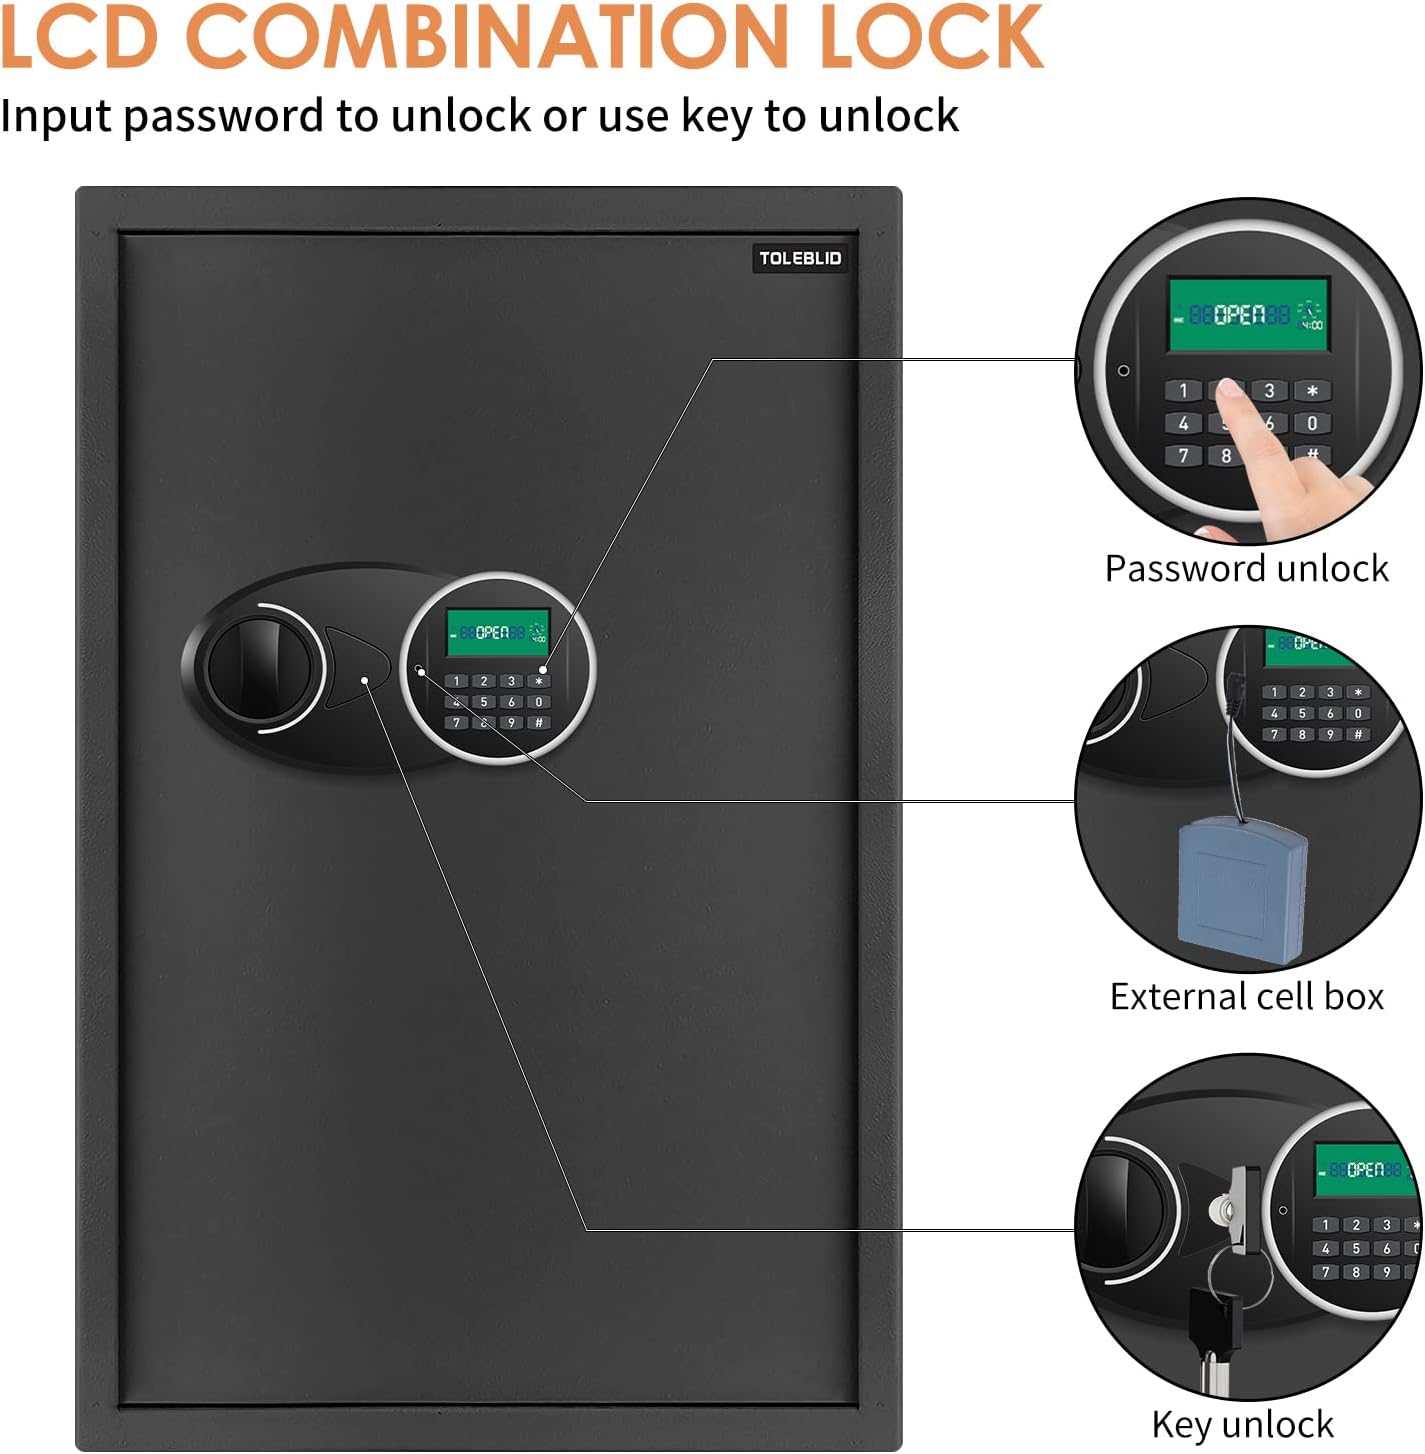
This image illustrates the LCD combination lock, highlighting the external battery box connection for powering the unit.
Operating Instructions
Initial Opening
The lock box may come with a default combination or require the use of an override key for the first opening. Refer to the packaging or a small sticker on the product for any pre-set default combination.
Setting/Changing the Combination
The combination lock offers over 1,000 possible combinations for enhanced security. To set or change the combination:
- Open the Lock Box: Use the current combination or an override key to open the lock box door.
- Locate Reset Button: On the inside of the lock mechanism, locate the reset button or lever. Consult the specific instructions provided with your physical product for its exact location and operation.
- Enter New Combination: While the reset button is engaged (or as per specific instructions), enter your desired new combination on the keypad.
- Confirm: Release the reset button. Test the new combination with the door open before closing it to ensure it has been set correctly.
Using the Combination Lock
To open the lock box using your programmed combination:
- Enter Combination: Input your combination on the digital keypad.
- Confirm Entry: The LED indicator on the keypad will typically confirm successful entry.
- Open Door: Turn the handle or knob to open the lock box door.
Using the Override Key
In situations such as a forgotten combination or depleted batteries, the provided override keys can be used for access:
- Locate Keyhole: Find the keyhole, which may be concealed near the keypad or under a cover.
- Insert and Turn: Insert one of the override keys and turn it to unlock the mechanism.
- Open Door: Turn the handle or knob to open the lock box door.
This image demonstrates both the password entry method and the key override method for opening the lock box.
Organizing Keys
The TOLEBLID key lock box features adjustable hook plates and includes key tags to help you organize up to 144 keys efficiently.
- Attach Keys to Tags: Securely attach each key to a provided key tag. The tags are designed to hold keys flat.
- Hang on Hooks: Hang the key tags on the numbered hooks inside the cabinet.
- Adjust Hook Plates: The key hook plates are adjustable. If you need more space for larger key rings or to reconfigure the layout, you can reposition the plates.

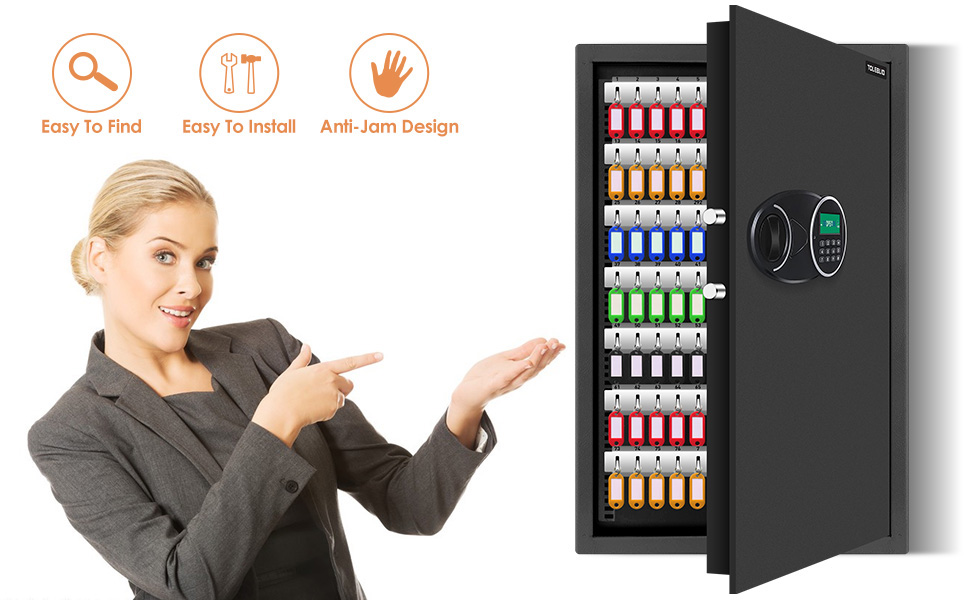
This image displays the interior of the key lock box, illustrating how keys are organized on numbered hooks using colored key tags.
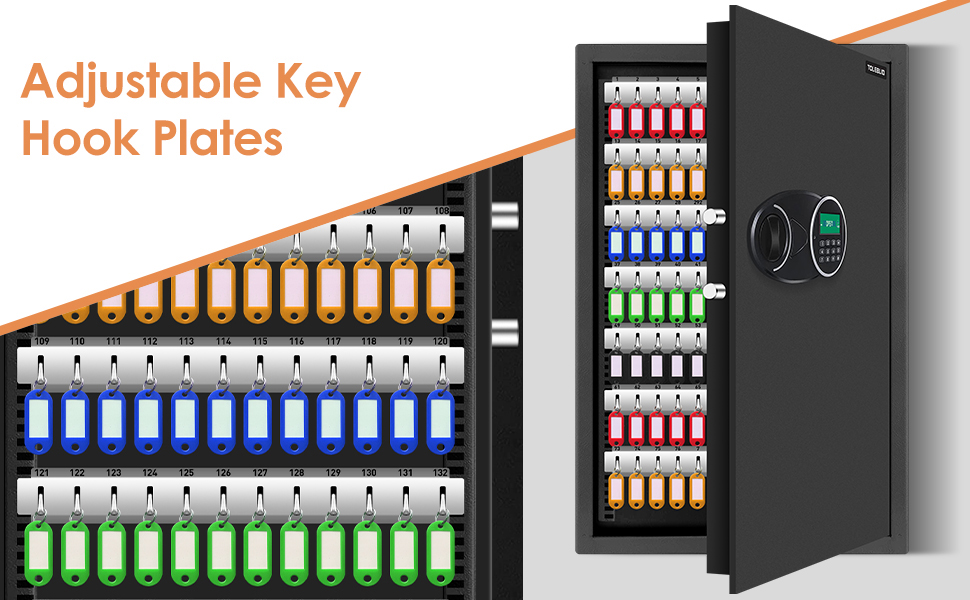
This image emphasizes the adjustable nature of the key hook plates, allowing for flexible key organization.
Maintenance
To ensure the longevity and proper functioning of your key lock box, follow these maintenance guidelines:
- Regular Inspection: Periodically inspect the lock box for any signs of wear, damage, or loose components.
- Cleaning: Clean the exterior surfaces with a soft, dry cloth. Avoid using abrasive cleaners, solvents, or harsh chemicals, as these can damage the finish.
- Battery Check: For the digital lock, regularly check the battery levels. Replace batteries promptly when they are low to prevent loss of access.
- Hinge Lubrication: If the door hinges become stiff, apply a small amount of silicone-based lubricant to ensure smooth operation.
Troubleshooting
Lock Box Will Not Open with Combination
- Incorrect Combination: Double-check that you are entering the correct combination.
- Low Batteries: If the digital display is dim or unresponsive, the batteries may be low. Use the external battery box or an override key to open the unit and replace the internal batteries.
- Combination Not Set Correctly: If you recently changed the combination, ensure it was set properly by following the instructions carefully.
Keys Do Not Fit on Hooks
- Adjust Hook Plates: The key hook plates are adjustable. Reposition them to create more vertical space between rows to accommodate larger key rings.
- Key Ring Size: Ensure that the key rings are not excessively large, which might prevent the door from closing properly.
Door Hinge Issues
- Stiff Hinges: Apply a small amount of silicone lubricant to the hinges.
- Damage: If a hinge appears damaged or misaligned, do not force the door. Contact customer support for assistance.
Specifications
| Feature | Detail |
|---|---|
| Brand | TOLEBLID |
| Model | TOLEBLID |
| Capacity | 144 Keys |
| Dimensions (D x W x H) | 6" x 14" x 14" |
| Item Weight | 15.3 Pounds |
| Material | Heavy-gauge steel, Alloy Steel |
| Finish | Powder Coated, Scratch Resistant Black |
| Lock Type | Combination, Key |
| Mounting Type | Wall Mount |
| Special Features | Adjustable Key Hook Plates, Durable Construction |
| UPC | 738252633683 |
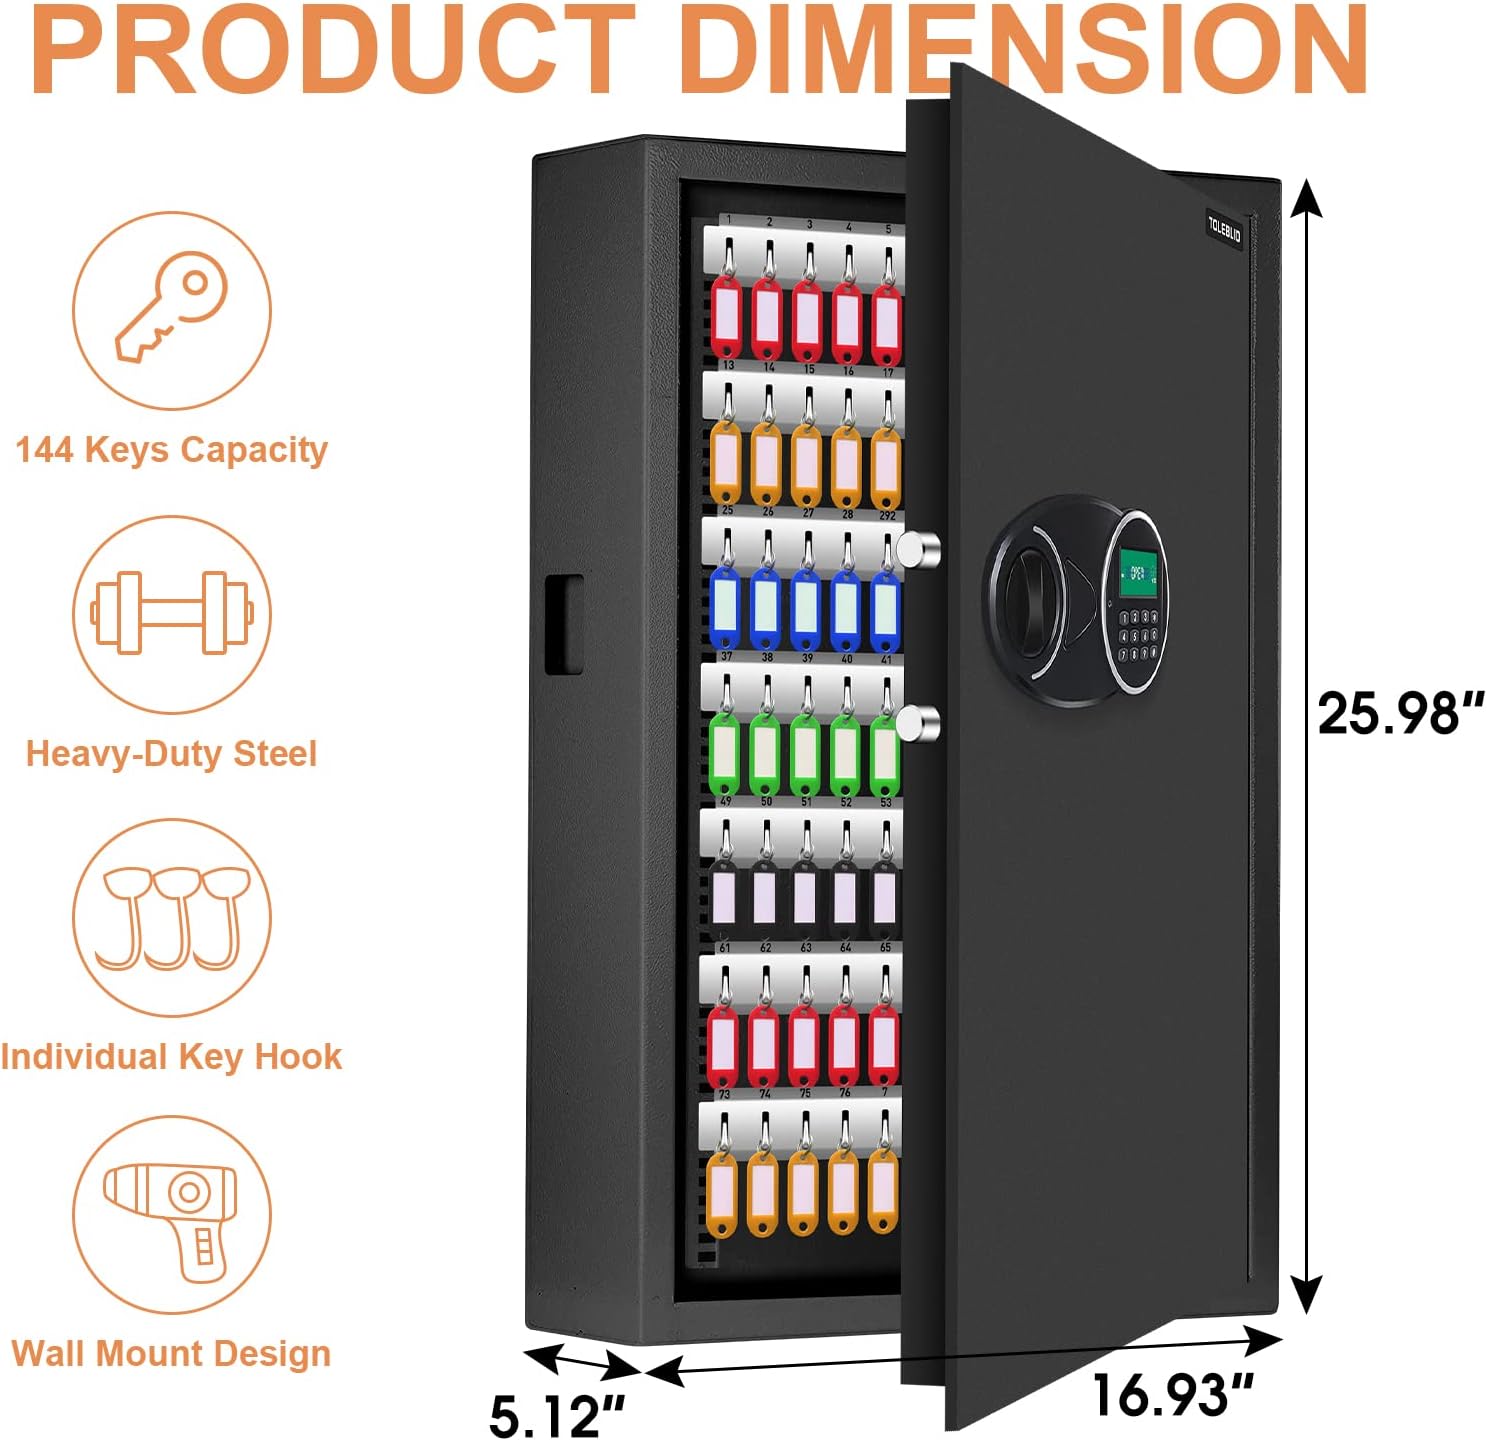
This image provides a visual representation of the key lock box's dimensions.
Warranty and Support
The TOLEBLID 144 Position Wall Mount Key Lock Box comes with a 90-day unreasonable return policy and lifetime warranty service. For any support needs, technical assistance, or warranty claims, please contact the manufacturer directly through their official channels.