
1. Introduction
This manual provides essential instructions for the setup, operation, and maintenance of your HUTNVEA 7-inch Touch Screen GPS Navigation System. Please read this manual thoroughly before using the device to ensure safe and optimal performance. Keep this manual for future reference.
2. Important Safety Information
- Driving Safety: Always prioritize safe driving. Do not operate the device in a way that distracts you from the road.
- Power Source: Use only the provided vehicle charger. Connecting to an incompatible power source may damage the device.
- Mounting: Ensure the device is securely mounted and does not obstruct your view of the road or interfere with vehicle controls.
- Temperature: Avoid exposing the device to extreme temperatures, direct sunlight for prolonged periods, or excessive moisture.
- Maintenance: Do not attempt to disassemble or repair the device yourself. Refer to qualified service personnel.
3. Package Contents
Verify that all items are present in your package:
- GPS Navigation for Car
- Vehicle Charger
- Sat Nav Suction Holder
- Back Bracket
- USB Cable
- User Manual

Image: All components included in the HUTNVEA GPS Navigation System package.
4. Device Setup
4.1. Mounting the Device
The GPS unit comes with a suction cup mount for easy installation on your vehicle's windshield. Ensure the mounting surface is clean and dry before attachment.
- Assemble the back bracket to the suction holder.
- Attach the GPS unit to the assembled mount by aligning the slots and sliding it into place until it clicks.
- Press the suction cup firmly against the desired area on your windshield.
- Flip the lever on the suction cup to secure it in position.

Image: The GPS unit attached to its adjustable suction cup mount.
4.2. Powering On
Connect the provided vehicle charger to the GPS unit's power port and plug the other end into your car's 12V power outlet. The device will typically power on automatically or can be turned on using the power button.

Image: Rear view of the GPS unit highlighting connection ports.
4.3. Initial Configuration
Upon first use, you may need to configure basic settings:
- Language: Select your preferred language.
- Time Zone: Set the correct time zone.
- Vehicle Profile: For optimal routing, especially for larger vehicles like RVs or trucks, enter your vehicle's dimensions (length, width, height) and weight. This feature helps avoid routes with restrictions (e.g., low bridges, narrow roads).
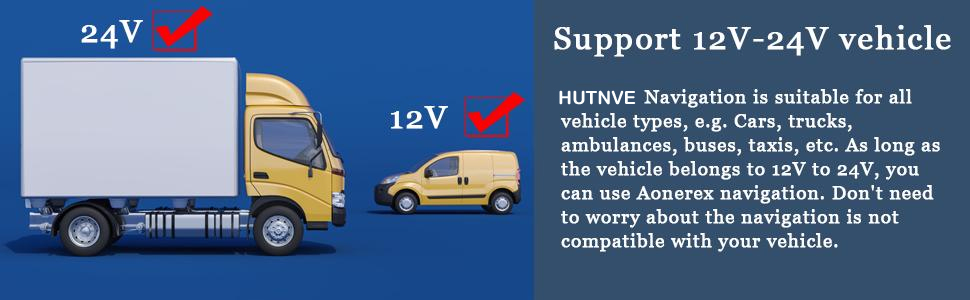
Image: Vehicle profile settings for customized routing.
5. Operating Instructions
5.1. Main Menu Overview
The main menu provides access to all functions. Tap the desired icon to enter a specific mode, such as Navigation, Settings, or Media Player.
5.2. Entering a Destination
To begin navigation, select 'Destination' from the main menu. You can search for a destination using various methods:
- Address: Enter the street address, city, and state.
- Coordinates: Input latitude and longitude.
- POI (Points of Interest): Search for nearby restaurants, gas stations, attractions, etc.
- Favorites: Select from previously saved locations.
5.3. Route Options
After entering your destination, the device will calculate a route. You can customize the route based on your preferences:
- Route Types: Choose between Fast, Green, Short, or Easy routes.
- Avoidances: Configure the system to avoid highways, toll roads, unpaved roads, or ferries.
5.4. Voice Guidance
The GPS system provides clear, real-voice turn-by-turn directions, allowing you to keep your eyes on the road. Audio prompts will guide you through each turn and upcoming maneuver.

Image: Visual representation of voice navigation and alert features.
5.5. Map Views
The device supports both 2D and 3D map views. You can switch between these views to suit your preference for navigating different environments.

Image: 2D and 3D map view options.
5.6. Speed and Warning Features
The GPS provides intelligent alerts to enhance your driving experience:
- Current Speed Display: Shows your current speed.
- Speed Camera Alerts: Notifies you of upcoming speed cameras.
- Red Light Warning: Provides warnings for red light cameras.
- Active Lane Assistant: Helps you stay in the correct lane for upcoming turns.

Image: Speed camera alert icon.
5.7. Map Updates
The device comes with pre-installed 2025 North American maps and includes lifetime map updates. Refer to the manufacturer's website or included documentation for instructions on how to download and install future map updates.
6. Maintenance
6.1. Cleaning
To clean the screen, gently wipe it with a soft, lint-free cloth. Do not use abrasive cleaners or solvents.
6.2. Battery Care
The device contains a Lithium Polymer battery. For optimal battery life, avoid fully discharging the battery frequently. Charge the device using the provided vehicle charger.
7. Troubleshooting
If you encounter issues with your GPS navigation system, refer to the following common problems and solutions:
- No GPS Signal: Ensure the device has a clear view of the sky. Move away from tall buildings or dense foliage.
- Screen Unresponsive: Try restarting the device. If the issue persists, ensure the screen is clean and free of debris.
- Inaccurate Positioning: Verify that the device has acquired a strong GPS signal. Map data may also be outdated; consider performing a map update.
- Device Not Powering On: Check the vehicle charger connection and ensure your car's 12V outlet is functioning.
For further assistance, contact customer support.
8. Specifications
| Feature | Detail |
|---|---|
| Item Weight | 1.54 pounds |
| Product Dimensions | 7.07 x 4.3 x 0.4 inches |
| Batteries | 1 Lithium Polymer batteries required (included) |
| Display Size | 7 Inches |
| Battery Life | 2 Hours |
| Voice Command | Touchscreen |
| Vehicle Service Type | Car, RV, Truck |
| Special Feature | Touchscreen |
| Connectivity Technology | USB |
| Map Type | North America (2025 Map) |
| Mounting Type | Windshield Mount |
| Resolution | 480 x 272 |
| Manufacturer | HUTNVEA |
9. Warranty and Support
9.1. Warranty Information
The product includes a 1-year warranty. For detailed terms and conditions, please refer to the warranty card included in your package or contact HUTNVEA customer service.
Optional protection plans are available for purchase, including 2-Year and 3-Year plans, as well as a Complete Protect monthly plan.
9.2. Customer Support
For technical assistance, troubleshooting, or warranty claims, please contact HUTNVEA customer support. Refer to the contact information provided in your user guide or on the manufacturer's official website.