
Scheppach 17274
Scheppach Compact 8T Wood Splitter User Manual
Model: 17274
Your guide to safe and efficient operation.
1. Important Safety Instructions
Always read and understand all safety warnings and instructions before operating the wood splitter. Failure to follow these instructions may result in electric shock, fire, and/or serious injury.
- Wear appropriate personal protective equipment (PPE), including safety glasses, gloves, and sturdy footwear.
- Ensure the work area is clear of bystanders, especially children and pets.
- Operate the splitter on a firm, level surface.
- Always use two-hand operation as designed for safety.
- Do not attempt to split logs exceeding the maximum specified dimensions.
- Disconnect power before performing any maintenance or adjustments.
2. Product Overview
The Scheppach Compact 8T Wood Splitter is designed for efficient splitting of hardwood and softwood logs. It features a powerful motor and a robust splitting wedge, ensuring reliable performance for logs up to 1070 mm in length and 350 mm in diameter.

Figure 2.1: The Scheppach Compact 8T Wood Splitter. This image shows the vertical design of the splitter with a log positioned for splitting, highlighting the maximum log length capacity of 1070 mm.
3. Setup and Assembly
The Scheppach Compact 8T Wood Splitter is designed for ease of setup. Follow these steps to prepare your splitter for operation.
- Unpacking: Carefully remove all components from the packaging. Verify that all parts listed in the packing list are present.
- Positioning: Place the wood splitter on a stable, level, and firm surface. Ensure there is adequate space around the machine for safe operation and log handling.
- Power Connection: Connect the splitter to a standard 230 V power socket. Ensure the electrical supply meets the machine's requirements (3150 W max).
- Initial Inspection: Before first use, inspect all bolts, nuts, and hydraulic connections to ensure they are tight and secure. Check for any visible damage.

Figure 3.1: The wood splitter in its compact storage position, demonstrating its height of 990 mm. This compact design facilitates easier storage when not in use.
4. Operating Instructions
Follow these steps for safe and effective operation of your wood splitter.
- Log Preparation: Ensure logs are cut to appropriate lengths, not exceeding 1070 mm, and have a maximum diameter of 350 mm. Remove any branches or knots that could interfere with splitting.
- Log Placement: Place the log vertically on the splitting table. Ensure it is stable and centered under the splitting wedge. The swivelling table can be adjusted for different working heights to accommodate various log lengths.
- Two-Hand Operation: To initiate the splitting process, simultaneously engage both control levers. This two-hand safety feature ensures your hands are away from the splitting wedge during operation.
- Splitting: The splitting wedge will descend, splitting the log. Once the log is split, release the control levers to retract the wedge.
- Removing Split Wood: Carefully remove the split wood from the table. Be mindful of any small pieces or splinters.

Figure 4.1: The wood splitter actively splitting a log. This demonstrates the machine's capability to efficiently process wood, with the split pieces falling away from the main unit.

Figure 4.2: A close-up view of the swivelling work table, showing how it can be adjusted or engaged, providing flexibility for different log sizes and user comfort.
5. Maintenance and Care
Regular maintenance ensures the longevity and safe operation of your wood splitter.
- Cleaning: After each use, clean the machine to remove wood chips, sawdust, and debris. Use a brush or compressed air.
- Hydraulic Fluid Check: Periodically check the hydraulic fluid level. Refer to the manufacturer's recommendations for the correct type of hydraulic fluid and refill procedures.
- Wedge Inspection: Inspect the splitting wedge for sharpness and damage. A dull wedge can reduce efficiency and increase strain on the motor.
- Bolt and Nut Tightness: Regularly check and tighten all bolts and nuts, especially those securing the splitting wedge and structural components.
- Storage: When not in use, store the wood splitter in a dry, protected area. The compact design allows for easier storage.
6. Troubleshooting
This section provides solutions to common issues you might encounter.
| Problem | Possible Cause | Solution |
|---|---|---|
| Splitter does not start. | No power supply; Emergency stop engaged; Motor overload. | Check power connection; Release emergency stop button; Allow motor to cool down. |
| Splitting force is weak. | Low hydraulic fluid; Air in hydraulic system; Dull splitting wedge. | Check and refill hydraulic fluid; Bleed air from system (refer to detailed manual); Sharpen or replace wedge. |
| Log gets stuck. | Log too large or too hard; Wedge not fully retracting. | Do not force the splitter; Remove log carefully; Check for obstructions preventing wedge retraction. |
If the problem persists after attempting these solutions, contact customer support.
7. Specifications
Key technical specifications for the Scheppach Compact 8T Wood Splitter.
- Model: 17274
- Splitting Force: 7.95 tonnes
- Motor: 230 V, max. 3150 W
- Max. Log Length: 1070 mm
- Max. Log Diameter: 350 mm
- Item Weight: Approximately 303 pounds (137.4 kg)
- Product Dimensions (L x W x H): 33.46 x 35.43 x 38.98 inches (85 x 90 x 99 cm)
- Compact Height (retracted): 990 mm (38.98 inches)
- Color: Blue
- Power Source: 230 V AC (Note: Product specifications list 'DC', but other product details indicate 230V, which is Alternating Current for this power level.)
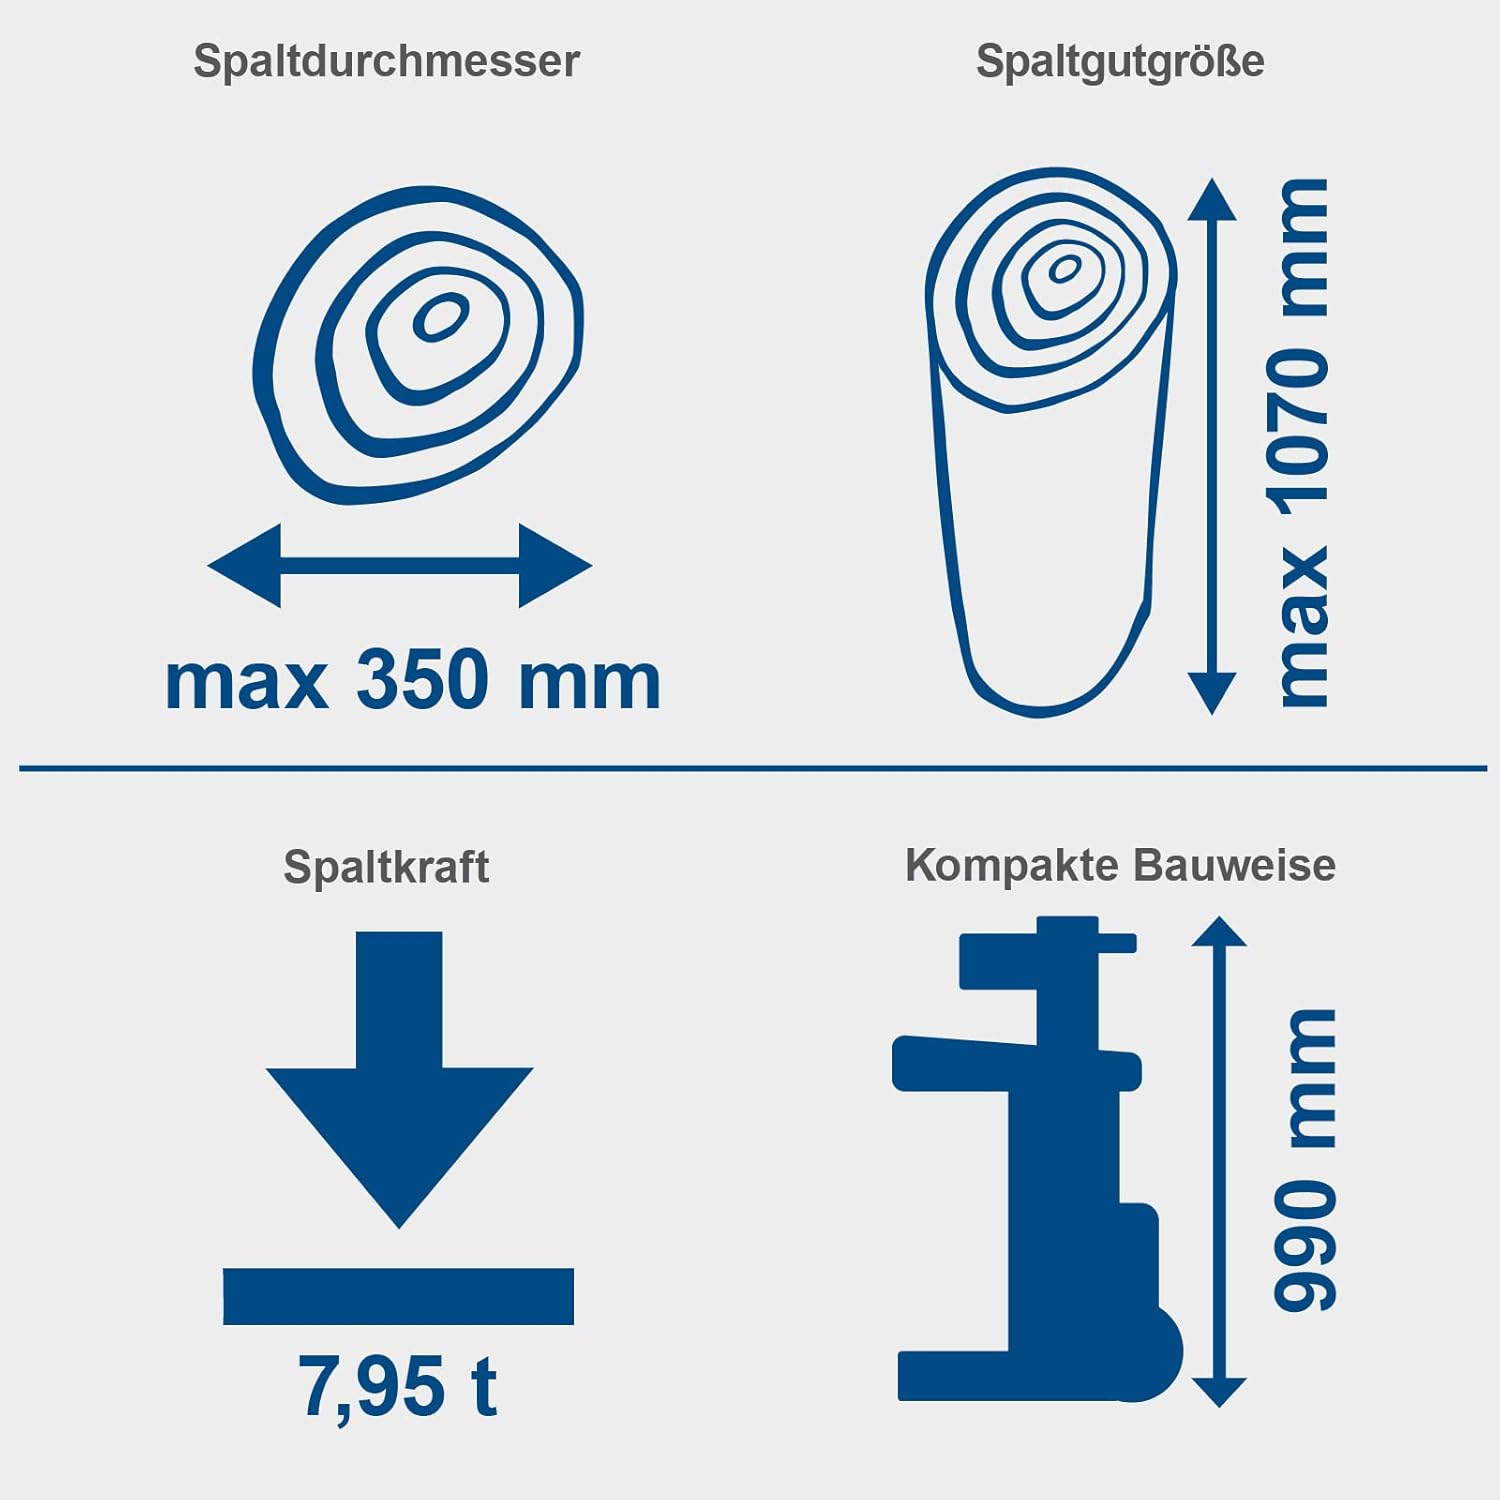
Figure 7.1: Visual representation of key specifications including maximum splitting diameter, maximum log length, splitting force, and compact height.

Figure 7.2: Diagram illustrating the electrical specifications of the motor, indicating 230V and 3150W power output.

Figure 7.3: Features diagram highlighting the Vario Splitting System, GS safety certification, patented splitting technology, and its unique position as Europe's only meter splitter under 8 tonnes.
8. Warranty and Support
For warranty information and customer support, please refer to the documentation included with your purchase or visit the official Scheppach website. Keep your proof of purchase for any warranty claims.
Manufacturer: Scheppach
Date First Available: August 23, 2024
For further assistance, please contact Scheppach customer service.
Ask a question about this manual
Ask about setup, troubleshooting, compatibility, parts, safety, or missing instructions. Manuals+ will review the question and use this page’s manual context to help answer it.