
Festool 576423

DOMINO Joiner DF 500 Q-Set User Manual
Model: 576423
1. Introduction
The Festool DOMINO Joiner DF 500 Q-Set is a precision power tool designed for creating strong, repeatable mortise and tenon joints in woodworking applications. Its unique cutting action rotates and oscillates to produce clean, accurate mortises, enhancing the efficiency and quality of joinery work. This manual provides essential information for the safe and effective operation, maintenance, and troubleshooting of your DOMINO Joiner.
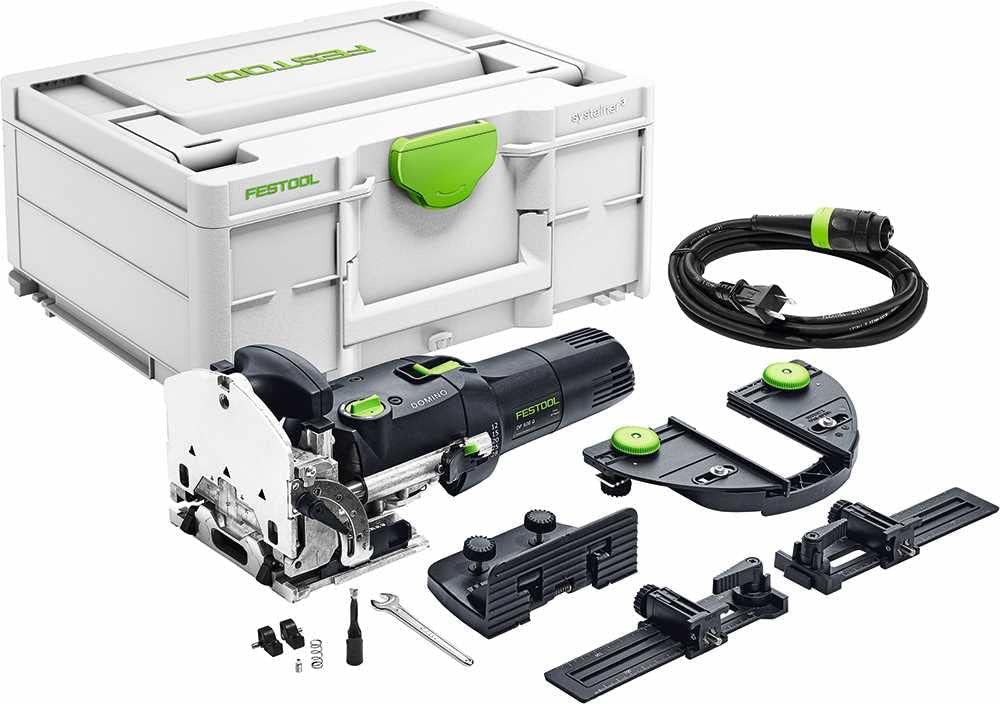
Figure 1: Festool DOMINO Joiner DF 500 Q-Set and included accessories.
2. Safety Information
Always read and understand all safety warnings, instructions, illustrations, and specifications provided with this power tool. Failure to follow all instructions listed below may result in electric shock, fire, and/or serious injury. Save all warnings and instructions for future reference.
- Always wear appropriate personal protective equipment, including eye protection, hearing protection, and a dust mask.
- Ensure the workpiece is securely clamped before operation to prevent movement.
- Connect the tool to a dust extraction system to minimize airborne dust and maintain a clean work area.
- Keep hands and body clear of the cutting area during operation.
- This product may expose you to chemicals including lead, which is known to the State of California to cause cancer and birth defects or other reproductive harm. For more information go to www.P65Warnings.ca.gov.
3. Setup
Upon unboxing, verify all components are present. The DF 500 Joiner comes with a 5mm cutter pre-installed. Ensure the tool is connected to a suitable power source and a dust extractor for optimal performance and safety.
3.1 Connecting Dust Extraction and Power
Connect the dust extraction hose to the designated port on the joiner. For Festool dust extractors, the tool's power cable can be plugged into the extractor, allowing the extractor to automatically start when the joiner is activated.

Figure 2: Proper connection of the DOMINO Joiner to a dust extraction system.
4. Operation
4.1 Marking and Preparing Workpieces
For precise joinery, especially with pre-finished materials, it is recommended to use painter's tape on the workpiece surface where the mortises will be cut. This helps prevent chipping and provides a clear surface for marking. Use a marking tool to indicate the exact centerlines for your dominoes. For initial setup, physically placing a domino on the marked tape can help visualize the placement and ensure proper alignment, preventing encroachment on edges.

Figure 3: Marking the precise locations for domino mortises on a workpiece protected by tape.
4.2 Clamping the Workpiece
Securely clamp your workpiece to a stable surface. For optimal results, especially when cutting mortises that require the tool's base to extend beyond the table surface (e.g., for 20mm settings), ensure the workpiece edge is off the table. This prevents interference and ensures accurate depth and height of the mortise.

Figure 4: Workpiece clamped securely, with the edge positioned to allow full plunge depth.
4.3 Cutting Mortises
Hold the joiner firmly with both hands. Align the center line indicator on the tool's base with your marked pencil line on the workpiece. Ensure the tool's base is flat against the workpiece. Turn on the joiner and make a smooth, controlled plunge into the material. Maintain consistent pressure throughout the cut. The unique cutting action creates a perfect, clean, and repeatable mortise.

Figure 5: The DOMINO Joiner in action, creating a precise mortise.
4.4 Mortise Width Adjustment
The DOMINO Joiner features a mortise width adjustment dial, allowing for easier alignment when joining panels. You can choose between a tight fit (zero play) or a slightly looser fit (more play) to accommodate glue and minor alignment adjustments. For applications requiring precise alignment, such as mitered casing, a looser fit on one side can provide crucial room for adjustment.

Figure 6: Domino tenons demonstrating the difference between tight and loose mortise settings.
4.5 Assembling Joints
Once mortises are cut, apply wood glue to the mortises and the domino tenons. Insert the dominoes into the mortises. The adjustable width of the mortises allows for slight lateral movement, enabling perfect alignment of the joint. This is particularly beneficial for applications like mitered casing, where precise flushness is critical and wood movement due to humidity can be a factor.

Figure 7: A mitered joint assembled with domino tenons, showcasing the precise fit.
5. Maintenance
Regular maintenance ensures the longevity and optimal performance of your Festool DOMINO Joiner. Always disconnect the tool from the power supply before performing any maintenance.
- Cleaning: Regularly clean the tool, especially the cutting area and dust extraction port, to prevent buildup of sawdust and debris.
- Cutter Inspection: Inspect the 5mm cutter (and any other cutters you use) for sharpness and damage. Replace dull or damaged cutters to ensure clean cuts and prevent strain on the motor.
- Lubrication: Refer to the detailed service manual for specific lubrication points and schedules.
6. Troubleshooting
This section addresses common issues you might encounter with your DOMINO Joiner.
| Problem | Possible Cause | Solution |
|---|---|---|
| Loose or imprecise joints | Incorrect mortise width setting; dull cutter; improper marking/alignment. | Adjust mortise width; replace cutter; re-mark and re-align carefully. |
| Chipping or tear-out on workpiece | Dull cutter; lack of tape on pre-finished material; too fast plunge rate. | Replace cutter; use painter's tape; reduce plunge speed. |
| Excessive dust/debris | Dust extractor not connected or not functioning properly. | Ensure dust extractor is connected and turned on; check hose for clogs. |
7. Specifications
- Manufacturer: Festool
- Part Number: 576423
- Item Weight: 13.23 pounds
- Product Dimensions: 15.59 x 11.65 x 7.36 inches
- Item Model Number: 576423
- Routing Height Adjuster with Scale: 5-30 mm
- Hose Port Diameter: 27 mm (1.06 inch)
8. Warranty & Support
Festool stands behind its products with comprehensive support. This includes a 30-day money-back guarantee and a 3-year satisfaction guarantee. Dedicated expert support is available to assist with any questions or issues you may encounter.
For detailed warranty information or to contact support, please refer to the official Festool website or your product registration documentation.
Ask a question about this manual
Ask about setup, troubleshooting, compatibility, parts, safety, or missing instructions. Manuals+ will review the question and use this page’s manual context to help answer it.