
j5create JVA14
j5create JVA14 4K Game Video Capture Card
Instruction Manual
Model: JVA14 | Brand: j5create
1. Introduction
The j5create JVA14 4K Game Video Capture Card is a high-performance device designed for capturing and streaming gameplay from various sources. It supports 4K video capture and 4K60 HDR pass-through, making it an ideal solution for gamers and content creators. This manual provides detailed instructions for setting up, operating, and maintaining your JVA14 capture card to ensure optimal performance.

Figure 1.1: j5create JVA14 4K Game Video Capture Card
2. Key Features
- High-Resolution Capture: Supports 4K @ 30 FPS video capture.
- 4K HDR Pass-Through: Allows 4K @ 60 FPS HDR pass-through for consoles capable of 4K resolution, ensuring a smooth gaming experience on your display.
- Audio Input/Output: Features 3.5 mm Audio In and Mic In ports for connecting headsets and microphones, enabling live commentary.
- Low-Latency Streaming: Utilizes a USB 3.2 connection for high-speed data transfer and minimal latency during streaming.
- Power Delivery Pass-Through: Supports 60W Power Delivery, allowing connected phones and laptops to stay charged while being used as a streaming device.
- Plug-and-Play: No driver installation required, compatible with macOS and Windows laptops and desktops.
- Software Compatibility: Fully compatible with popular streaming software such as OBS Studio, Twitch, and YouTube.

Figure 2.1: HDR Pass-through and Capture Capabilities

Figure 2.2: 60W Power Delivery Pass-Through Charging

Figure 2.3: Low-Latency Streaming via USB 3.2
3. Package Contents
Please verify that all items are present in the package:
- JVA14 Capture Card
- USB-A to USB-C Cable
- USB-C to USB-C Cable
- HDMI Cable
4. Product Overview
The JVA14 features a compact design with clearly labeled ports for easy connectivity. Familiarize yourself with the device's ports before setup.
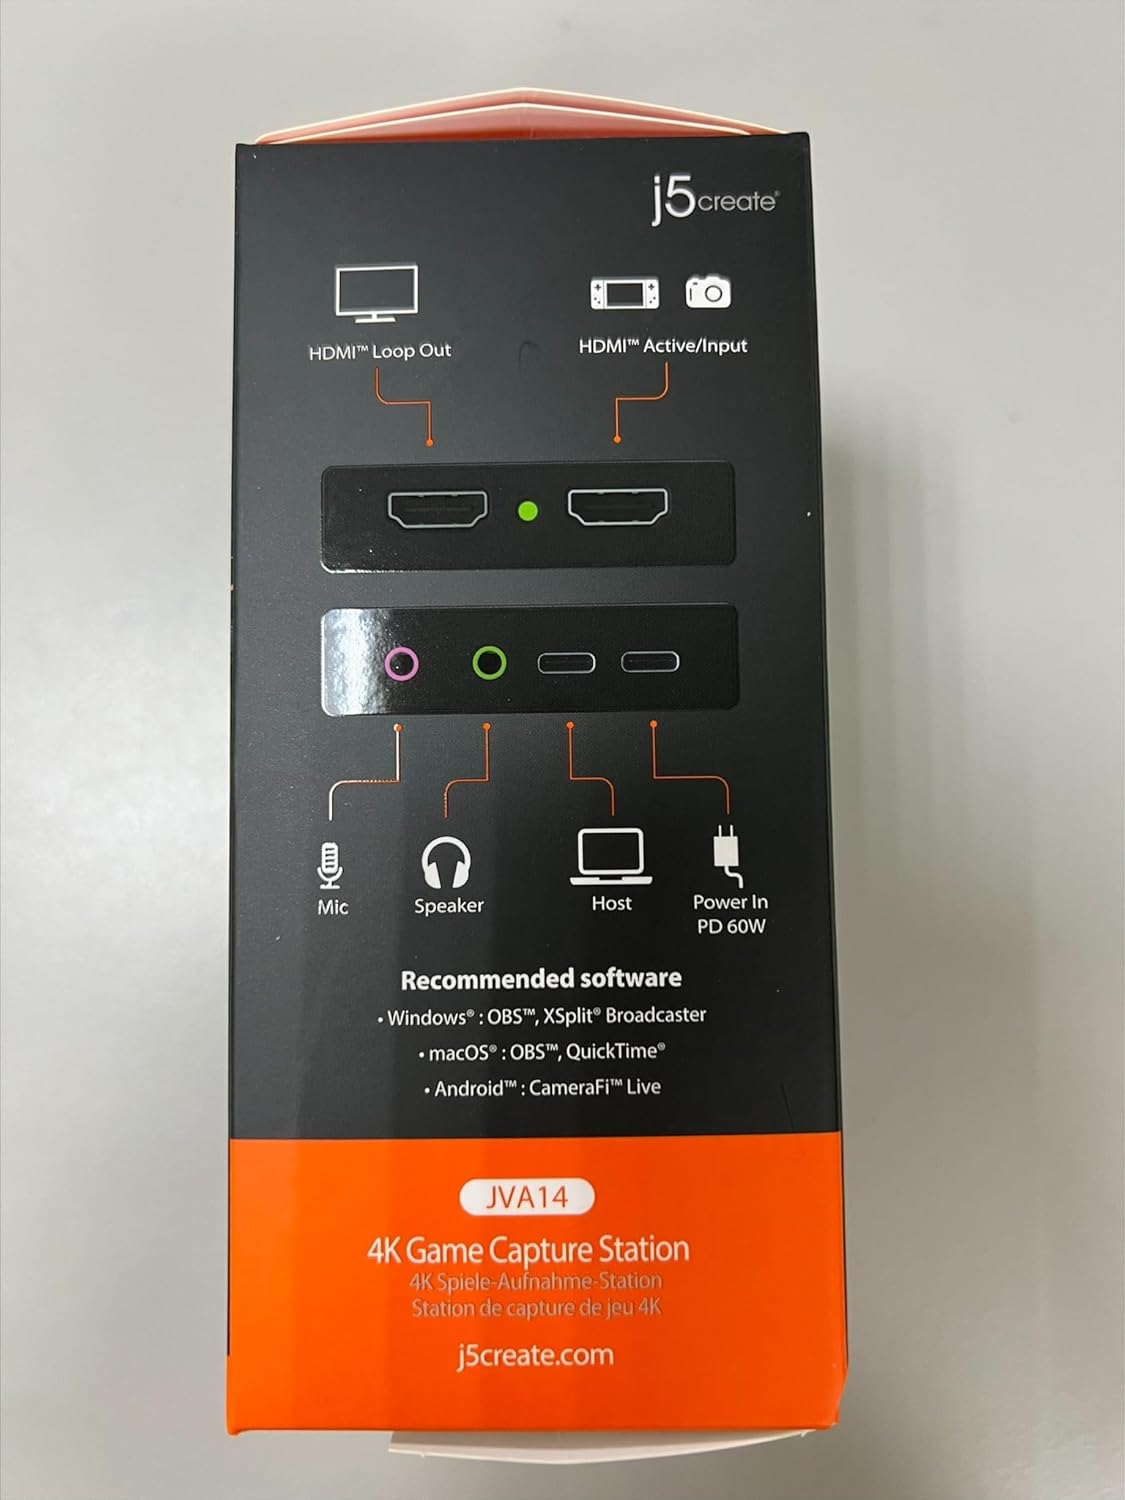
Figure 4.1: JVA14 Side View with Audio and USB Ports
- HDMI In: Connects to your gaming console (e.g., PS5, Xbox, Switch) or other video source.
- HDMI Out: Connects to your display (monitor, TV) for pass-through video.
- USB 3.2 Type-C (Host): Connects to your computer for data transfer and power.
- PD 60W Power In: USB-C port for connecting a power adapter to provide 60W Power Delivery pass-through charging.
- Mic In (3.5mm): For connecting an external microphone for commentary.
- Audio Out (3.5mm): For connecting headphones or speakers.
5. Setup Instructions
Follow these steps to set up your JVA14 capture card:
- Connect your gaming console or video source to the HDMI In port on the JVA14 using an HDMI cable.
- Connect your display (monitor or TV) to the HDMI Out port on the JVA14 using an HDMI cable. This allows you to view your gameplay without latency.
- Connect the JVA14 to your computer (Windows or macOS) using the provided USB 3.2 Type-C cable. The device is plug-and-play and does not require driver installation.
- (Optional) For Power Delivery pass-through charging, connect a 60W (or higher) USB-C power adapter to the PD 60W Power In port on the JVA14. This will charge your connected laptop or phone while streaming.
- (Optional) Connect an external microphone to the Mic In (3.5mm) port for live commentary.
- (Optional) Connect headphones or speakers to the Audio Out (3.5mm) port for monitoring audio.

Figure 5.1: Typical Game Capture Station Setup
6. Operation
Once the JVA14 is physically connected, you can begin using it with your preferred streaming or recording software.
- Software Setup: Open your preferred streaming or recording software (e.g., OBS Studio, QuickTime, CameraFi Live).
- Add Video Source: In your software, add a new video capture device. Select the JVA14 as your video source.
- Add Audio Source: Add a new audio input device and select the JVA14 for game audio. If using an external microphone connected to the JVA14, add it as a separate audio input.
- Configure Resolution and Frame Rate: Adjust the capture resolution and frame rate settings in your software. The JVA14 supports up to 4K30 FPS capture and 4K60 HDR pass-through.
- Start Streaming/Recording: Begin your live stream or recording session. The low-latency USB 3.2 connection ensures smooth performance.
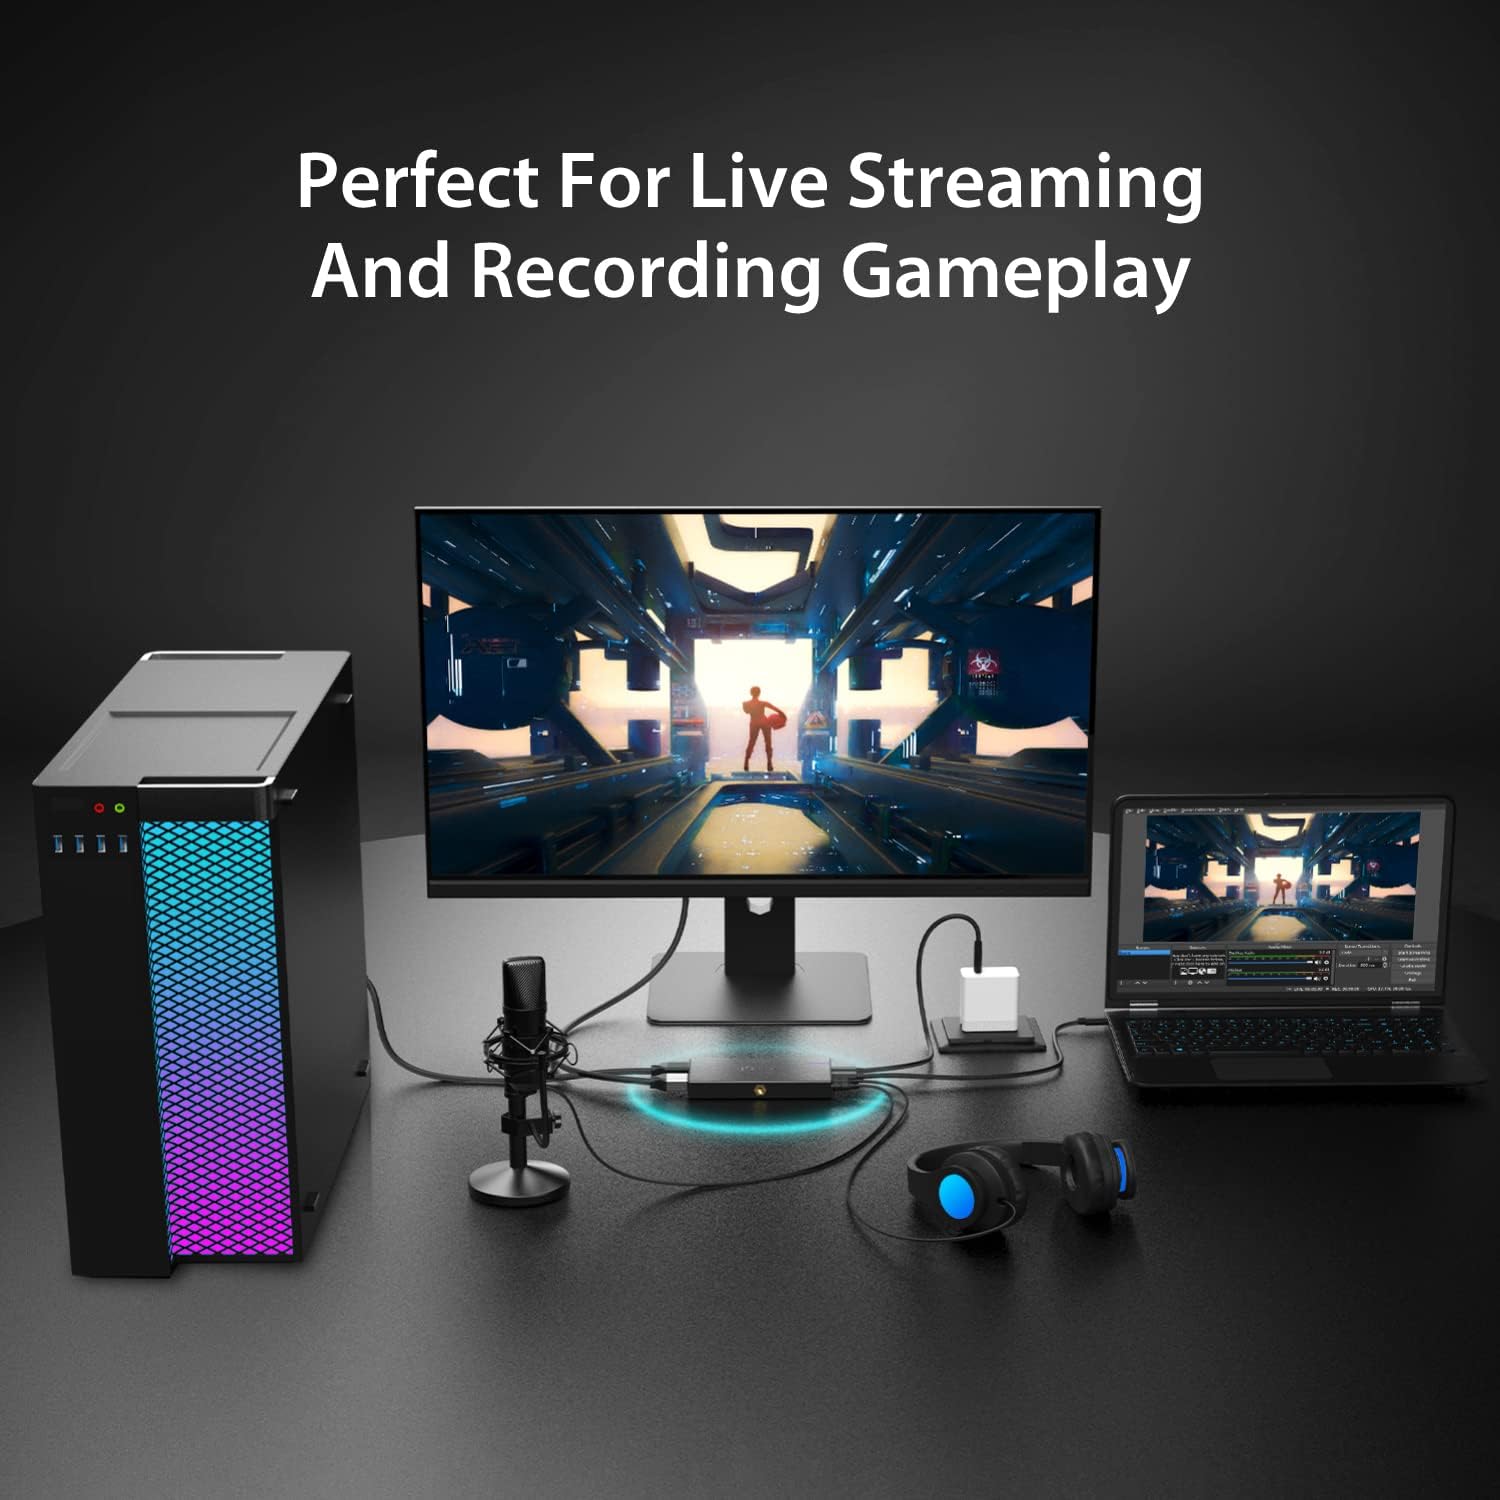
Figure 6.1: Live Streaming and Recording Gameplay Setup

Figure 6.2: Easy DSLR Attachment with 2 Cold Shoes Embedded
7. Maintenance
To ensure the longevity and optimal performance of your JVA14 capture card, follow these maintenance guidelines:
- Cleaning: Keep the device clean and free from dust. Use a soft, dry cloth for cleaning the exterior. Avoid using liquid cleaners or abrasive materials.
- Environment: Avoid exposing the device to extreme temperatures, direct sunlight, or high humidity. Operate it in a well-ventilated area.
- Storage: When not in use for extended periods, store the device in a cool, dry place, preferably in its original packaging or a protective case.
- Cable Care: Handle cables gently. Avoid sharp bends or excessive pulling, which can damage the connectors or internal wires.
8. Troubleshooting
If you encounter issues with your JVA14 capture card, refer to the following common problems and solutions:
- No Video Signal:
- Ensure all HDMI cables are securely connected to the correct ports (HDMI In from source, HDMI Out to display).
- Verify your gaming console or video source is powered on and outputting video.
- Check your streaming software settings to ensure the JVA14 is selected as the video capture device.
- If using a Meta Quest 3 or similar device, try unplugging and re-plugging the USB-C cable, potentially flipping the connector, to resolve image quality issues.
- No Audio:
- Check audio settings in your streaming software to ensure the JVA14 is selected as the audio input device.
- Verify microphone and headphone connections are secure in the 3.5mm ports.
- Ensure audio output from your source device is enabled and not muted.
- Lag or Stuttering During Capture/Streaming:
- Ensure you are connecting the JVA14 to a USB 3.2 port on your computer. USB 2.0 connections may limit bandwidth and cause performance issues.
- Close unnecessary applications on your computer to free up system resources.
- Lower the capture resolution or frame rate in your streaming software settings.
- LED Indicator Not Displaying as Expected:
- While the LED indicator provides status, its behavior might vary. If the device is functioning correctly otherwise (video and audio are captured), this may not indicate a fault.
- Difficulty with OBS Studio Setup:
- The JVA14 is UVC compliant and generally compatible with OBS. However, software configuration can be complex. Refer to online tutorials and the OBS Studio documentation for specific setup steps. Many community resources are available to assist with OBS configuration.
9. Specifications
| Attribute | Value |
|---|---|
| Brand | j5create |
| Series | JVA14 |
| Item Model Number | JVA14 |
| Hardware Platform | Xbox, PC, PlayStation, Switch |
| Operating System Compatibility | Mac OS, Windows |
| Item Weight | 11.7 ounces |
| Product Dimensions (LxWxH) | 5.27 x 2.54 x 0.69 inches |
| Video Capture Resolution | 4K (30 FPS) |
| HDR Pass-through | 4K60 HDR, 2K144 HDR, 1080p240 Hz HDR |
| Hardware Interface | USB, USB Type C, HDMI |
| Power Delivery | 60W Pass-Through Charging |
10. Warranty and Support
For detailed warranty information, technical support, and frequently asked questions, please visit the official j5create website:
You may also find additional resources and community support for streaming software like OBS Studio through their respective official channels.
Related documentsJVA14


Ask a question about this manual
Ask about setup, troubleshooting, compatibility, parts, safety, or missing instructions. Manuals+ will review the question and use this page’s manual context to help answer it.