
BooiParts N1996
Desktop Motherboard for N1996 L-A690 T5900V E2589 AM2 DDR2
User Manual
Introduction
This manual provides comprehensive instructions for the installation, operation, maintenance, and troubleshooting of your BooiParts N1996 Desktop Motherboard. Please read this manual thoroughly before beginning installation to ensure proper setup and optimal performance. This motherboard is designed for desktop systems, supporting AM2 processors and DDR2 memory.
Product Overview

Figure 1: Top-down view of the BooiParts N1996 Desktop Motherboard, showing the CPU socket, RAM slots, PCI Express slot, and various connectors. This image provides a clear layout of the main components.

Figure 2: Angled perspective of the BooiParts N1996 Desktop Motherboard, highlighting the RAM slots (blue and green), the CPU socket, and the rear I/O panel. This view helps in identifying port locations.
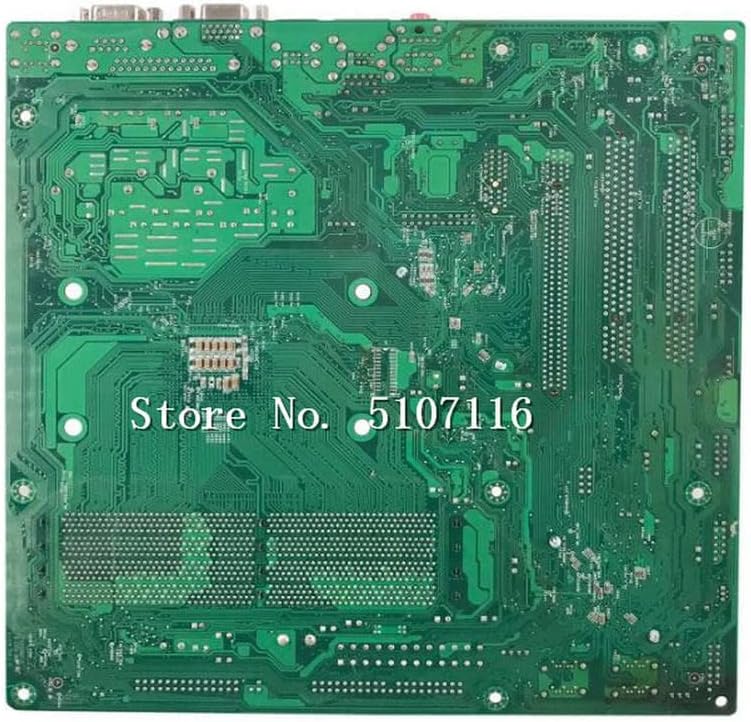
Figure 3: Bottom view of the BooiParts N1996 Desktop Motherboard, revealing the solder points and circuit traces. This side is typically mounted against the PC case tray.
Setup and Installation
Before proceeding with installation, ensure your workspace is clean, well-lit, and static-free. Use an anti-static wrist strap or frequently touch a grounded metal object to discharge static electricity.
1. Pre-Installation Checks
- Verify all components (CPU, RAM, power supply, case) are compatible with the N1996 motherboard.
- Unpack the motherboard carefully and place it on an anti-static surface.
- Familiarize yourself with the motherboard layout, identifying the CPU socket, RAM slots, expansion slots, and power connectors.
2. CPU Installation
- Gently lift the CPU socket lever.
- Align the CPU with the socket, matching the golden triangle/arrow on the CPU with the corresponding mark on the socket. Do not force the CPU into the socket.
- Lower the CPU into the socket.
- Press the lever back down to secure the CPU.
- Apply thermal paste to the CPU (if not pre-applied on the cooler) and install the CPU cooler according to its manufacturer's instructions.
3. RAM Installation
- Open the clips at both ends of the DDR2 RAM slots.
- Align the notch on the RAM module with the key in the RAM slot.
- Press down firmly on both ends of the RAM module until the clips snap into place.
4. Motherboard Mounting
- Install the I/O shield into the rear opening of your PC case.
- Carefully place the motherboard into the case, aligning the screw holes with the standoffs.
- Secure the motherboard with screws, ensuring it is firmly seated but not overtightened.
5. Connecting Peripherals and Power
- Connect the 24-pin ATX power connector and the 4-pin CPU power connector from your power supply to the motherboard.
- Connect SATA cables for storage drives (HDD/SSD) to the SATA ports on the motherboard.
- Connect front panel connectors (power button, reset button, USB ports, audio jacks, LED indicators) to their respective headers on the motherboard. Refer to your PC case manual for specific pin assignments.
- Install any expansion cards (e.g., graphics card) into the appropriate PCI Express slots and secure them.
- Connect display cables (VGA, DVI) to your graphics card or integrated graphics port.
Operating Instructions
1. First Boot and BIOS/UEFI Setup
- After connecting all necessary components and power, turn on your system.
- During the boot process, repeatedly press the DEL or F2 key (common keys, may vary) to enter the BIOS/UEFI setup utility.
- In the BIOS/UEFI, you can configure boot order, system time, CPU settings, memory settings, and other hardware parameters.
- Save changes and exit the BIOS/UEFI to continue booting.
2. Operating System and Driver Installation
- Insert your operating system installation media (USB drive or DVD).
- Follow the on-screen prompts to install your preferred operating system.
- After OS installation, install the necessary drivers for the motherboard chipset, audio, network, and any discrete graphics cards. These drivers are typically found on the manufacturer's website or an included driver CD/USB.
Maintenance
Regular maintenance helps ensure the longevity and stable operation of your motherboard and system.
- Dust Removal: Periodically clean dust from the motherboard and components using compressed air. Ensure the system is powered off and unplugged before cleaning.
- Component Checks: Ensure all cables are securely connected and no components are loose.
- BIOS Updates: Check the BooiParts website for BIOS updates. BIOS updates can improve compatibility, stability, and performance. Follow the specific instructions provided by BooiParts for BIOS flashing to avoid damaging the motherboard.
- Software Updates: Keep your operating system and drivers updated to the latest versions for optimal performance and security.
Troubleshooting
If you encounter issues with your motherboard, refer to the following common troubleshooting steps:
| Problem | Possible Cause | Solution |
|---|---|---|
| System does not power on. | Loose power cables, faulty power supply, incorrect front panel connections. | Check 24-pin and 4-pin CPU power connectors. Ensure front panel power switch is correctly connected. Test power supply. |
| No display on monitor. | Loose graphics card, incorrect display cable connection, faulty RAM. | Reseat graphics card and RAM modules. Ensure display cable is connected to the correct port (graphics card vs. integrated). Test with a known good monitor. |
| System powers on but no POST (Power-On Self-Test) or beeps. | CPU not seated correctly, RAM issues, BIOS corruption. | Reseat CPU and RAM. Clear CMOS (refer to motherboard manual for jumper/button location). |
| Operating system fails to load. | Incorrect boot order, corrupted OS installation, faulty storage drive. | Check boot order in BIOS. Attempt OS repair or reinstallation. Test storage drive. |
For more advanced troubleshooting, consult the BooiParts support website or a qualified technician.
Specifications
| Brand | BooiParts |
| Model Number | N1996 |
| CPU Socket | Socket AM2 |
| RAM Memory Technology | DDR2 |
| Memory Clock Speed | 2666 MHz (Note: This speed is unusually high for DDR2, typically DDR2 maxes out around 1066MHz. Using provided data.) |
| Memory Storage Capacity (Max) | 8 GB |
| Graphics Card Interface | PCI Express |
| Total USB Ports | 1 (Note: This likely refers to a specific internal header or a single type of port, not total available ports on the I/O shield.) |
Warranty Information
BooiParts products are manufactured to high quality standards. For specific warranty terms and conditions, please refer to the warranty card included with your product or visit the official BooiParts website. Keep your proof of purchase for warranty claims.
Support
For technical assistance, driver downloads, or further inquiries, please visit the official BooiParts support website. You may also find helpful resources and FAQs there. When contacting support, please have your product model number (N1996) and purchase details ready.
Note: This manual is for informational purposes only. BooiParts reserves the right to make changes to product specifications and features without prior notice.
Ask a question about this manual
Ask about setup, troubleshooting, compatibility, parts, safety, or missing instructions. Manuals+ will review the question and use this page’s manual context to help answer it.