
1. Important Safety Information
Please read and understand all safety warnings and instructions before operating this product. Failure to follow these instructions may result in electric shock, fire, or serious injury.
- Always wear eye protection and protective clothing when working with batteries.
- Ensure the work area is well-ventilated.
- Never smoke or allow a spark or flame in the vicinity of the battery or engine.
- Avoid touching battery terminals or clamps together.
- Keep out of reach of children.
- Disconnect the AC power cord before making or breaking battery connections.
WARNING: Cancer and reproductive harm. For more information go to www.P65Warnings.ca.gov.
2. Product Overview
The DEWALT DXAEC100 is a professional-grade battery charger and maintainer designed for 12V WET, GEL, and AGM automotive and marine batteries. It offers multiple functions including engine starting, battery charging, battery maintaining, battery reconditioning, and an alternator test.

Figure 2.1: Front view of the DEWALT DXAEC100 unit with battery clamps.
Key Features:
- 100 Amp Engine Start: Provides a powerful boost for starting vehicles with weak batteries.
- 30 Amp Automatic Battery Charger: Efficiently charges 12V batteries.
- 3 Amp Battery Maintainer: Keeps batteries at optimal charge during storage.
- Battery Reconditioner: Utilizes electric pulse technology to help reverse sulfate buildup and extend battery life.
- Alternator Check: Tests the vehicle's alternator to ensure proper operation.
- Digital LCD Screen: Provides clear display of charging status and battery voltage.
- Reverse Polarity Protection: Prevents damage from incorrect connections.

Figure 2.2: Labeled diagram of the DXAEC100's digital LCD screen and control buttons.
What's in the Box:
- DEWALT DXAEC100 Battery Charger and Maintainer Unit
- Heavy-duty powder-coated all-metal battery clamps with 6' cables
- User Manual (this document)
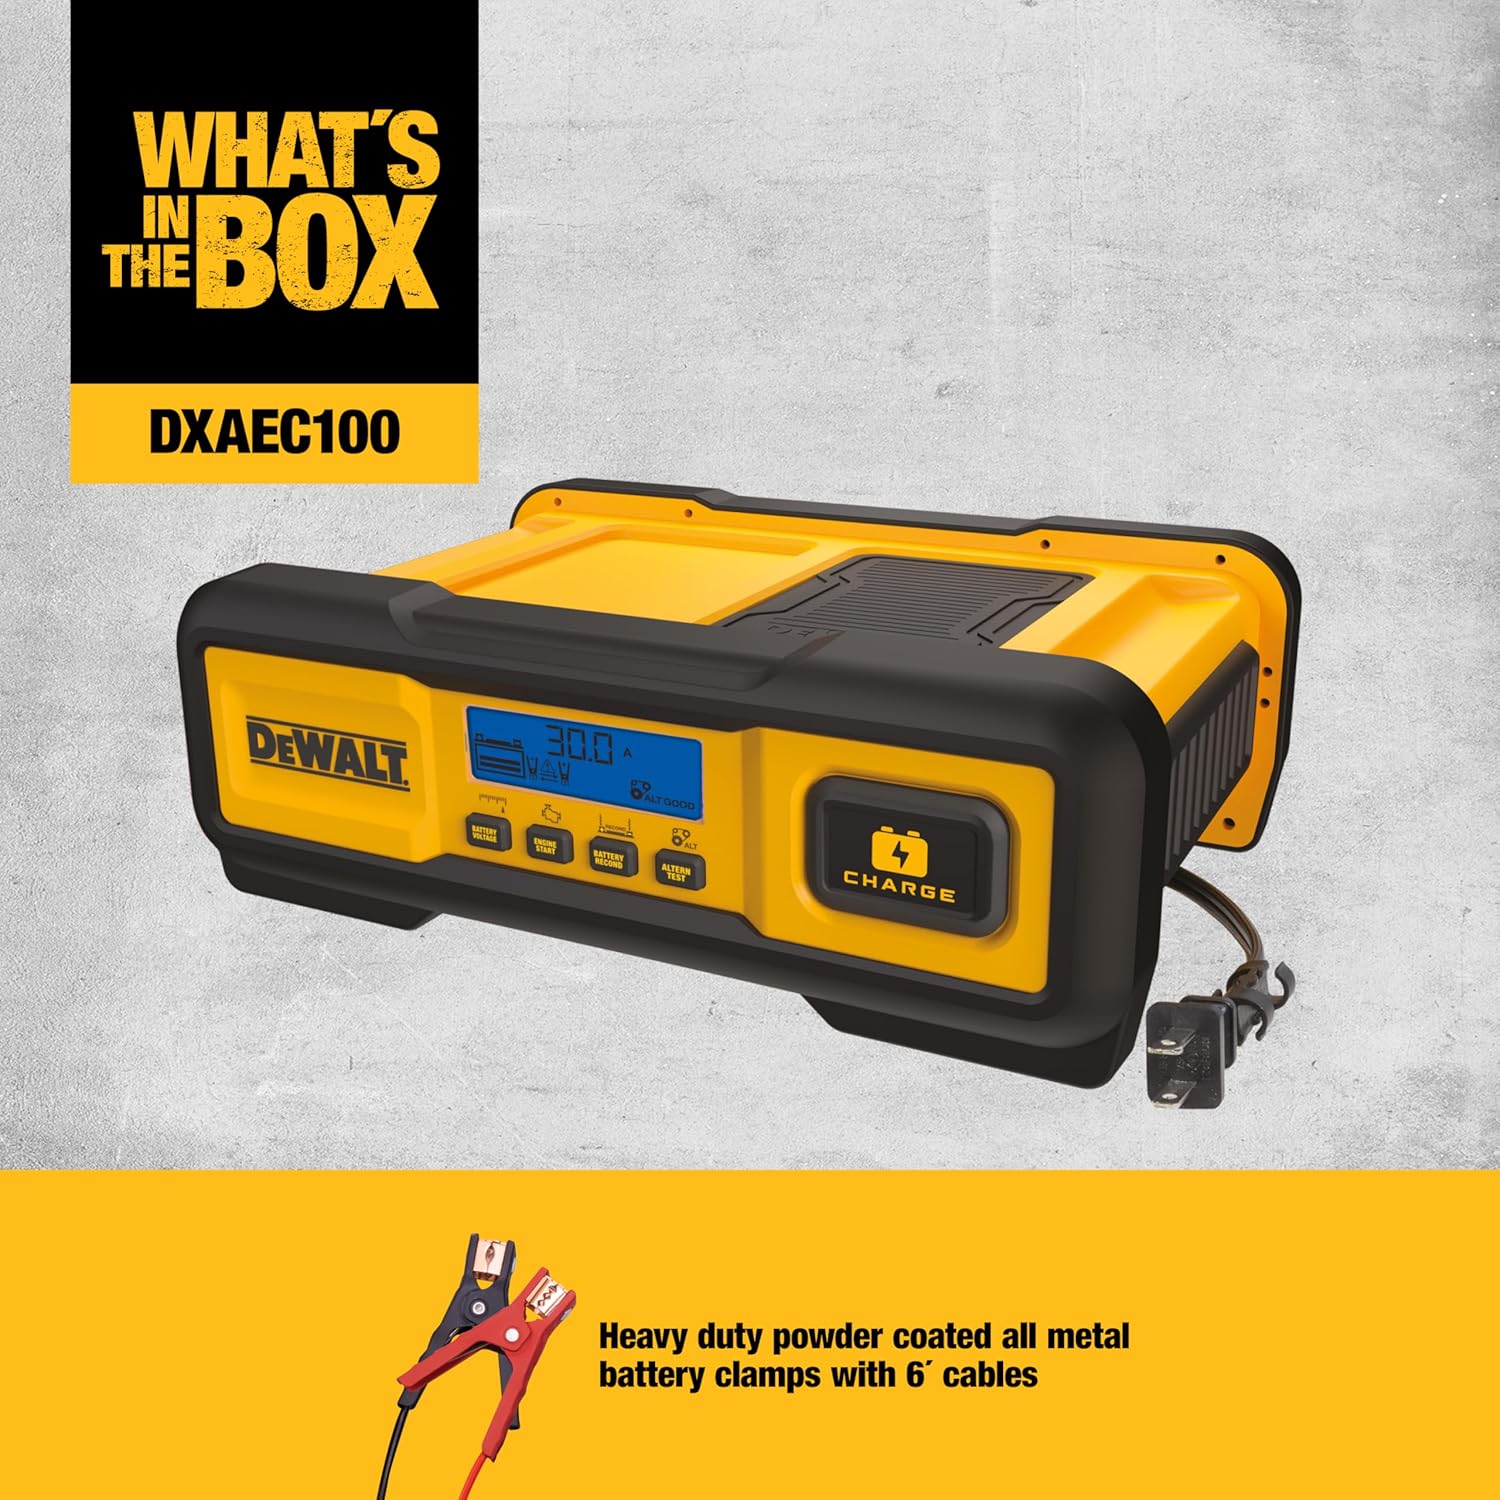
Figure 2.3: The DXAEC100 unit and its included battery clamps.
3. Setup
3.1 Connecting to a Battery
- Ensure the charger is unplugged from the AC power outlet.
- Identify the positive (+) and negative (-) terminals on the battery. The positive terminal is usually larger and marked with a plus sign.
- Connect the RED positive (+) clamp to the positive (+) battery terminal.
- Connect the BLACK negative (-) clamp to the negative (-) battery terminal. If connecting to a vehicle battery, connect the negative clamp to the vehicle chassis away from the battery and fuel line, if possible.
- Ensure all connections are secure.
3.2 Powering the Unit
- After connecting the battery clamps, plug the charger's AC power cord into a standard 110V AC wall outlet.
- The LCD screen will illuminate, and the unit will perform a self-test.

Figure 3.1: The DXAEC100 connected to a vehicle battery for charging.
4. Operating Instructions
The DXAEC100 features an easy-to-read LCD screen and push-button controls for various functions.
4.1 Automatic Charging
- Connect the charger to the battery and AC power as described in Section 3.
- The charger will automatically detect the battery type and voltage.
- Press the CHARGE button. The charger will begin the charging process, displaying the current and voltage on the LCD screen.
- The charger will automatically switch to maintenance mode once the battery is fully charged.
4.2 Engine Start Function (100 Amp)
Use this function to provide a quick boost to start a vehicle with a weak battery.
- Ensure the charger is properly connected to the battery and AC power.
- Press the ENGINE START button.
- Attempt to start the vehicle. Do not crank the engine for more than 5 seconds. Wait at least 3 minutes between attempts.
- Once the vehicle starts, disconnect the charger from the AC outlet, then disconnect the battery clamps.
4.3 Battery Maintainer (3 Amp)
This mode is ideal for keeping batteries fully charged during long periods of storage.
- Connect the charger to the battery and AC power.
- The charger will automatically enter maintenance mode once a full charge is detected or if the battery is already fully charged.
- The LCD will indicate 'MAINTAINING' or a similar status.
4.4 Battery Recondition
This feature uses electric pulse technology to help improve the charge capacity of older batteries by reducing sulfation.
- Connect the charger to the battery and AC power.
- Press the BATTERY RECOND button.
- The reconditioning process may take several hours. The charger will automatically switch to maintenance mode upon completion.
4.5 Alternator Test
This test helps determine if your vehicle's alternator is functioning correctly.
- Connect the charger to the vehicle battery. Do NOT connect to AC power.
- Start the vehicle's engine.
- Press the ALTERN TEST button.
- The LCD screen will display the alternator's output voltage. Refer to your vehicle's service manual for acceptable voltage ranges.
5. Maintenance
5.1 Cleaning
- Always disconnect the charger from AC power and the battery before cleaning.
- Wipe the case and cables with a soft, damp cloth. Do not use solvents or abrasive cleaners.
- Ensure the unit is completely dry before reconnecting to power.
5.2 Storage
- Store the charger in a cool, dry place when not in use.
- Keep the cables neatly coiled to prevent damage.
6. Troubleshooting
If you encounter issues with your DEWALT DXAEC100, refer to the following common problems and solutions:
| Problem | Possible Cause | Solution |
|---|---|---|
| Charger does not turn on. | No AC power; faulty outlet; internal fault. | Check AC power connection and outlet. Try a different outlet. If problem persists, contact customer support. |
| Charger displays 'BAD BATTERY' or does not charge a deeply discharged battery. | Battery voltage too low for detection; severely damaged battery. | The DXAEC100 may not initiate charging if the battery voltage is extremely low (e.g., below 4-5V). Try using a basic, non-automatic charger to bring the battery voltage up slightly, then connect the DXAEC100. If the battery is severely damaged, it may need replacement. |
| Charger displays 'REVERSE POLARITY'. | Battery clamps connected incorrectly. | Disconnect from AC power, then correctly connect the RED (+) clamp to the positive terminal and the BLACK (-) clamp to the negative terminal. Reconnect AC power. |
| Engine Start function does not work. | Insufficient charge; poor connections; battery too weak. | Ensure charger is plugged into AC power. Check battery clamp connections. Allow the charger to charge the battery for a few minutes before attempting engine start again. |
7. Specifications
| Feature | Specification |
|---|---|
| Model | DXAEC100 |
| Input Voltage | 120V AC, 60Hz |
| Output Voltage | 12V DC |
| Charging Amperage | 30 Amps (Automatic) |
| Maintaining Amperage | 3 Amps |
| Engine Start Amperage | 100 Amps |
| Compatible Battery Types | 12V WET, GEL, AGM |
| Dimensions (L x W x H) | 11 x 8.75 x 4 inches |
| Item Weight | 4 pounds |
| Manufacturer | Baccus Global LLC |

Figure 7.1: Physical dimensions of the DXAEC100 unit.
8. Warranty and Support
This DEWALT DXAEC100 Battery Charger and Maintainer comes with a Limited 1-Year Warranty from the date of purchase. This warranty covers defects in material and workmanship under normal use.
- For warranty claims or technical support, please contact DEWALT customer service.
- You can find more information and support resources by visiting the official DEWALT store on Amazon: DEWALT Store.

Figure 8.1: Limited 1-Year Warranty information.


