
1. Product Overview
The Vistefly M303 Pro is an advanced robot vacuum and mop designed to provide efficient and automated floor cleaning. It features powerful suction, intelligent navigation, and multiple control options for a convenient cleaning experience.

The Vistefly M303 Pro Robot Vacuum and Mop, showcasing its sleek design, integrated water tank for mopping, and a smartphone displaying the control application.
2. Package Contents
Please verify that all items are present in the package:
- Vistefly M303 Pro Robot Vacuum and Mop
- Charging Dock
- Power Adapter
- Remote Control (batteries included)
- Side Brushes (spare set included)
- High-Efficiency Filter (spare included)
- Mop Pads (spare set included)
- Water Tank
- Dustbin
- Magnetic Boundary Strips (with adhesive tabs)
- User Manual
An overview of the Vistefly M303 Pro's included accessories, such as the charging dock, remote control, side brushes, and mop pads.
3. Setup
3.1 Initial Charging
- Place the charging dock against a wall in an open, uncluttered area. Ensure there is at least 0.5 meters of clear space on either side and 1.5 meters in front of the dock.
- Connect the power adapter to the charging dock and plug it into a wall outlet.
- Place the robot onto the charging dock. The indicator light will show charging status. For first use, charge the robot completely (approximately 4-5 hours).

The robot vacuum automatically returning to its charging station when its battery is low, ensuring it's always ready for the next cleaning cycle.
3.2 Installing Side Brushes
Snap the left and right side brushes into their corresponding slots on the bottom of the robot until they click into place.
3.3 App Connection (Tuya Smart App)
- Download the "Tuya Smart" app from your smartphone's app store.
- Register or log in to your account.
- Follow the in-app instructions to add your Vistefly M303 Pro robot. This typically involves putting the robot into pairing mode (refer to the robot's specific pairing instructions in the quick start guide) and connecting to your home Wi-Fi network (2.4GHz only).

A user interacting with the Vistefly M303 Pro through its dedicated smartphone application, enabling remote control and monitoring.
3.4 Setting Up Magnetic Boundary Strips
Use the included magnetic boundary strips to create virtual walls or restrict the robot from entering specific areas. Place the strips flat on the floor in the desired locations. The robot will detect these strips and avoid crossing them.

The robot vacuum respecting a virtual boundary, demonstrating the ability to set forbidden zones to prevent cleaning in specific areas.
4. Operating Instructions
4.1 Starting a Cleaning Cycle
Press the power button on the robot or the remote control, or use the app to start a cleaning cycle. The robot will begin cleaning in its default mode.
4.2 Cleaning Modes
The Vistefly M303 Pro offers various cleaning modes:
- Auto Clean: The robot intelligently navigates and cleans the entire accessible area.
- Spot Clean: Focuses on a specific dirty area, cleaning in a spiral pattern.
- Edge Clean: Cleans along walls and furniture edges.
- Scheduled Clean: Set specific times for the robot to clean automatically via the app.

The robot vacuum systematically cleaning a room, illustrating its intelligent gyroscopic navigation for efficient route planning and location detection.
4.3 Vacuuming and Mopping
The robot can vacuum and mop simultaneously. Ensure the water tank is filled and the mop pad is attached for mopping functions.
- Vacuuming: The robot provides 3000Pa suction power, with three adjustable suction levels. It automatically increases suction on carpets for deeper cleaning.
- Mopping: Fill the water tank with clean water. Attach a clean mop pad. The robot will dispense water and mop the floor. Avoid using the mopping function on carpets.

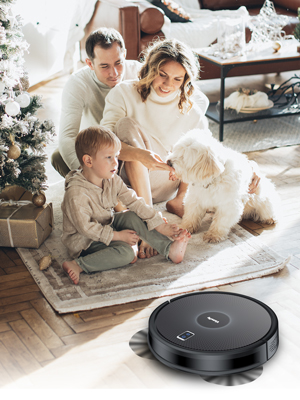
The Vistefly M303 Pro in action, demonstrating its combined vacuuming and mopping capabilities on both wooden and hard floors.

An illustration of the Vistefly M303 Pro's dual function, showing how it vacuums dry debris and mops wet surfaces simultaneously.
4.4 Voice Control Integration
The Vistefly M303 Pro is compatible with Amazon Alexa and Google Home. Follow the instructions in the Tuya Smart app to link your robot with your preferred voice assistant for hands-free control.
5. Maintenance
Regular maintenance ensures optimal performance and extends the lifespan of your robot vacuum.
5.1 Emptying the Dustbin
- Press the release button to remove the dustbin from the robot.
- Open the dustbin cover and empty its contents into a trash bin.
5.2 Cleaning the Filter
- Remove the filter from the dustbin.
- Tap the filter gently to remove dust and debris. Do not wash the HEPA filter with water.
- Replace the filter regularly (every 1-3 months, depending on usage).
5.3 Cleaning the Main Brush and Side Brushes
- Remove the main brush cover and lift out the main brush. Use the cleaning tool to remove hair and debris.
- Carefully pull off the side brushes. Remove any tangled hair or debris. Reinstall them, ensuring they are on the correct sides (L/R).
5.4 Cleaning the Water Tank and Mop Pad
- After mopping, remove the water tank and empty any remaining water.
- Detach the mop pad and wash it thoroughly. Allow it to air dry completely before reattaching.
6. Troubleshooting
If you encounter issues with your Vistefly M303 Pro, refer to the following common solutions:
- Robot not charging: Ensure the charging dock is powered on and the robot is correctly aligned with the charging contacts. Clean the charging contacts on both the robot and the dock.
- Robot getting stuck frequently: Clear obstacles, loose cables, and thick rugs from the cleaning path. Ensure the robot's wheels and brushes are free of debris.
- Poor suction performance: Empty the dustbin, clean or replace the filter, and check if the main brush and side brushes are free of tangles.
- App connection issues: Ensure your Wi-Fi network is 2.4GHz. Restart your router, robot, and smartphone. Re-attempt the pairing process.
- Mopping leaves streaks: Ensure the mop pad is clean. Use only clean water in the tank. For stubborn marks, pre-clean the area or use a suitable floor cleaner (check compatibility with robot mopping systems).
For persistent issues, consult the full user manual or contact Vistefly customer support.
7. Specifications
| Feature | Specification |
|---|---|
| Brand | Vistefly |
| Model | M303 Pro |
| Suction Power | 3000Pa |
| Battery Life | Up to 120 minutes |
| Battery Composition | Lithium Ion |
| Dimensions (L x W x H) | 32 x 32 x 7.6 cm |
| Weight | 5.09 kg |
| Special Features | Intelligent Mapping, Carpet Detection |
| Control Type | Amazon Alexa, Google Home, App Control, Remote Control |
| Compatible Devices | Google Home |
| Surface Recommendation | Hard Floors, Carpets |
8. Warranty and Support
The Vistefly M303 Pro Robot Vacuum and Mop comes with a manufacturer's warranty. Please refer to the warranty card included in your package for specific terms and conditions, including the warranty period and coverage details.
For technical support, troubleshooting assistance, or warranty claims, please contact Vistefly customer service through their official website or the contact information provided in your product documentation.
It is recommended to retain your proof of purchase for warranty purposes.