1. Introduction
Thank you for choosing the INGCO Rotary Hammer. This manual provides essential information for the safe and effective operation, maintenance, and troubleshooting of your new tool. Please read this manual thoroughly before first use and keep it for future reference. Proper use and maintenance will ensure optimal performance and extend the lifespan of your rotary hammer.
The INGCO Rotary Hammer is a versatile power tool designed for heavy-duty tasks, offering four distinct functions: drilling, hammer drilling, chiseling, and Vario-Lock for chisel positioning. It features a powerful 1500W motor, SDS-Plus chuck system for quick bit changes, vibration control, and a safety clutch for user protection.
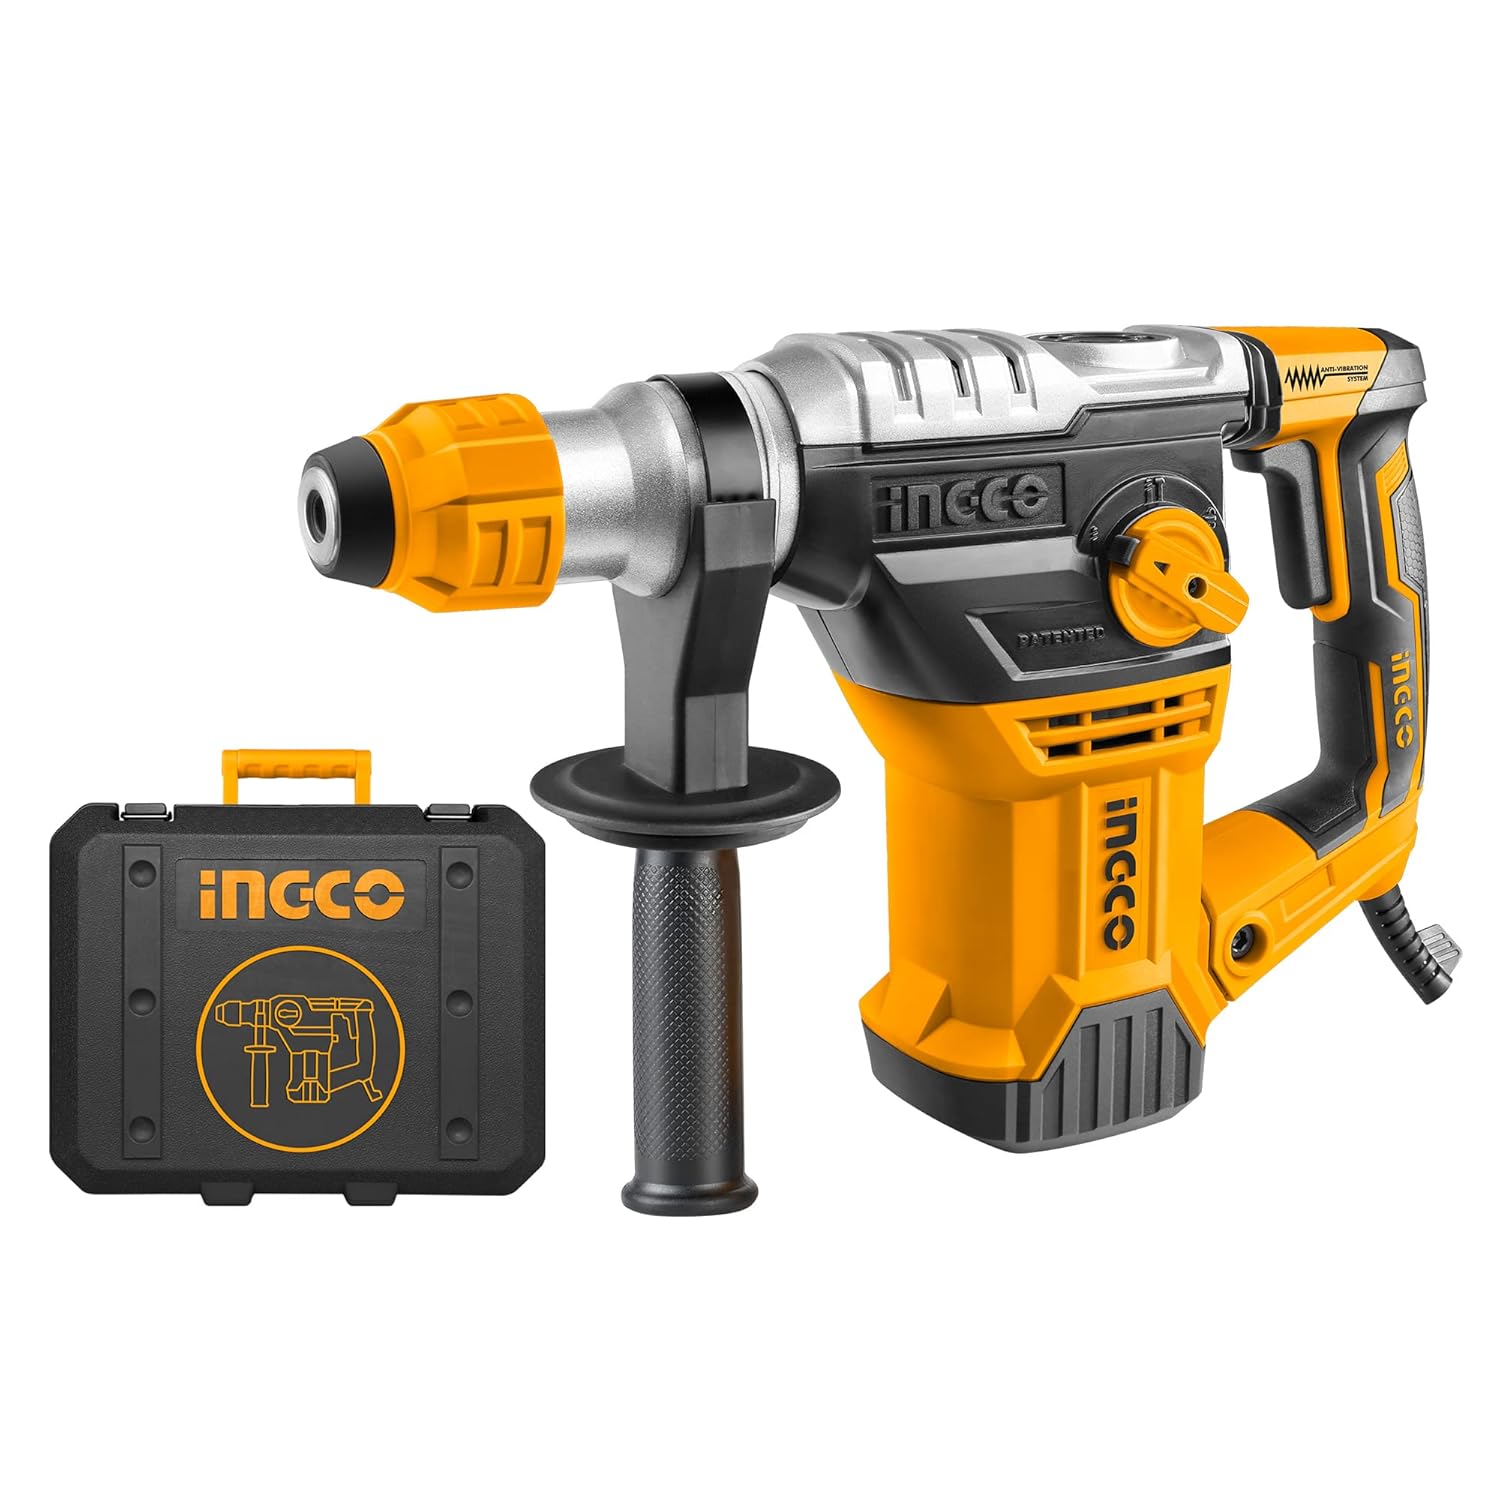
Figure 1: INGCO Rotary Hammer 1500W with included carrying case.
2. Safety Instructions
Always observe basic safety precautions to reduce the risk of fire, electric shock, and personal injury when operating power tools. Keep this manual for future reference.
2.1 General Power Tool Safety
- Work Area Safety: Keep the work area clean and well-lit. Cluttered or dark areas invite accidents. Do not operate power tools in explosive atmospheres, such as in the presence of flammable liquids, gases, or dust.
- Electrical Safety: Power tool plugs must match the outlet. Never modify the plug. Do not use any adapter plugs with earthed (grounded) power tools. Avoid body contact with earthed or grounded surfaces such as pipes, radiators, ranges, and refrigerators.
- Personal Safety: Always wear eye protection. Use hearing protection when operating the tool for extended periods. Wear a dust mask if operations create dust. Dress properly; do not wear loose clothing or jewelry. Keep hair, clothing, and gloves away from moving parts.
- Tool Use and Care: Do not force the power tool. Use the correct power tool for your application. Disconnect the plug from the power source before making any adjustments, changing accessories, or storing power tools. Store idle power tools out of the reach of children.
2.2 Specific Rotary Hammer Safety
- Hearing Protection: Hammer drilling and chiseling operations can cause significant noise. Always wear appropriate hearing protection.
- Dust Protection: Drilling and chiseling in masonry and concrete produce dust. Wear a dust mask and ensure adequate ventilation.
- Secure Workpiece: Always secure the workpiece firmly. Holding it by hand can lead to loss of control and injury.
- Hidden Wiring: Before drilling into walls, ceilings, or floors, check for hidden electrical wires, gas pipes, or water pipes using a suitable detector.
- Auxiliary Handle: Always use the auxiliary handle provided for better control and safety, especially during high-torque operations.
- Safety Clutch: This tool is equipped with a safety clutch. If the drill bit jams, the clutch disengages the drive to protect the user from sudden rotational forces. Release the trigger immediately if this occurs.
3. Product Overview
Familiarize yourself with the components of your INGCO Rotary Hammer before operation.

Figure 2: Key components of the INGCO Rotary Hammer.
- Tool Holder (SDS-Plus Chuck): For quick and secure insertion of SDS-Plus drill bits and chisels.
- Locking Sleeve: Used to secure or release the SDS-Plus accessories.
- Function Selector Button: Allows switching between the four operating modes: Hammer Drilling, Drilling, Vario-Lock, and Chiseling.
- On/Off Switch: Activates and deactivates the tool.
- Auxiliary Handle: Provides additional grip and control during operation.
3.1 Included Accessories
Your INGCO Rotary Hammer comes with the following accessories:

Figure 3: The rotary hammer and its included accessories.
- Rotary Hammer (1 unit)
- SDS-Plus Drill Bits (3 units)
- SDS-Plus Chisels (2 units)
- Auxiliary Handle (1 unit)
- Replaceable Carbon Brush Set (1 set)
- Grease (1 tube)
- Carrying Case (1 unit)
4. Setup
4.1 Attaching the Auxiliary Handle
The auxiliary handle can be rotated 360 degrees to suit left-handed or right-handed users and for optimal working positions. Loosen the handle by twisting it counter-clockwise, position it as desired, and then tighten it by twisting clockwise until secure.
4.2 Installing SDS-Plus Accessories
The SDS-Plus chuck system allows for quick and secure bit changes without additional tools.

Figure 4: Inserting an SDS-Plus drill bit into the chuck.
- Clean the shank of the drill bit or chisel before insertion.
- Pull back the locking sleeve on the tool holder.
- Insert the SDS-Plus accessory into the chuck until it clicks into place.
- Release the locking sleeve.
- Pull on the accessory to ensure it is securely locked. A slight axial play is normal for SDS-Plus systems.
4.3 Removing SDS-Plus Accessories
- Pull back the locking sleeve.
- Remove the accessory from the chuck.
5. Operating Instructions
The INGCO Rotary Hammer features a 4-function selector for various applications.

Figure 5: The 4-function selector dial.
5.1 Selecting Operating Mode
Rotate the function selector button to choose the desired mode:
- Hammer Drilling (Hammering and Rotation): For drilling in concrete, masonry, and stone. This mode combines rotary motion with powerful hammer blows.
- Drilling (Rotation Only): For drilling in wood, metal, ceramics, and plastics. Use appropriate drill bits for these materials.
- Chiseling (Hammer Only): For light chiseling, chipping, and demolition work in concrete and masonry. The tool provides hammer blows without rotation.
- Vario-Lock (Chisel Positioning): This mode allows you to adjust the angle of the chisel for optimal working position. Once the desired angle is set, switch back to Chiseling mode to lock the chisel in place and begin operation.
5.2 General Operation
- Ensure the correct accessory is installed and the function selector is set to the desired mode.
- Hold the tool firmly with both hands, using the main handle and the auxiliary handle.
- Position the drill bit or chisel on the workpiece.
- Press the On/Off switch to start the tool.
- Apply steady, even pressure. Do not force the tool; let the hammer mechanism do the work.
- When finished, release the On/Off switch and wait for the tool to come to a complete stop before setting it down.
5.3 Application Examples

Figure 6: Example of hammer drilling into a concrete surface.
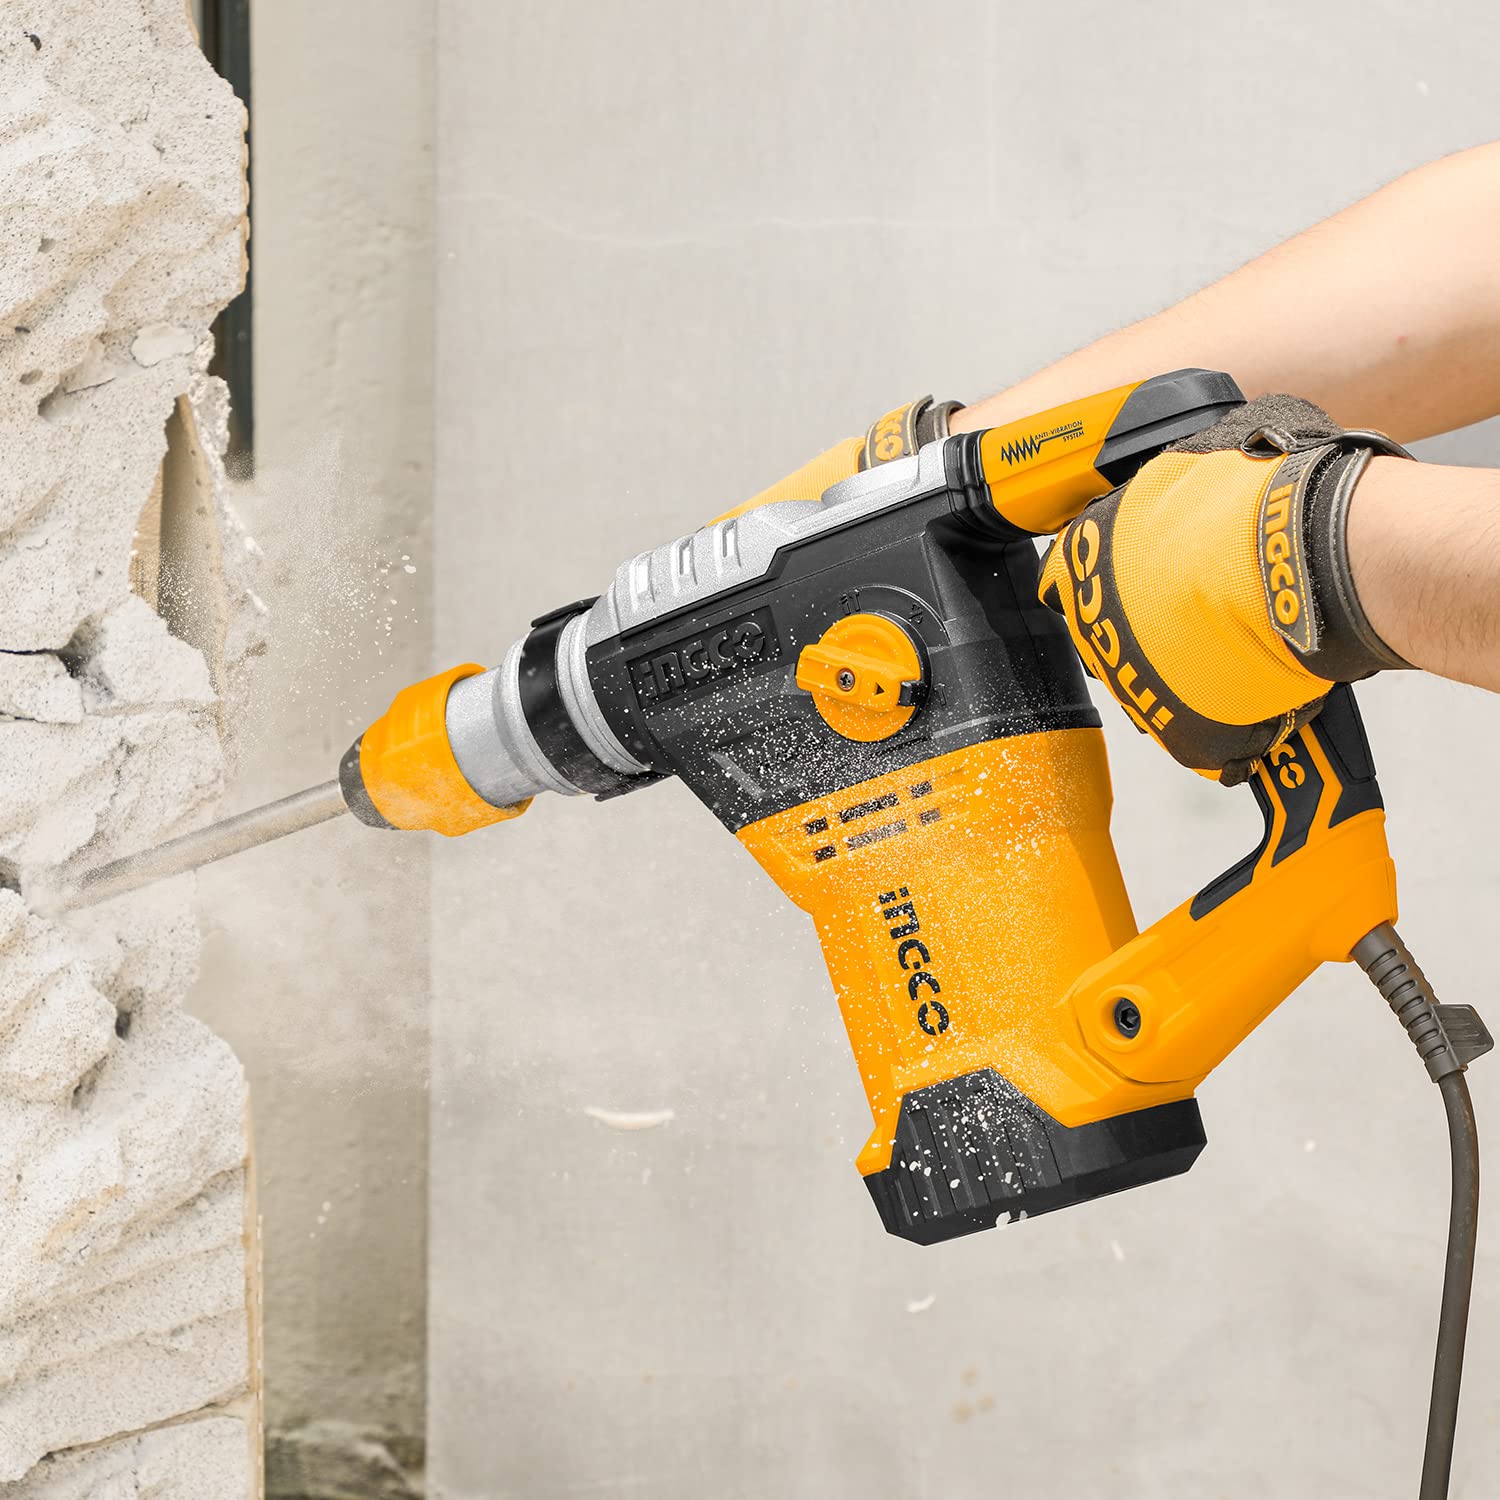
Figure 7: Example of chiseling a concrete wall.
6. Maintenance
Regular maintenance ensures the longevity and safe operation of your INGCO Rotary Hammer.
- Cleaning: After each use, clean the tool's ventilation slots and housing with a soft brush or compressed air. Do not use water or chemical cleaning agents. Keep the SDS-Plus chuck clean and lightly greased.
- Lubrication: Periodically apply a small amount of the provided grease to the SDS-Plus chuck and the shank of the drill bits/chisels to ensure smooth operation and reduce wear.
- Carbon Brush Replacement: The motor's carbon brushes are wear parts. When they are worn, the motor performance may decrease, or the tool may stop working. Replace both carbon brushes simultaneously using the spare set provided. Consult a qualified service technician if you are unsure how to perform this task.
- Cord Inspection: Regularly inspect the power cord for damage. If damaged, have it repaired by a qualified professional to avoid electrical hazards.
7. Troubleshooting
This section addresses common issues you might encounter with your rotary hammer.
| Problem | Possible Cause | Solution |
|---|---|---|
| Tool does not start | No power supply; Faulty On/Off switch; Worn carbon brushes | Check power connection; Contact service center; Replace carbon brushes |
| Reduced impact/drilling power | Worn carbon brushes; Insufficient lubrication; Damaged accessory | Replace carbon brushes; Apply grease to chuck/bit shank; Replace accessory |
| Excessive vibration | Bent or damaged accessory; Internal component issue | Replace accessory; Contact service center |
| Tool stops during operation (safety clutch activated) | Drill bit jammed in workpiece | Release trigger immediately, remove tool from workpiece, clear obstruction, restart |
8. Specifications
Technical data for the INGCO Rotary Hammer 1500W.

Figure 8: Product dimensions.
- Brand: Ingco
- Model: One button with four functions
- Power Source: Corded Electric
- Maximum Power: 1500 Watts
- Impact Energy: 5.5 Joules (J)
- No-Load Speed: 0-850 RPM
- Impact Frequency: 0-4400 bpm (blows per minute)
- Voltage: 220 Volts
- Amperage: 16 Amps
- Chuck Type: SDS-Plus
- Drilling Capacity (Concrete): 32 mm
- Drilling Capacity (Steel): 13 mm
- Drilling Capacity (Wood): 40 mm
- Item Weight: 8.8 kg (8800 Grams)
- Product Dimensions: 30 x 30 x 20 cm
- Material: Metal
- Color: Yellow & Black
9. Warranty and Support
Your INGCO Rotary Hammer is covered by a 24 Months Defect Free Warranty from the date of purchase. This warranty covers manufacturing defects under normal use. Please retain your purchase receipt as proof of purchase.
For any technical assistance, warranty claims, or customer support, please contact INGCO customer service. Our team is available for 7*24 hours reply Customer Support to assist you with any queries or issues you may encounter.
For service inquiries, please refer to the contact information provided with your product packaging or visit the official INGCO website.


