
1. Product Overview
The Goreit XHP70.2 LED Flashlight is a high-performance, rechargeable tactical torch designed for various outdoor and emergency applications. Featuring a powerful XHP70.2 LED chip, it delivers up to 15000 lumens of super bright light. Its robust aerospace-grade aluminum alloy construction ensures durability and IP67 waterproof rating. The flashlight offers multiple light modes, a zoomable beam, and a convenient USB input/output for charging and power bank functionality.
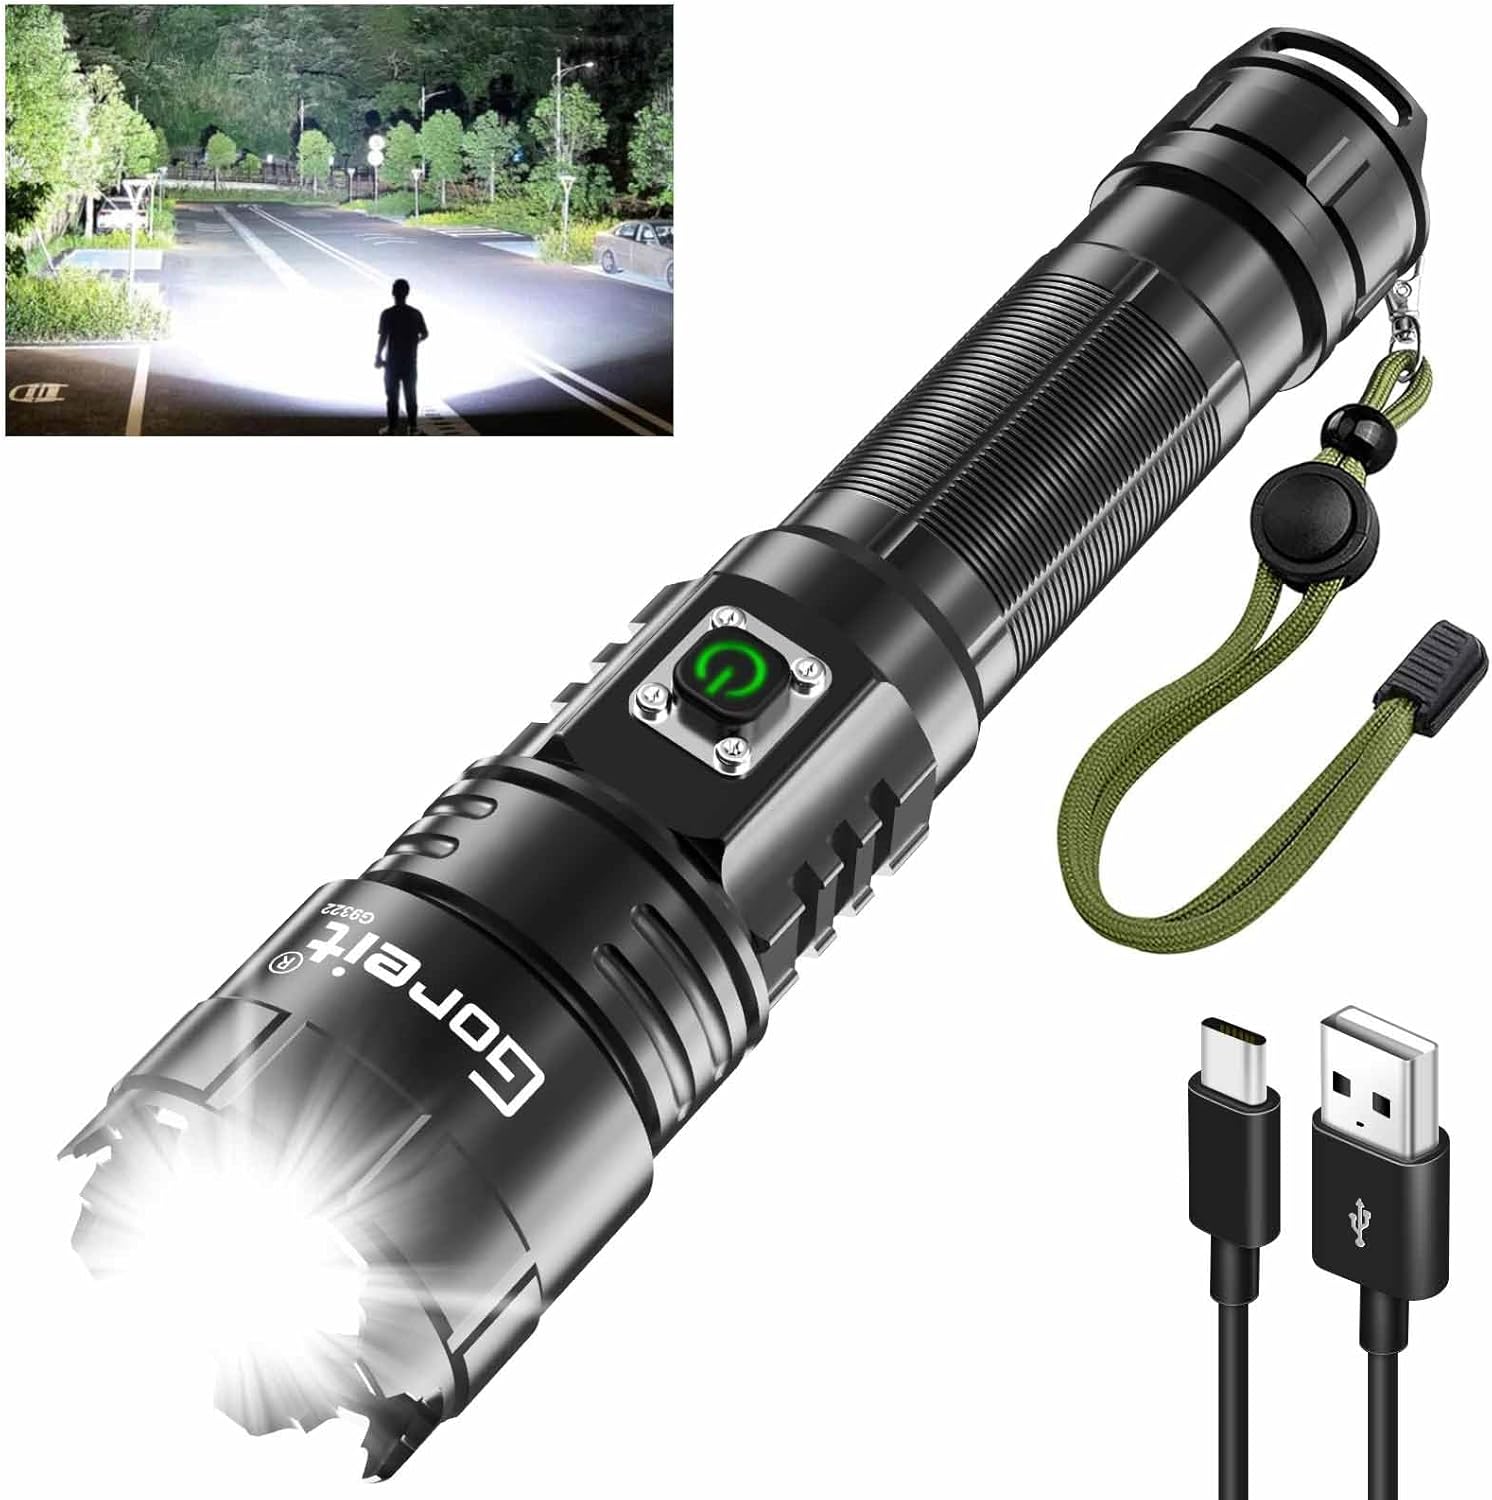
Image: The Goreit XHP70.2 LED Flashlight, showcasing its design, included USB charging cables, and an inset image demonstrating its powerful beam illuminating a distant area.
2. Safety Information
- Caution: To prevent accidental activation and battery drain, press and hold the power switch for 3 seconds to turn the flashlight ON or OFF.
- Do not shine the light directly into eyes. The high intensity beam can cause temporary vision impairment.
- Keep out of reach of children.
- Do not disassemble the flashlight head or internal components, as this may damage the device and void the warranty.
- Use only the specified battery type and charging methods.
- Avoid exposing the flashlight to extreme temperatures or corrosive liquids.
3. Package Contents
Upon opening your Goreit Flashlight package, please verify that all the following items are included:
- 1 x Goreit Rechargeable Flashlight
- 1 x Lithium-Ion Battery (pre-installed or separate)
- 1 x USB Charging Cable (Type-C)
- 1 x Lanyard
- 1 x Operating Instructions Manual (this document)

Image: A visual representation of the items included in the Goreit flashlight package, such as the flashlight unit, battery, USB cable, and lanyard.
4. Setup
4.1 Battery Installation
If the battery is not pre-installed, unscrew the tail cap of the flashlight. Insert the provided Lithium-Ion battery with the positive (+) end facing towards the head of the flashlight. Screw the tail cap back on securely.
4.2 Initial Charging
Before first use, it is recommended to fully charge the flashlight. Connect the supplied USB charging cable to the flashlight's USB port and to a compatible USB power source (e.g., wall adapter, computer, power bank). The indicator light on the switch will turn red during charging and green when fully charged.

Image: A diagram illustrating the USB input and output capabilities of the flashlight, showing how it can be recharged via various USB ports and used to charge other devices.
5. Operating Instructions
5.1 Power On/Off
To turn the flashlight ON, press and hold the power switch for approximately 3 seconds. To turn the flashlight OFF, press and hold the power switch for approximately 3 seconds again.
5.2 Light Modes
Once the flashlight is on, short press the power switch to cycle through the 5 available light modes:
- High: Maximum brightness for powerful illumination.
- Medium: Balanced brightness for general use.
- Low: Reduced brightness for extended battery life or close-range tasks.
- Strobe: Rapid flashing light for signaling or disorientation.
- SOS: International Morse code signal for emergencies.

Image: A visual guide to the flashlight's five light modes (High, Medium, Low, Strobe, SOS) and the instruction to press and hold the switch for 3 seconds to activate the device.
5.3 Zoom Function (Adjustable Focus)
The flashlight features an adjustable focus mechanism. Gently push or pull the head of the flashlight to switch between a focused spotlight beam and a wide floodlight beam.
- Spotlight: Pull the head outwards for a narrow, long-distance beam. Ideal for pinpointing objects far away.
- Floodlight: Push the head inwards for a wide, diffused beam. Suitable for illuminating a large area up close.

Image: A visual comparison demonstrating the flashlight's ability to switch between a focused spotlight for long-range illumination and a wide floodlight for broader area coverage.
6. Charging and Power Bank Function
6.1 Charging the Flashlight
The flashlight is equipped with a built-in USB charging port. To charge, connect the USB-C end of the provided cable to the flashlight's charging port and the USB-A end to a power adapter, computer, or car charger. The indicator light on the switch will glow red during charging and turn green when the battery is fully charged. Charging time is reduced, and the working time is extended up to 10 hours on low mode.

Image: A detailed diagram highlighting the upgraded XHP70.2 LED chip, which is central to the flashlight's powerful illumination and efficient energy use.
6.2 Power Bank Function (USB Output)
The flashlight can also function as a power bank to charge other electronic devices. Connect your device's charging cable to the flashlight's USB output port. This feature is useful for charging mobile phones or other small digital products in emergency situations.

Image: An icon illustrating the anti-slip texture design of the flashlight, enhancing grip and handling security.
7. Maintenance
- Cleaning: Wipe the flashlight body with a clean, soft cloth. For stubborn dirt, a slightly damp cloth can be used. Do not use abrasive cleaners or solvents.
- Battery Care: To prolong battery life, avoid fully discharging the battery frequently. Recharge the battery when the indicator light turns red. If storing for a long period, charge the battery every 3-6 months to maintain its health.
- Lubrication: Periodically apply a thin layer of silicone grease to the O-rings and threads to maintain waterproof integrity and smooth operation.
- Storage: Store the flashlight in a cool, dry place away from direct sunlight and extreme temperatures.
8. Troubleshooting
| Problem | Possible Cause | Solution |
|---|---|---|
| Flashlight does not turn on. | Battery is low or depleted. Battery inserted incorrectly. Power switch not pressed for 3 seconds. | Charge the battery fully. Check battery polarity (+/-). Press and hold the switch for 3 seconds. |
| Light output is dim. | Battery is low. Lens is dirty. | Recharge the battery. Clean the lens with a soft cloth. |
| Flashlight not charging. | Charging cable or adapter faulty. Charging port dirty. Battery not making contact. | Try a different cable/adapter. Clean the charging port. Ensure battery is properly seated. |
| Beam is inconsistent or flickers. | Loose connections. Low battery. | Tighten all parts (head, body, tail cap). Charge the battery. |
9. Specifications
| Feature | Detail |
|---|---|
| Brand | Goreit |
| Model Number | Goreit-AU-G9322 |
| Light Source | XHP70.2 LED Chip |
| Luminous Flux | 15000 Lumens |
| Light Modes | High, Medium, Low, Strobe, SOS |
| Power Source | Battery Powered (1 Lithium Ion battery included) |
| Voltage | 3.7 Volts |
| Charging | USB Rechargeable (USB Input & Output) |
| Material | Aerospace Grade Aluminum Alloy |
| Color | Black |
| Waterproof Rating | IP67 (Submersible up to 1 meter for 30 minutes) |
| Special Features | Zoomable Adjustable Focus, Weather & Shock Resistant, Safety Hammer Design |
| Product Dimensions | 3 x 18.01 x 4.29 cm |
| Item Weight | 330 g |
10. Warranty and Support
Goreit is committed to providing high-quality lighting products. For any questions, concerns, or assistance with your Goreit flashlight, please do not hesitate to contact our customer service team. We offer 7x24-hour customer service to ensure your satisfaction.
Please refer to your purchase documentation for specific warranty terms and conditions. Keep your proof of purchase for any warranty claims.