
Midea M6
Contents
Midea M6 Robot Vacuum and Scrub User Manual
Model: M6
1. Introduction
Thank you for choosing the Midea M6 Robot Vacuum and Scrub. This advanced cleaning device is designed to provide efficient and thorough cleaning of your floors, combining powerful vacuuming with effective mopping capabilities. Equipped with LDS navigation, the M6 intelligently maps your home for precise and systematic cleaning. Please read this manual carefully before using the product to ensure proper operation and maintenance.

The Midea M6 Robot Vacuum and Mop Cleaner, showcasing its sleek design, integrated water tank, dustbin, and accompanying mobile application interface.
2. Product Components
The Midea M6 Robot Vacuum and Scrub comes with the following main components:
- Midea M6 Robot Vacuum Unit
- Charging Dock
- Power Adapter
- Dustbin (600ml capacity)
- Water Tank (250ml capacity)
- Mop Pad
- Side Brushes (2)
- Cleaning Tool
- User Manual
3. Setup Guide
3.1 Unpacking and Placement
- Carefully remove all components from the packaging.
- Choose a suitable location for the charging dock. Ensure it is placed against a wall with at least 0.5 meters of clear space on either side and 1.5 meters in front.
- Connect the power adapter to the charging dock and plug it into a power outlet.
3.2 Initial Charging
Place the Midea M6 robot onto the charging dock. Ensure the charging contacts on the robot align with those on the dock. The robot will begin charging automatically. For first use, it is recommended to fully charge the robot before operation.
3.3 App Installation and Connection
To unlock the full potential of your Midea M6, download the Midea app on your smartphone.
- Scan the QR code in the manual or search for "Midea" in your app store (iOS/Android).
- Follow the in-app instructions to create an account and add your Midea M6 robot. Ensure your phone is connected to a 2.4GHz Wi-Fi network during setup.
- Once connected, the app allows for advanced features like mapping, scheduling, and zone cleaning.

This image illustrates the Midea M6 robot vacuum's advanced LiDAR navigation system, which accurately maps your home environment, identifying and navigating around objects such as pets and toys, even in low light conditions.
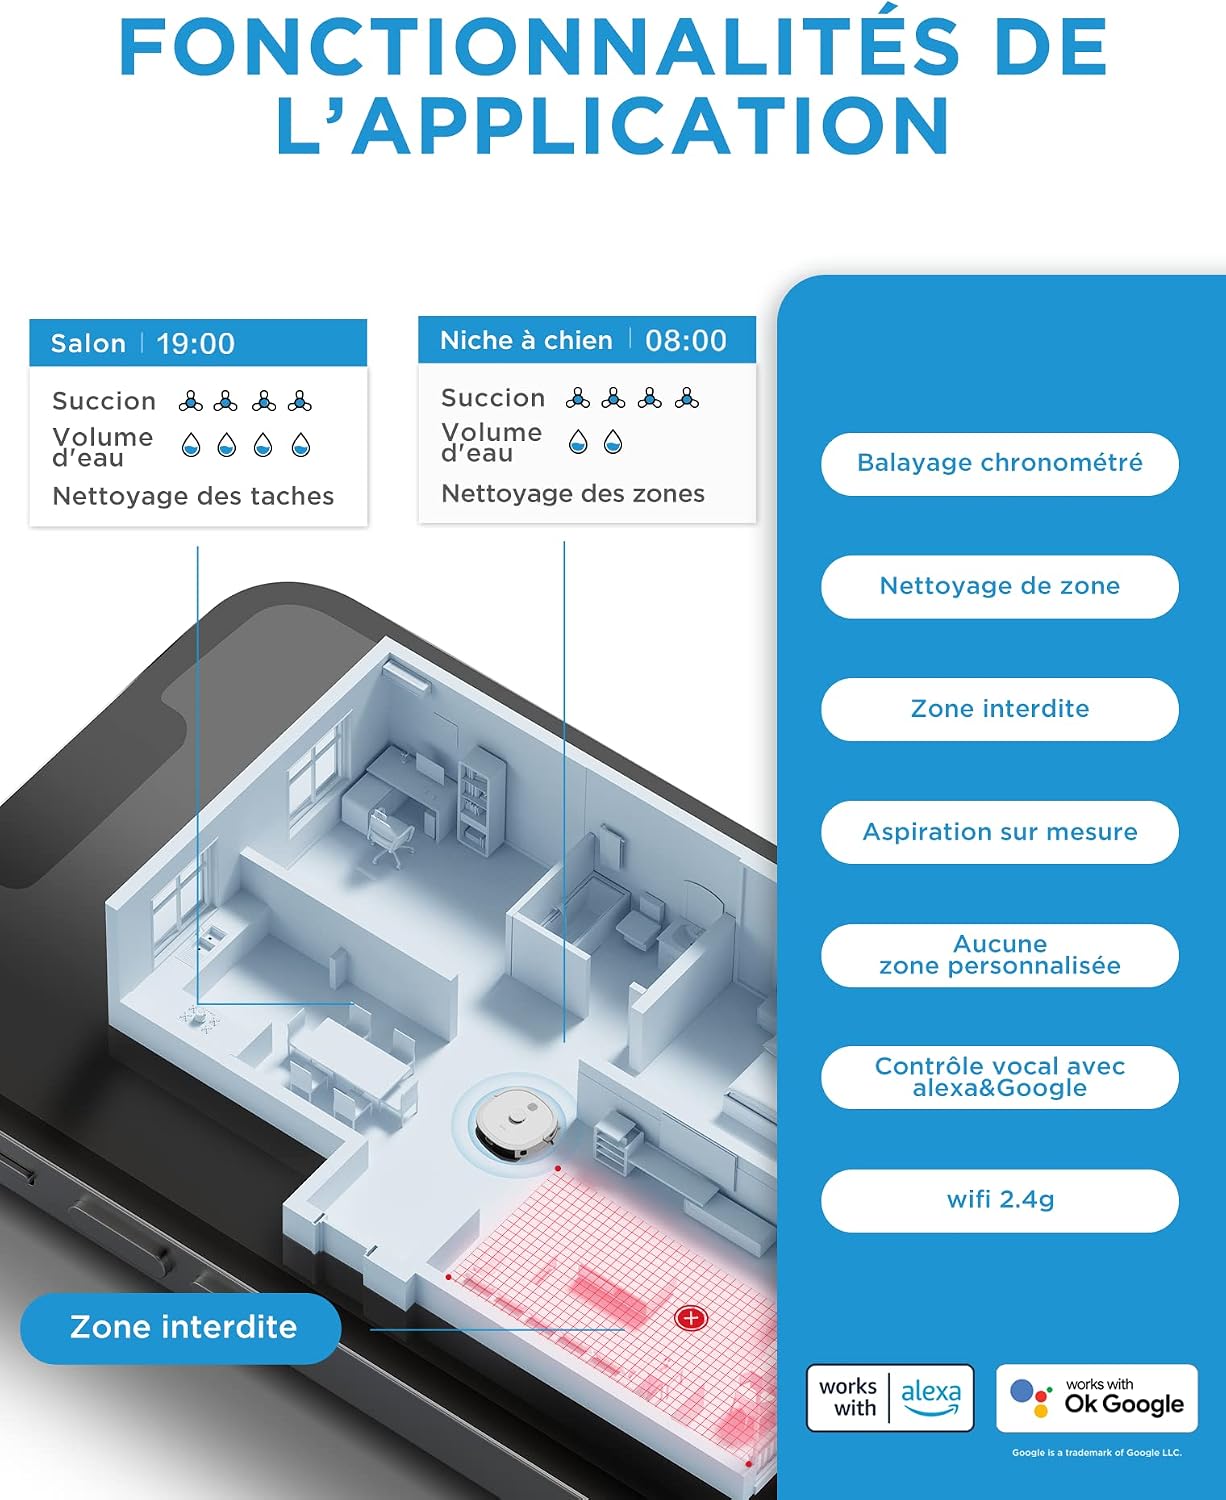
A visual representation of the Midea M6 mobile application, highlighting features such as timed cleaning schedules, zone cleaning, setting forbidden areas, customized suction, and voice control integration with Alexa and Google Assistant.
4. Operating Instructions
4.1 Starting a Cleaning Cycle
- From the Robot: Press the power button on the robot to start a general cleaning cycle.
- From the App: Open the Midea app and select 'Start Cleaning' for a full clean, or choose specific modes like 'Zone Clean' or 'Spot Clean'.
4.2 Cleaning Modes
The Midea M6 offers versatile cleaning options:
- Vacuuming: Utilizes powerful 2000Pa suction to pick up dust, debris, and pet hair.
- Mopping: The 250ml intelligent water tank allows for wet mopping. Adjust water flow via the app for different floor types.
- Vacuum & Mop (2-in-1): Simultaneously vacuums and mops for a comprehensive clean. This is ideal for hard floors.
- Carpet Boost: The robot automatically increases suction power to maximum when it detects carpets, ensuring deeper cleaning.

An exploded diagram of the Midea M6 robot vacuum, illustrating its 2-in-1 design with a 250ml intelligent water tank for mopping and a 600ml large dustbin for vacuuming, allowing for combined cleaning operations.
4.3 Smart Features
- Smart Mapping: The LDS navigation system creates an accurate, interactive map of your home, allowing for personalized cleaning plans.
- Scheduled Cleaning: Set specific times for the robot to clean automatically via the app.
- No-Go Zones & Virtual Walls: Define areas the robot should avoid using the app.
- Voice Control: Integrate with Alexa or Google Assistant for hands-free control.
- Multi-Map Memory: Store multiple floor plans in the app, ideal for multi-story homes.

This graphic compares the Midea M6's intelligent, systematic S-shaped cleaning path, which ensures thorough coverage and avoids missed spots, with the less efficient, random cleaning patterns of other robot vacuums.

The Midea M6 robot vacuum supports multi-floor mapping, enabling it to store and easily switch between different floor plans within the application, ideal for multi-story homes.

This image highlights the Midea M6's powerful 2000Pa suction, effective for cleaning hair, dust, and debris, and its 120-minute battery life, with automatic return to the charging station and resume cleaning function.
5. Maintenance
Regular maintenance ensures optimal performance and extends the lifespan of your Midea M6 robot vacuum.
5.1 Dustbin Emptying
Empty the 600ml dustbin after each cleaning cycle or when the app indicates it is full. Open the robot's top cover, remove the dustbin, and dispose of collected debris.
5.2 Water Tank Refilling and Mop Pad Cleaning
Refill the 250ml water tank with clean water before mopping. Remove the mop pad after each use, rinse it thoroughly, and allow it to air dry.
5.3 Brush Cleaning
- Main Brush: Periodically remove the main brush and use the provided cleaning tool to remove tangled hair and debris.
- Side Brushes: Check the side brushes regularly for wear or entanglement. Clean them as needed and replace if damaged.

A comparison showing the Midea M6's advanced cleaning head, featuring two side brushes and an improved main brush for more efficient and quieter cleaning, compared to other robots with fewer or less effective brush configurations.
5.4 Filter Cleaning
The HEPA filter inside the dustbin should be cleaned regularly. Tap it gently to remove dust or use the cleaning tool. Replace the filter every 3-6 months, depending on usage.
5.5 Sensor Cleaning
Wipe the robot's sensors (cliff sensors, wall sensors, charging contacts) with a clean, dry cloth to ensure accurate navigation and charging.
6. Troubleshooting
If you encounter issues with your Midea M6, refer to the following common problems and solutions:
| Problem | Possible Cause | Solution |
|---|---|---|
| Robot does not turn on | Low battery; Power button not pressed | Place robot on charging dock; Press and hold power button for 3 seconds |
| Robot cannot charge | Charging contacts dirty; Charging dock not powered | Clean charging contacts on robot and dock; Ensure power adapter is plugged in |
| Poor cleaning performance | Dustbin full; Brushes tangled; Filter clogged | Empty dustbin; Clean main and side brushes; Clean/replace filter |
| Robot gets stuck frequently | Obstacles in path; Cliff sensors dirty | Clear obstacles; Clean cliff sensors |
| App connection issues | Incorrect Wi-Fi password; Router too far; Not 2.4GHz network | Verify password; Move robot closer to router; Ensure 2.4GHz Wi-Fi |
For more detailed troubleshooting or persistent issues, please refer to the Midea app's help section or contact Midea customer support.
7. Specifications
| Feature | Detail |
|---|---|
| Brand | Midea |
| Model Number | Robot aspi |
| Colour | Large X |
| Package Dimensions | 44 x 39.2 x 14 cm |
| Item Weight | 5 kg |
| Dustbin Capacity | 600 Millilitres |
| Water Tank Capacity | 250 Millilitres |
| Power / Wattage | 40 watts |
| Voltage | 14.4 Volts |
| Noise Level | 65 dB |
| Filter Type | HEPA |
| Auto Shutoff | Yes |
| Compatible Models | Smartphone (via Midea App) |
8. Warranty and Support
Midea products are manufactured to high-quality standards and are covered by a limited warranty. Please refer to the warranty card included in your product packaging or visit the official Midea website for detailed warranty terms and conditions specific to your region.
For technical support, service, or inquiries, please contact Midea customer service through the contact information provided on the official Midea website or within the Midea mobile application. When contacting support, please have your product model number (M6) and purchase information ready.
Ask a question about this manual
Ask about setup, troubleshooting, compatibility, parts, safety, or missing instructions. Manuals+ will review the question and use this page’s manual context to help answer it.