Ortis Automatic Vacuum Switch Instruction Manual
Model: HVC-03Y
1. Product Overview
The Ortis Automatic Vacuum Switch is designed to enhance efficiency and safety in your workshop by automatically controlling your dust collection system in conjunction with your power tools. This device features multiple outlets, configurable settings for actuation threshold and shutoff delay, and clear LED indicators for ease of use. It helps prevent circuit overload and ensures a cleaner working environment by activating the vacuum only when a tool is in use.

Figure 1: The Ortis Automatic Vacuum Switch, showing its three outlets and integrated power cord.
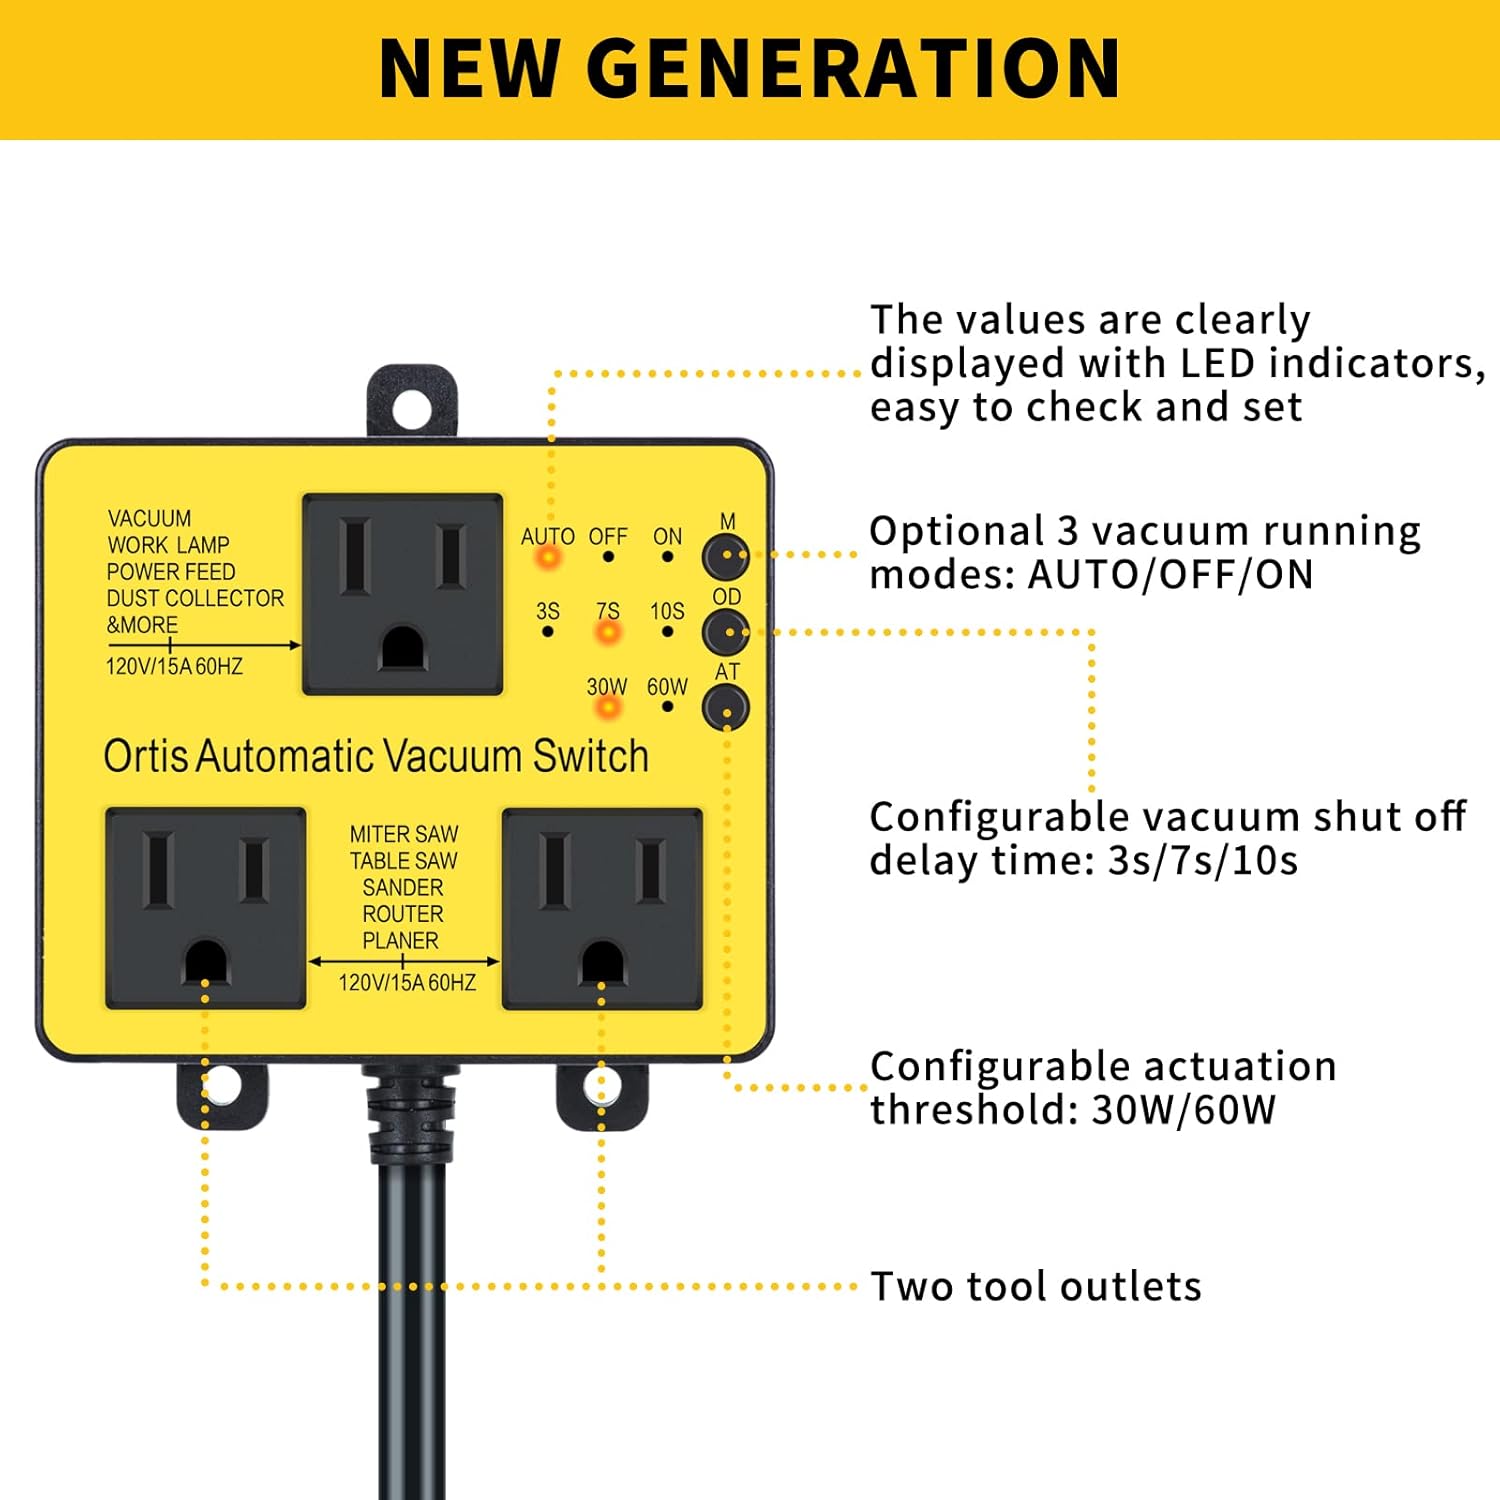
Figure 2: Overview of the new generation features, including LED indicators for modes, delay, and threshold settings.
2. Setup Instructions
Follow these simple steps to set up your Ortis Automatic Vacuum Switch:
- Plug into Wall Outlet: Plug the main power cord of the automatic vacuum switch into a standard 120V/15A wall socket.
- Connect Vacuum: Plug your vacuum cleaner or dust collector into the designated 'VACUUM' outlet on the switch. Ensure your vacuum is switched to the 'ON' position.
- Connect Power Tools: Plug your power tools (e.g., miter saw, table saw, sander, router, planer) into the two 'TOOL' outlets on the switch.

Figure 3: Visual guide for the easy 3-step setup process of the automatic vacuum switch.
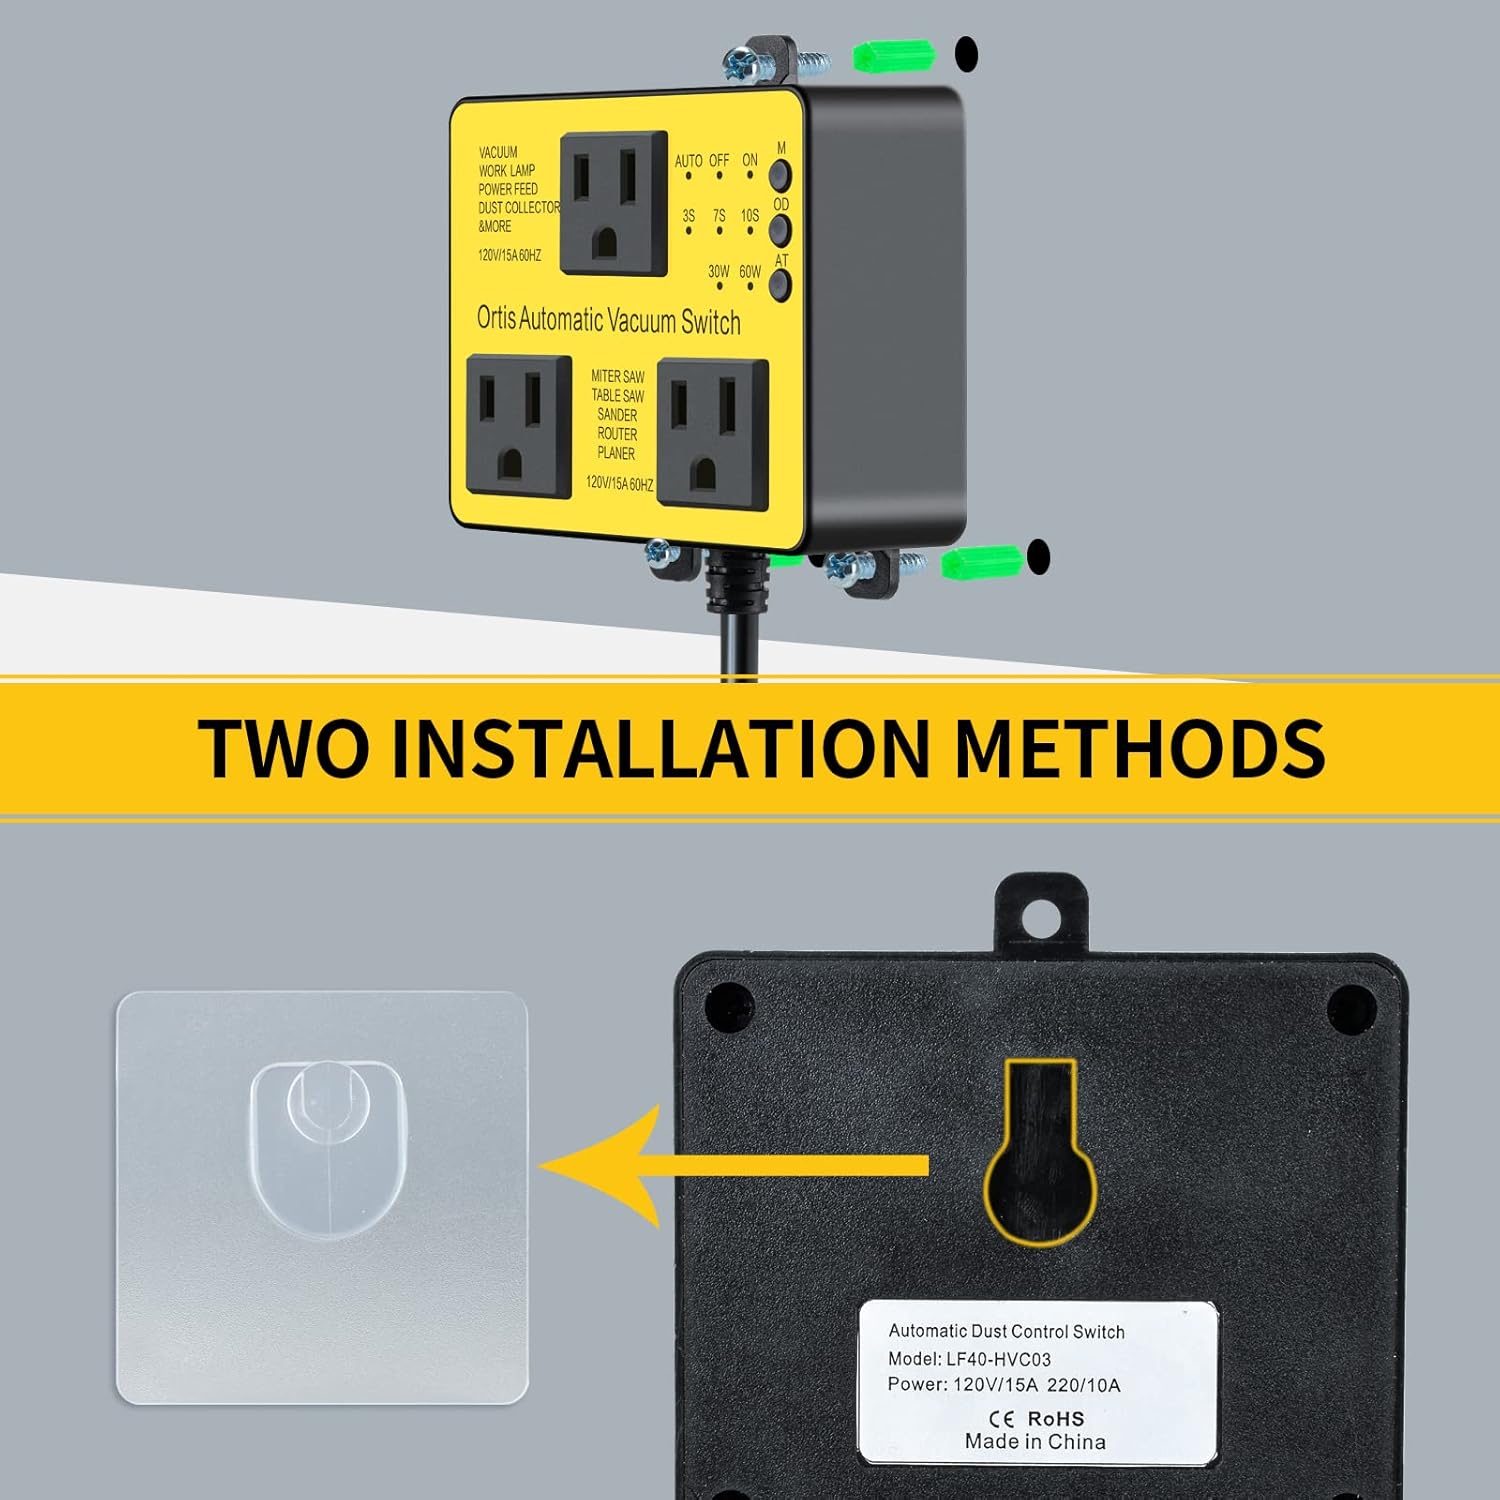
Figure 4: The two primary methods for installing the switch: screw mounting or adhesive hook mounting.
3. Operating Instructions
The Ortis Automatic Vacuum Switch offers flexible operating modes and configurable settings to suit your needs.
3.1. Operating Modes
The switch features three main operating modes, selectable via the 'M' button:
- AUTO Mode: The vacuum automatically turns on when a connected power tool is activated and turns off after a set delay once the tool stops. This is the recommended mode for most dust collection applications.
- OFF Mode: The vacuum remains off, regardless of power tool activity.
- ON Mode: The vacuum remains continuously on. This is useful for general shop cleanup or when you need constant vacuuming without tool activation.

Figure 5: The three vacuum running modes (AUTO, OFF, ON) indicated by LEDs.
3.2. Configurable Shutoff Delay Time
After your power tool is turned off, the vacuum can continue to run for a short period to clear remaining airborne debris. This delay is configurable using the 'OD' button:
- 3 seconds
- 7 seconds
- 10 seconds
Select the delay time that best suits your workflow and the type of dust being generated.

Figure 6: Adjustable shutoff delay times (3s, 7s, 10s) for the vacuum.
3.3. Configurable Actuation Threshold
The switch allows you to set the power threshold at which the vacuum will activate when a tool is turned on. This prevents the vacuum from running unnecessarily or failing to activate with lower-power tools. Use the 'AT' button to select:
- 30W (Watts)
- 60W (Watts)
Choose the threshold appropriate for your primary power tools.

Figure 7: Configurable actuation thresholds (30W, 60W) for tool detection.
3.4. Turn On Delay & Safety
The unit incorporates an automatic 1-second delay for vacuum turn-on when a tool is started. This feature is crucial for preventing circuit overload and tripping, especially with high-amperage tools. The UL-certified 14AWG power cord is designed to handle currents over 30A, ensuring safety and durability.

Figure 8: The robust UL-certified 14AWG power cord, designed for high current passage.
4. Maintenance
To ensure optimal performance and longevity of your Ortis Automatic Vacuum Switch, follow these simple maintenance guidelines:
- Keep Clean: Regularly wipe down the exterior of the switch with a dry cloth to remove dust and debris. Avoid using liquid cleaners directly on the unit.
- Check Connections: Periodically inspect all power cord and tool connections to ensure they are secure and free from damage.
- Store Properly: When not in use for extended periods, store the switch in a clean, dry environment.
5. Troubleshooting
If you encounter issues with your Ortis Automatic Vacuum Switch, refer to the following common problems and solutions:
| Problem | Possible Cause | Solution |
|---|---|---|
| Vacuum does not turn on when tool is activated. |
|
|
| Vacuum runs continuously. |
|
|
| Vacuum turns off too quickly or too slowly. | Shutoff delay time needs adjustment. | Adjust the shutoff delay time using the 'OD' button (3s, 7s, 10s). |
| Circuit breaker trips. | Overload on the circuit. | Ensure total wattage of connected devices (tool + vacuum) does not exceed 1875W (15A at 120V). Avoid connecting high-power tools simultaneously. |
6. Specifications
| Feature | Detail |
|---|---|
| Model Number | HVC-03Y |
| Voltage | 120 Volts |
| Wattage | 1875 watts (Max) |
| Amperage Capacity | 15 Amps |
| Item Weight | 8.8 ounces |
| Product Dimensions | 5 x 4 x 3 inches |
| Cable Length | 18.1 Inches |
| Material | Acrylonitrile Butadiene Styrene, Polycarbonate |
| Certification | UL |
| Total Power Outlets | 2 (Tool Outlets) + 1 (Vacuum Outlet) |
| Actuation Threshold | 30W / 60W |
| Shutoff Delay Time | 3s / 7s / 10s |

Figure 9: Key dimensions of the Ortis Automatic Vacuum Switch.
7. Warranty and Support
For warranty information and customer support, please refer to the documentation included with your product packaging. You may also visit the official Ortis website or contact their customer service for assistance with product inquiries, troubleshooting, or warranty claims.


