
QINIZX MiniMacroKeyPad-6K+
Contents
QINIZX Mini 6-Key Macro Mechanical Keypad User Manual
Model: MiniMacroKeyPad-6K+ | Brand: QINIZX
Introduction
This manual provides comprehensive instructions for the setup, operation, and configuration of your QINIZX Mini 6-Key Macro Mechanical Keypad. This compact, programmable keypad is designed for various applications, including gaming, office tasks, and specialized functions, offering customizable key assignments and RGB backlighting.
Package Contents
Please verify that all items are present in the package:
- 1 x QINIZX Mini 6-Key Macro Mechanical Keypad
- 1 x USB-C to USB Cable (1.5m)

Image: The QINIZX Mini 6-Key Macro Mechanical Keypad shown with its included USB-C to USB cable.
Specifications
| Model Number | MiniMacroKeyPad-6K+ |
| Dimensions | 2.68 x 2.0 x 1.18 inches (6.8 x 5.1 x 3.0 cm) |
| Weight | 1.76 ounces (50 grams) |
| Connectivity | Type-C USB |
| Switch Type | Mechanical (Red Switches, Hot-Swappable) |
| Backlighting | RGB |
| Compatibility | Windows, Mac OS, Linux (Configuration software requires Windows) |
| Features | Programmable Keys, Macro Functionality, Memory Function, Portable Design |


Image: The compact size of the keypad shown in hand, and a view of its base with non-slip pads and dimensions.
Setup Instructions
1. Hardware Connection
- Connect the provided USB-C to USB cable to the Type-C port on the keypad.
- Plug the other end of the USB cable into an available USB port on your computer.
- The keypad is plug-and-play for basic HID functionality. For custom programming, proceed to the software installation steps.
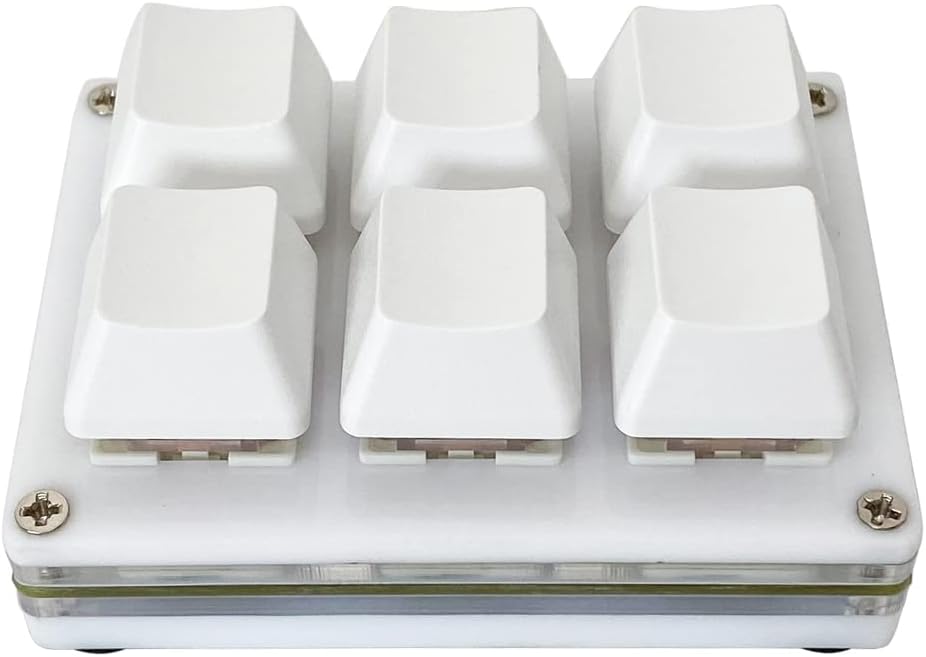
Image: Side view of the keypad highlighting the USB-C connection port.
2. Software Installation and Configuration (Windows Required for Setup)
To fully customize the keypad's functions and RGB lighting, you need to use the dedicated configuration software. Note: The software is Windows-based. If you intend to use the keypad with Mac OS or Linux, you must perform the initial configuration on a Windows computer. The keypad has a memory function and will retain its settings when moved to another operating system.
- Download the Software: Visit the official software website: https://key.itytsoft.com/. You may also find a direct link to the English software manual (6key_en.docx) on the same site.
- Prepare for Installation: Some antivirus software may flag the executable file (.exe) as a potential threat. This is a common occurrence for custom utility software. Temporarily disable your PC's protection software if you encounter issues during download or execution.
- Extract and Run: Download the
Setting.zipfile, extract its contents, and locate theRun-me.exefile. Double-clickRun-me.exeto launch the configuration software. - Select Language: If the software is not in English, look for an "English" or "ENGLISH" button to switch the interface language.
- Connect and Detect: Ensure your keypad is connected to the computer. In the software, click "SearchDevice" to detect your keypad. Once detected, click "Configure". If the software shows "unconnected" after 10 seconds, try a different USB port or restart your computer.

Image: Visual guide for downloading and launching the keypad configuration software.
Operating Modes and Key Configuration
The configuration software allows you to assign various functions to each of the 6 keys. Each key can operate independently in one of four modes:
- Keyboard Mode: Assign standard keyboard keys (e.g., A, B, C, Ctrl, Shift, Alt). Multiple key combinations are supported.
- Mouse Mode: Assign mouse functions (e.g., left click, right click, middle click, scroll up/down, mouse movement).
- Multimedia Mode: Assign multimedia controls (e.g., Play/Pause, Stop, Volume Up/Down, Mute, Next/Previous Track).
- Multi-key Mode (Macro): Create macros by assigning a sequence of up to 15 key presses. You can also add an interval time between key presses for specific applications (e.g., one-key password entry).
Configuring Keys:
- In the software interface, select the key you wish to configure.
- Choose the desired mode (Keyboard, Mouse, Multimedia, Multi-key) from the dropdown menu for that key.
- Follow the on-screen prompts to select the specific function or sequence of keys. For multi-key mode, click the keys you need to input one by one.
- After configuring all desired keys, click the "Save to Keyboard" button to apply the settings. A "save successfully" message will confirm the update.

Image: Software interface demonstrating key mode selection and assignment for various functions.
RGB Backlight Settings
The keypad features customizable RGB LED backlighting. You can adjust the lighting effects and colors through the configuration software.
- Within the configuration software, locate the "LED setting" section.
- Select from various LED modes, including static colors (red, green, blue, yellow, cyan, white, purple), flow modes, and a default colorful gradient mode that constantly brightens and slowly changes color.
- After selecting your preferred lighting effect, click "Save to Keyboard" to apply the changes.

Image: The keypad displaying different RGB backlight colors and effects.
Maintenance
General Care:
- Keep the keypad clean by wiping it with a soft, dry cloth.
- Avoid exposing the keypad to excessive moisture or extreme temperatures.
- Do not use harsh chemicals or abrasive cleaners.
Hot-Swappable Switches:
The QINIZX Mini 6-Key Macro Mechanical Keypad features hot-swappable switches, allowing you to replace the default Red switches with other compatible 3-pin or 5-pin mechanical switches without soldering. You can also replace the keycaps with standard Cherry MX compatible keycaps.
- Keycap Removal: Use a keycap puller to gently remove the keycaps.
- Switch Removal: Use a switch puller to carefully remove the mechanical switch from its socket. Apply even pressure to avoid damaging the PCB or switch pins.
- Switch Installation: Align the pins of the new switch with the holes on the PCB. Press down gently until the switch clicks into place. Ensure the pins are straight before insertion to prevent bending.
- Keycap Installation: Place the new keycap onto the switch stem and press down firmly.

Image: View of the keypad's hot-swappable switch socket, along with a detached keycap and mechanical switch.
Troubleshooting
- Keypad Not Responding:
- Ensure the USB cable is securely connected to both the keypad and the computer.
- Try connecting the keypad to a different USB port on your computer.
- Restart your computer and try again.
- Test the keypad on another computer if possible to rule out a computer-specific issue.
- Configuration Software Not Detecting Keypad:
- Verify the keypad is connected and powered on.
- Ensure you have downloaded the correct software from https://key.itytsoft.com/.
- Temporarily disable any antivirus or firewall software that might be blocking the application.
- Try running the software as an administrator.
- If the software shows "unconnected" after 10 seconds, try a different USB port or restart your computer.
- Keys Not Performing Assigned Functions:
- Reconnect the keypad and reopen the configuration software.
- Verify that the desired functions are correctly assigned to each key in the software.
- Ensure you clicked "Save to Keyboard" after making changes.
- If using on Mac/Linux, confirm that the configuration was saved on a Windows machine first.
- RGB Backlight Not Working or Incorrect:
- Check the LED settings in the configuration software.
- Ensure the desired lighting mode is selected and saved to the keypad.
Warranty and Support
For warranty information or technical support, please refer to the retailer where you purchased the QINIZX Mini 6-Key Macro Mechanical Keypad or visit the official QINIZX website for contact details. Please retain your proof of purchase for warranty claims.
Ask a question about this manual
Ask about setup, troubleshooting, compatibility, parts, safety, or missing instructions. Manuals+ will review the question and use this page’s manual context to help answer it.