
1. Introduction
This manual provides detailed instructions for the installation, operation, and maintenance of your SMONET 5MP HD WiFi Security Camera System. This system is designed for comprehensive home and office surveillance, offering high-definition video, audio recording, and remote access capabilities. Please read this manual thoroughly before setting up your system to ensure proper functionality and optimal performance.

Figure 1.1: Overview of the SMONET 5MP HD WiFi Security Camera System, including the NVR and eight 5MP cameras.
2. Package Contents
Verify that all items listed below are included in your package. If any items are missing or damaged, please contact SMONET customer support.
- 1 x 8-Channel NVR (Network Video Recorder) with pre-installed 3TB Hard Drive
- 8 x 5MP HD WiFi IP Cameras
- 9 x Power Adapters (1 for NVR, 8 for cameras)
- 1 x USB Mouse
- 1 x Ethernet Cable
- 1 x HDMI Cable
- Mounting Screw Kits for cameras
- Quick Start Guide
3. System Setup
3.1 Initial Connection
The SMONET WiFi Security Camera System is designed for easy setup with pre-paired cameras and NVR. Follow these steps for initial system activation:
- Connect NVR to a Monitor: Use the provided HDMI or VGA cable to connect the NVR to a TV or PC monitor.
- Connect NVR Power: Plug the NVR's power adapter into the NVR and then into an electrical outlet.
- Connect Cameras Power: Plug each camera's power adapter into the camera and then into an electrical outlet. The cameras will automatically connect to the NVR.
- Connect USB Mouse: Plug the USB mouse into a USB port on the NVR for system navigation.

Figure 3.1: The system features auto-pairing for true plug-and-play functionality, with cameras automatically connecting to the NVR upon power-up.
3.2 System Connection Diagram
Refer to the diagram below for a visual representation of the system's connections.

Figure 3.2: Detailed connection points on the NVR, including VGA, HDMI, USB, network, and power ports.
3.3 Network Connection for Remote Access
To enable remote viewing and alerts, connect the NVR to your router using the provided Ethernet cable. The system operates on its own 2.4GHz wireless signal for camera-to-NVR communication, so your home WiFi is only needed for remote access to the NVR.
4. Operating Instructions
4.1 Live View and Recording
Once powered on, the cameras will automatically display live video on the connected monitor. The NVR features a pre-installed 3TB hard drive for continuous 24/7 video recording. The system utilizes H.265+ video compression, which optimizes storage space by up to 50% compared to H.264, allowing for longer recording periods.

Figure 4.1: The NVR comes with a pre-installed 3TB hard drive for extensive video storage.
4.2 Remote Access and Mobile App
Access your security system remotely from anywhere using the free mobile application "XMeye Pro" on your iOS or Android smartphone/tablet, or via VMS software on your PC. This allows for live preview, recording playback, and system management.

Figure 4.2: Remote viewing is available on various smart devices, including smartphones, tablets, and personal computers.
4.3 Audio Recording
The cameras are equipped with one-way audio recording capabilities, allowing you to listen to sounds from the monitored area through the live feed or recorded playback.

Figure 4.3: The system supports one-way audio recording, enabling remote listening to the monitored environment.
4.4 Night Vision
Each bullet camera features 3 array infrared LEDs, providing clear night vision up to 65 feet (20 meters) in complete darkness.
4.5 AI Human Detection and Alerts
The system incorporates AI human detection to minimize false alarms. When human motion is detected in a configured monitoring area, the system can send email alerts or app push notifications to your smart device.

Figure 4.4: AI human detection provides accurate alerts, sending notifications to your phone via email or app push.
4.6 Recording Modes
The NVR supports multiple recording modes to suit your surveillance needs:
- Continuous Recording: 24/7 recording to the 3TB hard drive.
- Motion Record: Records only when motion is detected, saving storage space.
- Timed Record (Schedule): Records according to a predefined schedule.
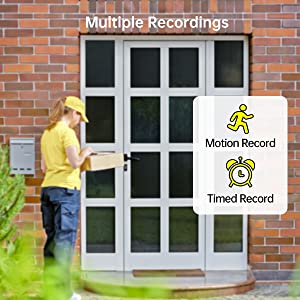
Figure 4.5: The system offers flexible recording options, including motion-activated and scheduled recording.
5. Maintenance
5.1 Camera Placement and Environmental Considerations
SMONET cameras are rated IP66 waterproof, making them suitable for both indoor and outdoor use. They are designed to operate in temperatures ranging from -20℃ to +55℃ (14°F to 131°F). Ensure cameras are placed in locations with access to a power source for continuous operation, as they are not battery-powered.

Figure 5.1: The IP66 waterproof design ensures durability for outdoor installation, providing clear day and night vision.
5.2 Optimizing WiFi Signal
The system features an "Auto Repeat" function, allowing cameras with weaker signals to automatically connect through cameras with stronger signals. This enhances the overall wireless transmission stability and range. For optimal performance, ensure cameras are within reasonable range of each other and the NVR.
6. Troubleshooting
- No Video Display:
Ensure the NVR is properly connected to a monitor via HDMI or VGA cable. Verify that the NVR and all cameras are powered on. Check all power adapters and cables for secure connections. - No Remote Access:
Confirm the NVR is connected to your router via an Ethernet cable. Ensure your smartphone or PC has internet access. Check the "XMeye Pro" app settings for correct NVR configuration and network status. - Cameras Losing Signal:
Relocate cameras closer to the NVR or other cameras to utilize the "Auto Repeat" function. Ensure there are no significant obstructions (e.g., thick walls, large metal objects) between cameras and the NVR. - No Recording:
Verify the 3TB hard drive is detected and functioning. Check recording schedules and motion detection settings in the NVR menu. Ensure the hard drive is not full; if so, configure overwriting or backup important footage. - False Motion Alerts:
Adjust the sensitivity of motion detection in the NVR settings. Utilize the AI human detection feature and define specific monitoring areas to reduce alerts from non-human movements. - System Not Working Without Home WiFi:
The system records and displays live video locally without internet. Home WiFi is only required for remote viewing via the app or VMS. If local viewing is not working, refer to "No Video Display" troubleshooting.
7. Specifications
| Feature | Specification |
|---|---|
| Brand | SMONET |
| Model Number | SMUS-W885M3TA-XM |
| Connectivity Technology | 2.4Ghz WiFi |
| Video Capture Resolution | 5MP |
| Number of Channels | 8 |
| Memory Storage Capacity | 3 TB (Hard Drive) |
| Power Source | Wired Electric |
| Operating System | Linux |
| Compatible Devices | Personal Computers, Smartphones, TV |
| Special Features | Motion Sensor, Free Phone APP, Motion/Human Detect and Alert, Night Vision |
| Night Vision Range | 65 Feet |
| Frame Rate | 12 fps |
| Recording Mode | Schedule |
| Hardware Interface | HDMI, USB 2.0, VGA |
| Viewing Angle | 90 Degrees |
| IP Rating | IP66 Waterproof |
| Operating Temperature | -20℃~+55℃ (14°F~131°F) |
8. Warranty and Support
SMONET is committed to providing reliable security solutions and customer support. Your SMONET 5MP HD WiFi Security Camera System comes with:
- 1-Year Free Warranty: Covers manufacturing defects and malfunctions under normal use.
- 30-Day Return Guarantee: For returns or exchanges within 30 days of purchase.
- Lifetime Technical Assistance: Access to SMONET's technical support team for any operational or troubleshooting queries throughout the product's lifespan.
For technical assistance or warranty claims, please contact SMONET customer service through the contact information provided with your product or on the official SMONET website.
Figure 8.1: SMONET prioritizes your safety and provides comprehensive support for its security products.
9. Official Product Videos
No official product videos from the seller were provided in the product data to embed in this manual.


