
1. Introduction
Thank you for purchasing the Greadio Portable CD Player. This versatile audio device is designed to provide high-fidelity sound and multiple playback options, including CD, Bluetooth, FM radio, AUX, and USB. It features a convenient remote control, a protective dust cover for CDs, and a sleep timer function, making it ideal for various home audio needs. Please read this manual carefully before use to ensure proper operation and to maximize your listening experience.
2. Package Contents
Please check the package for the following items:
- Greadio Portable CD Player Unit
- Remote Control
- USB-C Power Cable
- USB Power Adapter (Wall Plug)
- AUX Cable
- User Manual (this document)
3. Product Overview
Familiarize yourself with the main components and controls of your Greadio Portable CD Player.
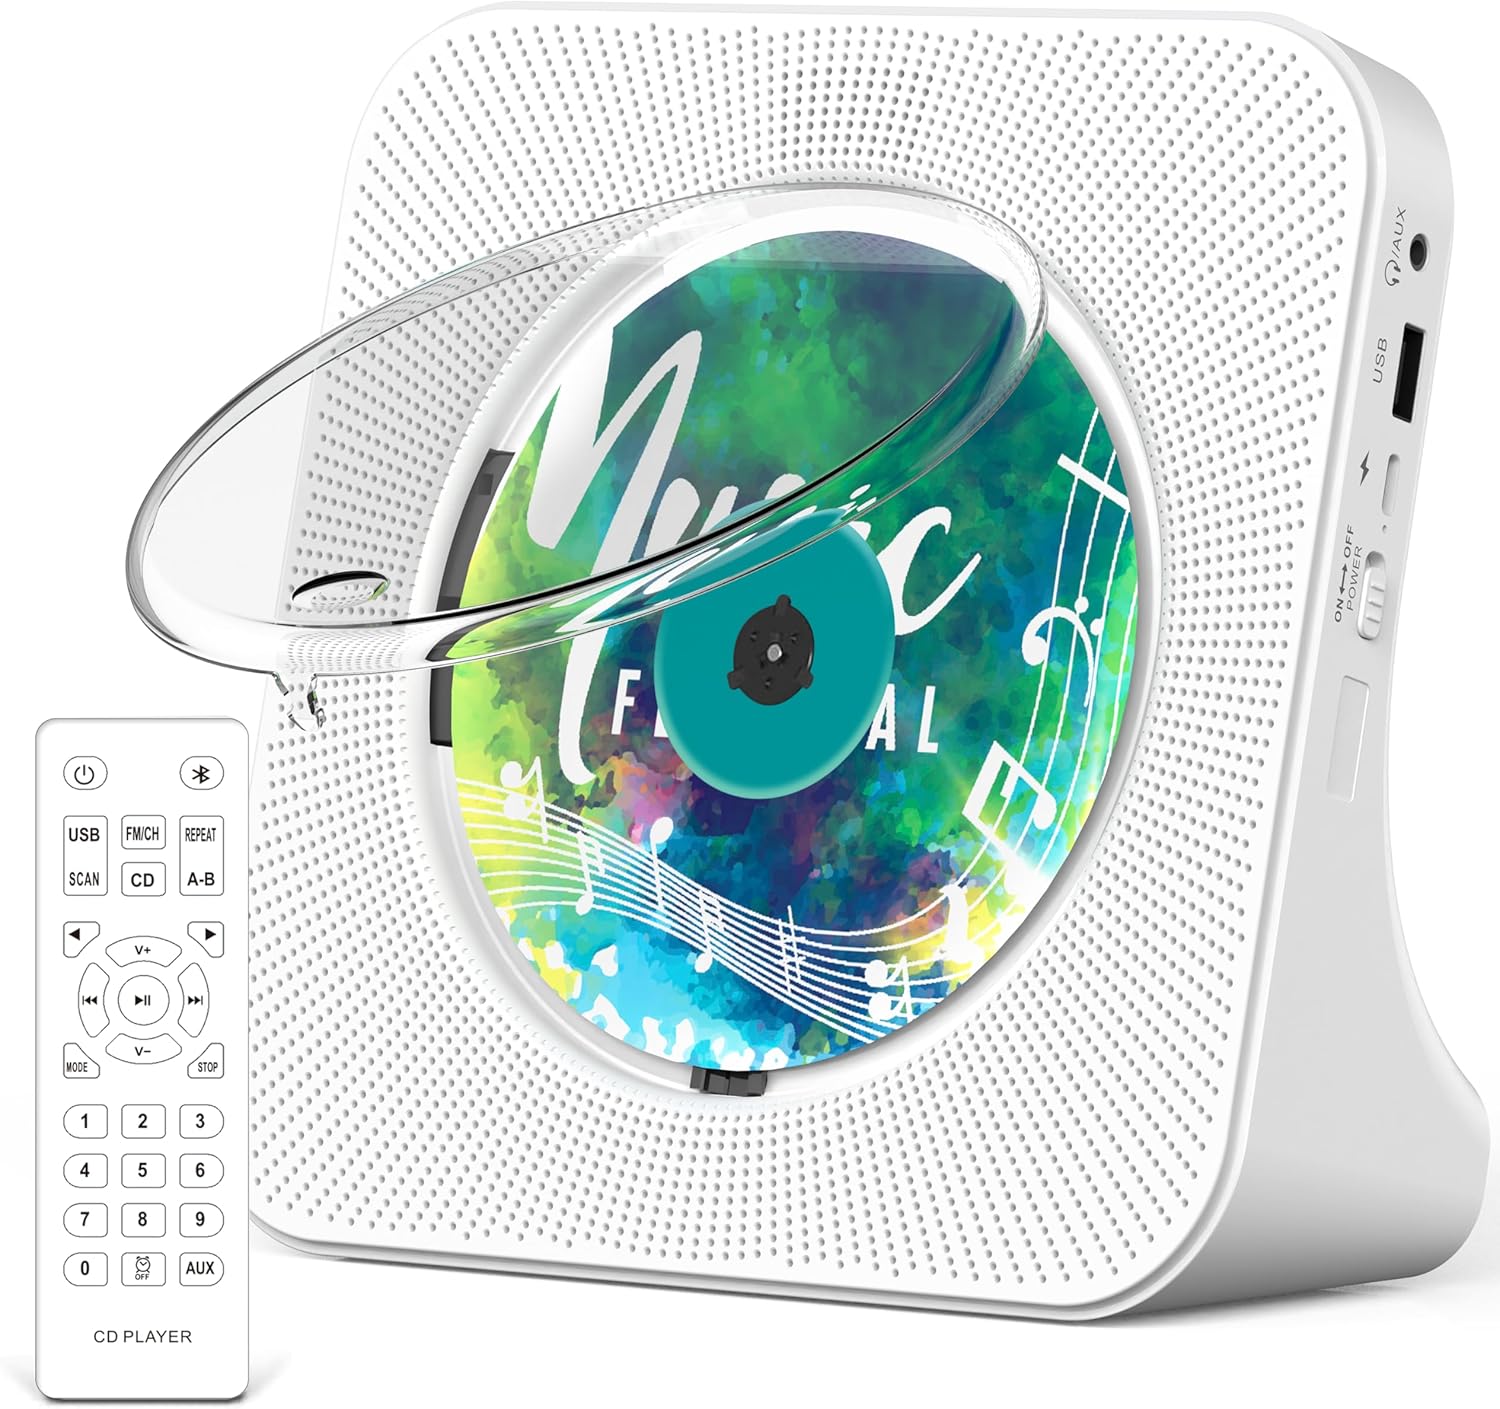
Image: Front view of the Greadio Portable CD Player in white, showcasing the transparent dust cover over a CD, and the included remote control. The player features a perforated speaker grille design on both sides of the CD compartment.
3.1. Controls and Ports
- Power Switch: Located on the side, to turn the unit On/Off.
- Mode Button: Cycles through CD, Bluetooth, FM, AUX, and USB modes.
- Play/Pause Button: Starts or pauses playback. Long press to turn off CD backlight.
- Previous/Next Buttons: Skips tracks or adjusts FM frequency.
- Volume Up/Down Buttons: Adjusts audio volume.
- Repeat Button: Repeats current track or album.
- Scan Button: (FM mode) Automatically scans and saves FM stations.
- USB Port: For USB flash drive playback.
- AUX Input: For connecting external audio devices via AUX cable.
- Headphone Jack: For private listening with wired headphones (not included).
- DC 5V Input: For power connection using the provided USB-C cable and adapter.
- LED Screen: Displays current mode, track number, volume, and other information.
4. Setup
4.1. Power Connection
- Connect the USB-C end of the power cable to the DC 5V input port on the CD player.
- Plug the USB-A end of the power cable into the provided USB power adapter.
- Insert the USB power adapter into a standard wall outlet.
- Flip the power switch on the side of the unit to the "ON" position. The LED screen will light up.
4.2. Remote Control Battery Installation
The remote control requires 2 x AAA batteries (not included).
- Open the battery compartment cover on the back of the remote control.
- Insert two AAA batteries, ensuring correct polarity (+ and -).
- Close the battery compartment cover securely.
5. Operating Instructions
5.1. General Operation
- Power On/Off: Use the power switch on the side of the unit.
- Mode Selection: Press the "MODE" button on the unit or remote to switch between CD, Bluetooth, FM, AUX, and USB modes. The current mode will be displayed on the LED screen.
- Volume Adjustment: Use the "V+" or "V-" buttons on the unit or remote.
5.2. CD Playback
- Gently lift the transparent dust cover.
- Place a CD (CD, CD-R, CD-RW, MP3, WMA format) onto the spindle, ensuring it clicks into place.
- Close the dust cover. The player will automatically detect the CD and begin playback.
- Use the Play/Pause, Previous, and Next buttons to control playback.
- Press the "REPEAT" button to cycle through repeat modes (e.g., repeat one, repeat all).
5.3. Bluetooth Mode (BT)
The CD player supports both Bluetooth transmitting and receiving.
5.3.1. Bluetooth Receiving (Connect your phone/tablet to the CD player)
- Switch the CD player to "BT" mode using the "MODE" button. The LED screen will show "BT" and the unit will enter pairing mode.
- On your Bluetooth device (e.g., smartphone), enable Bluetooth and search for available devices.
- Select "Greadio KC-806" from the list to pair. Once connected, you can play audio from your device through the CD player's speakers.
5.3.2. Bluetooth Transmitting (Connect the CD player to a Bluetooth headphone/speaker)
- Ensure your Bluetooth headphones or speaker are in pairing mode.
- Switch the CD player to "BT" mode. It will automatically search for nearby Bluetooth receiving devices.
- Once connected, audio from the CD player (CD, USB, FM, AUX) will be transmitted to your Bluetooth headphones/speaker.
5.4. FM Radio
- Switch the CD player to "FM" mode using the "MODE" button.
- Press the "SCAN" button on the remote or unit to automatically scan and save available FM stations.
- Use the Previous/Next buttons to navigate through the saved stations.
5.5. AUX Mode
- Connect one end of the provided AUX cable to the AUX input port on the CD player.
- Connect the other end of the AUX cable to the audio output (e.g., headphone jack) of your external device.
- Switch the CD player to "AUX" mode using the "MODE" button. Audio from your external device will now play through the CD player.
5.6. USB Mode
- Insert a USB flash drive containing MP3/WMA audio files into the USB port.
- Switch the CD player to "USB" mode using the "MODE" button. The player will automatically detect and begin playing audio files from the USB drive.
- Use the Play/Pause, Previous, and Next buttons to control playback.
5.7. Sleep Timer Function
The sleep timer allows the unit to automatically turn off after a set period.

Image: A Greadio Portable CD Player on a nightstand next to a sleeping person, with digital clock displays showing various sleep timer settings (0:30, 0:60, 0:90, 1:20, 1:50, 1:80 minutes).
- While the player is on, press the "SLEEP" button on the remote control.
- Each press will cycle through available sleep timer settings (e.g., 30, 60, 90, 120, 150, 180 minutes).
- The unit will automatically power off after the selected time duration.
6. Maintenance
6.1. Cleaning
- Wipe the unit with a soft, dry cloth. Do not use abrasive cleaners or solvents.
- Keep the CD compartment free of dust and debris.
6.2. CD Handling
- Handle CDs by their edges to avoid fingerprints and scratches.
- Store CDs in their cases when not in use.
- Do not expose CDs to direct sunlight or extreme temperatures.
7. Troubleshooting
| Problem | Possible Cause | Solution |
|---|---|---|
| No power | Power cable not connected; Power switch off. | Ensure power cable is securely connected and power switch is ON. |
| CD not playing / "NO DISC" displayed | CD inserted incorrectly; CD is dirty or scratched; Unsupported CD format. | Re-insert CD correctly; Clean CD with a soft cloth; Ensure CD format is supported (CD, CD-R, CD-RW, MP3, WMA). |
| No sound | Volume too low; Incorrect mode selected; AUX cable not fully inserted. | Increase volume; Select correct mode; Ensure AUX cable is fully inserted. |
| Bluetooth connection issues | Device too far; Not in pairing mode; Interference. | Ensure devices are within 10 meters; Put both devices in pairing mode; Reduce interference from other electronic devices. |
| Remote control not working | Batteries low or incorrectly inserted; Obstruction between remote and player. | Replace batteries (2 x AAA); Ensure correct polarity; Remove any obstructions. |
8. Specifications
| Feature | Detail |
|---|---|
| Model Name | KC-806 |
| Brand | Greadio |
| Product Dimensions | 5.67 x 5.67 x 2.07 inches |
| Item Weight | 2.16 pounds |
| Color | White |
| Connectivity Technology | Auxiliary, Bluetooth, USB |
| Bluetooth Version | 5.0 |
| Supported CD Formats | CD, CD-R, CD-RW, MP3, WMA |
| Power Input | DC 5V (via USB-C) |
| Remote Control Batteries | 2 x AAA (not included) |
| Sleep Timer Settings | 30-180 minutes |
9. Warranty and Support
Greadio provides a 12-month warranty and a 30-day money-back guarantee for this product. For any questions or assistance, please contact our 24/7 customer service. Your satisfaction is our priority.
For more information about Greadio products, please visit the official Greadio Store on Amazon.

