Introduction
Thank you for purchasing the Ysametp Mini Projector M10. This portable video projector is designed to provide a high-quality home theater experience with its 1080P Full HD support and 10000 Lux LED light source. It features dual built-in stereo speakers with an SRS sound system for immersive audio. Its compact size and multi-connection capabilities make it ideal for various entertainment and presentation needs. Please read this manual thoroughly before operating the projector to ensure proper use and maintenance.
Safety Information
To ensure safe operation and prolong the lifespan of your projector, please observe the following safety precautions:
- Do not block the ventilation openings. Ensure adequate airflow around the projector to prevent overheating.
- Do not expose the projector to rain or moisture to avoid electric shock or fire.
- Do not open the projector casing. Refer all servicing to qualified service personnel.
- Use only the power adapter supplied with the projector.
- Place the projector on a stable, flat surface to prevent it from falling.
- Avoid direct eye exposure to the projector lens when the lamp is on.
- Unplug the projector from the power outlet during lightning storms or when unused for long periods.
Package Contents
Please check the package contents upon unboxing:
- 1 x Ysametp Mini Projector M10
- 1 x HDMI Cable
- 1 x 3-in-1 AV Line
- 1 x Power Cord
- 1 x Tripod
- 1 x Drawstring Backpack
- 1 x Remote Control (batteries not included)
- 1 x User Manual

Product Overview
Familiarize yourself with the projector's components and connection ports.

Input/Output Ports:
- HDMI Port: Connect to devices like TV sticks, laptops, gaming consoles.
- USB Port: Connect USB drives for media playback.
- TF Card Slot: Insert TF cards for media playback.
- VGA Port: Connect to computers or laptops.
- AV Port: Connect to older devices like DVD players using the 3-in-1 AV cable.
- 3.5mm Audio Jack: Connect external headphones or speakers.
Setup
1. Placement and Screen Size
Position the projector on a flat, stable surface. The projection size can range from 32 inches to 200 inches, with an optimal projection distance between 3.6 feet and 16.4 feet.

2. Power Connection
Connect the supplied power cord to the projector's power input and then plug it into a power outlet.
3. Focus and Keystone Adjustment
After powering on, adjust the focus and keystone knobs located on top of the projector to achieve a clear and rectangular image. The focus ring adjusts image sharpness, while the keystone correction corrects trapezoidal distortion if the projector is not perfectly perpendicular to the screen.
Operating Instructions
1. Turning On/Off
- To Turn On: Press the power button on the projector or the remote control.
- To Turn Off: Press the power button again. The projector will go through a shutdown sequence.
2. Input Source Selection
Use the "Source" button on the remote control or the projector's control panel to select the desired input source (HDMI, USB, TF, VGA, AV).
3. Connecting Devices
- HDMI: Connect an HDMI cable from your device (e.g., TV Stick, laptop, game console) to the projector's HDMI port.
- USB/TF Card: Insert a USB drive or TF card into the respective port. The projector will automatically detect the media or prompt you to select it.
- VGA: Connect a VGA cable from your PC/laptop to the projector's VGA port.
- AV: Use the provided 3-in-1 AV cable to connect to devices with AV output.
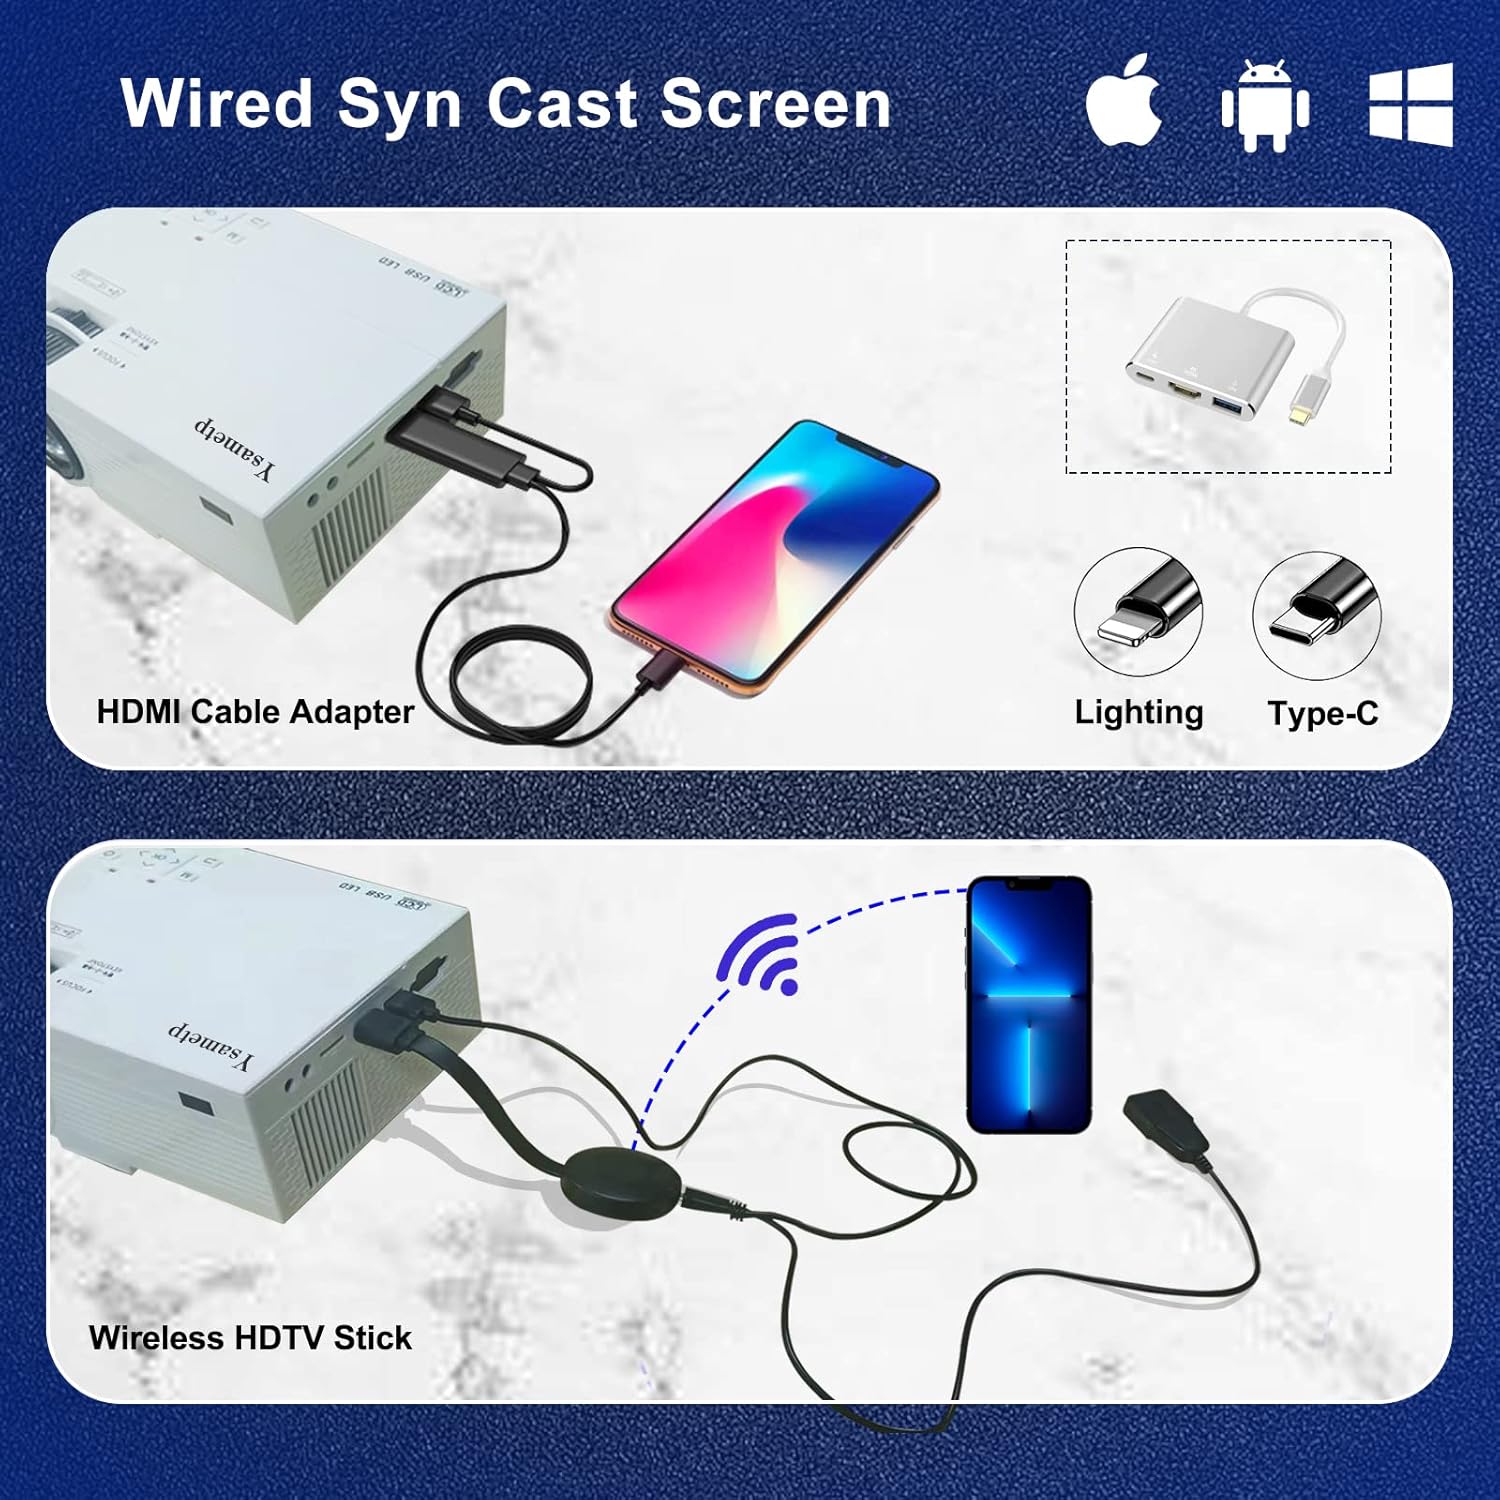
4. Wired Screen Mirroring (for Smartphones)
To mirror your smartphone screen, you will need an HDMI adapter (e.g., Lightning to HDMI for iPhone, USB-C to HDMI for Android) or a Miracast dongle/TV stick (like Roku, Fire TV Stick).

5. Audio Output
The projector has dual built-in stereo speakers. For external audio, connect headphones or external speakers to the 3.5mm audio jack.

Maintenance
1. Cleaning
- Lens: Use a soft, lint-free cloth specifically designed for optical lenses. Do not use abrasive cleaners.
- Casing: Wipe the projector's exterior with a soft, dry cloth. Do not use liquid or aerosol cleaners.
- Ventilation: Regularly check and clean the ventilation openings to prevent dust buildup, which can affect cooling performance.
2. Storage
When not in use, store the projector in a cool, dry place, away from direct sunlight and extreme temperatures. Use the provided drawstring backpack for protection during storage or transport.
3. LED Lifespan
The built-in LED light source is designed to support up to 55,000 hours of use, providing long-lasting performance.
Troubleshooting
| Problem | Possible Cause / Solution |
|---|---|
| No image on screen. |
|
| Image is blurry. |
|
| Image is trapezoidal. |
|
| No sound. |
|
| Remote control not working. |
|
Specifications
| Feature | Detail |
|---|---|
| Brand | Ysametp |
| Model | M10 |
| Display Technology | LCD |
| Native Resolution | 1920 x 1080 Pixels (Full HD Supported) |
| Image Brightness | 11000 Lux |
| Image Contrast Ratio | 10000:1 |
| Aspect Ratio | 4:3 |
| Projection Size | 32 - 200 Inches |
| Projection Distance | 3.6ft - 16.4ft |
| LED Lifespan | 55,000 hours |
| Noise Level | 31 dB |
| Wattage | 60 watts |
| Hardware Interface | VGA, USB, HDMI, 3.5mm Audio, TF Card |
| Dimensions (L x W x H) | 23.88 x 15.49 x 8.13 cm |
| Weight | 975.22 g (approx. 2.15 lb) |
Warranty and Support
Ysametp provides a 3-year product warranty for the Mini Projector M10.
If you encounter any problems or have questions regarding your projector, please do not hesitate to contact our customer support. Refer to the contact information provided on the product packaging or the official Ysametp website for assistance.


