1. Introduction
Thank you for choosing the Xaralyn Hamar Electric Fireplace with Elski LED Insert. This manual provides essential information for the safe assembly, installation, operation, and maintenance of your new electric fireplace. Please read all instructions carefully before use and retain this manual for future reference.

Figure 1: Xaralyn Hamar Electric Fireplace with Elski LED Insert. This image displays the complete unit, highlighting its modern design and the integrated electric firebox with a simulated flame effect.
2. Important Safety Instructions
Always follow basic safety precautions when using electrical appliances to reduce the risk of fire, electric shock, and injury to persons.
- Read all instructions before using this fireplace.
- This fireplace is hot when in use. To avoid burns, do not let bare skin touch hot surfaces. Keep combustible materials, such as furniture, pillows, bedding, papers, clothes, and curtains at least 3 feet (0.9 meters) from the front of the fireplace.
- Extreme caution is necessary when any heater is used by or near children or invalids and whenever the fireplace is left operating and unattended.
- Do not operate any fireplace with a damaged cord or plug or after the fireplace malfunctions, has been dropped, or damaged in any manner.
- Do not use outdoors.
- Never locate fireplace where it may fall into a bathtub or other water container.
- Do not run cord under carpeting. Do not cover cord with throw rugs, runners, or similar coverings. Arrange cord away from traffic area and where it will not be tripped over.
- To disconnect fireplace, turn controls to off, then remove plug from outlet.
- Do not insert or allow foreign objects to enter any ventilation or exhaust opening as this may cause an electric shock or fire, or damage the fireplace.
- To prevent a possible fire, do not block air intakes or exhaust in any manner. Do not use on soft surfaces, like a bed, where openings may become blocked.
- This fireplace is designed for decorative flame effect and supplemental heating. It does not produce CO2.

Figure 2: Safety features and characteristics. This image highlights that the fireplace is safe for pets and children, features realistic flames, and is electrically powered.
3. Package Contents
Upon opening the package, please ensure all components are present and undamaged. If any parts are missing or damaged, do not attempt to assemble or operate the fireplace. Contact Xaralyn customer support immediately.
- Xaralyn Hamar MDF Fireplace Surround (unassembled)
- Elski LED Electric Fireplace Insert
- Remote Control
- Assembly Hardware (screws, dowels, etc.)
- User Manual (this document)
4. Assembly Instructions
The Xaralyn Hamar fireplace surround is designed for self-assembly. The Elski electric insert is pre-assembled and ready for integration into the surround.
- Unpack Components: Carefully remove all parts from the packaging. Lay them out on a soft, clean surface to prevent scratches.
- Assemble Fireplace Surround: Follow the detailed assembly instructions provided with the MDF fireplace surround. This typically involves connecting panels using the supplied hardware (screws, dowels). Ensure all connections are secure.
- Insert Electric Fireplace: Once the fireplace surround facade is constructed, carefully slide the Elski LED Electric Fireplace Insert into the designated opening. Ensure it fits snugly and is properly aligned.
- Secure Insert (if applicable): Some models may require securing the insert with screws from the back or sides. Refer to the specific instructions for the surround.
- Final Placement: Position the assembled fireplace in its desired location, ensuring it is on a stable, level surface and near a suitable electrical outlet.

Figure 3: Assembled fireplace in a room setting. This image shows the Xaralyn Hamar fireplace integrated into a living space, demonstrating its freestanding nature and aesthetic appeal.
5. Installation and Placement
The Xaralyn Hamar Electric Fireplace is designed for freestanding installation and does not require a chimney or special ventilation. It can be placed in any room of your home.
- Location: Choose a flat, stable surface away from high-traffic areas and direct sunlight. Ensure there is a grounded electrical outlet within reach of the power cord.
- Clearance: Maintain a minimum distance of 3 feet (0.9 meters) from combustible materials (e.g., curtains, furniture) to the front of the fireplace.
- Power Connection: Plug the fireplace directly into a 220-240V (or appropriate local voltage) grounded wall outlet. Do not use extension cords or power strips, as these can overheat and cause a fire risk.
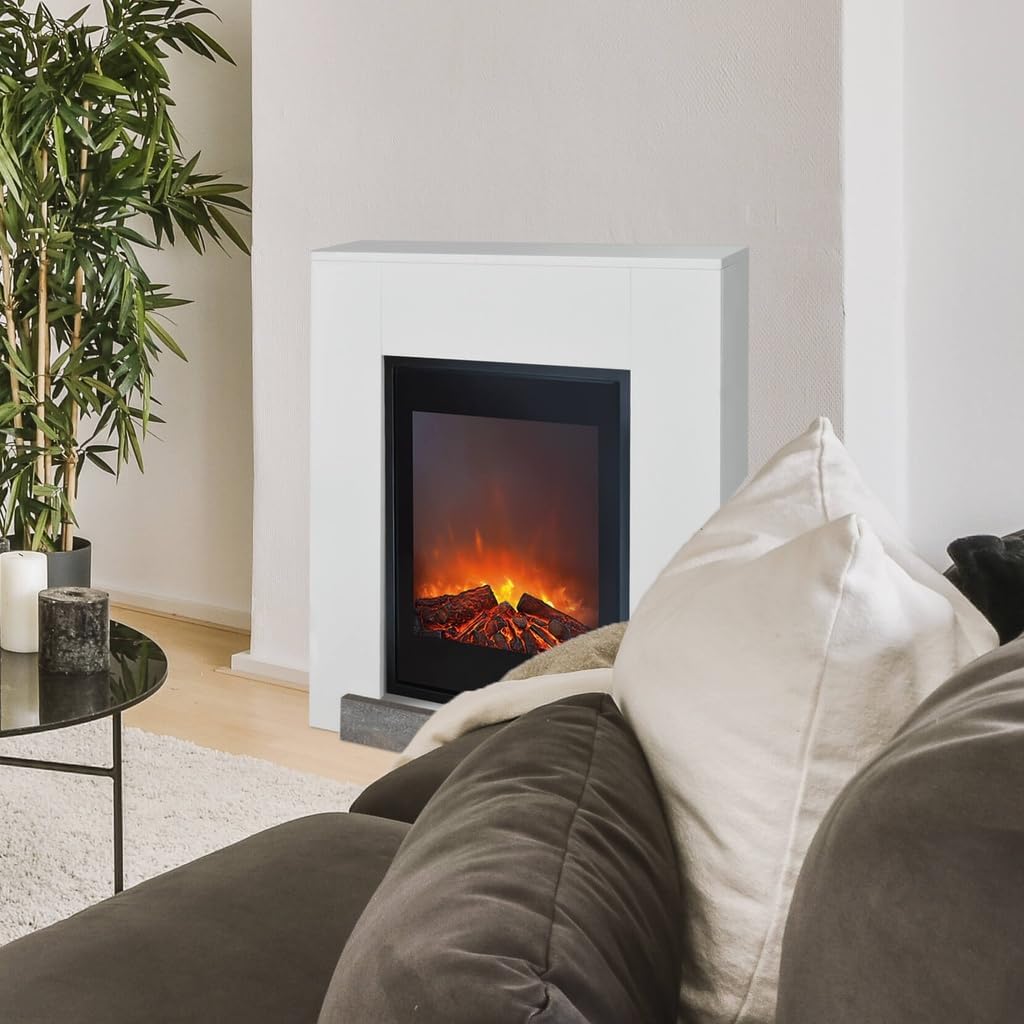
Figure 4: Fireplace in a home environment. This image illustrates the fireplace's versatility in placement within various room designs.
6. Operating Instructions
The Elski LED Electric Fireplace Insert can be operated using the controls on the unit or the included remote control.
6.1. Controls on the Unit
Locate the control panel, usually hidden behind a removable grate or panel on the fireplace insert. These controls typically include:
- Power Button: Turns the unit on/off.
- Flame Effect Button: Adjusts the brightness or style of the LED flame effect.
- Heater Settings: Cycles through heating levels (e.g., Low, High, Off).
6.2. Remote Control Operation
The remote control provides convenient operation from a distance. Ensure batteries are correctly installed.
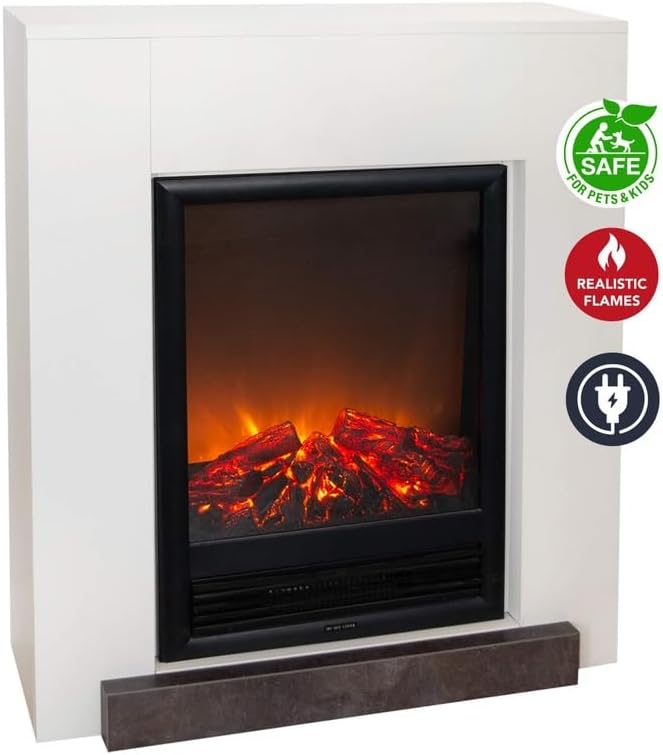
Figure 5: Remote control for the Elski LED Electric Fireplace Insert. This image shows the dedicated remote for adjusting flame effects and heating settings.
- Power Button (Ⓘ): Turns the fireplace on or off.
- Flame Button (🔥): Activates or adjusts the LED flame effect. The flame effect can be used independently without heating.
- Heat Buttons (☴☴☴): There are two heat buttons, each marked with three wavy lines.
- Pressing one of the heat buttons will activate the low heat setting (650 W).
- Pressing the other heat button will activate the high heat setting (1300 W).
- Pressing the active heat button again will turn the heat off.
The fireplace offers a decorative flame effect and adjustable heating power (0 - 650 - 1300 W). It operates on LED lighting for the flame effect and does not emit CO2.

Figure 6: Key features of the Elski LED Electric Fireplace Insert. This image highlights the LED lighting, adjustable heating (0-650-1300W), remote control functionality, coverage area (up to 18m²), and plug-and-play setup.
7. Maintenance
The Xaralyn Hamar Electric Fireplace with Elski LED Insert is designed to be largely maintenance-free.
- Cleaning: Before cleaning, ensure the fireplace is turned off and unplugged from the power outlet. Allow it to cool completely.
- Wipe the exterior surfaces of the fireplace surround with a soft, damp cloth. Do not use abrasive cleaners or solvents.
- Gently wipe the glass panel of the electric insert with a soft, lint-free cloth. Glass cleaner can be used sparingly if needed, applied to the cloth first, not directly to the unit.
- Periodically vacuum or wipe any dust from the air intake/exhaust vents to ensure proper airflow, though this unit is ventless for combustion, it still has air circulation for heating elements.
- Light Bulbs: The flame effect uses LED lighting, which has a long lifespan and typically does not require replacement.
- Storage: If storing the fireplace for an extended period, unplug it and cover it to protect from dust. Store in a dry, cool location.
8. Troubleshooting
If you experience issues with your Xaralyn Hamar Electric Fireplace, refer to the following common problems and solutions:
| Problem | Possible Cause | Solution |
|---|---|---|
| Fireplace does not turn on. |
|
|
| Flame effect not working. |
|
|
| No heat output. |
|
|
| Remote control not working. |
|
|
9. Product Specifications
| Brand | Xaralyn |
| Model | Hamar (with Elski LED Insert) |
| Dimensions (H x W x D) | 95.6 x 78.6 x 30 cm (37.6 x 30.9 x 11.8 inches) |
| Material | Engineered Wood (MDF) |
| Color | Ral9010 (White) |
| Power Source | Electric Cable |
| Heating Power | 0 - 650 - 1300 W (Adjustable) |
| Power Consumption (no heating) | 10 W |
| Flame Effect | LED Lighting, Adjustable |
| Control | On-unit controls, Remote Control |
| Installation Type | Freestanding |
| Ventilation Type | Ventless (for combustion, heating still requires air circulation) |
| CO2 Emission | None |
10. Warranty and Support
Xaralyn products are manufactured to high-quality standards. For information regarding warranty coverage, please refer to the warranty card included with your product or visit the official Xaralyn website. For technical support, replacement parts, or any inquiries, please contact Xaralyn customer service.
Xaralyn Customer Service:
- Website: www.xaralyn.com (Please check for local contact information)
- Email: Refer to website for contact form or email address.
- Phone: Refer to website for local phone numbers.
When contacting support, please have your product model (Hamar) and purchase information readily available.


