Introduction
Welcome to the user manual for your BEAMFLY H7 LED Headlight Bulbs. These high-performance LED bulbs are designed to provide superior illumination for your vehicle, offering enhanced brightness and a longer lifespan compared to traditional halogen bulbs. This manual provides essential information for installation, operation, maintenance, and troubleshooting to ensure optimal performance and safety.
Please read this manual thoroughly before installation and use.
Product Overview
The BEAMFLY H7 LED Headlight Bulbs feature advanced technology for powerful and efficient lighting.
Key Features:
- Up to 350% brighter light output, with a maximum luminous flux of 16000 lumens per pair.
- 6000K crisp white light for improved visibility.
- Multi-channel heat management system for extended lifespan up to 100,000 hours.
- Optimized beam pattern with reduced glare for oncoming traffic.
- Ideal halogen replacement for low beam/high beam in reflector/projector headlights.
- Operating Voltage: 12 Volts.
- Power: 100 Watts.
- IP68 Waterproof Level.
- Operating Temperature: -40°C to +120°C.

Image: Two BEAMFLY H7 LED headlight bulbs with their packaging, showcasing the product design and branding.
Package Contents:
- 2x H7 LED Headlight Bulbs
- 1x Installation Manual

Image: A detailed diagram highlighting the Premium CSP Chipsets, indicating 100W powerful light, 6000K super white light, 16000LM high lumen output, and 350% more brightness compared to standard halogen bulbs.
Setup and Installation
Before beginning installation, ensure your vehicle's engine is off and the battery is disconnected to prevent electrical hazards.
Compatibility Note:
These bulbs are incompatible with CANbus systems. If your vehicle has a CANbus system, additional decoders or resistors may be required to prevent error messages or flickering.
Installation Steps:
Access Headlight Assembly: Locate the headlight assembly in your vehicle. Depending on your vehicle model, this may require removing certain components like the bumper or fender liner. Consult your vehicle's service manual for specific access instructions.
Remove Old Bulb: Disconnect the power connector from the existing halogen bulb. Unclip or twist to remove the old H7 bulb from its housing.
Install BEAMFLY LED Bulb: Carefully insert the BEAMFLY H7 LED bulb into the headlight housing. Ensure the bulb is seated correctly and securely. The 360° adjustable adapter holder allows for optimization of the beam pattern; adjust as needed to achieve a clear, uniform light beam without glare.
Connect Power: Connect the power connector to the BEAMFLY LED bulb. Ensure a secure connection.
Secure Components: If any components were removed to access the headlight, reassemble them. Ensure all wiring is neatly tucked away and not interfering with moving parts or heat dissipation.
Test Functionality: Reconnect the vehicle battery. Turn on your headlights to test the new LED bulbs. Check both low and high beams. Verify that there are no error messages on your dashboard.
Beam Adjustment: After installation, it is recommended to check and adjust the headlight beam alignment to ensure proper road illumination and to avoid blinding oncoming drivers. This can often be done using adjustment screws on the headlight assembly.

Image: An illustration demonstrating the easy installation process of the H7 LED bulb, detailing its adjustable nature, physical dimensions, and the external constant power LED driver with IP68 waterproof rating and operating temperature range.
Operating Instructions
Your BEAMFLY H7 LED Headlight Bulbs operate automatically with your vehicle's headlight system.
General Operation:
- Turn on your vehicle's headlights as you normally would. The LED bulbs will illuminate instantly.
- Switch between low beam and high beam functions using your vehicle's standard controls.
Optimal Performance:
- The 6000K color temperature provides a bright white light, enhancing visibility during night driving.
- The optimized beam pattern is designed to provide wider visibility and a more concentrated beam, reducing glare for other drivers.
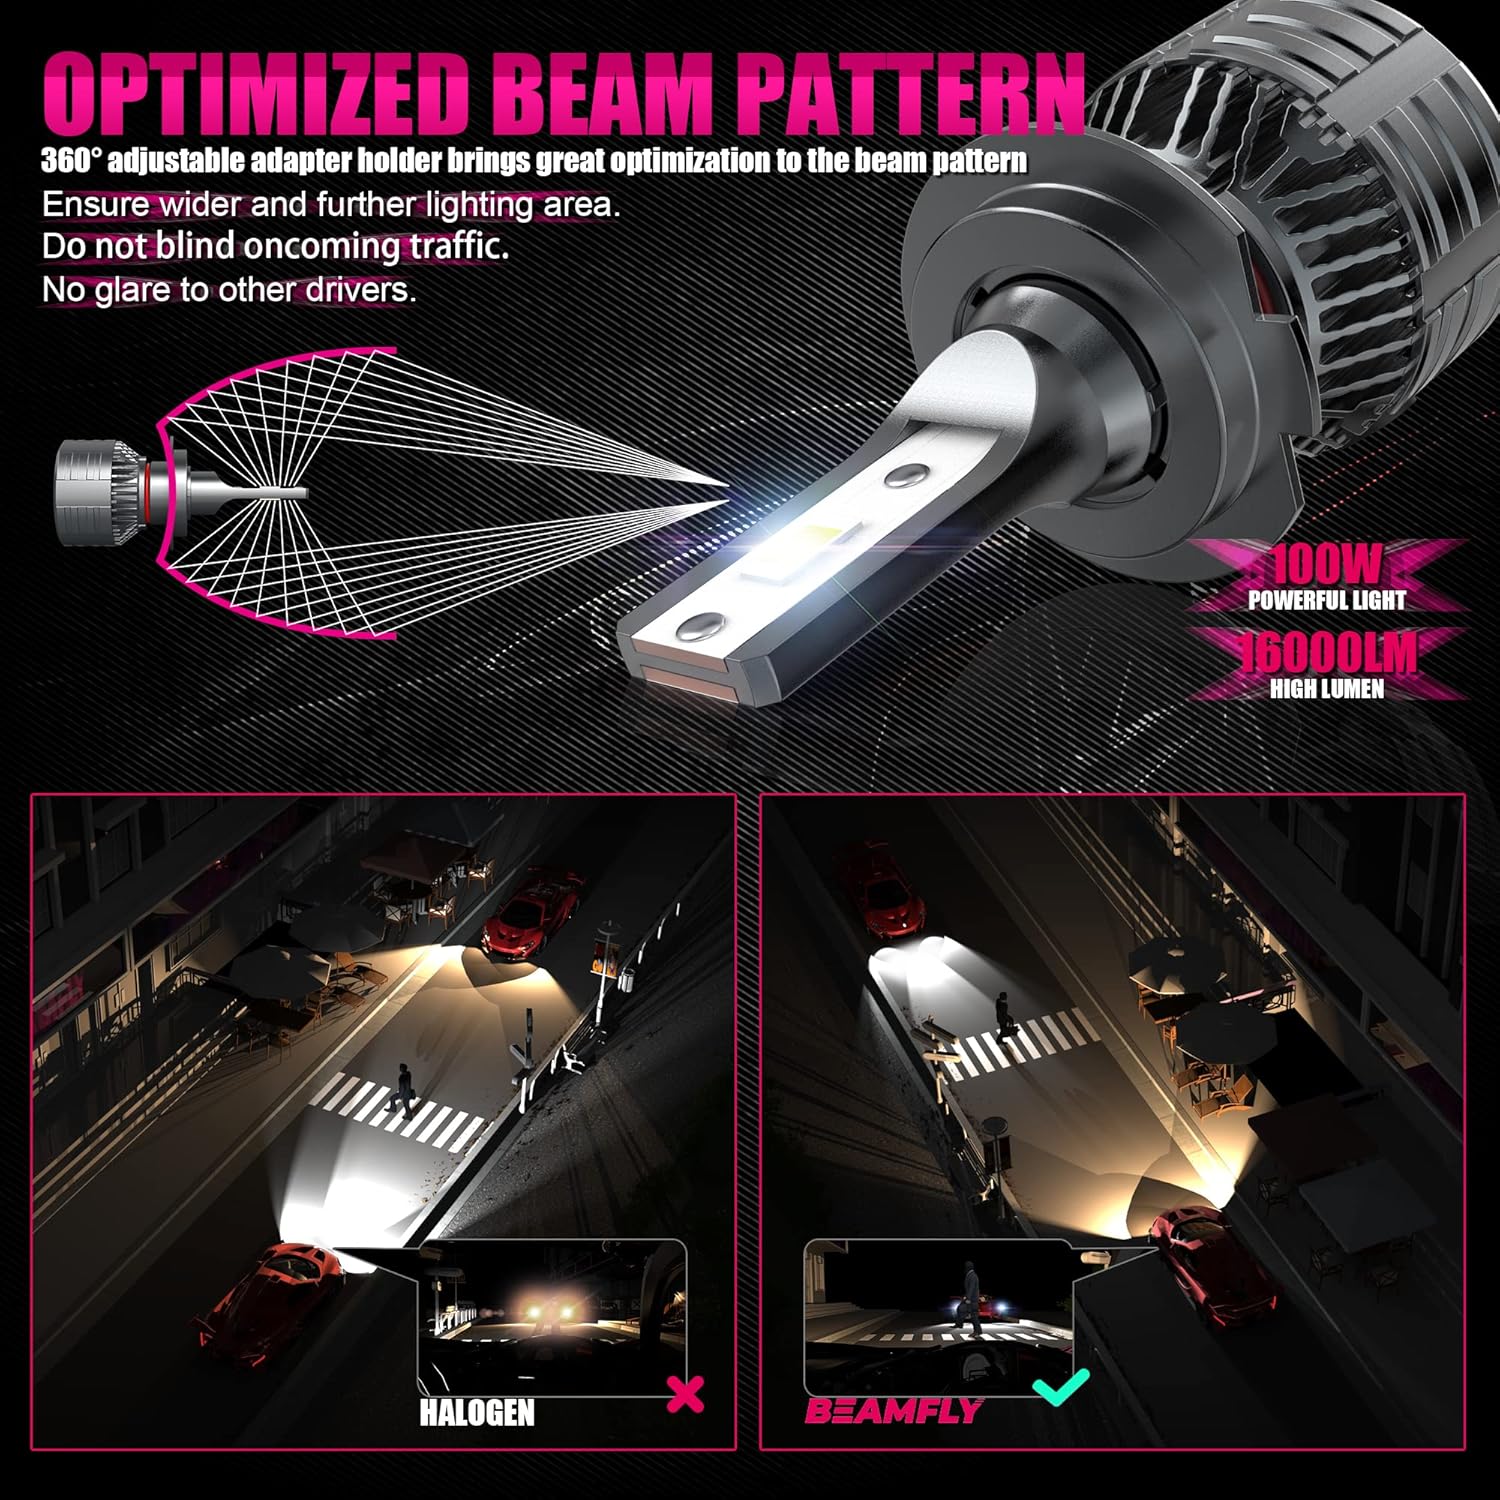
Image: A visual comparison demonstrating the optimized beam pattern of BEAMFLY LED headlights, highlighting how they provide a wider and more focused light distribution compared to traditional halogen bulbs, effectively reducing glare for oncoming traffic.
Maintenance
BEAMFLY LED headlight bulbs are designed for long-term durability and require minimal maintenance.
Cleaning:
- Periodically inspect the headlight lenses for dirt or debris. Clean with a soft, damp cloth to maintain optimal light output.
- Do not use abrasive cleaners or solvents on the bulbs or lenses.
Inspection:
- Regularly check the bulbs for any signs of damage or loose connections.
- Ensure the cooling system (fan and heat sink) remains free from obstructions to prevent overheating and ensure maximum lifespan.
Bulb Replacement:
Due to their extended lifespan (up to 100,000 hours), frequent replacement is not anticipated. If a bulb needs replacement, follow the installation steps in reverse order. It is recommended to replace bulbs in pairs to maintain consistent light output and color temperature.

Image: An exploded view diagram illustrating the powerful cooling system of the LED bulb, featuring a noiseless turbofan operating at 10000 RPM and an aluminum fin heat sink designed for efficient and constant heat dissipation, contributing to a 100,000-hour lifespan and IP68 rating.
Troubleshooting
If you encounter issues with your BEAMFLY H7 LED Headlight Bulbs, refer to the following common problems and solutions:
| Problem | Possible Cause | Solution |
|---|---|---|
| Bulbs not turning on | Loose connection; Incorrect polarity; Blown fuse; CANbus incompatibility. | Check all connections are secure. Ensure correct polarity (some LEDs are sensitive to polarity). Check vehicle fuses. If CANbus is present, install a CANbus decoder/resistor. |
| Flickering or flashing bulbs | CANbus incompatibility; Voltage fluctuations. | Install a CANbus decoder/resistor. Ensure stable 12V power supply. |
| Dashboard error message | CANbus incompatibility (vehicle detects low power draw). | Install a CANbus decoder/resistor. |
| Poor beam pattern or glare | Incorrect bulb orientation; Improper headlight alignment. | Adjust the 360° adapter holder for optimal beam pattern. Adjust vehicle headlight alignment. |
| Bulb overheating and shutting off | Insufficient airflow around cooling system; Prolonged use in extreme conditions. | Ensure cooling fan and heat sink are not obstructed. Allow bulbs to cool if used continuously for very long periods in high temperatures. |
| Radio interference (FM) | Electromagnetic interference from LED driver. | While these bulbs have an EMC filter, some vehicles may still experience minor interference. Ensure proper grounding and secure connections. |
| Light not homogeneous on asphalt | Characteristic of some LED designs; Headlight reflector design. | This can be a characteristic of LED bulbs in certain reflector housings. Ensure the bulb is correctly seated and aligned. |
| Cables too long to fit in housing | Limited space in headlight assembly. | Carefully coil and secure excess cable length within the available space, ensuring it does not obstruct the cooling fan or other components. |
Specifications
| Feature | Detail |
|---|---|
| Model | H7 |
| Light Source Type | LED (Light Emitting Diode) |
| Luminous Flux | 16000 Lumens (per pair) |
| Color Temperature | 6000 Kelvin (Cool White) |
| Power Output | 100 Watts |
| Operating Voltage | 12 Volts |
| Lifespan | Up to 100,000 Hours |
| Waterproof Rating | IP68 |
| Operating Temperature | -40°C to +120°C |
| Heat Management | Multi-channel system with active cooling fan and passive aluminum fin heat sink |
| Special Features | Not compatible with CANbus without additional decoder/resistor. Optimized beam pattern. |
| Dimensions (Package) | 18.1 x 12.3 x 4.6 cm |
| Weight | 190 g |
Warranty and Support
Warranty Information:
For warranty details and claims, please refer to the purchase documentation or contact BEAMFLY customer support directly. Keep your proof of purchase for warranty validation.
Customer Support:
If you require further assistance or have questions not covered in this manual, please contact BEAMFLY customer support.
Visit the official BEAMFLY store for more information: BEAMFLY Store
Recycling Information:
Please dispose of the product and its components responsibly according to local regulations. For information on recycling light bulbs, consult local recycling guidelines.
Information on Broken Bulbs:
In case of a broken or damaged bulb, handle with care. Avoid direct contact with broken glass or internal components. Follow local guidelines for cleaning up and disposing of broken lamps.