
1. Introduction
This manual provides essential instructions for the setup, operation, and maintenance of your Tyler Big Button Phone for Seniors, Model TBBP7-WH. This corded landline phone is designed for ease of use, featuring large buttons, a loud ringer, and a picture speed dial function, making it suitable for individuals with visual or hearing impairments.
2. Package Contents
Before proceeding with the setup, please ensure all items are present in the package:
- Tyler Big Button Phone Base Unit
- Handset
- Coiled Handset Cord
- Telephone Line Cord
- AC Power Adapter

Image: The phone's base unit, handset, coiled handset cord, telephone line cord, and AC power adapter are shown, illustrating all included components.
3. Setup Instructions
Follow these steps to set up your Tyler Big Button Phone:
- Connect the Handset: Plug one end of the coiled handset cord into the handset and the other end into the designated port on the left side of the phone base unit.
- Connect the Telephone Line: Plug one end of the telephone line cord into the 'LINE' port on the back of the phone base unit. Plug the other end into your wall telephone jack.
- Connect the AC Power Adapter: Insert the small plug of the AC power adapter into the 'DC IN' port on the back of the phone base unit. Plug the larger end of the adapter into a standard electrical wall outlet. The phone does not require batteries for basic operation, but the AC adapter powers features like the display, alarm, and LED indicator.
- Initial Check: Once connected, lift the handset. You should hear a dial tone. If not, recheck all connections.
4. Operating Instructions
4.1 Basic Calling Functions
- Making a Call: Lift the handset, wait for a dial tone, then dial the desired phone number using the large numeric keypad.
- Receiving a Call: When the phone rings, lift the handset to answer.
- Ending a Call: Place the handset back on the base unit.
- Redial: To redial the last number called, lift the handset and press the 'REDIAL' button.
- Mute: During a call, press the 'MUTE' button to temporarily silence your microphone. Press it again to unmute.
- Flash: Use the 'FLASH' button for call waiting or to transfer calls if supported by your phone service.
4.2 Volume Control
The phone features adjustable volume controls for both the handset and the ringer:
- Handset Volume: A small switch on the left side of the handset allows you to adjust the receiver volume. This feature complies with FCC Part 68 requirements for hearing aid compatibility.
- Ringer Volume: A switch located under the phone base unit allows you to set the ringer to Low, High, or Off.

Image: The phone's handset volume control and the location of the loud ringer are indicated, demonstrating the accessibility features.
4.3 Pictured Speed Dial
The phone includes three dedicated picture speed dial buttons (A, B, C) for quick access to frequently called numbers:
- Setting Speed Dial Numbers:
- Press the 'STORE' button.
- Dial the phone number you wish to save.
- Press one of the picture speed dial buttons (A, B, or C).
- Press 'STORE' again to save.
- Using Speed Dial: Lift the handset and press the desired picture speed dial button (A, B, or C). The phone will automatically dial the stored number.
- Adding Pictures: You can insert small photos of your contacts into the clear covers of the speed dial buttons for easy visual identification.
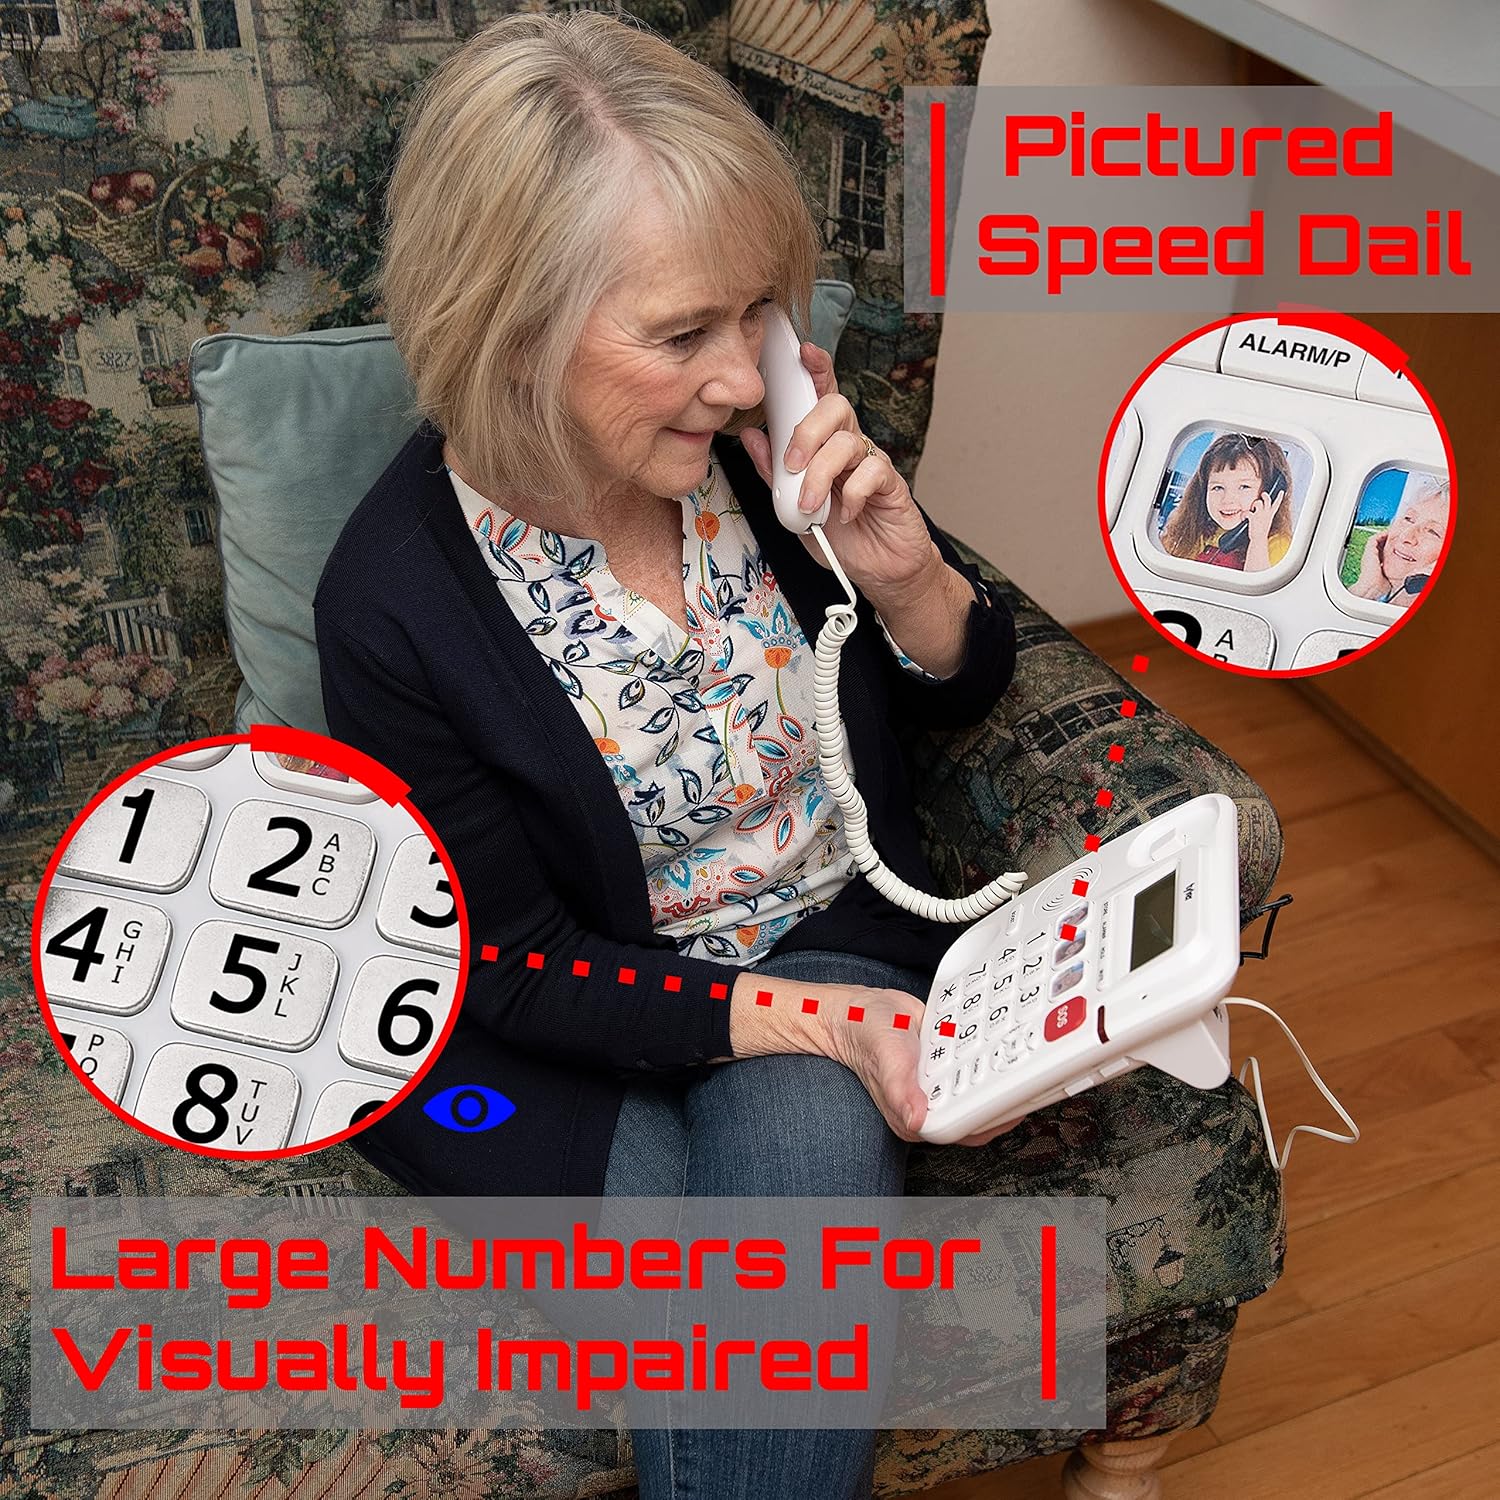
Image: A close-up of the phone's keypad highlights the large, easy-to-read numbers and the three customizable picture speed dial buttons.
4.4 SOS Emergency Button
The red 'SOS' button is designed for emergency situations:
- Setting SOS Number:
- Press the 'STORE' button.
- Dial the emergency contact number (e.g., 911 or a family member).
- Press the 'SOS' button.
- Press 'STORE' again to save.
- Using SOS: In an emergency, lift the handset and press the 'SOS' button. The phone will automatically dial the pre-programmed emergency number.

Image: The phone's SOS emergency button and the LED call indicator are prominently displayed, showing key safety features.
4.5 Additional Features
- LED Call Indicator: A light indicator flashes when there is an incoming call, providing a visual alert.
- Day/Month Calendar, Time, Alarm: The phone's display shows the current day, month, and time. An alarm function is also available. Refer to the detailed instructions for setting these features. Note that the time display is in 24-hour format.
5. Maintenance
To ensure the longevity and proper functioning of your phone, follow these maintenance guidelines:
- Cleaning: Wipe the phone's surface with a soft, damp cloth. Do not use harsh chemicals or abrasive cleaners.
- Avoid Liquids: Keep the phone away from water and other liquids to prevent damage.
- Storage: Store the phone in a cool, dry place when not in use for extended periods.
6. Troubleshooting
If you encounter issues with your Tyler Big Button Phone, refer to the following troubleshooting tips:
| Problem | Possible Cause | Solution |
|---|---|---|
| No dial tone | Telephone line cord is disconnected or faulty. | Check that the telephone line cord is securely plugged into both the phone and the wall jack. Try a different phone line cord if available. |
| Phone does not ring | Ringer volume is set to 'Off' or too low. | Adjust the ringer volume switch located under the phone base unit to 'Low' or 'High'. |
| Low handset volume | Handset volume is set too low. | Adjust the handset volume switch on the left side of the handset. |
| Display is blank or not working | AC power adapter is disconnected or faulty. | Ensure the AC power adapter is securely plugged into the phone and a working electrical outlet. |
| Speed dial not working | Number not stored correctly. | Re-program the speed dial number following the instructions in Section 4.3. |
If the problem persists after trying these solutions, please contact customer support.
7. Specifications
| Feature | Description |
|---|---|
| Brand | Tyler |
| Model Number | TBBP7-WH |
| Color | White |
| Telephone Type | Corded |
| Power Source | Corded Electric |
| Material | Plastic |
| Dialer Type | Single Keypad |
| Multiline Operation | Single-Line Operation |
| Compatible Devices | PSTN (Public Switched Telephone Network) |
| Caller ID | No |
| Answering System Type | Microcassette (Note: This refers to the type of answering system if one were integrated, but the product description does not indicate an integrated answering machine. Please refer to product packaging for clarification on this feature.) |
| Recording Capacity | 16 Minutes (If answering system is present) |
| Phone Standby Time | 96 days (Internal battery for memory/settings) |
| UPC | 712131666511 |
8. Warranty Information
For detailed warranty information, please refer to the documentation included with your purchase or visit the official Tyler product website. Warranty terms and conditions may vary.
9. Customer Support
If you require further assistance or have questions not covered in this manual, please contact Tyler customer support through their official website or the retailer from whom you purchased the product.