
BN-LINK CP-C179
Contents
BN-LINK Smart Digital Timer User Manual
Model: CP-C179
1. Introduction
Thank you for purchasing the BN-LINK Smart Digital Timer. This device allows you to automate the power supply to your electrical appliances, helping you save energy and enhance convenience. Please read this manual carefully before use to ensure proper operation and safety.
2. Safety Precautions
To prevent accidents and ensure safe operation, please observe the following:
- Do not exceed the electrical rating of the timer. Rated Voltage: AC100V, Input Current: 15A 50/60Hz 1500W.
- The timer is made with PC flame-retardant material to prevent electrical fires.
- The plug is equipped with an insulating cap to prevent fires caused by tracking phenomena.
- Do not disassemble or modify the timer.
- Keep the timer away from water and high humidity environments.
- Ensure the timer is securely plugged into a wall outlet.
Applicable Electrical Appliances (Do not exceed specified power):
- Heater appliances: 1500W or less (e.g., electric kettles, electric carpets, heated toilet seats)
- Transformer appliances: 750W or less (e.g., TVs, stereos, AV equipment)
- Motor appliances: 400W or less (e.g., fans, ventilation fans, circulation pumps)
- Lighting fixtures: 750W or less (e.g., incandescent illuminations, fluorescent lamps)
- LED lighting fixtures: 250W or less (e.g., LED illuminations, LED fluorescent lamps)
Note: Simultaneous ON/OFF of two electrical appliances is possible by connecting an extension cord to the timer output and then connecting two electrical appliances to the extension cord. However, please ensure not to exceed 15A total and pay attention to connections.
3. Product Overview
The BN-LINK Smart Digital Timer features a simple design with rounded corners and a large, easy-to-read display. A power indicator lamp is located on the bottom left for quick status checks.

Figure 3.1: Front view of the timer with its clear digital display and intuitive button layout.

Figure 3.2: The timer's large display and easy-to-understand buttons, designed for user convenience.

Figure 3.3: Physical dimensions of the timer, measuring 70mm in height and 68mm in width, with a weight of 114.2 grams.
4. Setup
4.1 Initial Power-Up
- Plug the timer into a standard AC100V wall outlet.
- The display will light up, and the current time will be shown. If the display is blank, press any button to activate it.
4.2 Setting Current Time and Day
- Press the 'Clock' button (時計) to enter time setting mode.
- Use the 'Day' (曜日), 'Hour' (時), and 'Minute' (分) buttons to adjust the current day, hour, and minute respectively.
- Press the 'Clock' button again to confirm and exit time setting mode.
5. Operating Instructions
5.1 Programming ON/OFF Times
The timer supports up to 20 ON/OFF programs per day. You can set specific days, hours, and minutes for each program.
- Press the 'Program' (プログラム) button to enter programming mode. The display will show '1 ON'.
- Use the 'Day' (曜日) button to select the desired day(s) for this program (e.g., Mon-Fri, everyday, specific days).
- Use the 'Hour' (時) and 'Minute' (分) buttons to set the ON time for Program 1.
- Press the 'Program' button again. The display will show '1 OFF'.
- Use the 'Day' (曜日), 'Hour' (時), and 'Minute' (分) buttons to set the OFF time for Program 1.
- Repeat steps 1-5 for additional programs (up to 20). Press 'Program' to cycle through '2 ON', '2 OFF', etc.
- To exit programming mode, press the 'Clock' (時計) button.
5.2 Activating Timer Mode
After setting your programs, you must switch the timer to 'Timer' mode for the programs to execute.
- Press the 'Mode' (モード) button repeatedly until 'Timer' is displayed on the screen.
- The timer will now automatically turn connected appliances ON and OFF according to your set programs.
- To manually override the timer, press the 'Mode' button to switch between 'ON', 'OFF', and 'Timer' modes.
5.3 Power Saving Feature
The timer's screen will automatically go blank after 3 minutes of inactivity to save power. Press any button to reactivate the display.

Figure 5.1: The timer's safety features, including flame-retardant material and an insulated plug, alongside its capacity for 20 programs.
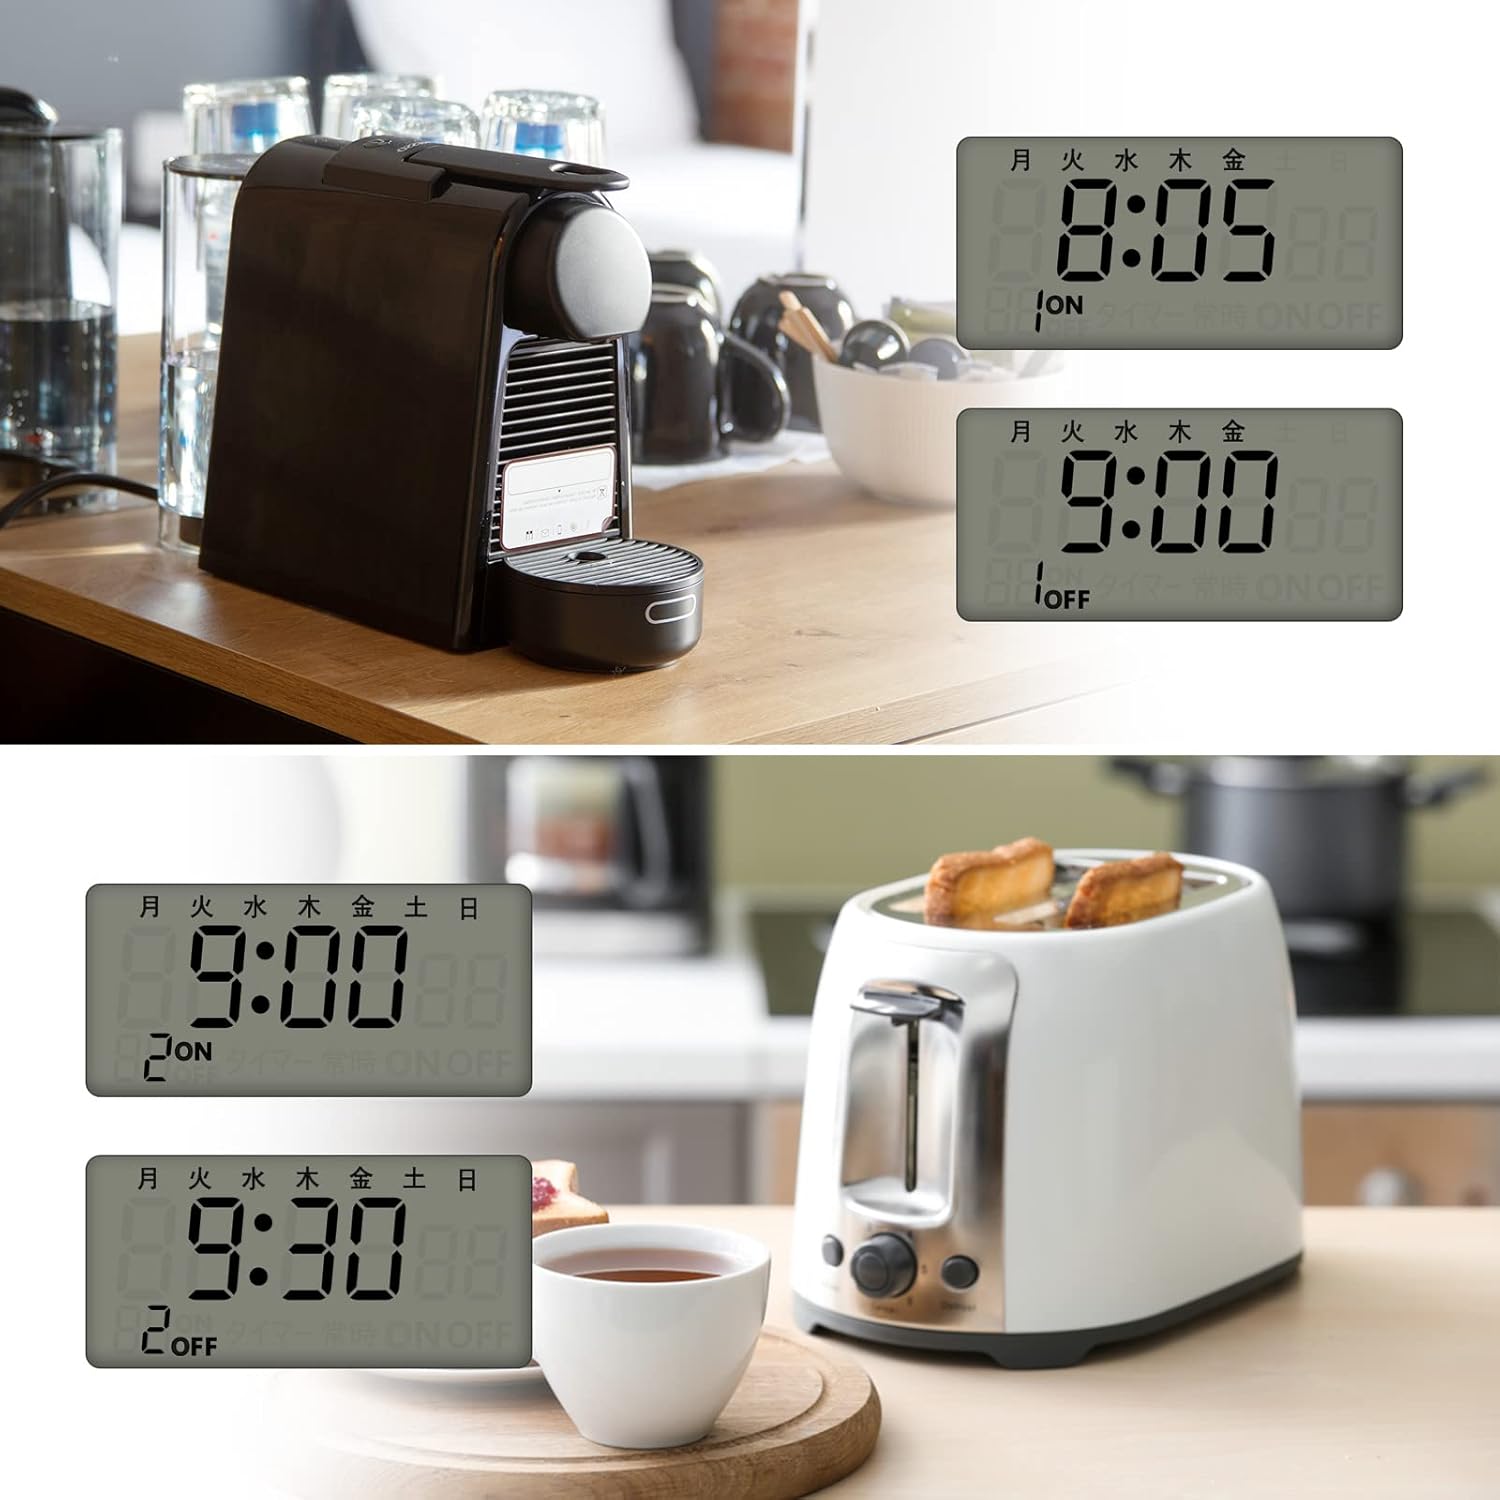
Figure 5.2: Examples of the timer's use with common kitchen appliances like a coffee maker and a toaster.

Figure 5.3: Versatile applications of the timer, including controlling humidifiers, lamps, Wi-Fi routers, and decorative lighting.

Figure 5.4: The timer's role in home security, enabling anti-theft lighting by simulating presence when you are away.
6. Maintenance
To ensure the longevity and proper functioning of your timer, follow these maintenance guidelines:
- Wipe the timer with a soft, dry cloth. Do not use abrasive cleaners or solvents.
- Ensure the timer is unplugged before cleaning.
- Keep the timer in a clean, dry environment, away from direct sunlight and extreme temperatures.
7. Troubleshooting
If you encounter issues with your BN-LINK Smart Digital Timer, please refer to the following common problems and solutions:
| Problem | Possible Cause | Solution |
|---|---|---|
| Timer does not turn ON/OFF at programmed times. | Timer is not in 'Timer' mode. | Press the 'Mode' button until 'Timer' is displayed on the screen. |
| Display is blank or dim. | Power saving mode activated or insufficient lighting. | Press any button to reactivate the display. Ensure adequate lighting if viewing in a dark area. |
| Programs are lost after power outage. | Internal battery may be depleted or defective. | The timer has a built-in battery for backup. If programs are consistently lost, contact customer support. |
| Difficulty understanding instructions. | Manual translation or complexity. | Review the instructions carefully, paying attention to mode changes (e.g., holding 'Mode' button for 5 seconds for certain functions). If issues persist, contact support. |
| Timer is not responding. | Temporary malfunction or power issue. | Unplug the timer from the outlet for a few minutes, then plug it back in. If the issue persists, contact customer support. |
8. Specifications
| Feature | Specification |
|---|---|
| Manufacturer | BN-LINK |
| Model Number | CP-C179 |
| Rated Voltage | AC100V |
| Input Current | 15A |
| Power Rating | 1500W |
| Frequency | 50/60Hz |
| Material | Plastic (PC Flame-Retardant) |
| Color | White |
| Product Dimensions (L x W x H) | 3.3 x 6.8 x 7 cm |
| Item Weight | 114 grams |
| Battery Type | Nickel-metal hydride (NiMH) |
| Batteries Included | Yes |
9. Warranty and Support
9.1 Manufacturer Warranty
This product comes with a 1-year manufacturer warranty. Please retain your proof of purchase for warranty claims.
9.2 Customer Support
For any questions, technical assistance, or warranty inquiries, please contact BN-LINK customer support through the retailer where you purchased the product or visit the official BN-LINK website for contact information.
Ask a question about this manual
Ask about setup, troubleshooting, compatibility, parts, safety, or missing instructions. Manuals+ will review the question and use this page’s manual context to help answer it.