1. Introduction
Thank you for choosing the Walfront 8 Channel Audio Mixer. This manual provides essential information for the proper setup, operation, and maintenance of your audio mixer. Please read this manual thoroughly before using the product to ensure optimal performance and longevity.
This compact and versatile audio mixer is designed to combine multiple audio sources into a single output, offering both mono and stereo capabilities for various applications.
2. Product Overview
The Walfront 8 Channel Audio Mixer is a low-noise mixing console featuring 8 channel inputs and 2 channel outputs. It is designed for ease of use and portability, making it suitable for various audio mixing needs.
Key Features:
- 8 Channel Inputs, 2 Channel Outputs: Provides flexible connectivity for multiple audio sources.
- Individual Volume Adjustment: Each input channel features an independent volume knob for precise control.
- Master Volume Control: Two master volume knobs allow for overall output level adjustment.
- Mono/Stereo Input Modes: Supports 4-channel stereo or 8-channel mono input by adjusting the mode switch.
- Dual Power Options: Can be powered by a 9V lithium battery or the included DC 12V power adapter.
- Compact and Portable: Lightweight and small design for easy carrying and storage.
Package Contents:
- 1 x Walfront 8 Channel Audio Mixer
- 1 x DC 12V Power Adapter (US Plug 110-240V)
- 1 x 6.35mm Audio Cable
3. Component Identification

Figure 1: Top Panel Controls
- CHANNEL 1-4 (A/B): Input channels with individual volume controls.
- VOLUME Knobs: Adjust the input level for each channel.
- MASTER A (Mono) / MASTER B: Master volume controls for output groups.
- MIC/LINE Switches: Select input type for Master A and Master B.
- PEAK Indicator: Lights up when the audio signal is clipping.
- MONO (8 CH) / STEREO (4 CH) Switch: Selects the overall output mode.

Figure 2: Rear Panel Connections
- INPUT 1-8 (6.35mm Jacks): Connect your audio sources.
- OUTPUT A / OUTPUT B (6.35mm Jacks): Connect to your amplifier or recording device.
- ON/OFF Switch: Power switch for the unit.
- DC 12V Input: Connect the provided power adapter.
4. Setup
- Power Connection:
- Connect the provided DC 12V power adapter to the 'DC 12V' input jack on the rear panel.
- Plug the power adapter into a standard 110-240V US power outlet.
- Alternatively, the mixer can be powered by a 9V lithium battery (not included).
- Audio Input Connection:
- Connect your audio sources (e.g., microphones, instruments, media players) to the 'INPUT 1' through 'INPUT 8' 6.35mm jacks on the rear panel.
- Ensure cables are securely connected.
- Audio Output Connection:
- Connect the 'OUTPUT A' and/or 'OUTPUT B' 6.35mm jacks to your amplifier, powered speakers, or recording device.
- Initial Power On:
- Before turning on, ensure all volume knobs are set to their minimum position (0).
- Flip the 'ON/OFF' switch to the 'ON' position. The power indicator light should illuminate.
5. Operating Instructions
- Input Mode Selection:
- Use the 'MIC/LINE' switches for 'MASTER A' and 'MASTER B' to select the appropriate input sensitivity for your connected devices. 'MIC' is for microphones, 'LINE' is for line-level devices (e.g., keyboards, media players).
- Individual Channel Volume Adjustment:
- Gradually turn up the 'VOLUME' knob for each active input channel until the desired level is achieved.
- Monitor the 'PEAK' indicator. If it lights up frequently, reduce the channel volume to prevent distortion.
- Master Volume Adjustment:
- Adjust the 'MASTER A' and 'MASTER B' volume knobs to control the overall output level of the mixer.
- Mono/Stereo Output Mode:
- Use the 'MONO (8 CH) / STEREO (4 CH)' switch to select your desired output configuration.
- In MONO (8 CH) mode, all 8 input channels are mixed into a single mono signal, output through both OUTPUT A and OUTPUT B.
- In STEREO (4 CH) mode, inputs 1-4 are routed to OUTPUT A (left channel) and inputs 5-8 are routed to OUTPUT B (right channel), creating a stereo mix.
6. Power Supply
The Walfront 8 Channel Audio Mixer offers flexible power options:
- DC 12V Power Adapter: Use the included 110-240V US plug adapter for continuous power.
- 9V Lithium Battery: For portable use, the mixer can be powered by a single 9V lithium battery (not included). Ensure the battery is correctly installed according to polarity markings.
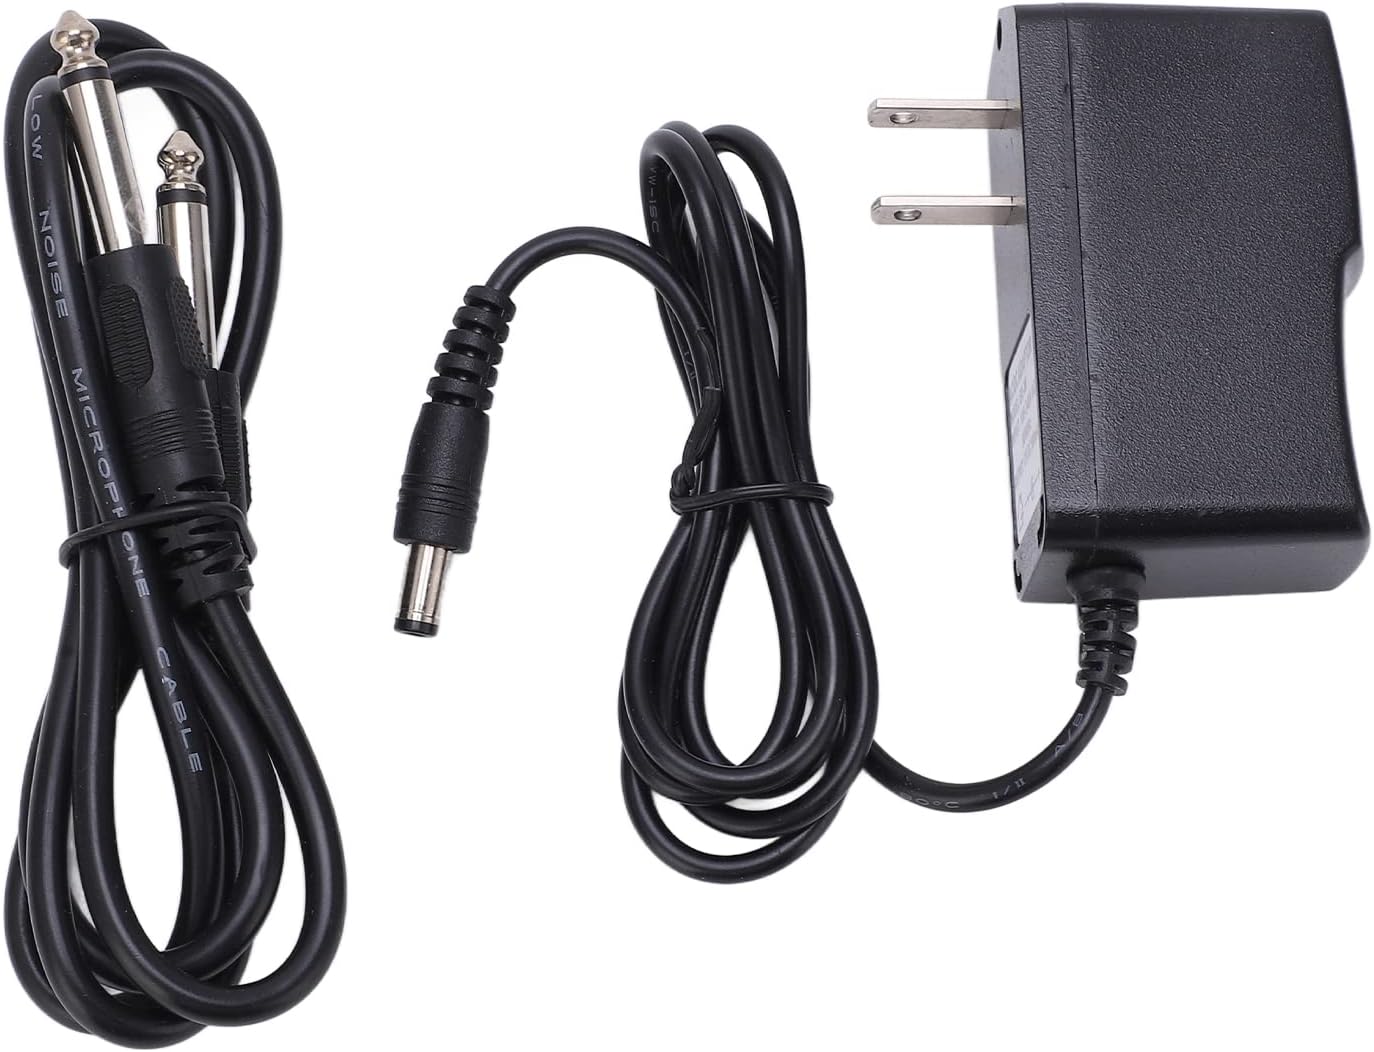
Figure 3: Power Input and Switch
7. Maintenance
- Cleaning: Use a soft, dry cloth to clean the exterior of the mixer. Avoid using liquid cleaners or solvents.
- Storage: Store the mixer in a cool, dry place away from direct sunlight and extreme temperatures.
- Handling: Handle the unit with care to prevent damage to knobs, switches, and input/output jacks.
- Battery Replacement: If using battery power, replace the 9V lithium battery when the power indicator dims or audio quality degrades.
8. Troubleshooting
| Problem | Possible Cause | Solution |
|---|---|---|
| No power | Power adapter not connected; battery drained; power switch off. | Ensure power adapter is securely connected and plugged in. Replace battery if drained. Turn power switch to 'ON'. |
| No sound output | Volume knobs set too low; incorrect input/output connections; faulty cables. | Increase individual channel and master volume. Check all audio cable connections. Test with different cables. |
| Distorted sound | Input level too high (PEAK light on); incorrect MIC/LINE setting. | Reduce individual channel volume. Ensure correct 'MIC/LINE' setting for your source. |
| Excessive noise/hum | Ground loop; interference from other electronics; poor quality cables. | Ensure proper grounding. Keep audio cables away from power cables. Use shielded cables. |
9. Specifications
- Brand: Walfront
- Model Number: Walfrontftc59w7z8b6571
- Number of Channels: 8
- Connectivity Technology: 6.35mm (1/4 inch) jack
- Output Connector Type: TRS
- Power Source: Battery Powered (9V lithium) or DC 12V Adapter
- Voltage: 12 Volts (DC)
- Item Weight: 1.58 pounds
- Package Dimensions: 7.87 x 6.3 x 3.11 inches
10. Warranty and Support
For warranty information or technical support, please refer to the product packaging or contact Walfront customer service directly. Keep your purchase receipt as proof of purchase.
