1. Introduction
Thank you for choosing the Maclean MCE995 Hunter Metal Detector. This device is designed for detecting various metals, including coins, relics, jewelry, gold, and silver. It features a waterproof search coil, an intuitive LCD screen, and advanced discrimination capabilities to enhance your treasure hunting experience. Please read this manual thoroughly before operating the detector to ensure proper use and optimal performance.
2. Safety Information
- Always obtain permission before searching on private property.
- Avoid searching in areas where underground utilities (cables, pipes) may be present.
- Exercise caution when digging to prevent injury or damage to property.
- Do not operate the detector near live electrical wires or in thunderstorms.
- Keep the control box dry. The search coil is waterproof, but the control box is not.
- Dispose of batteries responsibly according to local regulations.
3. Package Contents
Please check the package contents to ensure all items are present:
- Maclean MCE995 Hunter Metal Detector (Control Box, Adjustable Stem, Search Coil)
- Armrest with strap
- User Manual
Note: Two 9V alkaline batteries are required for operation and are not included in the package.
4. Product Overview
4.1 Components
The Maclean MCE995 Hunter Metal Detector consists of the following main components:
- Control Box: Houses the electronics, LCD display, and control buttons.
- Adjustable Stem: Allows for length adjustment to suit user height.
- Search Coil: The waterproof component that detects metal objects.
- Armrest: Provides support and comfort during use.
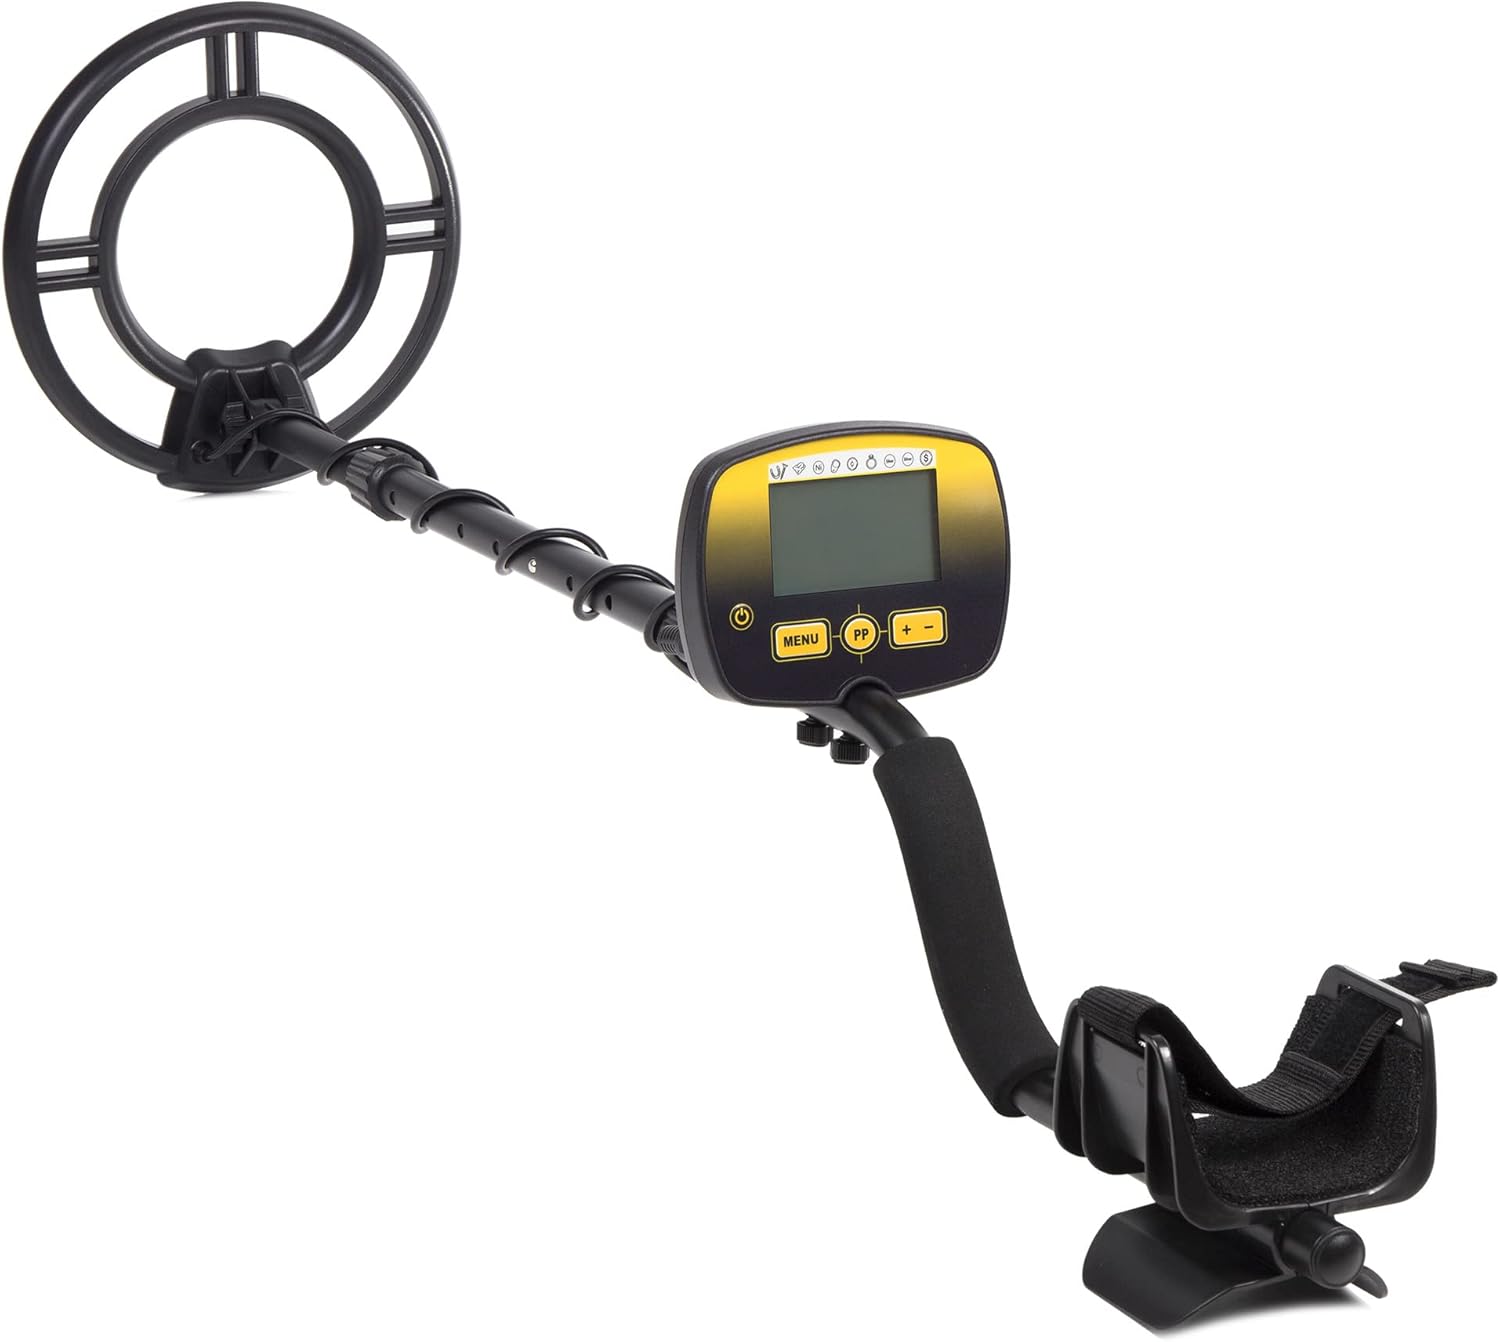
Figure 4.1: Fully assembled Maclean MCE995 Hunter Metal Detector.
4.2 Control Panel and LCD Display
The control panel features five buttons and an LCD screen that provides essential information during operation.

Figure 4.2: Detailed view of the control panel and LCD display.
LCD Display Indicators:
- Metal Type Indicator: Displays probable metal type (e.g., Iron Foil, 5¢, Alum, Zn 10¢, 25¢, 50¢, 1$, Silver).
- Target Depth: Indicates the approximate depth of the detected object.
- DISC (Discrimination): Shows the active discrimination setting.
- NOTCH: Indicates if the Notch function is active.
- SENS (Sensitivity): Displays the current sensitivity level (1 to 10).
- Volume Level: Indicates the audio volume setting.
- Battery Status: Shows the remaining battery life.
- Digital Target Detection: Provides a numerical value for target identification.
- Backlight: Allows for use in low-light conditions.
Control Buttons:
- Power Button: Turns the detector on or off.
- MENU Button: Accesses and navigates through settings.
- PP (Pinpoint) Button: Activates the pinpoint function for precise target location.
- '+' Button: Increases values or navigates menu options.
- '-' Button: Decreases values or navigates menu options.
5. Setup
5.1 Assembly
Follow these steps to assemble your metal detector:
- Attach the search coil to the lower stem using the provided bolt and nut.
- Connect the lower stem to the middle stem, and then the middle stem to the upper stem (control box assembly). Ensure the spring clips engage securely.
- Wrap the search coil cable around the stem, ensuring it is snug but not overly tight, and plug the connector into the port on the control box.
- Slide the armrest onto the upper stem and secure it in a comfortable position.

Figure 5.1: Assembly diagram of the metal detector components.
5.2 Battery Installation
The detector requires two 9V alkaline batteries (not included).
- Locate the battery compartment on the control box.
- Open the compartment cover.
- Insert two 9V batteries, observing the correct polarity (+/-).
- Close the battery compartment cover securely.
5.3 Adjusting the Detector
Adjust the length of the stem and the armrest for comfortable operation:
- Loosen the locking collar on the stem.
- Extend or retract the stem until the search coil is parallel to the ground when you are standing upright and holding the detector comfortably.
- Tighten the locking collar to secure the stem length.
- Adjust the armrest position and secure the strap around your forearm for stability.
6. Operating Instructions
6.1 Power On/Off
Press the Power Button (usually marked with a circle and vertical line) on the control panel to turn the detector on. Press and hold the same button to turn it off.
6.2 Basic Operation
Once powered on, the detector will perform a self-test. Begin by sweeping the search coil slowly and steadily from side to side, keeping it parallel to the ground and approximately 1-2 inches above the surface. When a target is detected, the detector will emit an audio tone, and the LCD screen will display information about the probable target.
6.3 Sensitivity Adjustment (SENS)
Sensitivity controls the detector's ability to detect targets. Higher sensitivity increases detection depth but can also increase false signals in mineralized ground or areas with electrical interference.
- Press the MENU button until 'SENS' is highlighted on the LCD.
- Use the '+' and '-' buttons to adjust the sensitivity level from 1 (lowest) to 10 (highest).
- Start with a medium sensitivity level and adjust as needed based on ground conditions.
6.4 Discrimination (DISC) and Notch Function
The discrimination function allows the detector to ignore unwanted metals (like iron) and focus on more valuable targets. The Notch function allows you to selectively eliminate specific metal categories.
- Press the MENU button until 'DISC' or 'NOTCH' is highlighted.
- Use the '+' and '-' buttons to adjust the discrimination level or select/deselect specific notches. Refer to the LCD's metal type indicators to understand which categories are being discriminated against.
- A higher DISC setting will filter out more ferrous (iron) objects.
6.5 Audio Tones
The detector provides three distinct audio tones (high, medium, low) to help identify different types of metals:
- Low Tone: Typically indicates ferrous metals (iron).
- Medium Tone: Often indicates small non-ferrous metals or some alloys.
- High Tone: Usually indicates larger non-ferrous metals, such as silver, copper, or gold.
6.6 Pinpoint Function (PP)
Once a target is detected, use the pinpoint function to locate its exact position before digging.
- Center the search coil over the detected target.
- Press and hold the PP button.
- Slowly move the coil in a cross-pattern over the target. The audio tone will become loudest and the signal strength indicator on the LCD will peak when the coil is directly over the center of the target.
6.7 Headphone Use
The detector includes a 3.5mm headphone jack for private listening and to better hear subtle target signals, especially in noisy environments.
- Plug any standard 3.5mm headphones into the headphone jack on the control box.
- The internal speaker will be muted when headphones are connected.
6.8 Waterproof Search Coil
The search coil is waterproof (IP68 rated), allowing you to search in shallow water. However, the control box is not waterproof and must be kept dry at all times.
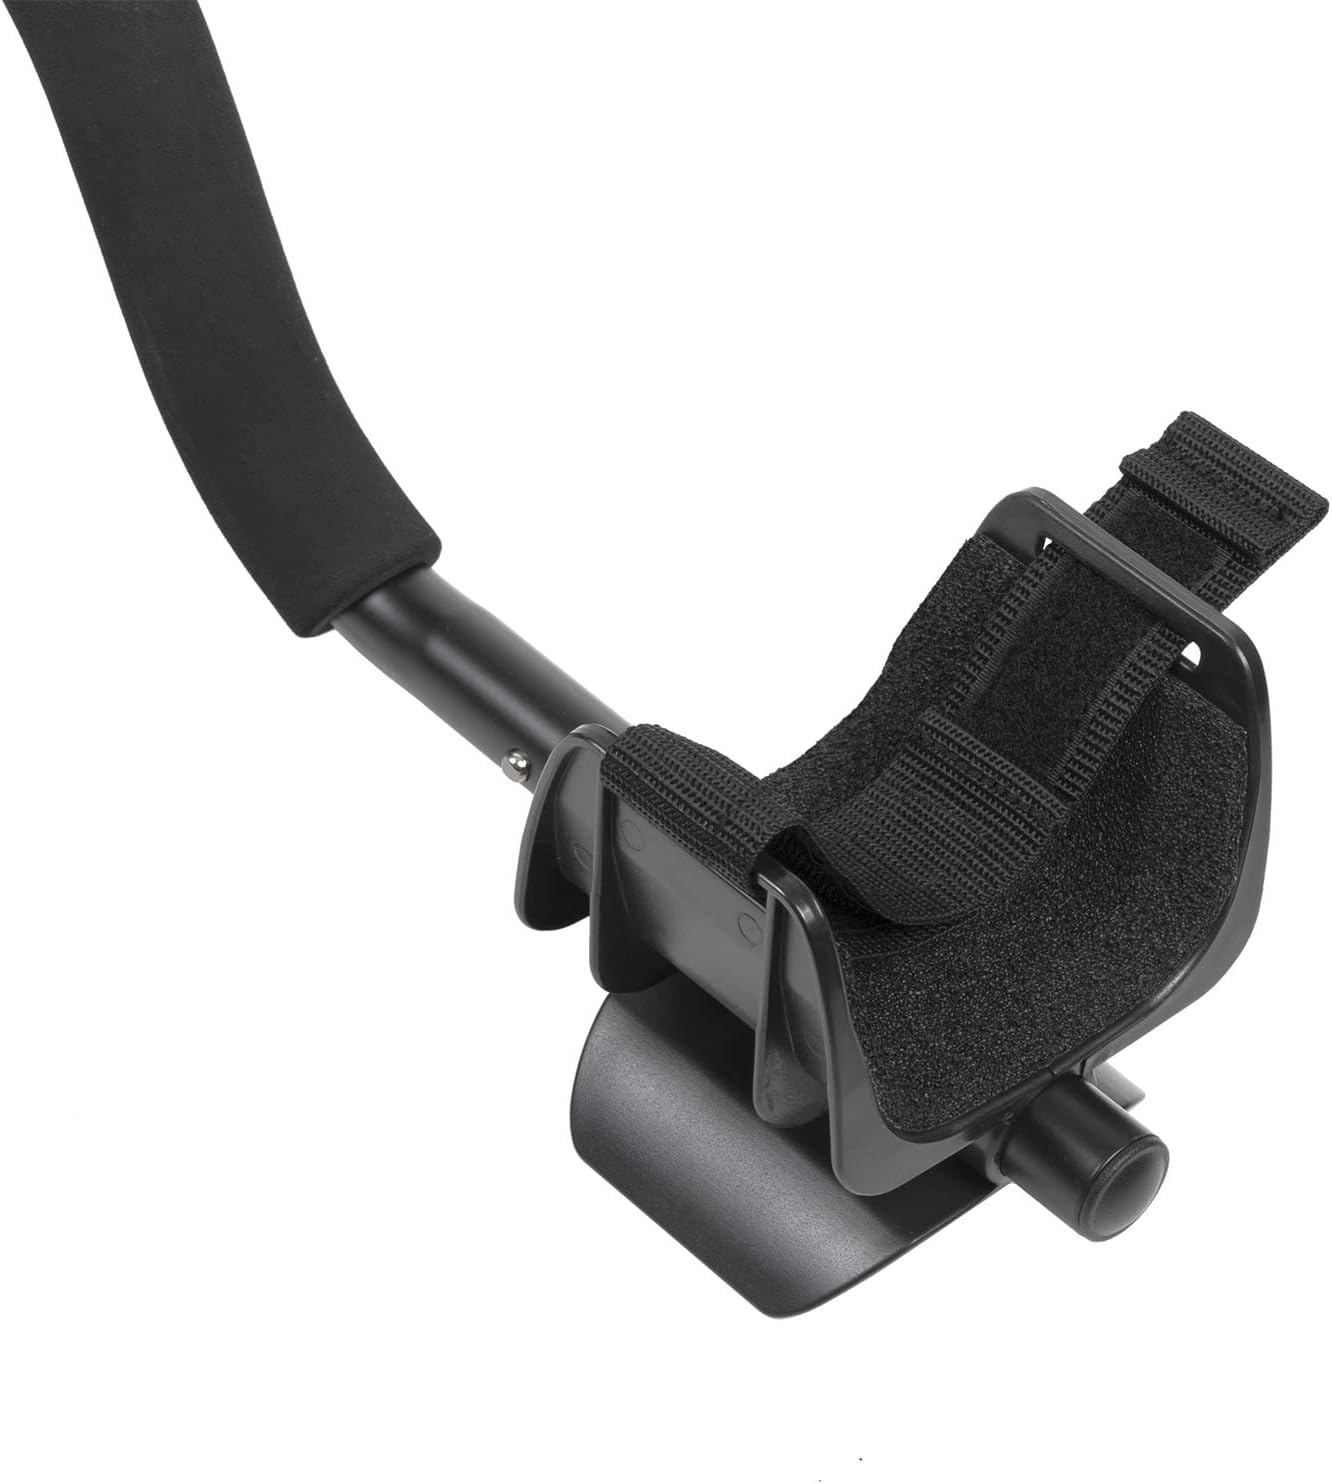
Figure 6.1: The waterproof search coil, suitable for shallow water detection.
7. Maintenance
- Cleaning: Wipe the detector with a damp cloth after each use. Do not use abrasive cleaners or solvents. The search coil can be rinsed with fresh water.
- Storage: Store the detector in a cool, dry place when not in use. Remove batteries if storing for extended periods to prevent leakage.
- Battery Care: Replace batteries when the low battery indicator appears on the LCD. Always use fresh, high-quality alkaline batteries.
- Cable Inspection: Regularly check the search coil cable for any signs of damage or wear.
8. Troubleshooting
If you encounter issues with your Maclean MCE995 Hunter Metal Detector, refer to the following common problems and solutions:
| Problem | Possible Cause | Solution |
|---|---|---|
| No power | Dead or incorrectly installed batteries | Replace batteries with fresh 9V alkaline batteries, ensuring correct polarity. |
| Erratic signals / False signals | High sensitivity, electrical interference, mineralized ground, loose coil cable | Reduce sensitivity. Move away from power lines or other electronic devices. Tighten the search coil cable connection. |
| No detection / Low sensitivity | Low sensitivity setting, deeply buried target, incorrect discrimination setting | Increase sensitivity. Ensure discrimination is not set too high for desired targets. Sweep slower. |
| LCD screen not visible in dark | Backlight off | The LCD screen has a backlight feature for night use. Check manual for specific backlight activation if not automatic. |
If the problem persists after trying these solutions, please contact Maclean customer support.
9. Specifications
| Feature | Specification |
|---|---|
| Model | MCE995 Hunter |
| Brand | Maclean |
| Power Source | 2 x 9V Alkaline Batteries (not included) |
| Battery Life | Approximately 30 hours |
| Search Coil | Waterproof |
| Display | LCD with Backlight |
| Discrimination Function | Yes (DISC, NOTCH modes) |
| Sensitivity Adjustment | Levels 1-10 |
| Audio Tones | Three distinct tones (Low, Medium, High) |
| Headphone Jack | 3.5mm |
| Adjustable Length | Yes |
| International Protection Rating | IP68 (for search coil) |
| Product Dimensions (L x W x H) | 43 x 29 x 15 cm |
| Item Weight | 1.06 Kilograms |
| Material | Metal |
10. Warranty and Support
For warranty information or technical support, please refer to the documentation provided with your purchase or contact your retailer. You may also visit the official Maclean website for further assistance.


