1. Introduction
This manual provides essential information for the proper installation, operation, and maintenance of your Rampage RM-420 BLACK EAGLE 27-inch 165Hz 1ms IPS Full HD Gaming Monitor. Please read this manual thoroughly before using the product and retain it for future reference.
2. Safety Information
- Do not expose the monitor to rain or moisture to prevent fire or shock hazards.
- Do not open the monitor casing. There are no user-serviceable parts inside. Refer all servicing to qualified personnel.
- Place the monitor on a stable, flat surface to prevent it from falling.
- Ensure proper ventilation around the monitor. Do not block ventilation openings.
- Use only the power adapter supplied with the monitor.
- Unplug the monitor from the power outlet during lightning storms or when unused for long periods.
3. Package Contents
Verify that all items are present in your product package:
- Rampage RM-420 BLACK EAGLE Monitor
- Monitor Stand (Base and Neck)
- Power Cable
- HDMI Cable
- User Manual (this document)
4. Setup
4.1 Assembling the Stand
- Carefully remove the monitor from its packaging, keeping the screen protected.
- Attach the stand neck to the back of the monitor by aligning the mounting points and securing with screws if provided.
- Attach the stand base to the stand neck, ensuring it clicks into place or is secured with the provided screw.
- Place the assembled monitor on a stable, flat surface.
4.2 Connecting Cables
Connect the necessary cables to the monitor and your computer or other devices.
- Power Connection: Connect the power cable to the monitor's power input and then to a wall outlet.
- Video Connection: Connect one end of the HDMI or DisplayPort (DP) cable to the corresponding port on your monitor and the other end to your computer's graphics card. A VGA port is also available for older systems.
- Audio Connection: If desired, connect external speakers or headphones to the audio output jack on the monitor.
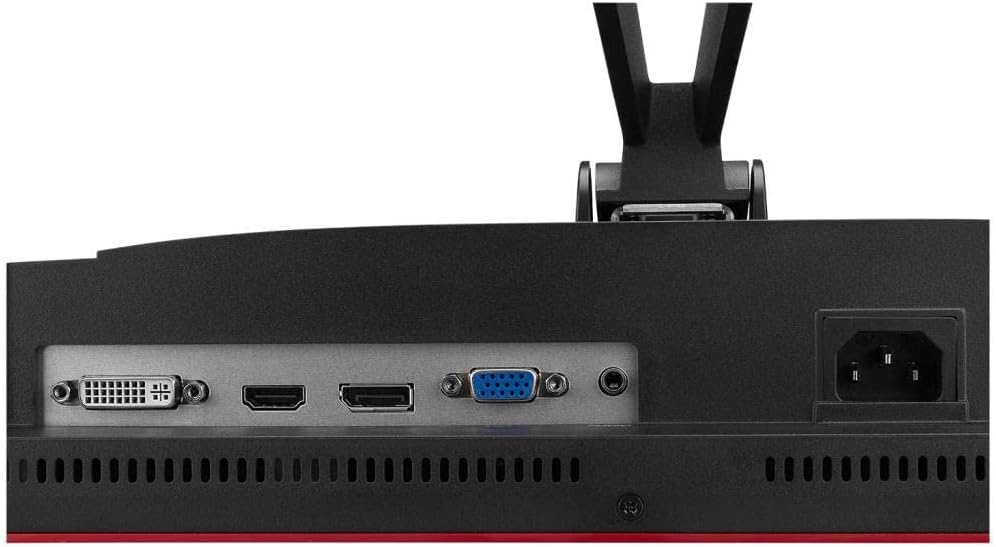
Image: Rear view of the monitor showing the DVI, HDMI, VGA, and DisplayPort inputs, along with the audio out and power input.
4.3 Initial Power-On
After connecting all cables, press the power button on the monitor to turn it on. The monitor should automatically detect the input signal. If not, you may need to manually select the input source using the OSD menu.
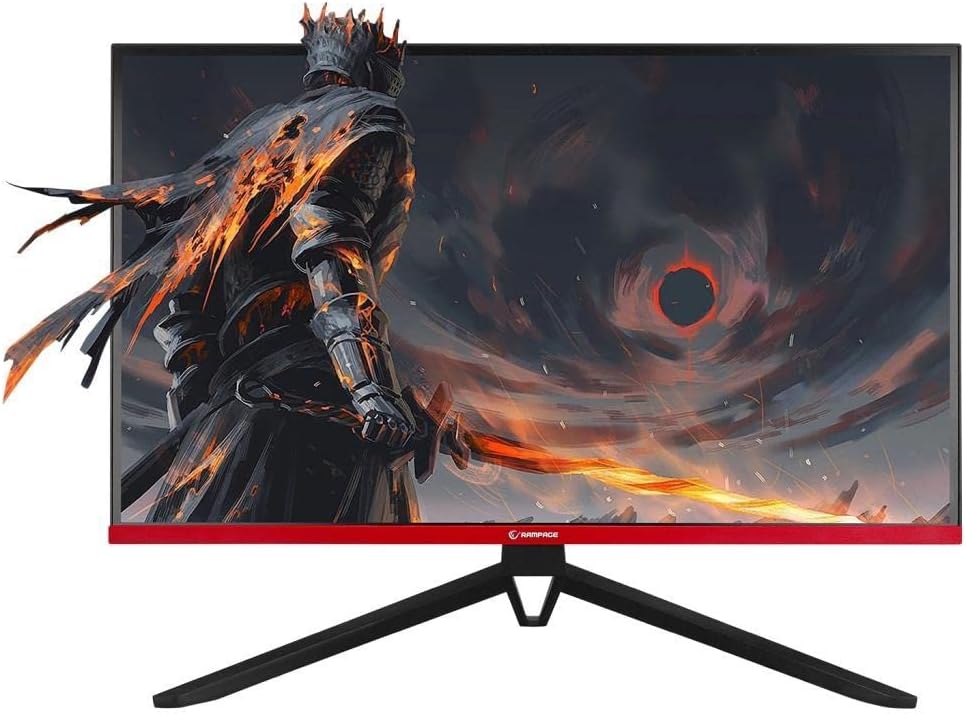
Image: Front view of the Rampage RM-420 monitor, showcasing its display with a vibrant game scene.
5. Operating the Monitor
5.1 On-Screen Display (OSD) Menu
The OSD menu allows you to adjust various monitor settings. Use the buttons located on the monitor (usually on the back or bottom right) to navigate and select options.
- Press the Menu button to open the OSD.
- Use the Up/Down or Left/Right buttons to navigate through menu options.
- Press the Enter or OK button to select an option or confirm a setting.
- Press the Exit or Back button to return to the previous menu or exit the OSD.
5.2 Display Settings
Key settings you can adjust include:
- Brightness/Contrast: Adjust the overall luminance and difference between light and dark areas.
- Color Settings: Modify color temperature, hue, and saturation.
- Input Source: Manually select between HDMI, DisplayPort, or VGA inputs.
- Refresh Rate: Ensure your refresh rate is set to 165Hz for optimal gaming performance (requires compatible graphics card and cable).
- FreeSync: Enable or disable AMD FreeSync technology for tear-free gaming (requires compatible AMD graphics card).
- Picture Mode: Select from preset modes (e.g., Standard, Game, Movie, Text) for different viewing scenarios.
5.3 RGB Lighting
The monitor features RGB lighting on its rear panel. These lights can often be controlled via the OSD menu to change colors or lighting effects, enhancing the aesthetic of your gaming setup.

Image: Rear view of the Rampage RM-420 monitor, highlighting the integrated RGB lighting elements.
6. Maintenance
6.1 Cleaning the Monitor
- Always unplug the monitor before cleaning.
- Use a soft, lint-free cloth slightly dampened with water or a specialized screen cleaner to wipe the screen. Avoid using alcohol, ammonia, or abrasive cleaners.
- For the casing, use a soft, dry cloth.
6.2 Storage
If storing the monitor for an extended period, disconnect all cables, pack it in its original packaging if possible, and store it in a cool, dry place away from direct sunlight and extreme temperatures.
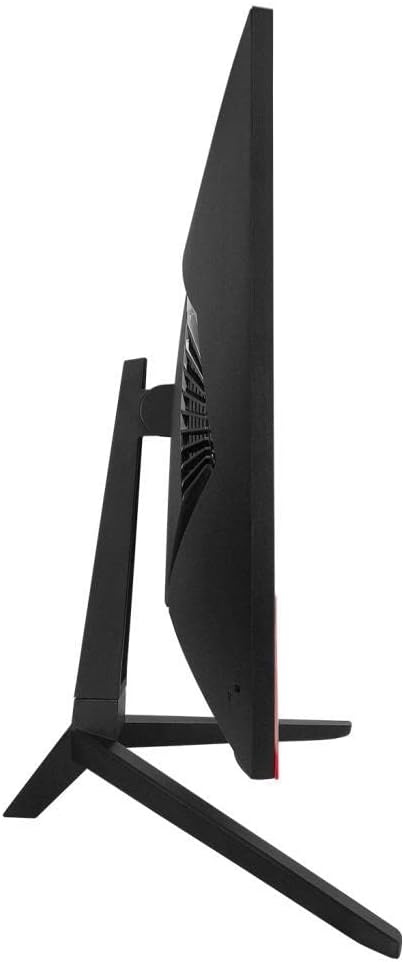
Image: Side profile of the Rampage RM-420 monitor, showing its slim design.
7. Troubleshooting
If you encounter issues with your monitor, refer to the following common problems and solutions:
- No Power:
- Ensure the power cable is securely connected to both the monitor and the power outlet.
- Check if the power outlet is functioning correctly.
- Press the monitor's power button.
- No Signal:
- Verify that the video cable (HDMI, DP, VGA) is securely connected to both the monitor and your computer.
- Ensure your computer is turned on and not in sleep mode.
- Manually select the correct input source using the OSD menu.
- Try a different video cable or port.
- Distorted or Flickering Image:
- Check the video cable for damage or loose connections.
- Adjust the display resolution and refresh rate settings on your computer.
- Disable FreeSync in the OSD menu to see if the issue persists.
- Update your graphics card drivers.
- Buttons Not Responding:
- Unplug the monitor from the power outlet for 30 seconds, then plug it back in and try again.
8. Specifications
| Feature | Specification |
|---|---|
| Brand | Rampage |
| Model Number | RM-420 BLACK EAGLE |
| Screen Size | 27 Inches |
| Display Resolution | 1920 x 1080 Pixels (Full HD) |
| Refresh Rate | 165Hz |
| Response Time | 1ms |
| Panel Type | IPS |
| Screen Surface | Matte |
| Connectivity | VGA, 2x HDMI, DisplayPort (DP) |
| Features | Freesync, RGB Lighting |
| Product Weight | 560 g |
| First Available Date | 17 March 2022 |
9. Warranty and Support
Your Rampage RM-420 BLACK EAGLE monitor comes with a standard manufacturer's warranty. For detailed warranty terms and conditions, please refer to the warranty card included in your package or visit the official Rampage website. For technical support, troubleshooting assistance beyond this manual, or service inquiries, please contact Rampage customer support through their official channels.


