Introduction
The Roland JUPITER-X is a 61-key synthesizer that combines classic Roland design with a powerful new synth engine. It is engineered to faithfully recreate sought-after instruments from Roland's extensive history of genre-defining sounds, while also offering advanced capabilities for modern sound design.
This manual provides essential information for setting up, operating, maintaining, and troubleshooting your JUPITER-X synthesizer, ensuring you get the most out of its features and capabilities.
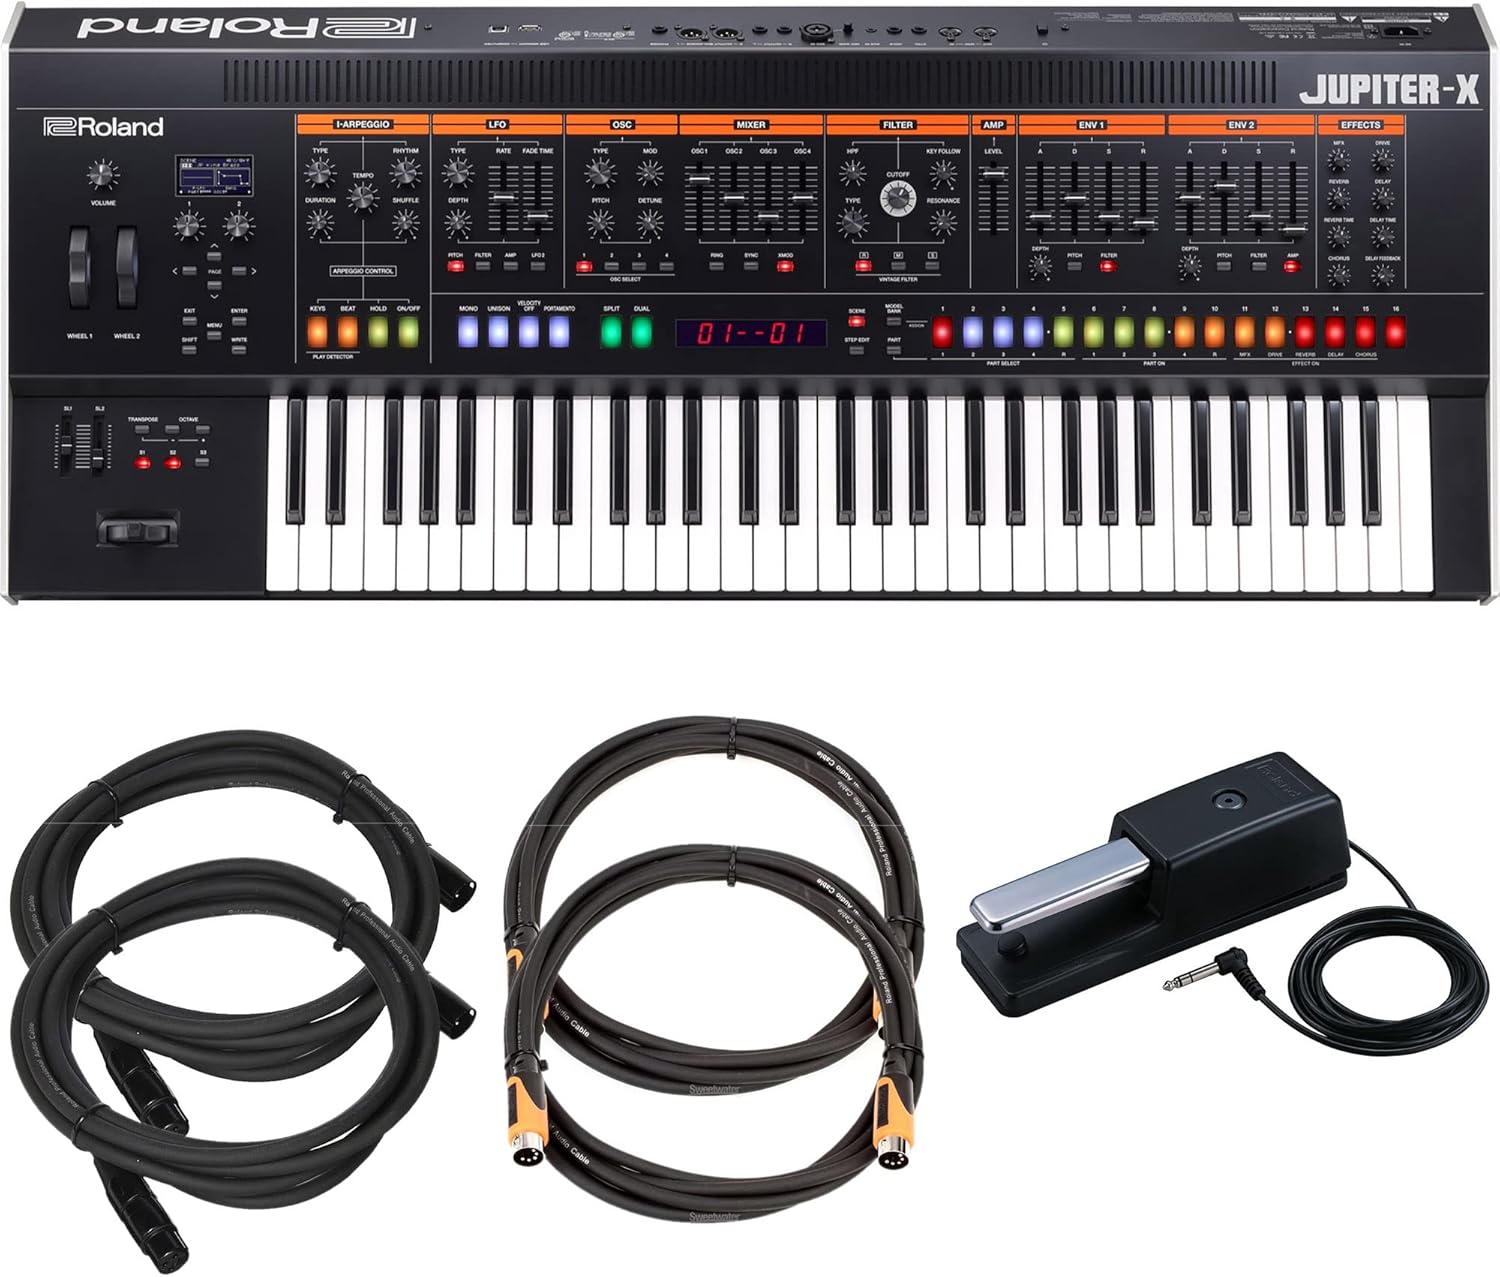
Figure 1: Roland JUPITER-X Synthesizer with included sustain pedal, MIDI cable, and microphone cable.
Setup
1. Unboxing and Inspection
Carefully remove all components from the packaging. Verify that all included items are present:
- Roland JUPITER-X 61-key Synthesizer
- Real-feel Sustain Pedal
- Roland 10ft MIDI Cable
- Roland 10ft Microphone Cable
- Power Cable (not explicitly listed but implied for a synthesizer)
- User Manual (this document)
Inspect the synthesizer and accessories for any signs of damage during transit. If any items are missing or damaged, contact your retailer immediately.
2. Connecting the Synthesizer
Before connecting, ensure the JUPITER-X and all connected devices are powered off.
- Power Connection: Connect the power cable to the AC IN jack on the rear panel of the JUPITER-X, then plug the other end into a suitable AC outlet.
- Audio Output: Connect the JUPITER-X's OUTPUT (L/MONO, R) jacks to your mixer, audio interface, or amplifier using appropriate audio cables.
- Sustain Pedal: Connect the included sustain pedal to the HOLD jack on the rear panel.
- MIDI Connections: Use the included Roland 10ft MIDI cable to connect the JUPITER-X to other MIDI devices (e.g., a computer's MIDI interface or another synthesizer). Connect the MIDI OUT of the JUPITER-X to the MIDI IN of the external device, and vice-versa if bi-directional communication is desired.
- Microphone Input: If using a microphone, connect it to the MIC INPUT jack. The included Roland 10ft Microphone Cable can be used for this purpose.

Figure 2: Rear panel connections including power, audio outputs, MIDI, and pedal inputs.
3. Initial Power On
Once all connections are secure, turn on your audio system (mixer, amplifier, etc.) first, then power on the JUPITER-X using the power switch. Adjust the volume knob on the JUPITER-X and your audio system to a comfortable listening level.
Operating the JUPITER-X
1. Overview of Controls
The JUPITER-X features a comprehensive layout of physical controls designed for intuitive sound shaping and performance. Familiarize yourself with the main sections:
- Keyboard: 61-key, aftertouch-enabled keyboard for expressive playability.
- Volume Knob: Controls the overall output volume.
- Pitch Bend/Modulation Wheels: For real-time expressive control over pitch and modulation.
- I-Arpeggio Section: Dedicated controls for the intelligent arpeggiator.
- LFO, OSC, Mixer, Filter, Amp, ENV, Effects Sections: Dedicated knobs and sliders for detailed sound synthesis and effects processing.
- Part Select Buttons: To select and control individual parts (up to five simultaneously).
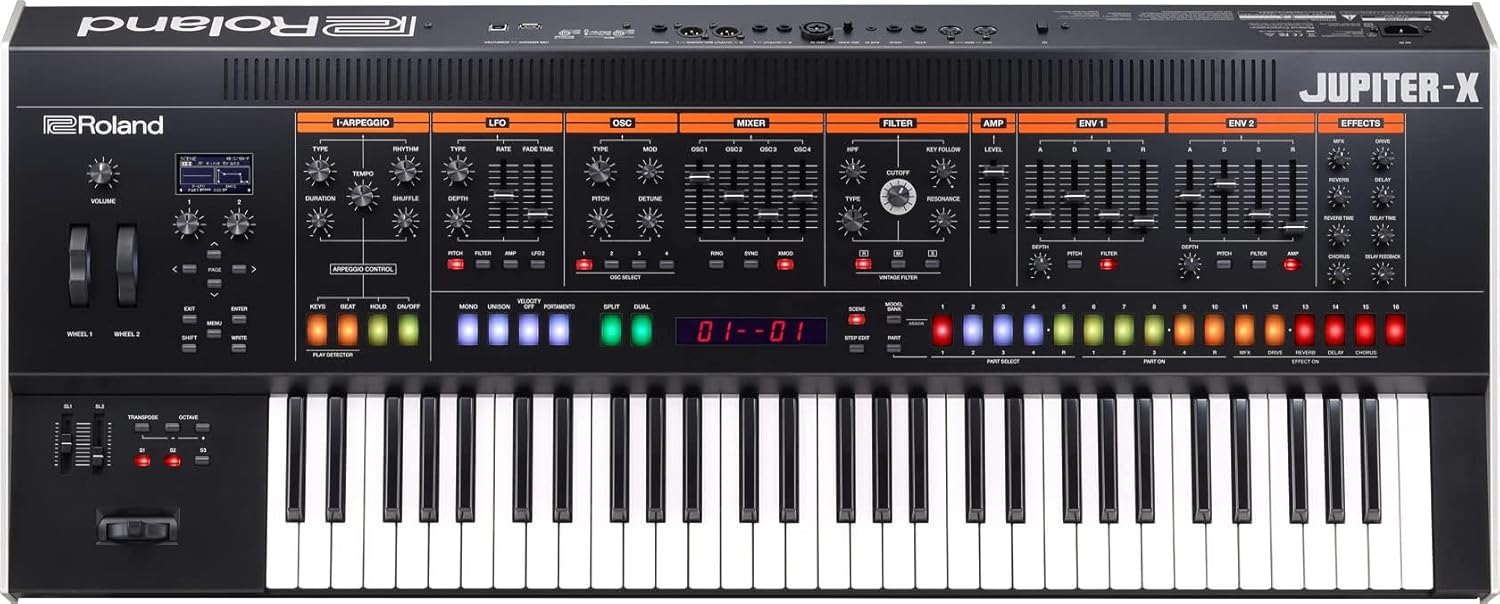
Figure 3: Detailed view of the JUPITER-X control panel, highlighting the various synthesis sections.
2. Sound Engine and Model Expansions
The JUPITER-X is powered by Roland's advanced sound engine, capable of reproducing a wide range of iconic sounds. It can morph into legendary instruments through its Model Expansions, including:
- Analog Classics: JUPITER-8, JUNO-106, SH-101
- Drum Machines: TR-808, TR-909
- Digital Favorites: XV-5080, RD Pianos
You can also explore the powerful new JUPITER-X engine for original sound creation. The ZENOLOGY Pro software allows for detailed editing and integration with your Digital Audio Workstation (DAW), enabling seamless sound design between hardware and software.
3. I-Arpeggio Functionality
The I-Arpeggio is a next-generation arpeggiator that uses artificial intelligence to generate complementary musical parts. It analyzes your input (notes, rhythms, phrases) and creates drum parts, bass lines, chords, and arpeggiated lines across the JUPITER-X's five parts simultaneously. Generated patterns can be customized and exported to your DAW for further refinement.
4. Layering and Polyphony
The JUPITER-X supports multiple layers and offers extensive polyphony, allowing you to create rich, complex sounds. Utilize the Part Select buttons to manage and manipulate individual sound layers, building intricate textures and arrangements.
Maintenance
1. Cleaning
To maintain the appearance and functionality of your JUPITER-X:
- Use a soft, dry cloth to wipe down the surface.
- For stubborn dirt, slightly dampen the cloth with water and a mild, non-abrasive cleaner, then wipe dry immediately.
- Avoid using harsh chemicals, solvents, or abrasive materials, as these can damage the finish.
- Keep the keyboard free of dust and debris.
2. Software Updates
Periodically check the official Roland website for firmware updates. Updates can provide new features, performance enhancements, and bug fixes. Follow the instructions provided by Roland carefully when performing any software updates.
3. Storage
When not in use, store the JUPITER-X in a clean, dry environment, away from direct sunlight, extreme temperatures, and excessive humidity. Consider using a dust cover to protect the instrument.
Troubleshooting
This section addresses common issues you might encounter with your JUPITER-X. If the problem persists after trying these solutions, please contact Roland customer support.
| Problem | Possible Cause | Solution |
|---|---|---|
| No sound output |
|
|
| MIDI not responding |
|
|
| Sustain pedal not working |
|
|
Specifications
| Feature | Detail |
|---|---|
| Model Name | Jupiter X |
| Item Model Number | AUS-JUPITER-X-COMBO-STD |
| Brand | Roland |
| Number of Keyboard Keys | 61 |
| Body Material | Metal |
| Item Weight | 52 pounds |
| Product Dimensions (L x W x H) | 45.5 x 9.7 x 23.1 inches |
| Included Components | Real-feel Sustain Pedal, Roland 10ft MIDI cable, Roland 10ft Microphone Cable |
| UPC | 840262211369 |
| ASIN | B09VPMNKSW |
| Connector Type | Auxiliary |
Warranty and Support
For detailed warranty information, please refer to the warranty card included with your product or visit the official Roland website. Roland provides comprehensive support for its products.
Online Resources:
- Free Online Piano Lessons: Roland, in association with Pianote, offers free online piano lessons. Register your JUPITER-X on the Roland website to unlock these lessons.
- Product Support: Visit the Official Roland Store on Amazon or the main Roland website for FAQs, downloads (manuals, drivers, firmware), and contact information for technical support.
Always ensure you are using official Roland resources for support and updates to guarantee compatibility and proper functionality.


