Introduction
Thank you for choosing the KADAX Rectangular Planter. This manual provides essential information for the proper assembly, use, and maintenance of your new planter. Designed for both indoor and outdoor use, particularly on balconies and windowsills, this planter offers a practical and aesthetic solution for cultivating plants, herbs, and vegetables. Its robust construction and intelligent design ensure optimal growing conditions and ease of use.
Safety Information
Please read and understand all safety instructions before using the planter. Failure to follow these instructions may result in damage to the product or personal injury.
- Ensure the planter is placed on a stable, level surface. If using balcony hangers, verify they are securely attached and capable of supporting the full weight of the planter when filled with soil and water.
- Do not overload the planter with excessive soil or plants, as this may compromise its structural integrity or the stability of its mounting.
- Keep out of reach of small children and pets to prevent accidental tipping or ingestion of soil/plants.
- When moving the planter, especially when filled, exercise caution. It is recommended to empty the planter before relocating it to prevent strain or damage.
- The planter is designed to withstand various weather conditions. However, in extreme weather (e.g., strong winds, heavy snow), consider bringing it indoors or securing it further to prevent damage.
Product Overview
The KADAX Rectangular Planter system consists of two primary components: the outer casing and a removable inner insert with handles. This design facilitates easy planting and maintenance while providing an effective drainage system.

Image: The KADAX Rectangular Planter, showcasing the main planter body, the removable inner insert, and the two included balcony hangers. The bottom part of the image displays the planter filled with vibrant purple flowers, illustrating its intended use.
- Outer Casing: The main rectangular body of the planter, providing structural support and aesthetic appeal. It is designed to be weather-resistant.
- Inner Insert: A removable tray that fits inside the outer casing. It features handles for easy lifting and holes at the bottom to facilitate drainage and prevent root rot.
- Balcony Hangers (Optional): Two sturdy metal hangers designed to securely attach the planter to balcony railings. These are adjustable to fit various railing widths.

Image: A detailed diagram illustrating the dimensions of the KADAX Rectangular Planter and its accompanying balcony hangers. The planter measures 56 cm in length, 18.5 cm in width, and 19.5 cm in height. The hangers are adjustable from 23-33 cm in width and 24.5 cm in height, with a total weight of 460g per hanger. The overall weight of the planter is 1.3 kg.
Setup
1. Preparing the Planter
- Unpack all components: the outer planter casing, the inner insert, and the two balcony hangers (if included).
- Ensure all parts are clean and free from debris.
- Place the inner insert into the outer casing. The insert should fit snugly, resting on its elevated base within the outer casing. This creates a reservoir for excess water.
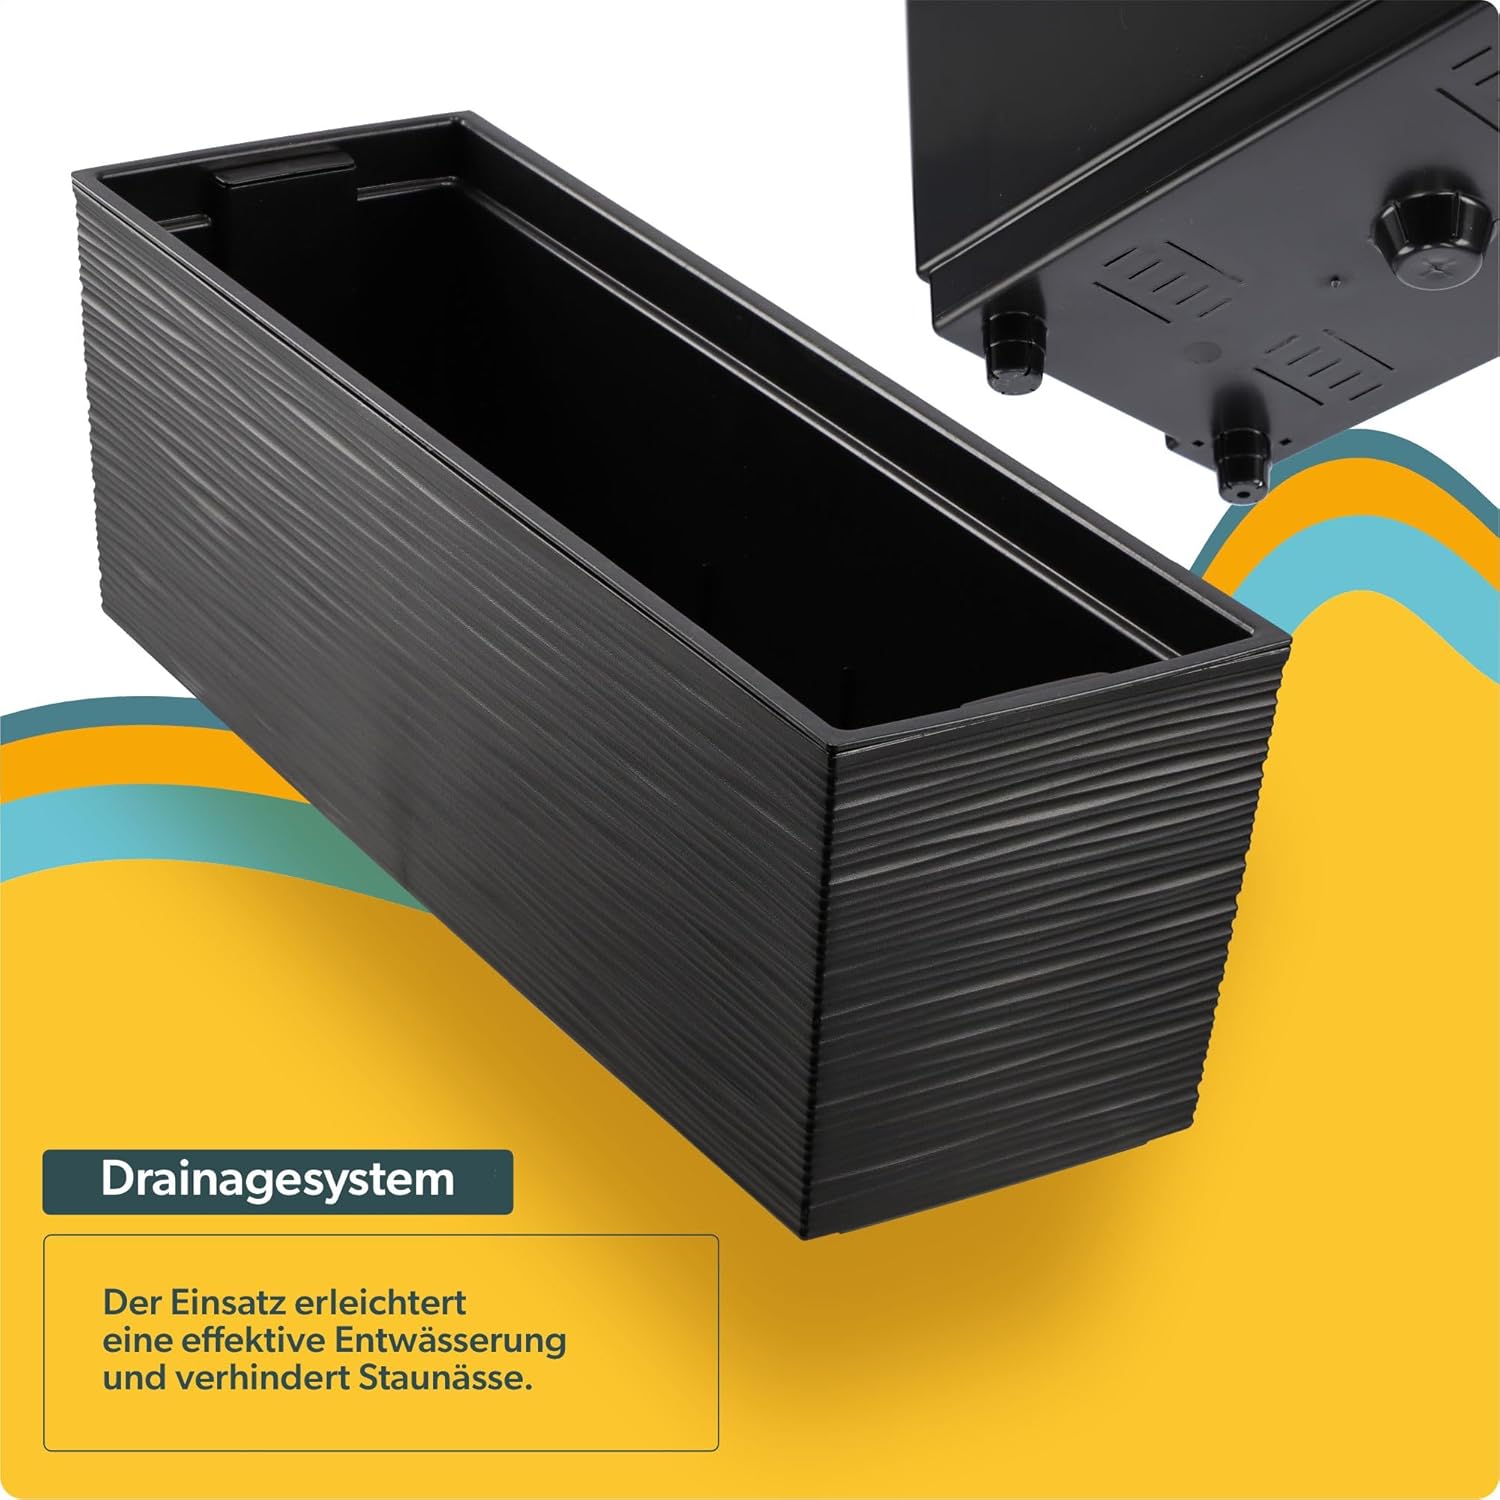
Image: A close-up view of the KADAX planter's drainage system. The image highlights the inner insert with its elevated base and drainage holes, which allow excess water to collect in the space between the insert and the outer casing, preventing root rot.
2. Attaching Balcony Hangers (Optional)
If you intend to hang the planter on a balcony railing, follow these steps:
- Identify the two attachment points on the outer casing of the planter where the hangers will connect.
- Attach each hanger to its respective point on the planter. Ensure they are securely fastened.
- Adjust the width of the hangers to match your balcony railing. Use the adjustment mechanism on the hangers to achieve a secure fit.
- Carefully lift the planter with the attached hangers and place it onto the balcony railing. Verify that the hangers are stable and the planter is level before filling with soil.

Image: The KADAX Rectangular Planter securely mounted on a wooden balcony railing using its adjustable hangers. The image demonstrates how the planter can be easily moved along the railing to adjust for sunlight or shade, highlighting its versatility.
Operating Instructions
1. Planting
- With the inner insert in place, fill it with appropriate potting soil for your chosen plants. Leave some space at the top for watering.
- Carefully place your plants into the soil, ensuring their roots are well covered.
- Water the plants thoroughly after planting. The integrated drainage system will collect excess water in the outer casing, preventing waterlogging of the roots.
2. Watering
Water your plants as needed, observing the soil moisture. The design of the planter ensures that roots do not sit in standing water, promoting healthier plant growth.
3. Repotting or Changing Plants
The removable inner insert makes repotting or changing plants simple and mess-free:
- Grasp the handles of the inner insert.
- Carefully lift the insert out of the outer casing.
- Perform necessary planting or repotting tasks.
- Once done, place the inner insert back into the outer casing. This method keeps the outer casing clean and reduces effort.
Maintenance
Regular maintenance will ensure the longevity and aesthetic appeal of your KADAX planter.
- Cleaning: The planter can be easily cleaned with a damp cloth and mild soap. Avoid abrasive cleaners that may damage the plastic surface.
- Drainage Check: Periodically check the space between the inner insert and the outer casing for accumulated debris. Clear any blockages to ensure proper drainage.
- Winter Care: While the planter is resistant to frost and high temperatures, it is advisable to empty it of soil and store it in a sheltered location during harsh winter conditions to prolong its lifespan.
- UV Resistance: The high-quality plastic is UV-resistant, preventing discoloration and material degradation from sun exposure.
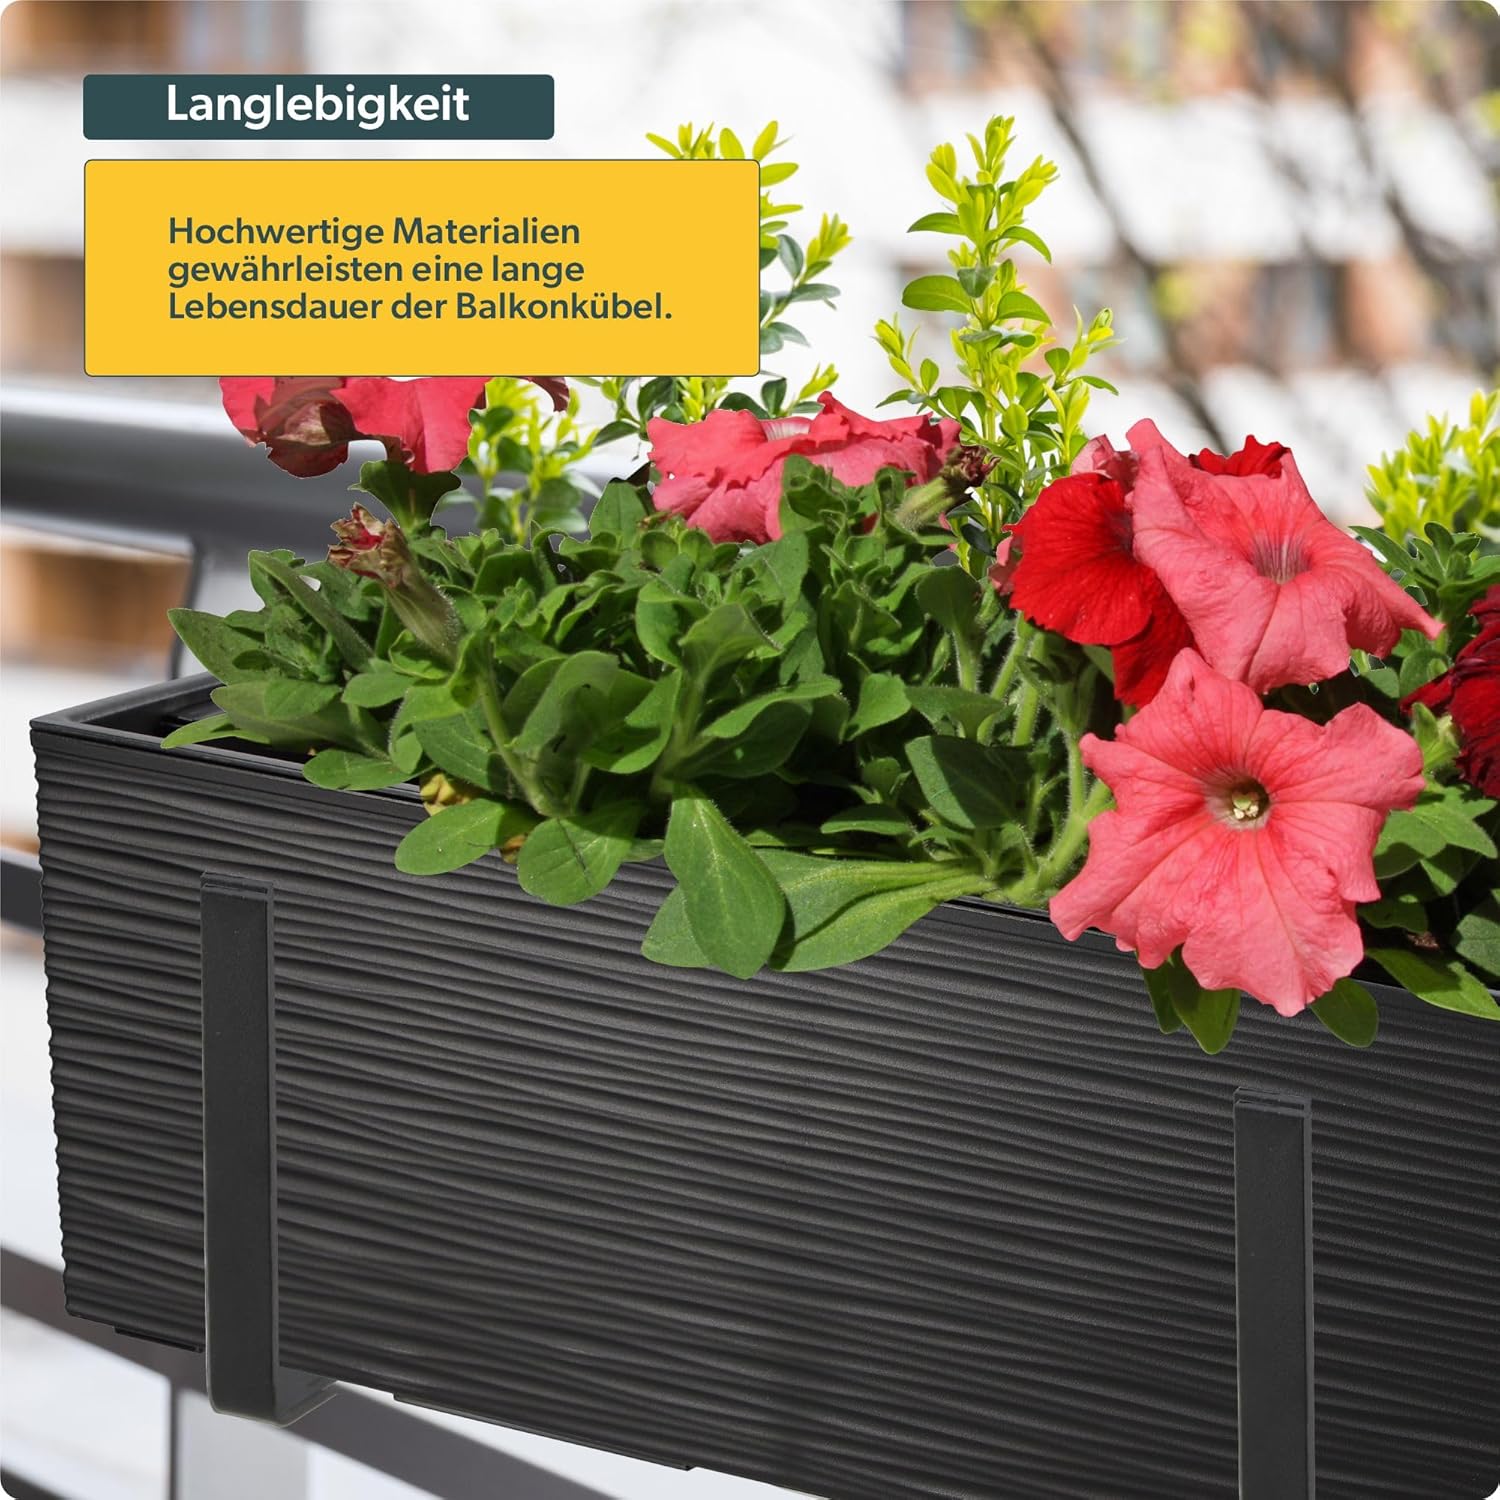
Image: A KADAX Rectangular Planter filled with vibrant red and pink petunias, positioned on a balcony railing. This image emphasizes the product's durability and resistance to outdoor elements, showcasing its ability to maintain aesthetic properties over time.
Troubleshooting
| Problem | Possible Cause | Solution |
|---|---|---|
| Water accumulation in the inner insert. | Drainage holes in the inner insert are blocked. | Remove the inner insert and clear any debris from the drainage holes. |
| Planter appears unstable on railing. | Hangers are not properly adjusted or secured. | Re-adjust the hangers to fit the railing tightly and ensure all fastening points are secure. Reduce weight if necessary. |
| Discoloration or fading of the planter. | Prolonged exposure to extreme UV radiation or harsh chemicals. | While UV-resistant, extreme conditions over many years can cause minor fading. Avoid using harsh cleaning agents. |
| Difficulty removing inner insert. | Soil compaction or debris between insert and casing. | Gently rock the insert while pulling up on the handles. Ensure the outer casing is clean before re-inserting. |
Specifications
| Feature | Detail |
|---|---|
| Brand | KADAX |
| Model Number | K3858 |
| Color | Black (Ritzmuster) |
| Dimensions (L x W x H) | 56 x 18.5 x 19.5 cm |
| Material | Plastic |
| Item Weight | 1.3 Kilograms |
| Special Features | With insert, With supports, Indoor/Outdoor use, Weather-resistant |
| Form | Rectangular |
| Mounting Type | Support (Hangers) |
Warranty and Support
KADAX products are manufactured to high-quality standards. For any issues or inquiries regarding your planter, please contact the seller directly. The standard return policy allows for returns or replacements within 30 days of purchase.
For further assistance, please visit the KADAX Seller Page on Amazon.
