Introduction
Welcome to the user manual for your EPOMAKER Skyline 75% Gasket-Mounted Hot-Swappable Wired Gaming Keyboard DIY Kit. This manual provides comprehensive instructions for assembly, operation, maintenance, and troubleshooting to ensure optimal performance and longevity of your keyboard.
Package Contents
Please verify that all items are present in your package before proceeding with assembly.

Image description: An overhead view of the EPOMAKER Skyline keyboard kit components, including the keyboard base, USB cable, keycap puller, and a small copper logo plate, next to a white box.
- 1x EPOMAKER Skyline Keyboard Kit (75% layout)
- 1x Rotary Knob
- 1x USB 3.0 to Type-C Cable
- 1x Keycap Puller
- 1x Copper Logo Plate
Product Features
75% Compact Layout with 82 Keys
The EPOMAKER Skyline features a compact 75% layout with 82 keys, designed for efficiency and space-saving without sacrificing essential functions.

Image description: A diagram illustrating the 82-key 75% compact layout of the keyboard kit, highlighting features like hot-swappable sockets, RGB backlight, rotary knob, Type-C cable, and Windows/Mac compatibility.
Gasket-Mounted Structure
This keyboard utilizes a gasket-mounted design, which provides a softer typing experience and helps reduce hand fatigue during extended use. The structure incorporates silicon dampening foam for improved acoustics and feel.

Image description: An exploded view diagram showing the layers of the gasket-mounted keyboard structure, including the top case, mounting plate, hot-swappable PCB, silicon dampening foam layers, and bottom case, with the rotary knob visible at the top right.
Hot-Swappable PCB
The PCB is hot-swappable, supporting both 3-pin and 5-pin mechanical switches. This allows for easy installation and replacement of switches without soldering, enabling customization of your typing feel.
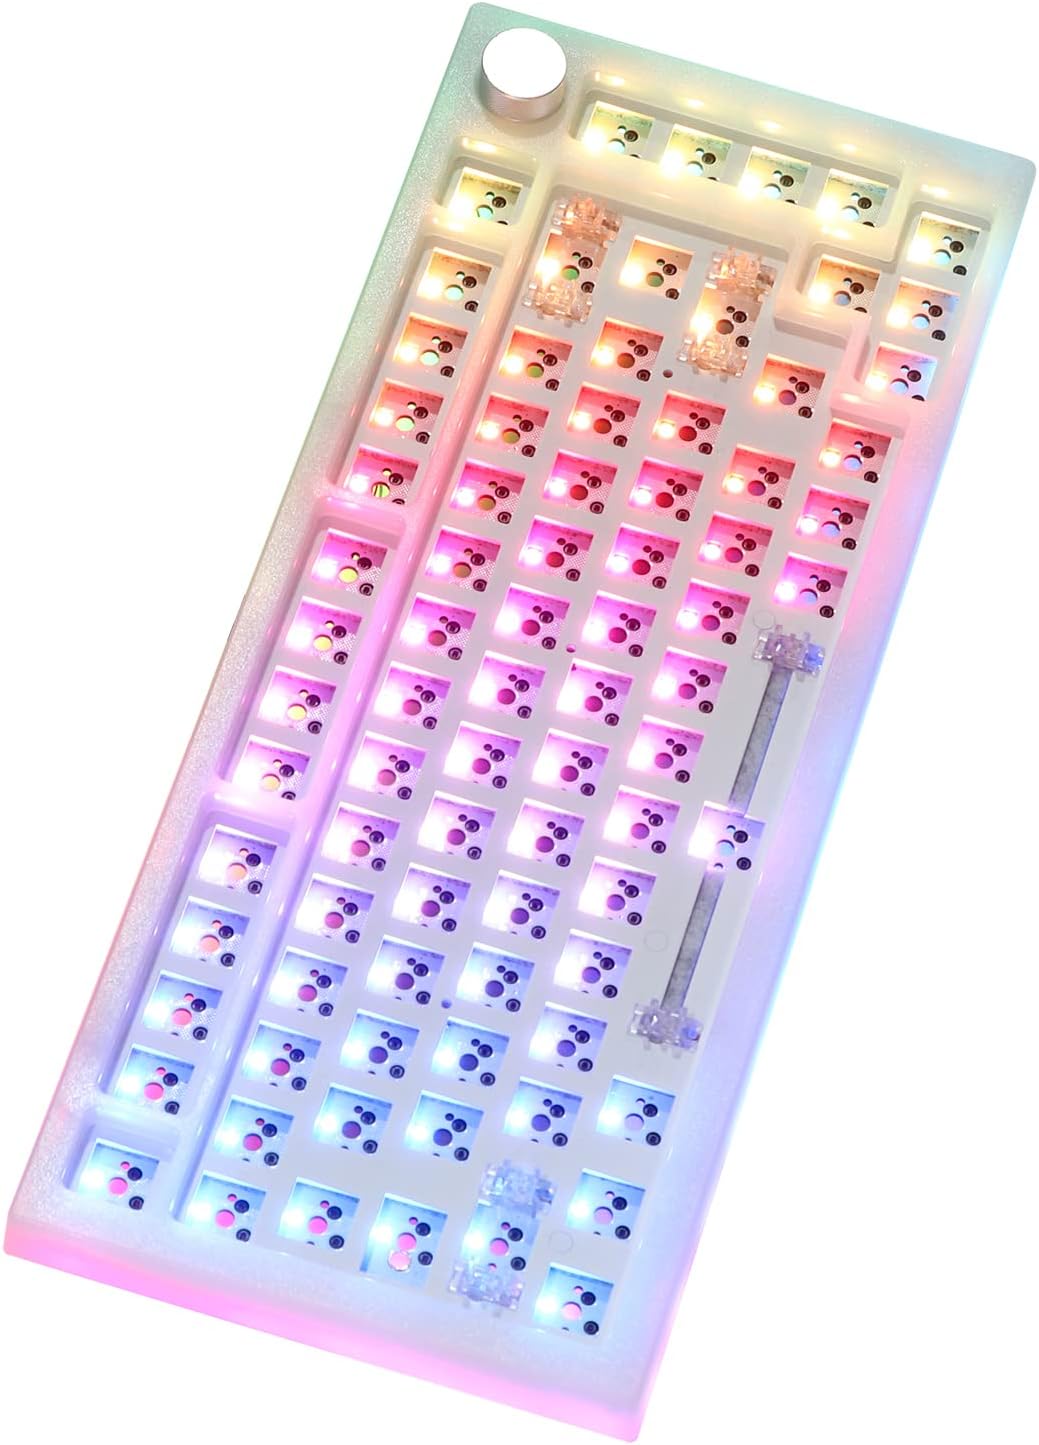
Image description: A close-up view of the hot-swappable sockets on the keyboard's PCB, showing the receptacles where mechanical switches are inserted.
RGB Backlighting
The keyboard features customizable RGB backlighting, offering various lighting effects and colors to enhance your typing environment.

Image description: An image of the keyboard kit with switches installed, showcasing vibrant RGB backlighting illuminating the key areas. Text overlays mention "Amazing RGB Backlight" and "Music Rhythm Mode".
Rotary Knob Functionality
A multi-functional rotary knob is integrated into the keyboard for convenient control:

Image description: A close-up of the silver rotary knob on the keyboard, with an accompanying diagram defining its functions: clockwise rotation for volume increase, counter-clockwise for volume decrease, and pressing the knob for play/pause.
- Clockwise rotation: Volume increase
- Counter-clockwise rotation: Volume decrease
- Press the knob: Play/Pause media
Compatibility
The keyboard is compatible with both Windows and Mac operating systems.
Setup Instructions
Step 1: Install Switches
Carefully align the pins of your mechanical switches with the hot-swappable sockets on the PCB. Press firmly until the switch clicks into place. Ensure switch pins are not bent during installation.

Image description: A close-up image demonstrating the installation of a mechanical switch into the hot-swappable PCB using a switch puller tool.
Step 2: Install Keycaps
Place your desired keycaps onto the installed switches. Press down gently until each keycap is securely seated.
Step 3: Connect to Computer
Connect the provided USB Type-C cable to the keyboard's port and the other end to an available USB port on your computer. The keyboard should be automatically recognized by your operating system.
Operating Instructions
Basic Keyboard Use
The keyboard functions as a standard 75% layout keyboard. Refer to your operating system's settings for specific key assignments or customization options.
Rotary Knob Control
Use the rotary knob for quick media control:
- Turn clockwise to increase audio volume.
- Turn counter-clockwise to decrease audio volume.
- Press the knob to play or pause media playback.
RGB Backlight Control
Specific key combinations or software may be required to change RGB lighting modes and colors. Consult the EPOMAKER official website or software documentation for detailed instructions on customizing the RGB backlight.
Maintenance
Cleaning
To clean the keyboard, disconnect it from your computer. Use a soft brush or compressed air to remove dust and debris from between the keycaps. For deeper cleaning, use the provided keycap puller to remove keycaps and clean the switches and plate with a damp cloth (ensure no liquid enters the switches). Allow to dry completely before reassembly and use.
Switch and Keycap Replacement
The hot-swappable design allows for easy replacement of switches and keycaps. Use a switch puller to carefully remove switches and a keycap puller for keycaps. When installing new components, ensure proper alignment to avoid damage.
Troubleshooting
Keyboard Not Responding
- Ensure the USB cable is securely connected to both the keyboard and the computer.
- Try connecting the keyboard to a different USB port on your computer.
- Test the keyboard on another computer to rule out system-specific issues.
Specific Keys Not Working
- Carefully remove the keycap and switch for the non-functional key.
- Inspect the switch pins for any bends or damage. Straighten bent pins gently if possible.
- Reinsert the switch firmly into the hot-swappable socket. If the issue persists, try replacing the switch with a known working one.
RGB Backlight Issues
- Check if the RGB function is enabled via software or keyboard shortcuts (if applicable).
- Ensure the keyboard's firmware is up to date.
Specifications
| Attribute | Detail |
|---|---|
| Brand | EPOMAKER |
| Model | Skyline |
| Layout | 75% (82 keys) |
| Structure | Gasket-Mounted |
| Switch Compatibility | 3-pin and 5-pin Hot-Swappable |
| Connectivity | Wired (USB Type-C) |
| Backlight | RGB |
| Special Features | Rotary Knob, RGB Backlighting |
| Compatible Devices | PC (Windows, Mac) |
| Product Dimensions | 33.5 x 13.5 x 2 cm |
| Weight | 873 g |
Warranty Information
EPOMAKER products typically come with a standard manufacturer's warranty. For detailed warranty terms and conditions, please refer to the official EPOMAKER website or contact their customer support. Keep your purchase receipt as proof of purchase.
Support Information
For technical assistance, troubleshooting, or further inquiries, please visit the official EPOMAKER website or contact their customer support team.
Official Website: www.epomaker.com


