
1. Introduction
Thank you for purchasing the Nakamichi Solo 1 Hybrid Vacuum Tube Speaker System. This manual provides essential information for the safe and efficient operation of your speaker system. Please read this manual thoroughly before use and retain it for future reference.
The Nakamichi Solo 1 combines modern audio technology with the warm, rich sound characteristics of vacuum tubes, delivering a unique and high-fidelity listening experience.
2. Safety Information
- Power Source: Use only the specified power adapter. Ensure the voltage matches the requirements of your region.
- Ventilation: Do not block any ventilation openings. Maintain adequate space around the unit for proper airflow to prevent overheating.
- Water and Moisture: Do not expose the unit to rain, moisture, or dripping/splashing liquids. Do not place objects filled with liquids, such as vases, on the apparatus.
- Heat: Keep the unit away from heat sources such as radiators, heat registers, stoves, or other apparatus (including amplifiers) that produce heat.
- Cleaning: Unplug the unit from the power outlet before cleaning. Use a dry, soft cloth only. Do not use liquid cleaners or aerosol cleaners.
- Servicing: Do not attempt to service this product yourself. Refer all servicing to qualified service personnel.
- Vacuum Tubes: The vacuum tubes can become hot during operation. Avoid touching them directly. Allow the unit to cool down before moving or servicing.
3. Package Contents
Please check that all items are present and in good condition:
- Nakamichi Solo 1 Hybrid Vacuum Tube Speaker System
- Power Adapter
- Remote Control
- Auxiliary Audio Cable
- User Manual (this document)
4. Product Features
- Hybrid Vacuum Tube Amplifier: Combines the warmth of vacuum tubes with the efficiency of solid-state amplification.
- High Power Output: Up to 100 Watts maximum speaker power output for robust sound.
- Multiple Connectivity Options: Bluetooth, NFC, USB, and Auxiliary (AUX) input.
- Remote Control: Convenient operation from a distance.
- Compact Design: Flush mount compatible with a 4-inch speaker size and 1-inch tweeter diameter.
- 2-Channel Audio: Delivers stereo sound configuration.
5. Controls and Connections
Familiarize yourself with the various controls and connection ports on your Nakamichi Solo 1 speaker system.
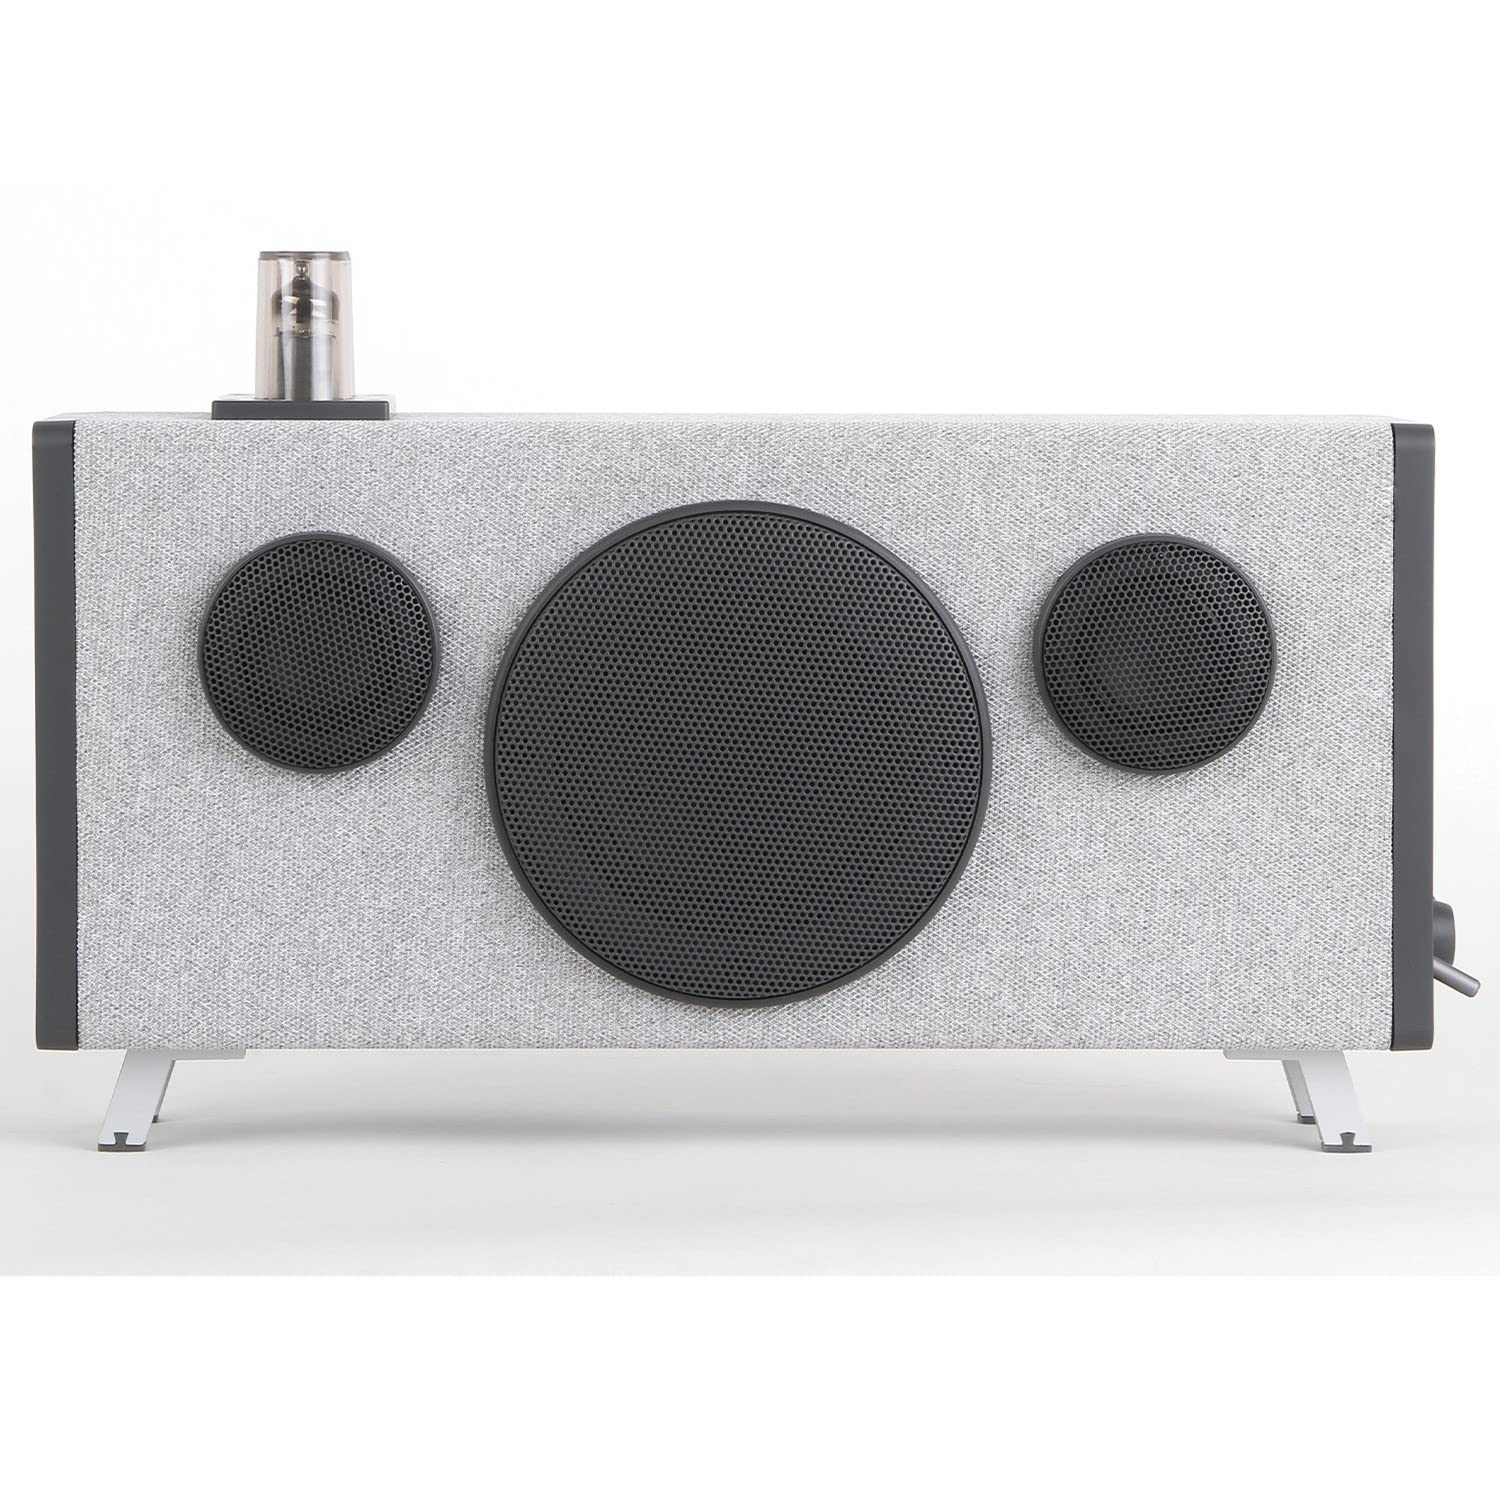
Image: Front view of the Nakamichi Solo 1 speaker system, showcasing the main unit with visible vacuum tubes and front-panel controls.
Front Panel Controls:
- Power Button: Turns the unit on or off.
- Volume Knob: Adjusts the master volume level.
- Source/Mode Button: Cycles through input sources (Bluetooth, USB, AUX).
- Play/Pause Button: Controls playback for Bluetooth and USB modes.
- Previous/Next Track Buttons: Skips tracks for Bluetooth and USB modes.
Rear Panel Connections:
- DC IN Port: Connects to the provided power adapter.
- AUX IN Port: 3.5mm stereo input for external audio devices.
- USB Port: For USB drive playback.
- NFC Tag: For quick Bluetooth pairing with NFC-enabled devices.
6. Setup
- Placement: Place the Nakamichi Solo 1 on a stable, flat surface. Ensure there is adequate ventilation around the unit. Avoid placing it near strong magnetic fields or direct sunlight.
- Power Connection: Connect the provided power adapter to the DC IN port on the rear of the speaker. Plug the other end of the power adapter into a suitable wall outlet.
- Initial Power On: Press the Power button on the front panel or the remote control to turn on the unit. The indicator light will illuminate.
7. Operating Instructions
After setup, you can begin using your Nakamichi Solo 1 speaker system. Use the Source/Mode button on the unit or the remote control to select your desired input source.
7.1. Bluetooth Pairing
Connect your Bluetooth-enabled device to the Solo 1 wirelessly.
- Turn on the Nakamichi Solo 1.
- Press the Source/Mode button until "Bluetooth" or "BT" is displayed (if applicable) or the Bluetooth indicator light flashes. The speaker is now in pairing mode.
- On your mobile device (smartphone, tablet, laptop), enable Bluetooth and search for available devices.
- Select "Nakamichi Solo 1" from the list of found devices.
- Once paired, the Bluetooth indicator light will become solid, and you may hear a confirmation tone.
- You can now play audio from your device through the Solo 1.
7.2. NFC Pairing (Near Field Communication)
For NFC-enabled devices, pairing is even simpler.
- Ensure NFC is enabled on your mobile device.
- Turn on the Nakamichi Solo 1 and select Bluetooth mode.
- Tap your NFC-enabled device gently against the NFC tag area on the Solo 1 (usually on the rear panel).
- Your device will prompt you to confirm the Bluetooth pairing. Accept the connection.
- The devices will pair automatically.
7.3. USB Playback
Play audio files directly from a USB flash drive.
- Insert a USB flash drive (formatted to FAT32) containing compatible audio files into the USB port on the rear of the Solo 1.
- Press the Source/Mode button until "USB" is selected.
- The speaker will automatically begin playing the audio files from the USB drive.
- Use the Play/Pause and Previous/Next Track buttons on the unit or remote control to manage playback.
7.4. Auxiliary Input (AUX)
Connect external audio devices using the 3.5mm auxiliary cable.
- Connect one end of the 3.5mm auxiliary audio cable to the AUX IN port on the rear of the Solo 1.
- Connect the other end of the cable to the headphone jack or audio output of your external device (e.g., MP3 player, CD player).
- Press the Source/Mode button until "AUX" is selected.
- Play audio from your external device. The sound will be output through the Solo 1.
8. Maintenance
- Cleaning: Disconnect the power before cleaning. Use a soft, dry cloth to wipe the exterior surfaces. Do not use abrasive cleaners, waxes, or solvents.
- Storage: If storing the unit for an extended period, unplug it from the power outlet and store it in a cool, dry place, away from direct sunlight and extreme temperatures.
- Vacuum Tube Care: The vacuum tubes are designed for long life. Avoid unnecessary physical shock to the unit, as this can damage the tubes.
9. Troubleshooting
If you encounter issues with your Nakamichi Solo 1, refer to the following table for common problems and solutions.
| Problem | Possible Cause | Solution |
|---|---|---|
| No power | Power adapter not connected or faulty outlet. | Ensure power adapter is securely connected to the unit and a working power outlet. Try a different outlet. |
| No sound | Volume too low; incorrect source selected; device not playing. | Increase volume on both the speaker and the source device. Select the correct input source. Ensure the source device is playing audio. |
| Bluetooth pairing fails | Speaker not in pairing mode; device too far; interference. | Ensure speaker is in Bluetooth pairing mode. Move device closer to the speaker. Turn off other Bluetooth devices to reduce interference. |
| Distorted sound | Volume too high; poor audio source quality; damaged cable. | Reduce volume. Try a different audio source. Replace auxiliary cable if used. |
| USB playback not working | USB drive not formatted correctly; incompatible file types; faulty USB drive. | Ensure USB drive is FAT32 formatted. Check if audio files are compatible (e.g., MP3). Try a different USB drive. |
10. Specifications
| Feature | Specification |
|---|---|
| Brand | Nakamichi |
| Model Name | Solo 1 |
| Maximum Speaker Power Output | 100 Watts |
| Connectivity Technology | Auxiliary, Bluetooth, NFC, USB |
| Mounting Type | Flush Mount |
| Compatible Devices | Laptop, Smartphone, Tablet |
| Surround Sound Channel Configuration | 2 (Stereo) |
| Control Method | Remote |
| Speaker Size | 4 Inches |
| Tweeter Diameter | 1 Inches |
| Power Source | Corded Electric |
| Audio Driver Type | Hybrid Driver |
| ASIN | B09V6YZXPQ |
11. Warranty and Support
Nakamichi products are designed and manufactured to the highest quality standards. For information regarding warranty coverage, please refer to the warranty card included with your product or visit the official Nakamichi website for details specific to your region.
For technical support, troubleshooting assistance beyond this manual, or service inquiries, please contact Nakamichi customer support through their official website or the contact information provided in your product packaging.
Please have your product model (Solo 1) and ASIN (B09V6YZXPQ) ready when contacting support.


