
1. Introduction
Thank you for choosing the Ipega PG-SW018D Wireless Gamepad. This manual provides detailed instructions on how to set up, operate, and maintain your gamepad. Please read this manual carefully before use to ensure optimal performance and a satisfying gaming experience.
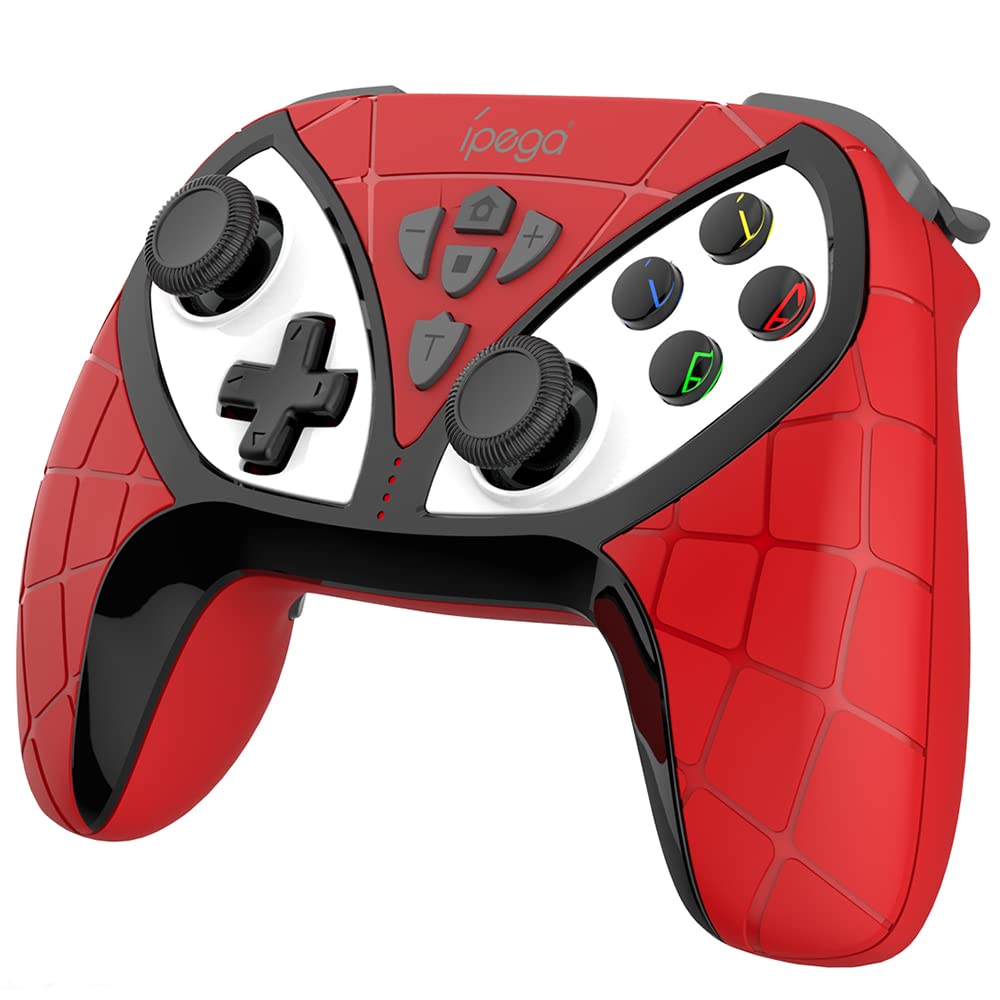
Figure 1: Front view of the Ipega PG-SW018D Wireless Gamepad.
2. Product Overview and Features
The Ipega PG-SW018D is a versatile wireless gamepad designed for various gaming platforms, including Nintendo Switch, Android devices, PS3, and PC. It features a comfortable design and advanced functionalities to enhance your gameplay.
2.1 Button Functions
Refer to the diagram below for an overview of the gamepad's buttons and their functions.

Figure 2: Detailed diagram of gamepad button layout and functions.
2.2 Programmable Keys (M1-M4)
The gamepad includes four programmable keys (M1, M2, M3, M4) located on the bottom. These keys can be customized to perform common function keys or combination keys, improving operational efficiency during gameplay.
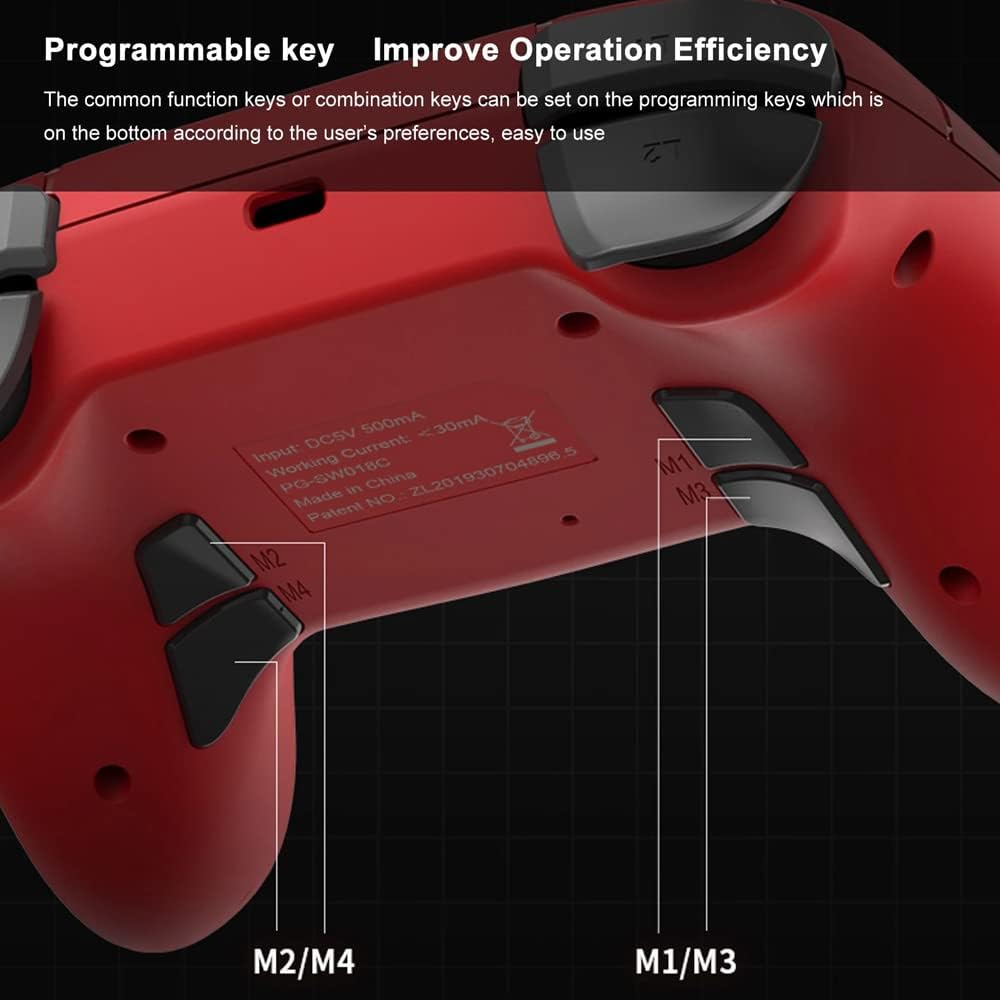
Figure 3: Location of programmable M1-M4 keys.
2.3 Dual-Motor Vibration
Experience immersive gaming with the dual-motor vibration feature. The gamepad provides haptic feedback that responds to in-game scenes, enhancing realism and engagement.
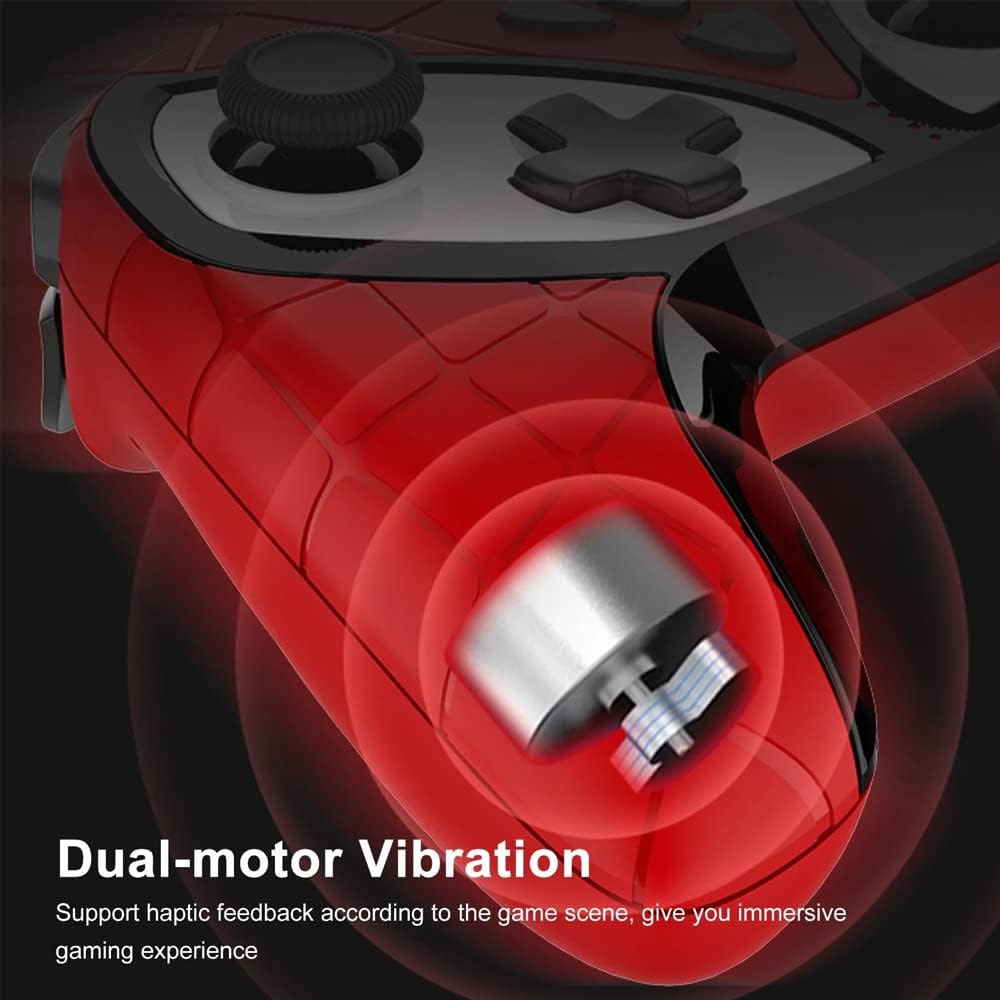
Figure 4: Illustration of the dual-motor vibration system.
2.4 TURBO Function
Activate the TURBO function for auto-fire capabilities. This allows for rapid, continuous input with a single key press, providing an advantage in fast-paced games.

Figure 5: TURBO function activation.
2.5 Colorful LED Luminous Keys
The gamepad features colorful LED luminous keys that light up, enhancing your gaming environment and adding a personalized touch, especially during night play.

Figure 6: Colorful LED luminous keys.
2.6 6-Axis Gyroscope Body Sense Technology
Equipped with a built-in 6-axis gyroscope chip, the gamepad ensures high-precision recognition of direction and visual field. This technology provides a pixel-level sliding experience, immersing you in a 3D game battlefield.

Figure 7: 6-Axis Gyroscope in action.
2.7 High-Precision Joystick
The gamepad features non-slip rocker caps on its joysticks, offering 360-degree sensitive steering for smooth and stable operation, crucial for precise control in games.

Figure 8: High-precision joystick.
3. Setup and Connection
The PG-SW018D gamepad supports multiple connection methods depending on your device. Ensure the gamepad is charged before attempting to connect.
3.1 Connecting to Nintendo Switch
- From the Switch HOME Menu, select 'Controllers' > 'Change Grip/Order'.
- On the gamepad, press and hold the 'HOME' button and 'Y' button simultaneously for 2 seconds until the LED indicators start flashing rapidly.
- The Switch will detect the gamepad. Once connected, the corresponding player LED on the gamepad will light up solid.
3.2 Connecting to Android Devices
- Ensure Bluetooth is enabled on your Android device.
- On the gamepad, press and hold the 'HOME' button and 'A' button simultaneously for 2 seconds until the LED indicators start flashing rapidly.
- On your Android device, search for Bluetooth devices and select 'PG-SW018D' from the list.
- Once paired, the corresponding LED on the gamepad will light up solid.
3.3 Connecting to PS3 Console (Wired & Wireless)
- Ensure the gamepad is powered off. Hold the 'A' button and 'HOME' button simultaneously for 2 seconds to ensure it's off.
- Connect the gamepad to the PS3 console using a USB cable.
- Wait for successful pairing. The corresponding indicator light will remain solid, indicating PS3 connection mode.
- You can now remove the USB cable to switch to wireless connection.
3.4 Connecting to PC (Wired)
- Connect the gamepad to your PC using a USB cable.
- The PC should automatically detect and install the necessary drivers.
- Note: Vibration functionality may not work when connected to PC via USB cable.
4. Operating Instructions
Once connected, you can begin using your gamepad. Familiarize yourself with the button layout and special functions for an enhanced gaming experience.
4.1 Using Programmable Keys (M1-M4)
To program M1-M4 keys, refer to the specific instructions provided in your gamepad's packaging or the official Ipega website for detailed steps on mapping functions.
4.2 Activating TURBO Function
To activate TURBO for a specific button, press and hold the desired button, then press the 'T' (TURBO) button. Repeat the process to deactivate TURBO for that button.
4.3 Charging the Gamepad
Connect the gamepad to a USB power source (e.g., console, PC, USB wall adapter) using the provided charging cable. The LED indicators will show charging status and turn off or change color when fully charged.
5. Maintenance
Proper care and maintenance will extend the life of your Ipega PG-SW018D Gamepad.
- Cleaning: Use a soft, dry cloth to clean the gamepad. Avoid using harsh chemicals or abrasive materials.
- Storage: Store the gamepad in a cool, dry place away from direct sunlight and extreme temperatures.
- Battery Care: Do not expose the battery to high temperatures or attempt to disassemble it. Charge the gamepad regularly, even if not in use, to maintain battery health.
- Avoid Drops: Protect the gamepad from drops and impacts, which can damage internal components.
6. Troubleshooting
If you encounter issues with your gamepad, please refer to the following common solutions:
- Gamepad does not turn on: Ensure the gamepad is fully charged. Connect it to a power source and try again.
- Cannot connect/synchronize:
- Ensure the gamepad is in the correct pairing mode for your device (e.g., HOME + Y for Switch, HOME + A for Android).
- Make sure Bluetooth is enabled on your device and that the gamepad is within range.
- Remove any previous pairings of the gamepad from your device's Bluetooth settings and try pairing again.
- Restart both the gamepad and your device.
- Buttons are unresponsive: Check if the gamepad is properly connected. If connected wirelessly, ensure there are no strong interferences. Try resetting the gamepad (if a reset button is available, usually a small pinhole).
- Vibration not working on PC: As noted in the setup section, vibration may not function when connected to a PC via USB cable. This is a known limitation.
- No receiver included: The Ipega PG-SW018D is a Bluetooth gamepad and typically does not require a separate USB receiver for Bluetooth-enabled devices. If your PC or device lacks Bluetooth, you may need to purchase a separate Bluetooth adapter.
7. Specifications
| Brand | Ipega |
| Model Number | PG-SW018D |
| Connectivity | Bluetooth Wireless, USB Wired |
| Compatibility | Nintendo Switch, Android, PS3, PC |
| Package Dimensions | 17.5 x 14 x 7.6 cm |
| Package Weight | 300 grams |
| ASIN | B09V67NQ7F |
8. Warranty and Support
For warranty information and technical support, please refer to the documentation included with your purchase or visit the official Ipega website. Keep your proof of purchase for any warranty claims.
If you require further assistance, please contact Ipega customer service through their official channels.


