
1. Introduction
The Bamboosang X7 is a high-definition 15-megapixel portable document and book scanner designed for various applications, including office presentations, educational use, and digitizing documents. It features real-time video recording and projection capabilities, making it suitable for diverse environments. This scanner supports A3 size capture, multilingual OCR, and includes SDK and TWAIN compatibility.
Key features include intelligent continuous shooting, automatic correction of curved surfaces, edge filling for damaged pages, automatic image segmentation, and merging of identification photos. The device is foldable and portable, with a stable base for ease of use.
Compatibility Note: This scanner is compatible only with Windows 8 or higher operating systems. It is not compatible with Apple Mac OS.
2. Setup Guide
2.1 Unpacking and Components
Carefully remove all components from the packaging. Ensure the following items are present:
- Bamboosang X7 Document Scanner unit
- USB cable
- Scanning mat (if included)
- Software installation CD (or download instructions)
2.2 Hardware Connection
- Place the scanner on a stable, flat surface.
- Unfold the scanner arm to its upright position.
- Connect the USB cable from the scanner to an available USB port on your computer.
- If a scanning mat is provided, place it beneath the scanner head, ensuring the document placement area is clear.
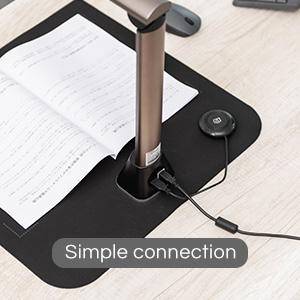
Figure 2.2.1: Simple USB connection of the scanner.
2.3 Software Installation
The scanner requires dedicated software for full functionality. Follow these steps:
- Using the CD: Insert the provided software CD into your computer's CD-ROM drive and follow the on-screen instructions to install the software.
- Downloading Software: If your computer lacks a CD-ROM drive, visit the official Bamboosang website (refer to product packaging or included documentation for the URL) to download the latest software version. Run the installer and follow the prompts.
- After installation, restart your computer if prompted.
3. Operating Instructions
3.1 Basic Scanning Procedure
- Ensure the scanner is connected and the software is running on your Windows 8 or higher PC.
- Place the document or book you wish to scan on the scanning mat, centered under the scanner camera.
- Open the Bamboosang scanning software. The software will display a live preview from the scanner's camera.
- Adjust the document's position as needed to fit within the preview area.
- Click the 'Scan' or 'Capture' button within the software, or use the external shutter button if available.
- The scanned image will appear in the software interface for review and further processing.

Figure 3.1.1: Scanner set up for automatic document capture.
3.2 Advanced Scanning Features
3.2.1 Automatic Continuous Shooting
Configure the software to automatically capture images at set intervals. This is useful for scanning multiple pages of a book or document without manually clicking the shutter button for each page. Simply turn the page, and the scanner will capture the next image.
3.2.2 Curve Flattening Technology
When scanning open books, the software automatically detects and corrects the curvature of the pages, producing a flat, readable image. This technology also helps to remove accidental finger presence from the scanned image.

Figure 3.2.1: Curve-flattening technology in action.
3.2.3 Optical Character Recognition (OCR)
The integrated OCR function allows you to convert scanned images of text into editable and searchable digital text formats (e.g., Word, Excel, PDF, TXT). This feature supports multilingual recognition.

Figure 3.2.2: OCR functionality for converting scanned documents to editable formats.
3.2.4 Real-time Video Recording and Projection
The scanner can record video in real-time, which is beneficial for presentations, demonstrations, or creating instructional content. It can also project the live camera feed onto a larger display.

Figure 3.2.3: Real-time video recording and projection in a meeting setting.
3.2.5 Image Processing Features
The software includes various image processing functions:
- Automatic Correction: Corrects skewed images and fills in broken edges of scanned pages.
- Automatic Image Segmentation: Divides a single scan into multiple distinct images.
- ID Photo Merging: Automatically merges both sides of scanned identification cards into a single image.
- Excess Part Erasure: Removes unwanted background or excess parts from the scanned image.
4. Maintenance
4.1 Cleaning the Scanner
To ensure optimal performance and image quality, keep the scanner clean:
- Exterior: Wipe the exterior surfaces of the scanner with a soft, dry, lint-free cloth. For stubborn dirt, slightly dampen the cloth with water. Avoid abrasive cleaners or solvents.
- Camera Lens: Gently clean the camera lens with a lens cleaning cloth or a soft, dry microfiber cloth. Do not use harsh chemicals.
- LED Lights: Ensure the LED lights are free from dust to maintain consistent illumination.
4.2 Software Updates
Periodically check the Bamboosang official website for software updates. Keeping your software updated ensures access to the latest features, performance improvements, and bug fixes.
5. Troubleshooting
This section addresses common issues you might encounter with your Bamboosang X7 scanner.
5.1 Scanner Not Detected
- Check USB Connection: Ensure the USB cable is securely connected to both the scanner and the computer. Try a different USB port.
- Restart Software/Computer: Close and reopen the scanning software. If the issue persists, restart your computer.
- Reinstall Drivers: If the scanner is still not detected, try reinstalling the scanner software and drivers.
- Operating System Compatibility: Verify that your computer is running Windows 8 or higher. The scanner is not compatible with Mac OS.
5.2 Poor Image Quality
- Clean Lens/Lights: Refer to Section 4.1 for instructions on cleaning the camera lens and LED lights.
- Proper Lighting: Ensure adequate ambient lighting. The scanner has built-in LED lights for illumination, but extreme darkness or glare can affect quality.
- Document Placement: Ensure the document is flat and centered on the scanning mat.
- Software Settings: Check the resolution and image enhancement settings within the scanning software.
5.3 OCR Not Working Correctly
- Image Clarity: Ensure the scanned image is clear and legible. Blurry or low-resolution scans will result in poor OCR accuracy.
- Language Settings: Verify that the correct language is selected in the OCR settings within the software.
- Font Type: OCR works best with standard, clear fonts. Highly stylized or handwritten text may not be accurately recognized.
6. Specifications
| Feature | Specification |
|---|---|
| Model | X7 |
| Brand | Bamboosang |
| Scanner Type | Document Scanner |
| Camera Resolution | 15 Megapixels |
| Max Scan Size | A3 |
| Connectivity | USB |
| Light Source Type | LED (9 LED lights) |
| OCR Support | Multilingual |
| Software Compatibility | Windows 8 or higher (Not compatible with Mac OS) |
| GTIN / UPC | 727196120021 |
| Dimensions (Folded) | Approximately 375mm (Height) x 260mm (Length) x 85mm (Base Width) |

Figure 6.1.1: Physical dimensions of the Bamboosang X7 scanner.
7. Warranty and Support
7.1 Product Warranty
Please refer to the warranty information provided with your purchase documentation or on the official Bamboosang website for details regarding the product warranty period and terms.
7.2 Customer Support
For technical assistance, troubleshooting beyond this manual, or inquiries about spare parts, please contact Bamboosang customer support. Contact information can typically be found on the product packaging, the official website, or your purchase invoice.
