
1. Important Safety Information
Please read all instructions carefully before using the Bonsenkitchen Food Vacuum Sealer Machine. Retain this manual for future reference.
- Ensure the appliance is placed on a stable, flat, and dry surface.
- Do not immerse the appliance, power cord, or plug in water or other liquids.
- Keep out of reach of children.
- Unplug from the outlet when not in use and before cleaning.
- Do not operate any appliance with a damaged cord or plug, or after the appliance malfunctions or has been damaged in any manner.
- Avoid sealing items with excessive liquid, as this can damage the machine.
2. Product Overview
The Bonsenkitchen Food Vacuum Sealer Machine is designed to remove air from specially designed bags and seal them, helping to preserve food freshness.

Figure 2.1: Bonsenkitchen Food Vacuum Sealer Machine.
Key Features:
- Built-in Cutter: For creating custom-sized bags from rolls.
- Multiple Sealing Modes: Dry, Moist, Gentle, External Vacuum, and Seal functions.
- External Suction Port: For use with vacuum canisters or wine stoppers.
- Separated Cleaning Design: Facilitates easy cleaning of the sealing area.
3. Setup
- Unpack the Machine: Carefully remove the vacuum sealer and all accessories from the packaging.
- Placement: Place the machine on a clean, dry, and flat countertop. Ensure there is enough space around the unit for operation.
- Power Connection: Plug the power cord into a standard 120V electrical outlet. The indicator lights may briefly illuminate.
- Prepare a Bag (if using a roll):

Figure 3.1: Using the built-in cutter to create a custom-sized bag.
- Open the lid of the vacuum sealer.
- Place a vacuum sealer roll into the designated area (if applicable, or simply unroll).
- Pull the bag material across the sealing strip to the desired length.
- Use the built-in cutter to cut the bag material.
- Close the lid and press down firmly on both sides until it latches.
- Press the 'Seal' button to create a bottom seal for your custom bag. Wait for the indicator light to turn off before opening.
4. Operating Instructions
4.1 Vacuum Sealing Food
- Prepare the Bag: Place the food item into a vacuum sealer bag. Ensure at least 3 inches of empty space at the top of the bag for proper sealing.
- Position the Bag: Open the lid of the vacuum sealer. Place the open end of the bag into the vacuum channel, ensuring it lies flat and smooth across the sealing strip. The bag opening should be fully within the vacuum chamber.
- Close the Lid: Close the lid firmly until both sides click into place.
- Select Mode: Choose the appropriate mode based on your food type.
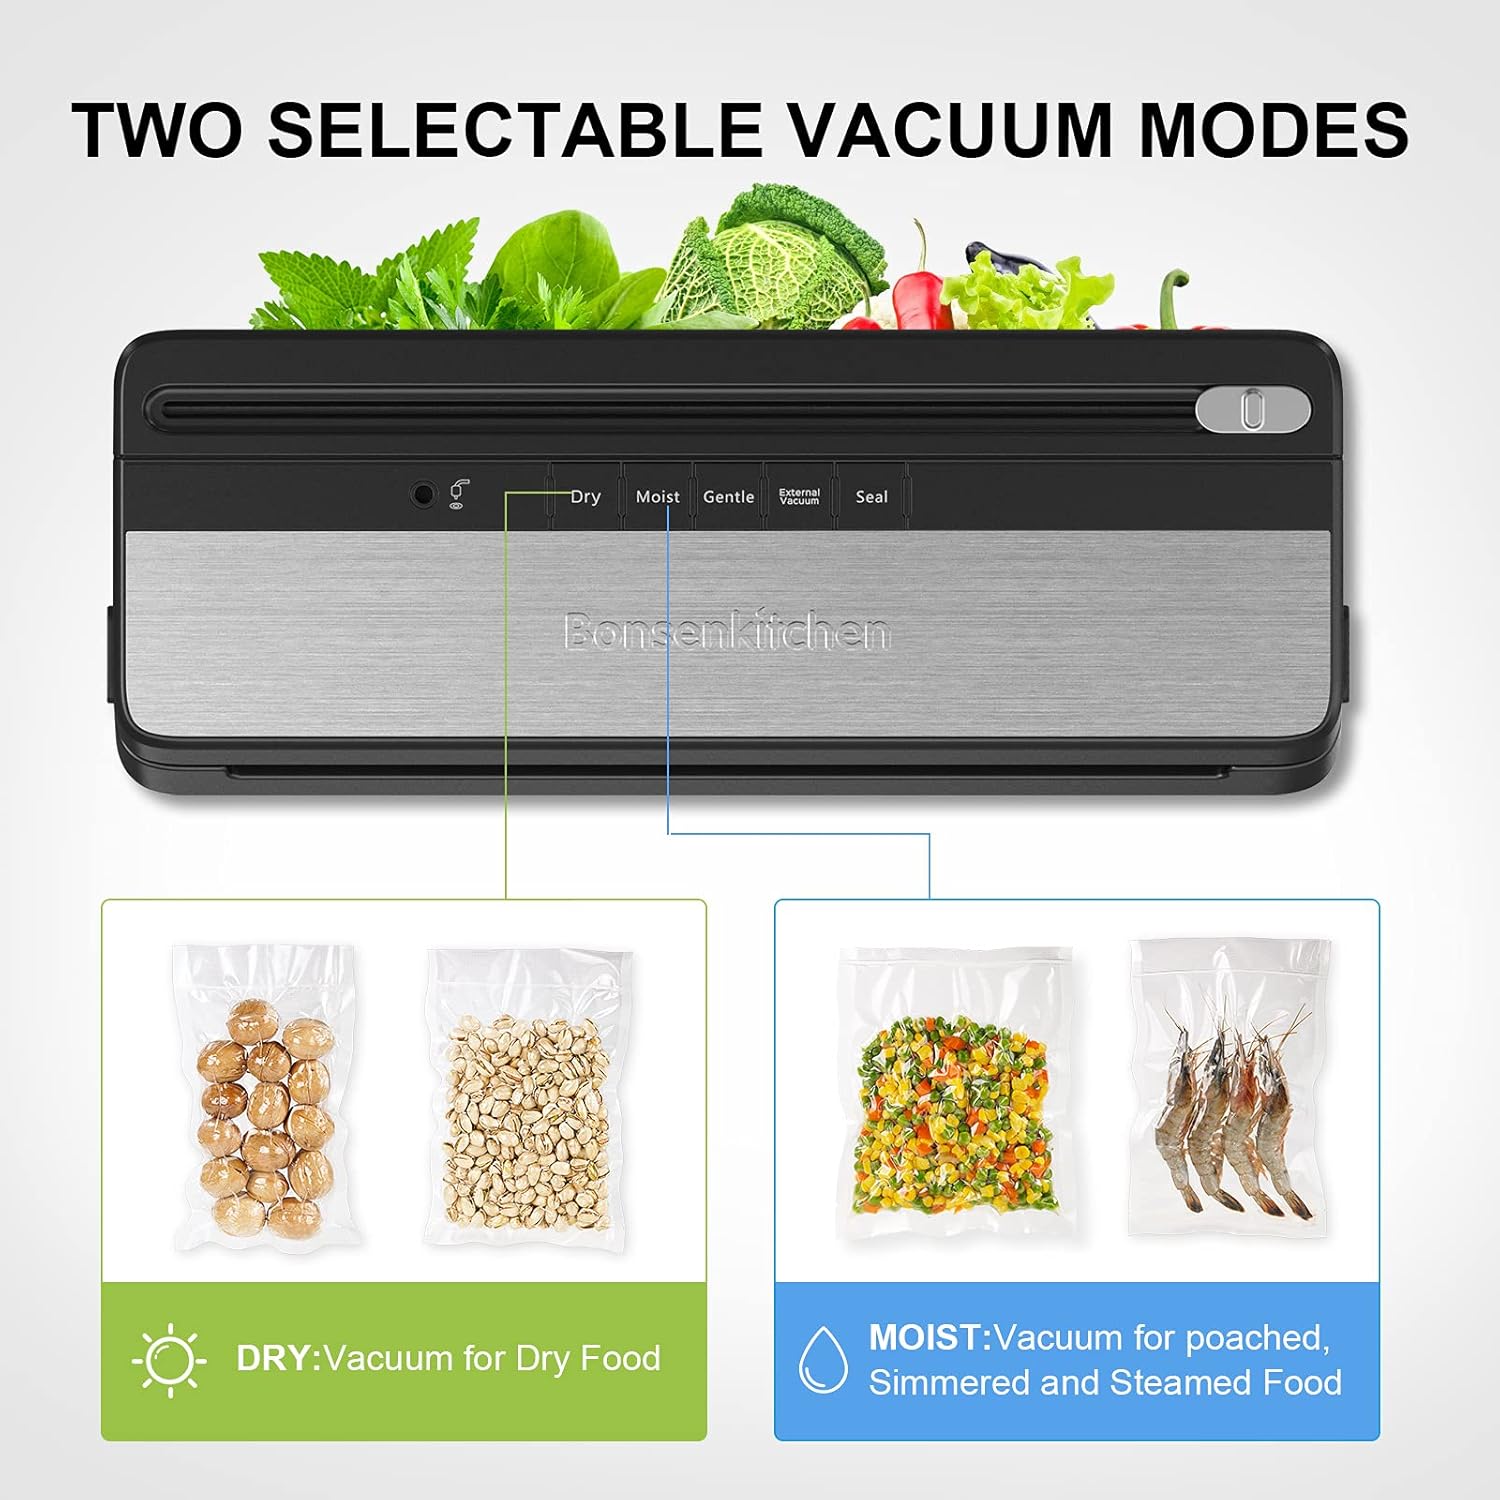
Figure 4.1: Dry and Moist vacuum sealing modes.
- Dry Mode: For solid foods without moisture.
- Moist Mode: For poached, stewed, or steamed foods with some moisture.
- Gentle Mode: For fragile or delicate foods to prevent crushing.
- Start Sealing: Press the corresponding function button (e.g., 'Dry', 'Moist', 'Gentle'). The machine will begin the vacuuming process, and indicator lights will illuminate.
- Monitor and Stop (Optional): If using Gentle mode or if you wish to stop the vacuum process before it completes automatically, press the 'Stop' button.
- Sealing: After vacuuming, the machine will automatically proceed to seal the bag. The 'Seal' indicator light will be on.
- Completion: Once the sealing process is complete, the indicator lights will turn off. Press the release buttons on the sides to open the lid and remove the sealed bag.
4.2 Using the External Vacuum Function
This function allows you to vacuum seal external containers, such as canisters or wine stoppers, using the accessory hose.

Figure 4.2: External suction for containers.
- Connect Hose: Insert one end of the accessory hose into the external vacuum port on the machine.
- Connect to Container: Attach the other end of the hose to the vacuum port on your compatible container or wine stopper.
- Start Vacuum: Press the 'External Vacuum' button. The machine will begin to remove air from the container.
- Completion: The machine will stop automatically when the vacuum process is complete. Remove the hose from both the machine and the container.
5. Maintenance and Cleaning
Regular cleaning ensures optimal performance and extends the lifespan of your vacuum sealer.

Figure 5.1: Separated design for easy cleaning.
- Unplug: Always unplug the appliance from the power outlet before cleaning.
- Clean Exterior: Wipe the exterior of the machine with a soft, damp cloth. Do not use abrasive cleaners or solvents.
- Clean Vacuum Channel and Sealing Strip:
- The machine features a separated design for easier access to the vacuum channel and sealing strip.
- Carefully detach the top part of the machine (refer to product diagrams if available for specific detachment points).
- Wipe the vacuum channel and the sealing strip with a damp cloth to remove any food debris or moisture. Ensure these areas are completely dry before reassembling and using the machine.
- Do not wash the main unit under running water.
- Storage: Store the machine in a dry place with the lid unlatched to prevent compression of the sealing gaskets, which can affect future sealing performance.
6. Troubleshooting
If you encounter issues with your vacuum sealer, please refer to the following common problems and solutions:
| Problem | Possible Cause | Solution |
|---|---|---|
| Machine does not power on. | Not plugged in; power outlet issue. | Ensure the power cord is securely plugged into a working outlet. |
| Incomplete vacuum or air remains in the bag. | Bag not properly positioned; lid not fully latched; wrinkles in the bag; moisture in the vacuum channel. | Ensure the open end of the bag is flat and fully inside the vacuum channel. Press down firmly on both sides of the lid until it clicks. Smooth out any wrinkles in the bag. Clean and dry the vacuum channel and sealing strip. |
| Bag does not seal. | Sealing strip is dirty or wet; bag material is not compatible; sealing strip is worn. | Clean and dry the sealing strip. Ensure you are using appropriate vacuum sealer bags. If the issue persists, contact customer service. |
| Bag melts during sealing. | Heat sealing time too long. | Ensure the bag is correctly positioned and not overlapping the heating element excessively. Allow the machine to cool between seals if performing multiple operations. |
If the problem persists after attempting these solutions, please contact Bonsenkitchen customer service for further assistance.
7. Specifications
| Feature | Detail |
|---|---|
| Brand | Bonsenkitchen |
| Model | B09V179C3L |
| Material | Stainless Steel |
| Color | Silver |
| Power Source | Corded Electric |
| Operation Mode | Automatic |
| Wattage | 120 watts |
| Voltage | 120 Volts |
| Product Dimensions | 15.16 x 5.51 x 2.91 inches |
| Item Weight | 3.45 pounds |
| Date First Available | March 31, 2022 |
8. Warranty and Support
The Bonsenkitchen Food Vacuum Sealer Machine comes with a 1-Year Warranty from the date of purchase.
For warranty claims, technical support, or any questions regarding the operation or maintenance of your appliance, please contact Bonsenkitchen customer service. Refer to the product packaging or the official Bonsenkitchen website for the most current contact information.


