1. Introduction
This manual provides essential information for the safe and efficient operation of your TANLANIN TE-2028BR Vinyl Record Player. Please read it thoroughly before use and retain it for future reference.
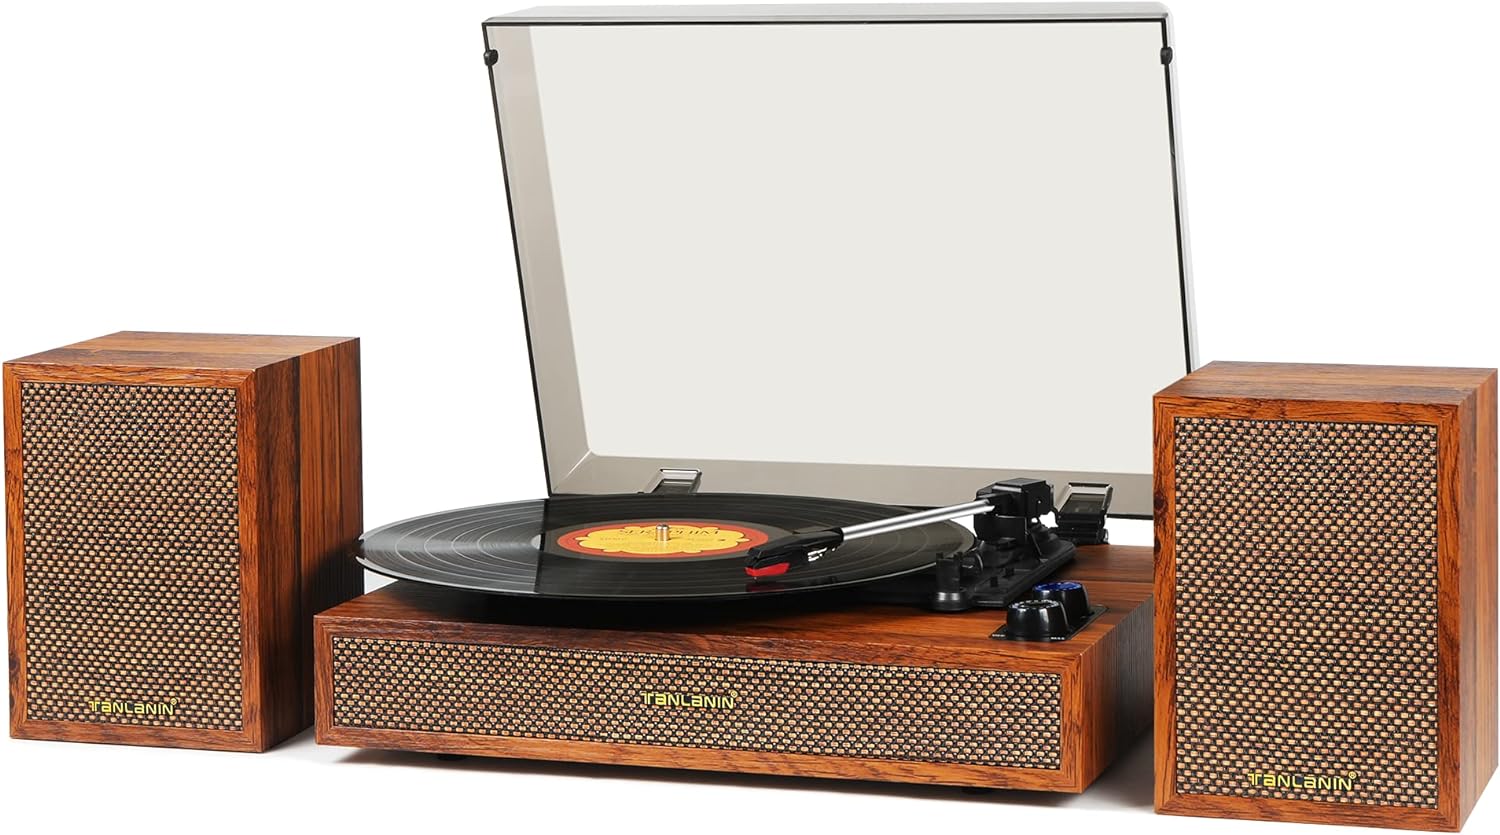
Image 1.1: TANLANIN TE-2028BR Vinyl Record Player with external speakers.
2. Safety Instructions
Observe the following safety precautions to prevent electric shock, fire, or damage to the unit:
- Do not expose the unit to rain or moisture.
- Do not open the cabinet. Refer servicing to qualified personnel only.
- Avoid placing the unit near heat sources or in direct sunlight.
- Ensure proper ventilation around the unit.
- Use only the power adapter supplied with the unit.
- Keep the unit away from strong magnetic fields.
- Clean only with a dry cloth.
3. Package Contents
Verify that all items are present in the package:
- TANLANIN TE-2028BR Turntable Unit
- External Stereo Speakers (2 units)
- 45 RPM Adapter
- Slipmat
- Spare Needle (Stylus)
- Power Adapter
- Instruction Manual
4. Product Overview
4.1 Front and Top Panel Components
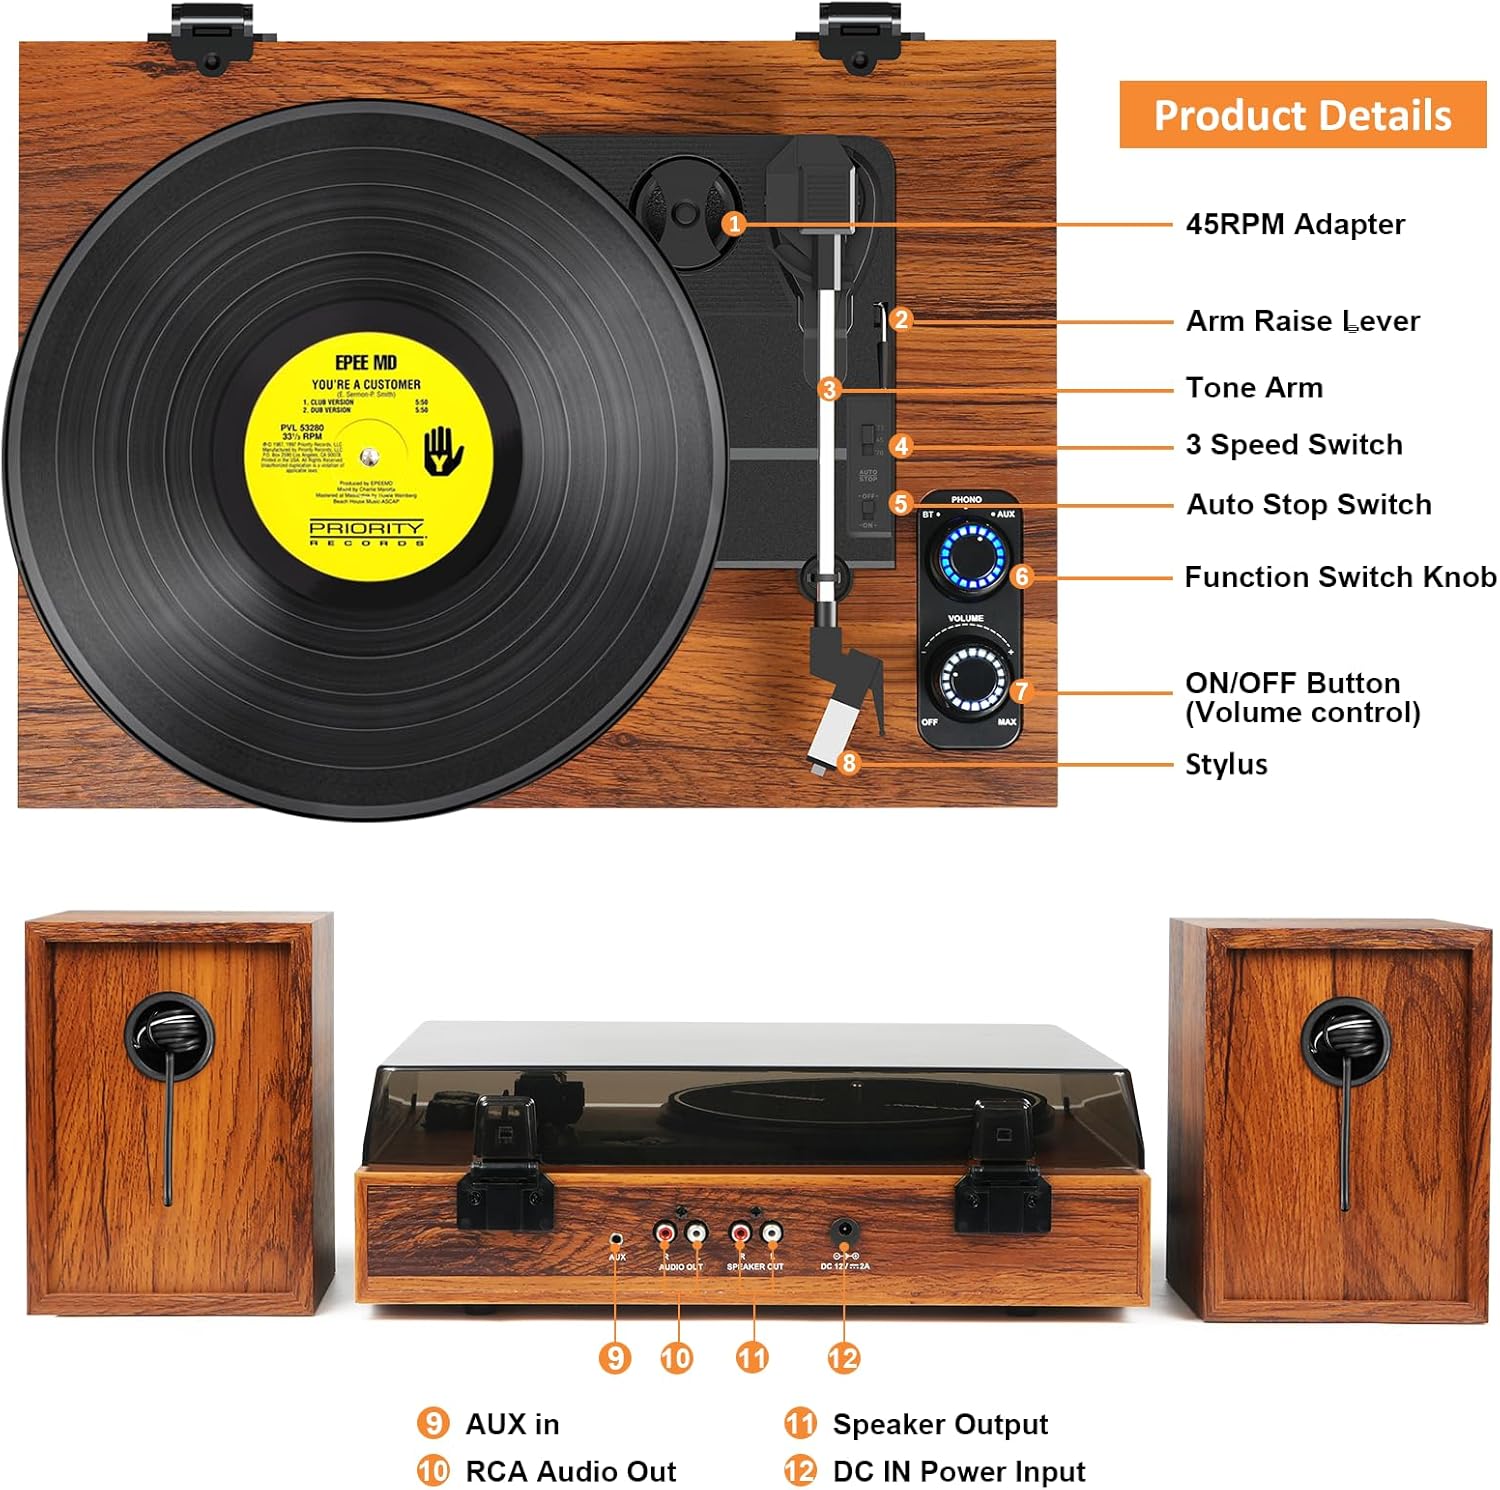
Image 4.1: Front and Top Panel Components. Key components include the 45 RPM Adapter, Arm Raise Lever, Tone Arm, 3 Speed Switch, Auto Stop Switch, Function Switch Knob, ON/OFF Button (Volume control), and Stylus.
- 45 RPM Adapter: Used for playing 45 RPM records with a large center hole.
- Arm Raise Lever: Lifts and lowers the tone arm.
- Tone Arm: Holds the stylus and tracks the record grooves.
- 3 Speed Switch: Selects playback speed (33, 45, or 78 RPM).
- Auto Stop Switch: Enables or disables the auto-stop function.
- Function Switch Knob: Selects input mode (BT, PHONO, AUX).
- ON/OFF Button (Volume control): Turns the unit on/off and adjusts volume.
- Stylus: The needle that reads the record grooves.
4.2 Rear Panel Connections

Image 4.2: Rear Panel Connections. Includes AUX IN, RCA Audio Out (L/R), Speaker Output (L/R), and DC IN Power Input.
- AUX IN: 3.5mm input for connecting external audio devices.
- RCA Audio Out (L/R): For connecting to an external amplifier or powered speakers.
- Speaker Output (L/R): For connecting the included external passive speakers.
- DC IN Power Input: Connect the power adapter here.
5. Setup
Follow these steps for initial setup:
- Unpack: Carefully remove all components from the packaging.
- Placement: Place the turntable unit and speakers on a stable, level surface. Ensure adequate space for ventilation.
- Connect Speakers: Connect the included external speakers to the "SPEAKER OUT" ports on the rear of the turntable using the provided speaker cables. Ensure correct polarity (red to red, black to black).
- Power Connection: Connect the power adapter to the "DC IN 12V" port on the rear of the turntable, then plug the adapter into a wall outlet.
- Remove Stylus Protector: Gently remove the clear plastic stylus protector from the needle.
- Place Slipmat: Place the felt slipmat onto the turntable platter.
6. Operation
6.1 Playing Vinyl Records

Image 6.1: The turntable supports 3 speeds: 33, 45, and 78 RPM for various record sizes.
- Power On: Turn the ON/OFF (Volume) knob clockwise to power on the unit.
- Select PHONO Mode: Rotate the Function Switch Knob to "PHONO".
- Select Speed: Set the 3 Speed Switch to the appropriate speed (33, 45, or 78 RPM) for your record. Use the 45 RPM adapter if needed for singles.
- Place Record: Carefully place your vinyl record on the turntable platter.
- Auto Stop: Set the Auto Stop Switch to ON if you want the platter to stop automatically when the record finishes. Set to OFF for continuous play.
- Start Playback: Lift the tone arm using the Arm Raise Lever. Position the tone arm over the desired track on the record. Gently lower the tone arm using the Arm Raise Lever.
- Adjust Volume: Adjust the volume using the ON/OFF (Volume) knob.
- End Playback: At the end of the record (if auto-stop is OFF), or when you wish to stop, lift the tone arm using the Arm Raise Lever and return it to the tone arm rest.
6.2 Bluetooth Mode

Image 6.2: Bluetooth connectivity allows wireless audio streaming from compatible devices.
- Power On: Turn the ON/OFF (Volume) knob clockwise to power on the unit.
- Select BT Mode: Rotate the Function Switch Knob to "BT". The LED indicator will flash, indicating pairing mode.
- Pair Device: On your Bluetooth-enabled device (smartphone, tablet, etc.), search for "TANLANIN" in the Bluetooth settings and select it to pair.
- Play Audio: Once paired, the LED indicator will stop flashing. You can now stream audio from your device to the record player's speakers.
- Adjust Volume: Adjust the volume using the ON/OFF (Volume) knob on the record player and/or your connected device.
6.3 AUX Input
- Power On: Turn the ON/OFF (Volume) knob clockwise to power on the unit.
- Select AUX Mode: Rotate the Function Switch Knob to "AUX".
- Connect Device: Connect your external audio device (e.g., MP3 player, smartphone) to the "AUX IN" port on the rear of the turntable using a 3.5mm audio cable (not included).
- Play Audio: Start playback on your external device.
- Adjust Volume: Adjust the volume using the ON/OFF (Volume) knob on the record player and/or your connected device.
6.4 RCA Audio Output
The RCA Audio Out ports allow you to connect the turntable to an external amplifier or powered speakers for an alternative audio experience.
- Connect Cables: Connect RCA cables (not included) from the "RCA AUDIO OUT" ports on the turntable to the corresponding input ports on your amplifier or powered speakers.
- Select Input: Select the appropriate input on your external audio system.
- Play Audio: Follow the instructions for playing vinyl records (Section 6.1). The audio will be routed through your external system.
7. Maintenance
7.1 Cleaning the Unit
- Wipe the turntable and speakers with a soft, dry cloth.
- Do not use harsh chemicals or abrasive cleaners.
- Keep the dust cover closed when not in use to prevent dust accumulation.
7.2 Stylus Care

Image 7.1: The ruby stylus is designed for precise record tracking.
- Avoid touching the stylus tip with your fingers.
- Clean the stylus periodically with a soft brush, brushing from back to front.
- Replace the stylus when you notice a decrease in sound quality or visible wear. A spare needle is included.
8. Troubleshooting
If you encounter issues, refer to the following common problems and solutions:
| Problem | Possible Cause | Solution |
|---|---|---|
| No power | Power adapter not connected or faulty. | Ensure power adapter is securely connected to the unit and a working outlet. |
| No sound from speakers | Volume too low; speakers not connected; incorrect mode selected. | Increase volume. Check speaker connections. Ensure correct function mode (PHONO, BT, AUX) is selected. |
| Record skipping | Dirty or damaged record; worn stylus; turntable not level. | Clean record. Replace stylus. Ensure turntable is on a stable, level surface. |
| Bluetooth not pairing | Unit not in BT mode; device too far; interference. | Ensure Function Switch Knob is set to "BT". Move device closer. Restart both devices. |
| Auto-stop not working | Auto Stop Switch is OFF; specific record type. | Ensure Auto Stop Switch is ON. Some records may not trigger auto-stop due to variations in groove design. |
9. Specifications

Image 9.1: Product dimensions for the turntable and external speakers.
| Feature | Detail |
|---|---|
| Model Number | TE-2028BR |
| Brand | TANLANIN |
| Product Dimensions (Turntable) | 14.1 x 11.2 x 4.9 inches |
| Product Dimensions (Each Speaker) | 5.1 x 5 x 7.1 inches |
| Item Weight | 11 pounds |
| Speeds Supported | 33 1/3, 45, 78 RPM |
| Drive Type | Belt Drive |
| Stylus Type | Ruby Stylus |
| Connectivity | Bluetooth, AUX-in, RCA Audio Out |
| Special Features | Built-in Preamp, Detachable Speakers, Auto Stop, LED Shift Knob |
| Material | Acrylic, Engineered Wood |
| Color | Light Brown |
| Power Consumption (On-mode) | 30.00 watts |
10. Warranty and Support
TANLANIN is committed to providing quality products and customer satisfaction. If you encounter any issues or require assistance with your TE-2028BR Vinyl Record Player, please contact our customer support team.
For further information or support, please visit the official TANLANIN store on Amazon: TANLANIN Store


