
1. Introduction
The QUECOO T12-959 Soldering Station Iron Kit is a portable and precise soldering tool designed for electronic repair and various soldering tasks. It features an LCD screen for clear digital information, automatic standby, and automatic sleep functions to enhance safety and prolong the life of the heating element. This manual will guide you through the setup, operation, and maintenance of your soldering station.

Image 1.1: QUECOO T12-959 Smart Soldering Station overview.
2. Product Components
The QUECOO T12-959 Soldering Station Kit (SET5) includes the following components:
- 1 x T12-959 Soldering Station
- 1 x M8 Metal Handle
- 5 x T12 Soldering Tips (ILS, JL02, KU, BL, BC1)
- 1 x Power Cord

Image 2.1: Included components of the T12-959 Soldering Station Kit.
3. Setup Instructions
- Connect the Power Cord: Insert the power cord into the AC power interface on the back of the soldering station. Ensure it is securely connected.
- Connect the Soldering Iron Handle: Attach the M8 metal handle to the handle interface on the front of the soldering station. Twist the connector until it is firm.
- Insert a Soldering Tip: Select the desired T12 soldering tip and insert it firmly into the M8 metal handle.
- Power On: Press the red switch on the back of the soldering station to turn it on. The LCD screen will illuminate.

Image 3.1: Rear and front panel connections of the T12-959 Soldering Station.
Video 3.1: This video demonstrates the initial setup of the QUECOO T12-959 Soldering Station, including connecting the power cord, soldering iron handle, and inserting a soldering tip. It also shows the power-on sequence and basic temperature adjustment.
4. Operating Instructions
4.1. Temperature Adjustment
Once powered on, the LCD screen will display the current temperature. Turn the rotary knob on the front panel to adjust the desired temperature. The station heats up rapidly, reaching 300°C within 7 seconds.
4.2. Accessing Settings
To access the settings menu, press and hold the rotary knob for approximately 2 seconds. The menu allows you to configure various functions such as temperature locking, auto standby, auto sleep, and temperature stabilization.

Image 4.1: Setting Menu options on the LCD display.
4.3. Auto Sleep and Standby
The soldering station features intelligent automatic sleep, standby, and shutdown functions to conserve energy and enhance safety. If the soldering iron is not used for a set period (e.g., 1 minute), it will automatically enter sleep mode. After a longer period of inactivity, it will enter standby and eventually shut down. Lifting the handle or rotating the encoder will wake the unit up.

Image 4.2: Auto Sleep function display.
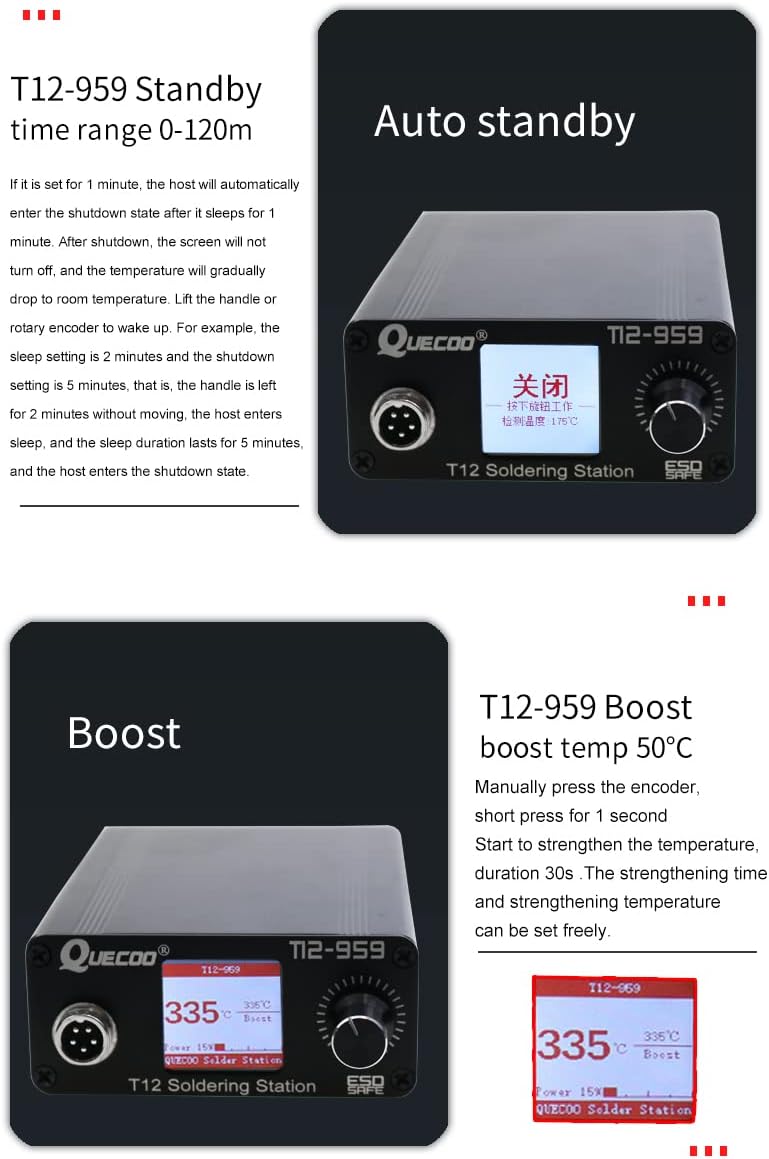
Image 4.3: Auto Standby and Boost functions.
4.4. Boost Function
To temporarily increase the temperature for demanding soldering tasks, manually press the encoder (rotary knob) for 1 second. This activates the Boost function, increasing the temperature by 50°C for a duration of 30 seconds. The strengthening time and temperature can be adjusted in the settings.
5. Maintenance
- Tip Cleaning: Regularly clean soldering tips with a damp sponge or brass wool to remove excess solder and oxidation. This ensures optimal heat transfer and extends tip life.
- Storage: When not in use, store the soldering station and iron in a dry, safe place. Ensure the tip is tinned before storage to prevent oxidation.
- Power Off: Always turn off the soldering station using the main power switch when not in use for extended periods.
6. Specifications
| Feature | Specification |
|---|---|
| Model Number | SET5 |
| Output Power | 75W |
| Temperature Range | 150°C - 450°C (302°F - 842°F) |
| Heat-up Time | Heats to 300°C within 7 seconds |
| Display Type | LCD |
| Product Dimensions | 120 x 88 x 38 mm (4.72 x 3.46 x 1.5 inches) |
| Item Weight | 1.28 pounds (approx. 580g) |
| Power Source | AC/DC |
| Material | Metal |
| UPC/GTIN | 748521130850 |

Image 6.1: Physical dimensions of the T12-959 Soldering Station.

Image 6.2: Weight of the T12-959 Soldering Station host.
7. Troubleshooting
If you encounter any issues with your QUECOO T12-959 Soldering Station, please consider the following:
- No Power: Ensure the power cord is securely connected to both the station and a working power outlet. Check the power switch on the back of the unit.
- Iron Not Heating: Verify that the soldering iron handle is properly connected to the station and that a tip is correctly inserted. Check the temperature setting on the LCD screen.
- Temperature Fluctuations: Ensure the soldering tip is clean and properly seated. Avoid excessive pressure on the tip during soldering.
For further assistance, please refer to the warranty and support information below.
8. Warranty and Support
QUECOO provides a 1-year warranty for the T12-959 Soldering Station Iron Kit. We are committed to customer satisfaction and offer life-long after-sales service. If you have any questions or require support, please do not hesitate to contact us.
For warranty claims or technical assistance, please contact QUECOO customer service through the retailer where the product was purchased or visit the official QUECOO store page.


