
1. Introduction
This manual provides detailed instructions for the installation, operation, and maintenance of the Whirlpool WPW10190961 Genuine OEM Side-by-Side Refrigerator Ice Maker Assembly. This component is designed to replace the original ice maker in compatible Whirlpool refrigerators, ensuring proper ice production.
The Whirlpool WPW10190961 is a genuine Original Equipment Manufacturer (OEM) part, engineered to meet Whirlpool's quality standards for optimal performance and compatibility with your appliance.
2. Safety Information
WARNING: To prevent electric shock or injury, always disconnect power to the refrigerator and turn off the water supply before attempting any installation or maintenance procedures.
- Unplug the refrigerator from the electrical outlet or shut off the household circuit breaker.
- Turn off the refrigerator's water supply valve.
- Wear appropriate personal protective equipment, such as gloves, if necessary.
- Handle sharp edges and components with care.
3. Product Overview
The Whirlpool WPW10190961 Ice Maker Assembly is responsible for producing ice in your side-by-side refrigerator. It receives water from the water inlet valve, fills an ice mold, freezes the water, and then automatically ejects the ice into the storage bin before refilling for the next cycle.
This assembly replaces part numbers W10122503, 2212352, 2212353, and W10190961.

Figure 1: Whirlpool WPW10190961 Genuine OEM SxS Refrigerator Ice Maker Assembly.

Figure 2: Official Whirlpool OEM Parts branding, indicating genuine component.
4. Setup and Installation
Installation of this ice maker assembly requires basic hand tools, some disassembly of the appliance, and novice repair experience. It is crucial to follow all safety precautions before beginning.
Required Tools:
- Multi-screwdriver (Phillips and Flathead)
- Pliers (optional, for water line if needed)
Installation Steps:
- Prepare the Refrigerator: Ensure the refrigerator is unplugged and the water supply is turned off.
- Access the Ice Maker: Carefully remove any shelves or ice bins that obstruct access to the existing ice maker.
- Disconnect Old Ice Maker: Disconnect the electrical connector and any water lines attached to the old ice maker. Remove the screws or clips securing the old ice maker in place.
- Remove Old Ice Maker: Carefully detach and remove the old ice maker assembly.
- Transfer Components: You will need to re-use the auger arm, cover, and bracket from your existing ice maker. Transfer these components to the new WPW10190961 assembly.
- Install New Ice Maker: Position the new ice maker assembly in the refrigerator. Secure it with the screws or clips previously removed.
- Connect Electrical and Water: Reconnect the electrical connector to the new ice maker. Ensure all connections are secure.
- Restore Power and Water: Turn the refrigerator's water supply back on. Plug the refrigerator back into the electrical outlet or restore power at the circuit breaker.
- Check for Leaks: Observe the water connections for any leaks. If a leak is detected, turn off the water supply and tighten the connection.
- Initial Operation: Allow the refrigerator to cool and the ice maker to begin its cycle. Refer to the Operating Instructions section for initial ice production times.
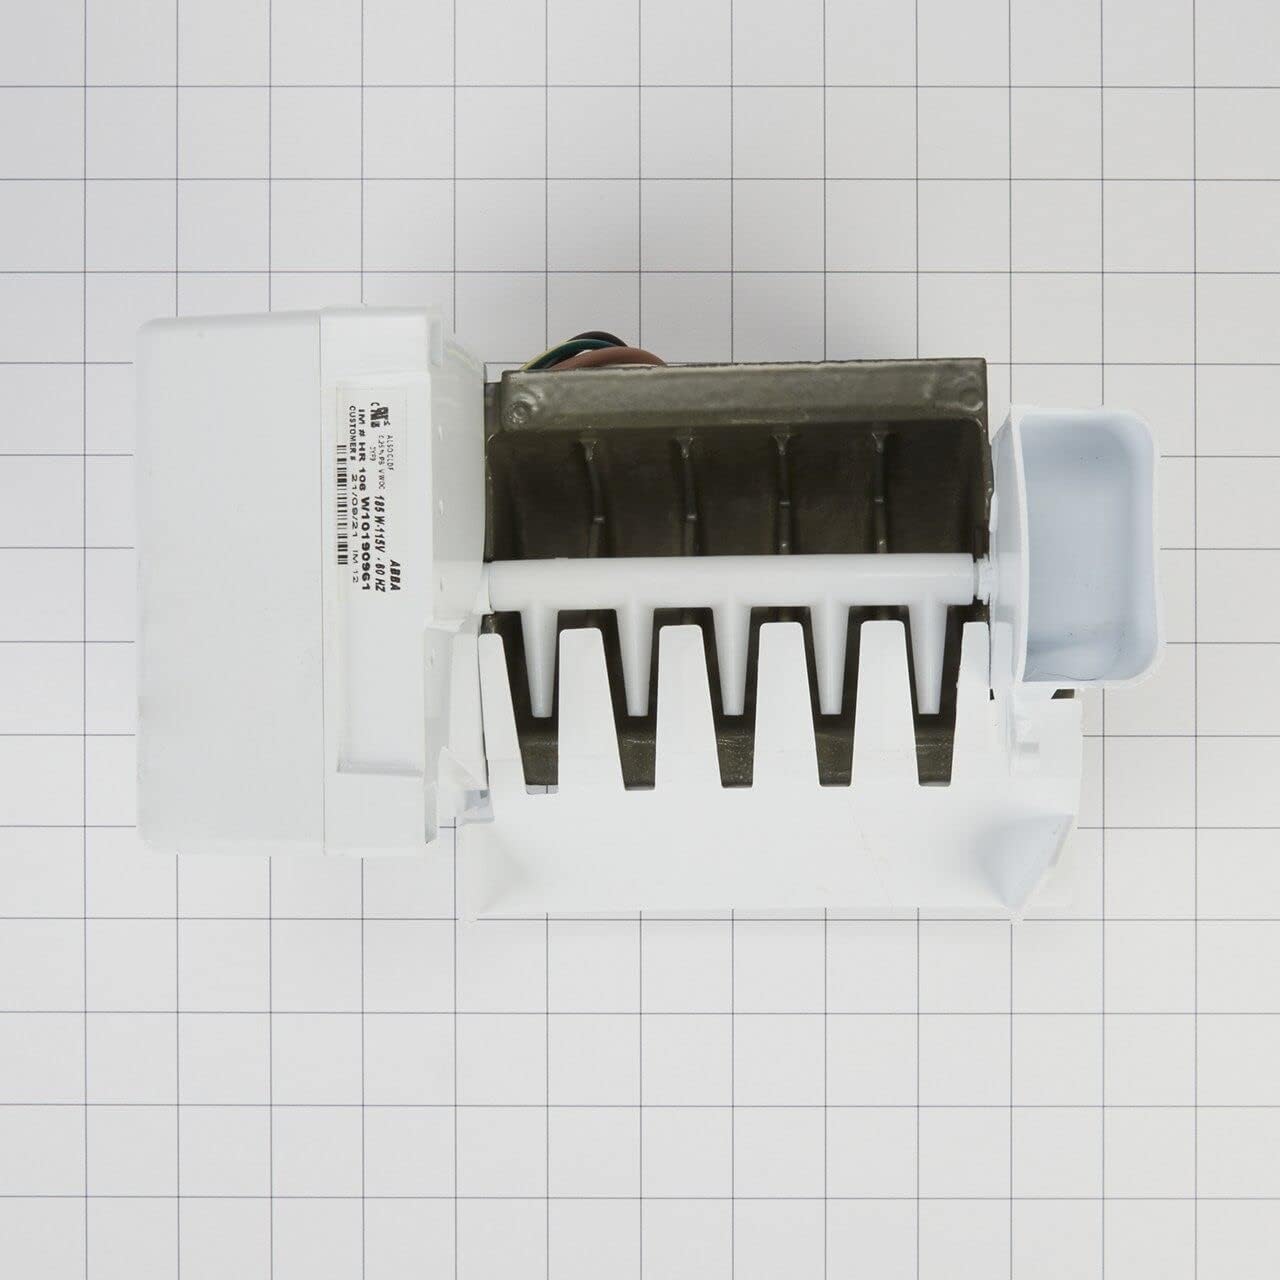
Figure 3: Top view of the ice maker assembly, showing the ice mold and ejection mechanism.

Figure 4: Side view of the ice maker assembly, highlighting the electrical connections.
5. Operating Instructions
Once installed and power is restored, the ice maker will automatically begin its ice production cycle. Ensure the ice maker's control arm or switch is in the 'ON' position.

Figure 5: Control box of the ice maker, showing the 'Automatic Ice Maker ON/OFF' switch.
Initial Ice Production:
- Allow 24 hours for the refrigerator to cool to its optimal temperature after installation.
- Allow up to 72 hours for the ice cube storage bin to fully fill with ice. The first few batches of ice may be smaller or irregular.
Turning the Ice Maker On/Off:
Locate the ON/OFF switch on the ice maker control box (refer to Figure 5). Move the switch to the 'ON' position to activate ice production or to the 'OFF' position to stop it.
6. Maintenance
Regular maintenance helps ensure optimal performance and longevity of your ice maker.
- Cleaning: Periodically empty and clean the ice storage bin with mild soap and water. Rinse thoroughly and dry before returning it to the freezer.
- Water Line Inspection: Inspect the water supply line for kinks or leaks. A damaged water line should be replaced promptly to prevent water damage and ensure proper water flow to the ice maker.
- Water Filter: Consider adding an inline water filter to the copper supply line to improve the quality and taste of your ice. Replace water filters according to the manufacturer's recommendations.
7. Troubleshooting
If your ice maker is not functioning as expected, review the following common issues and solutions:
| Problem | Possible Cause | Solution |
|---|---|---|
| No ice production | Ice maker switch is OFF | Ensure the ice maker ON/OFF switch is in the 'ON' position. |
| No water supply | Check if the refrigerator's water supply valve is open. Inspect the water line for kinks or blockages. | |
| Refrigerator not cold enough | Allow sufficient time for the freezer compartment to reach optimal freezing temperatures (at least 24 hours after power restoration). | |
| Slow ice production | Low water pressure | Check household water pressure. Ensure the water filter (if installed) is not clogged. |
| Freezer temperature too high | Verify the freezer temperature setting. It should be set to 0°F (-18°C) or colder. | |
| Ice cubes are small or hollow | Low water pressure or clogged filter | Check water pressure and replace the water filter if necessary. |
8. Specifications
| Feature | Detail |
|---|---|
| Brand | Whirlpool |
| Model Name | Whirlpool WPW10190961 Genuine OEM SxS Refrigerator Ice Maker Assembly |
| Part Number | WPW10190961 |
| Replaces Part Numbers | W10122503, 2212352, 2212353, W10190961 |
| Product Dimensions | 14.5"D x 7.5"W x 7.44"H |
| Voltage | 120V |
| Item Weight | 50 pounds (approximate shipping weight) |
| UPC | 883049497747 |
9. Warranty Information
This Whirlpool Genuine OEM part comes with a one-year manufacturer's warranty. For specific warranty terms and conditions, please refer to the documentation included with your purchase or contact Whirlpool customer support.
10. Support
For further assistance, technical support, or to inquire about other genuine Whirlpool replacement parts, please contact Whirlpool customer service or visit the official Whirlpool website.
You can also visit the Whirlpool Store on Amazon for more product information and support resources.


